


The Crafter's Box is a monthly maker subscription box:
As a member of The Crafter's Box, we'll send a lovingly kitted box of tools and materials to your doorstep on a monthly basis. Each month we feature a new expert maker and that maker has built for us a unique, grown-up, on-trend project that reflects their artistic style. In addition to the monthly box, our featured maker has created an educational, digital workshop to teach their crafting medium and to offer their tips and tricks.
The best part of this model is the ability to revisit workshops in the future to create again and again. Happy making!
This review is of the Crafter’s Box subscription at $65.00 for a month to month subscription with free shipping.

My Subscription Addiction paid for this box. (Check out the review process post to learn more about how we review boxes.)
About The Crafter's Box
The Subscription Box: The Crafter's Box
The Cost: $65.00 per month + free U.S. shipping (save with longer subscriptions)
The Products: A shipped kit of curated tools and materials + a new digital workshop by the featured maker of the month
Ships to: The U.S. for free and internationally for varying rates
Good to Know: The featured project for the month is announced on the 1st and subscribers have until the 8th to pause, skip, or swap that month. Projects are designed to be for ages 18+.
The Crafter's Box January 2021 Review
The Crafter's Box is an artisan craft subscription box that features a different, unique craft each month that is designed with the crafty adult in mind. The boxes are thoughtfully curated with high-end materials so that your finished products are modern and luxe. There's also an accompanying video workshop led by the featured artist that introduces you to the craft and provides you with detailed instructions to complete the project.
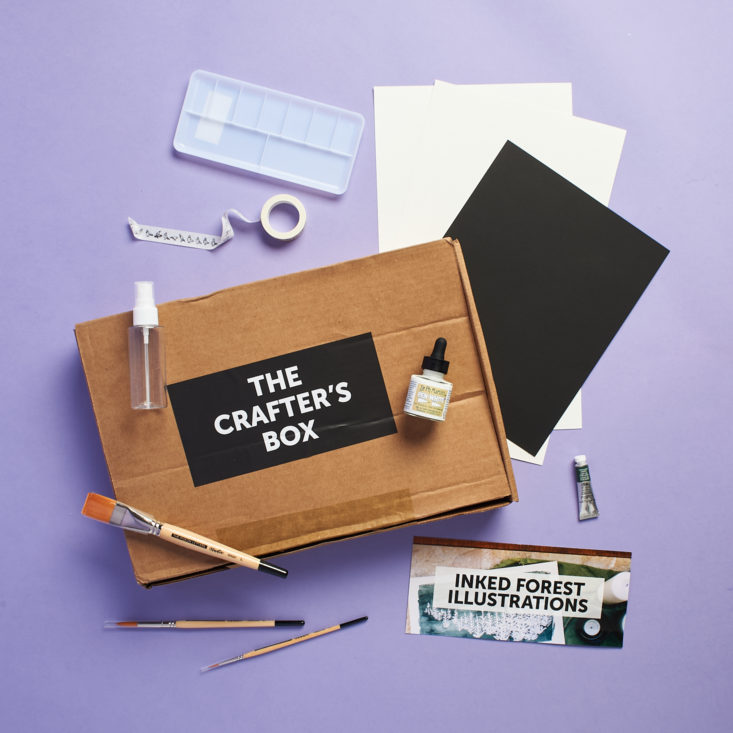
Let's take a look inside January's box -- the craft this month is Inked Forest Illustration!


1 of 4


We received two info cards this month detailing information on what's included in the box, as well as a short bio on the featured maker this month, Peggy Dean of The Pigeon Letters. This month we're exploring the medium of ink through illustrations and silhouettes of forest trees.
Now, onto the items!

1 of 4


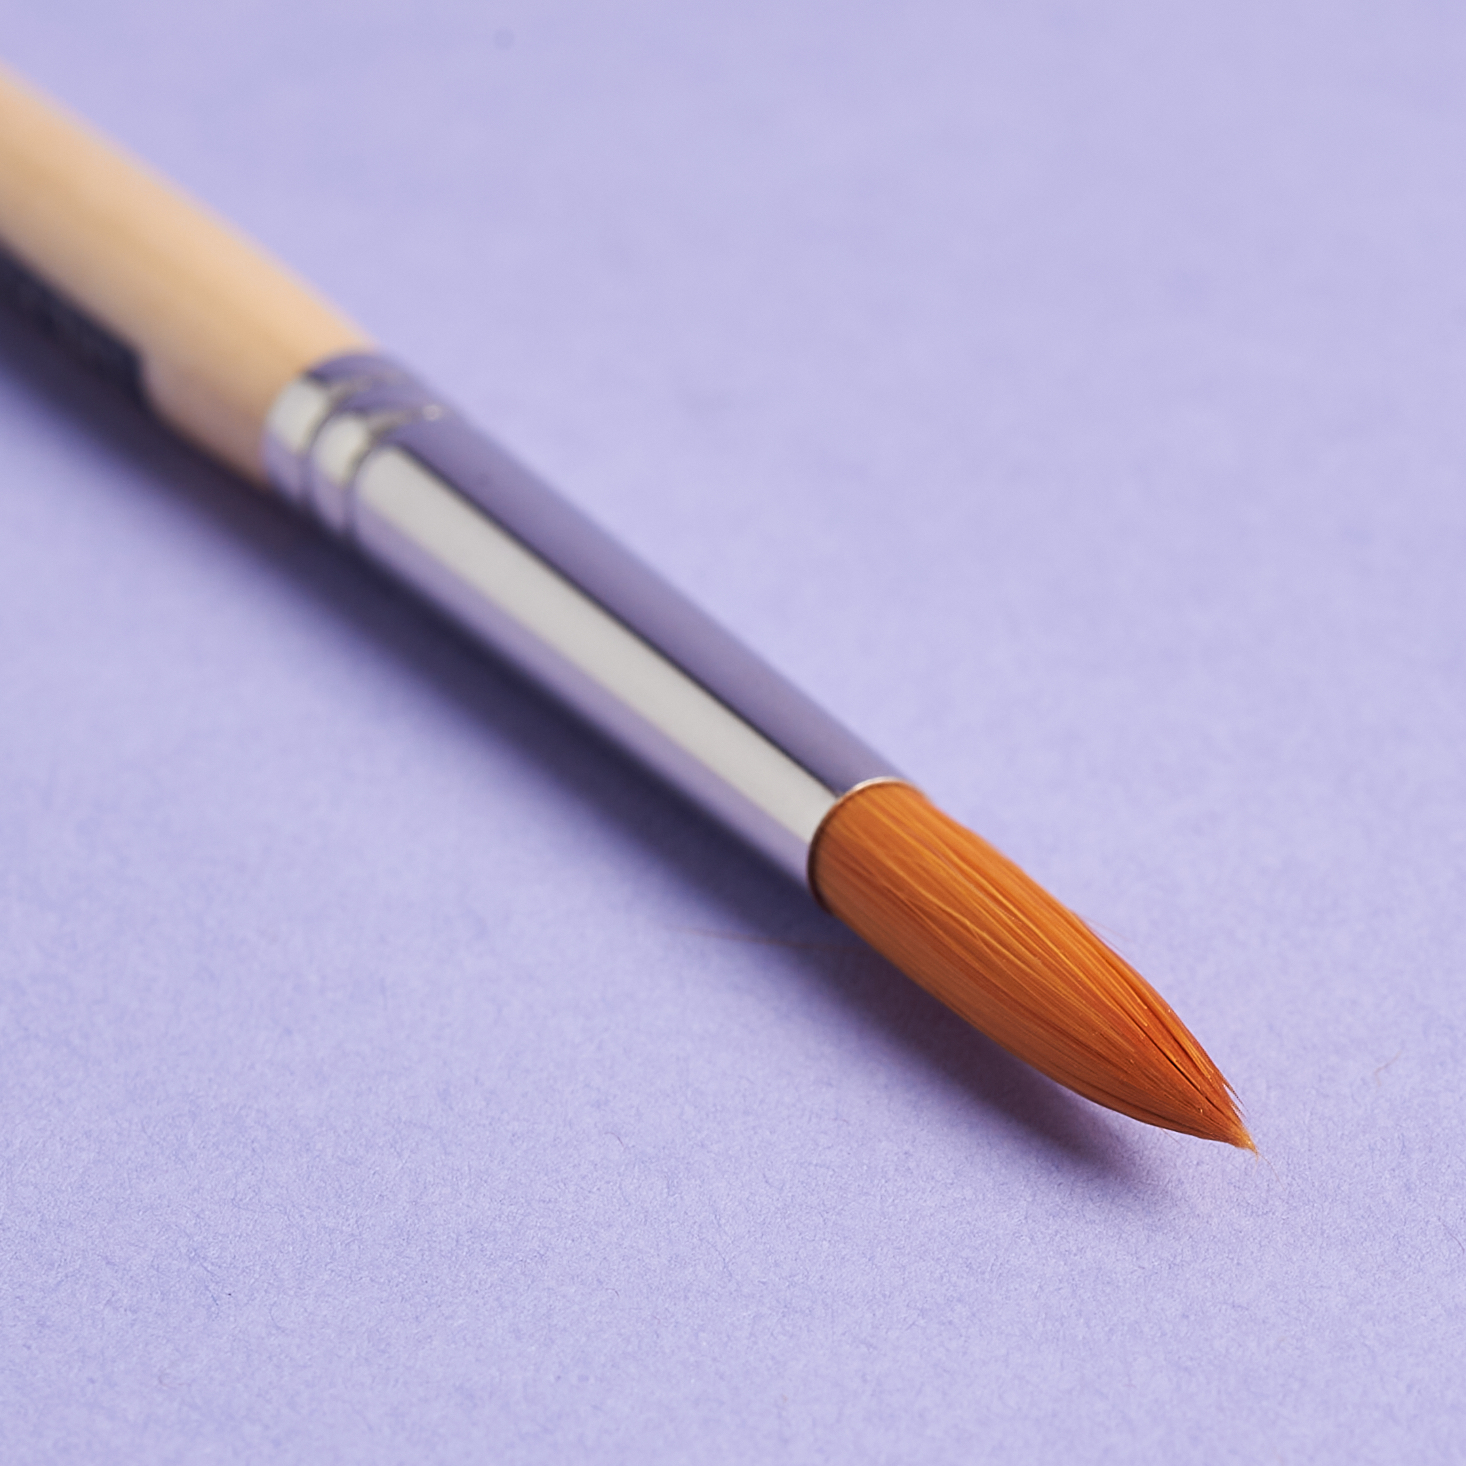
The Pigeon Letters Trio of Brushes
The Pigeon Letters 1" Wash Brush – Retail Value $17.80
The Pigeon Letters #2 Studio Round Brush - Estimated Value $6.90 (Only available in 3-piece set)
The Pigeon Letters #8 Studio Round Brush – Retail Value $10.40
The paintbrushes are from Peggy Dean's company, the Pigeon Letters, and they're eco-friendly, professional-grade, and cruelty-free synthetic. I'm not arty and don't know much about brushes, but these brushes are really pretty. They have a good weight to them and the handles are super glossy. The bristles are soft and very shiny too. That's my layperson's impression of these brushes. Basically, they look like really high-quality brushes to me.


1 of 3
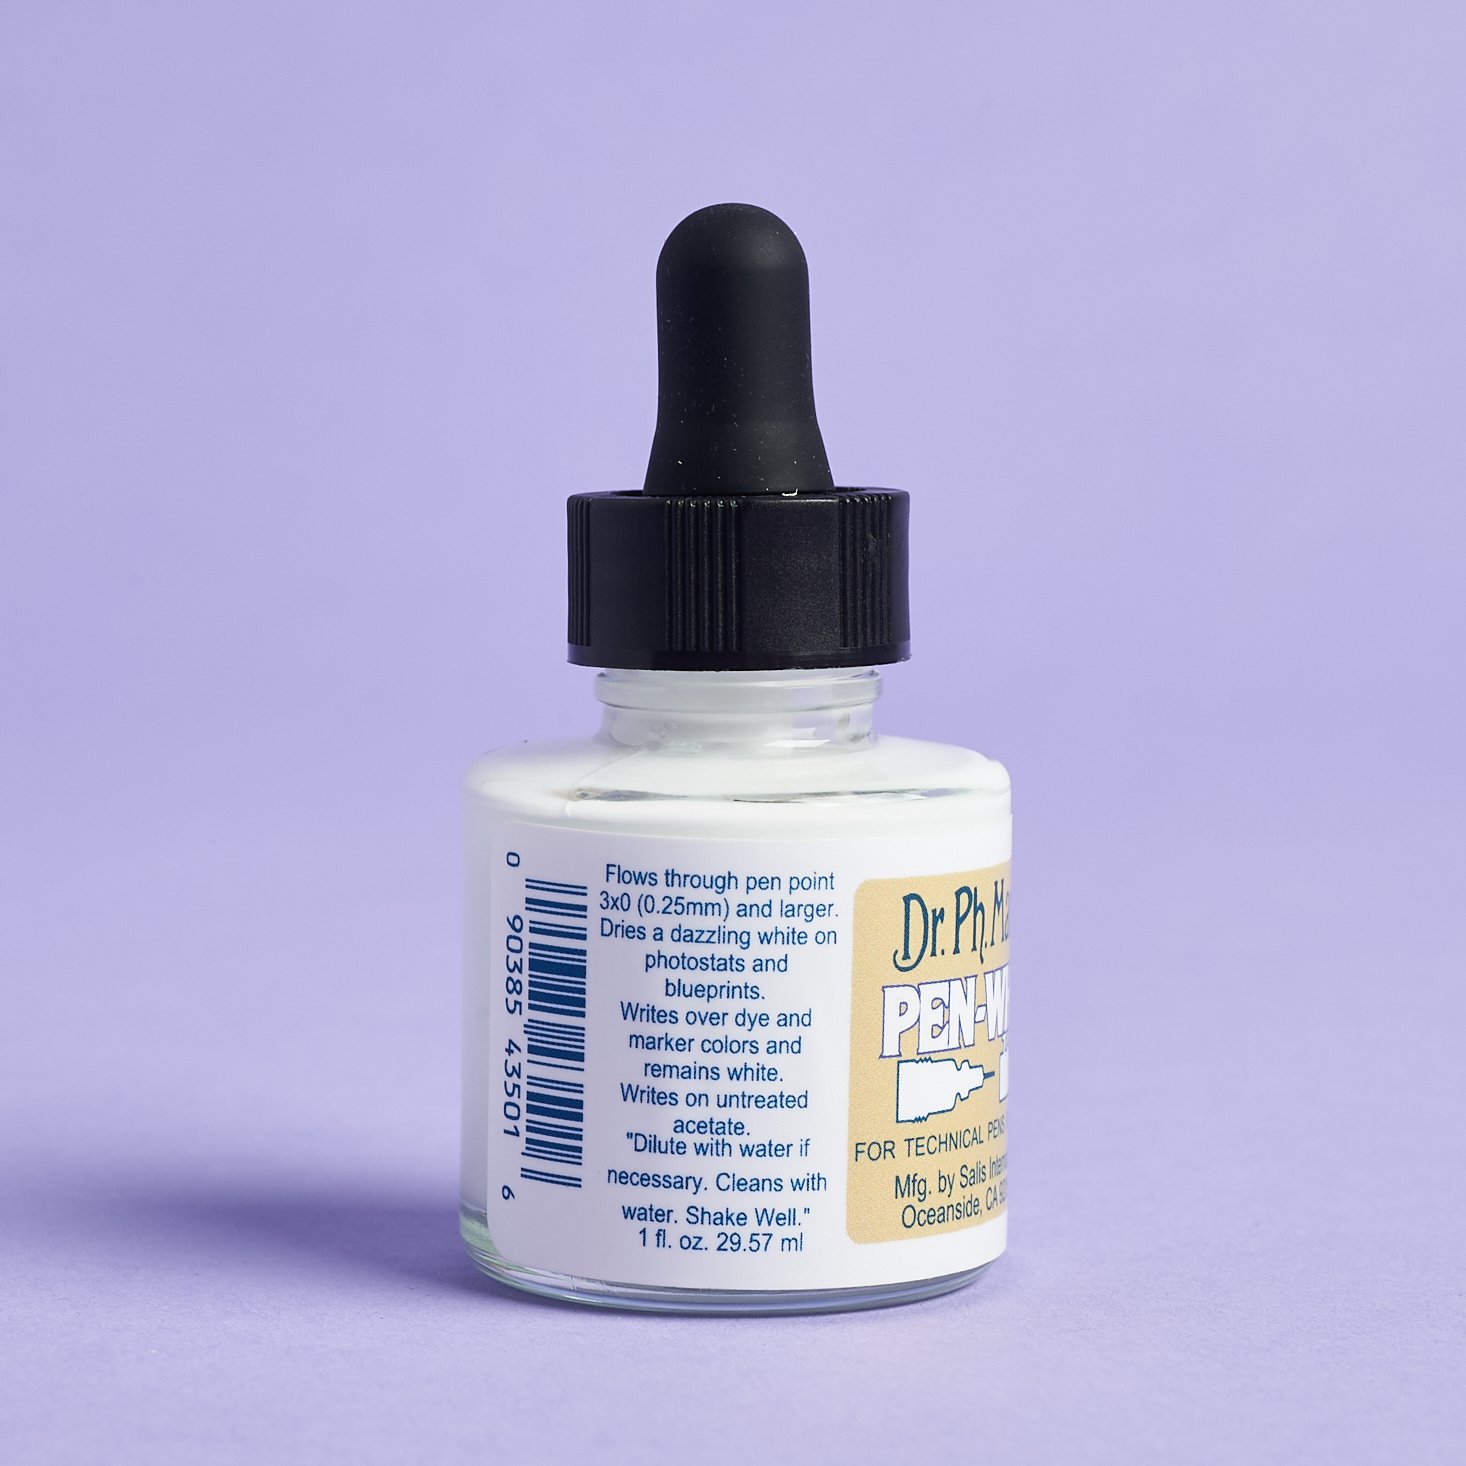
Dr. Ph. Martin's Pen White Ink – Retail Value $10.00
This is a super opaque white ink that we will be using for our main piece this month. Peggy explains in the video tutorial that it's typically used with an ink pen but we'll be using this with our round paintbrushes.


1 of 2
Winsor & Newton Watercolor in Perylene Green – Retail Value $10.99 (currently on sale for $6.92)
This tube of paint is really small! I was surprised that such a tiny tube has such a high retail value but a little goes a long way and the deep green color is gorgeous.


1 of 2
Heavy Watercolor Paper in Black and White – Estimated Value $3.00 (based on this pack of 12 sheets)
We were provided with this 140lb premium, cold-pressed watercolor paper. Peggy says that you need at least a 140lb, 300 gsm paper for this project, and the cold-pressed process creates a nice rough texture for the ink to settle in to. Our two pieces of white watercolor paper measures 8x14". We also received some black paper measuring 8x10" to practice on.

1 of 3

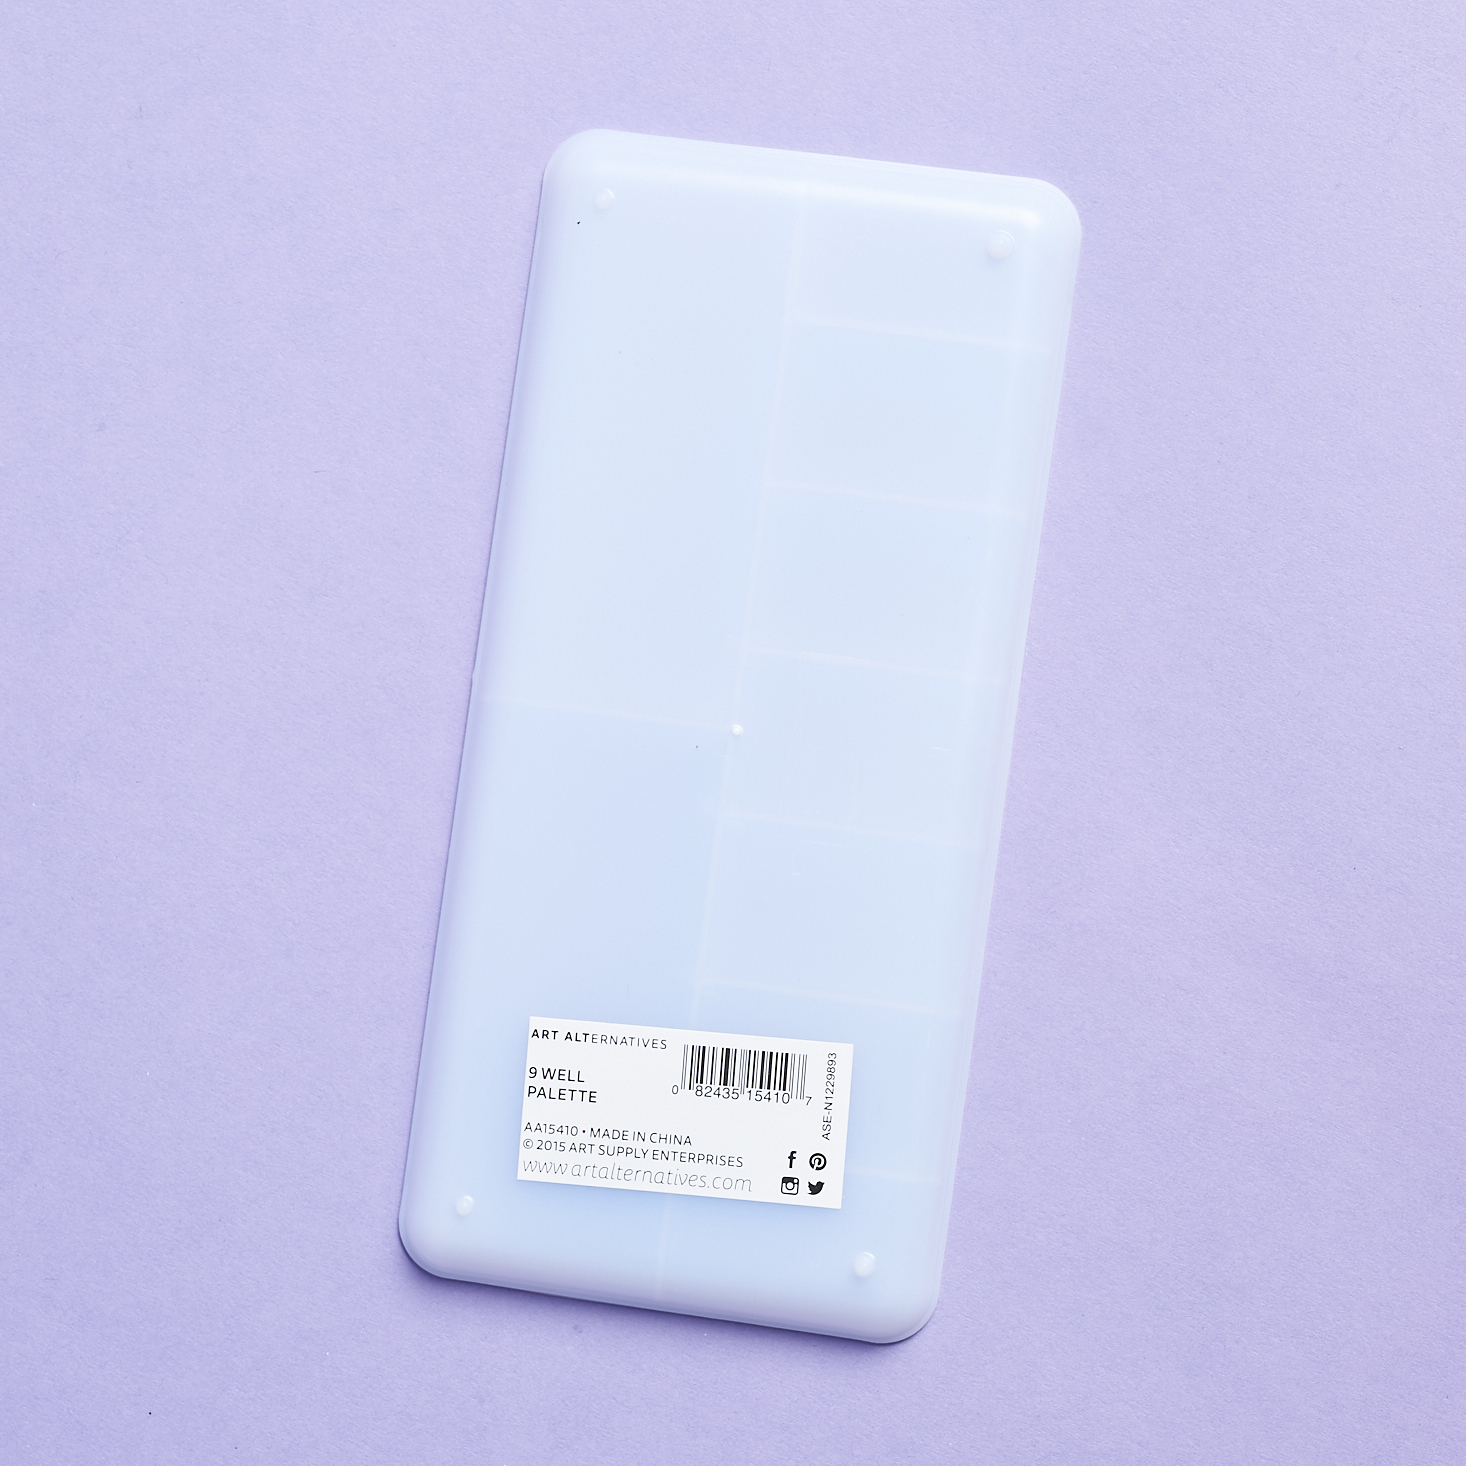
Art Alternatives 9 Well Paint Palette – Retail Value $1.35
I love how the Crafter's Box provides every tool you'll need for your project. That's great for an aspiring crafter like me who doesn't currently own a paint palette.

1 of 3

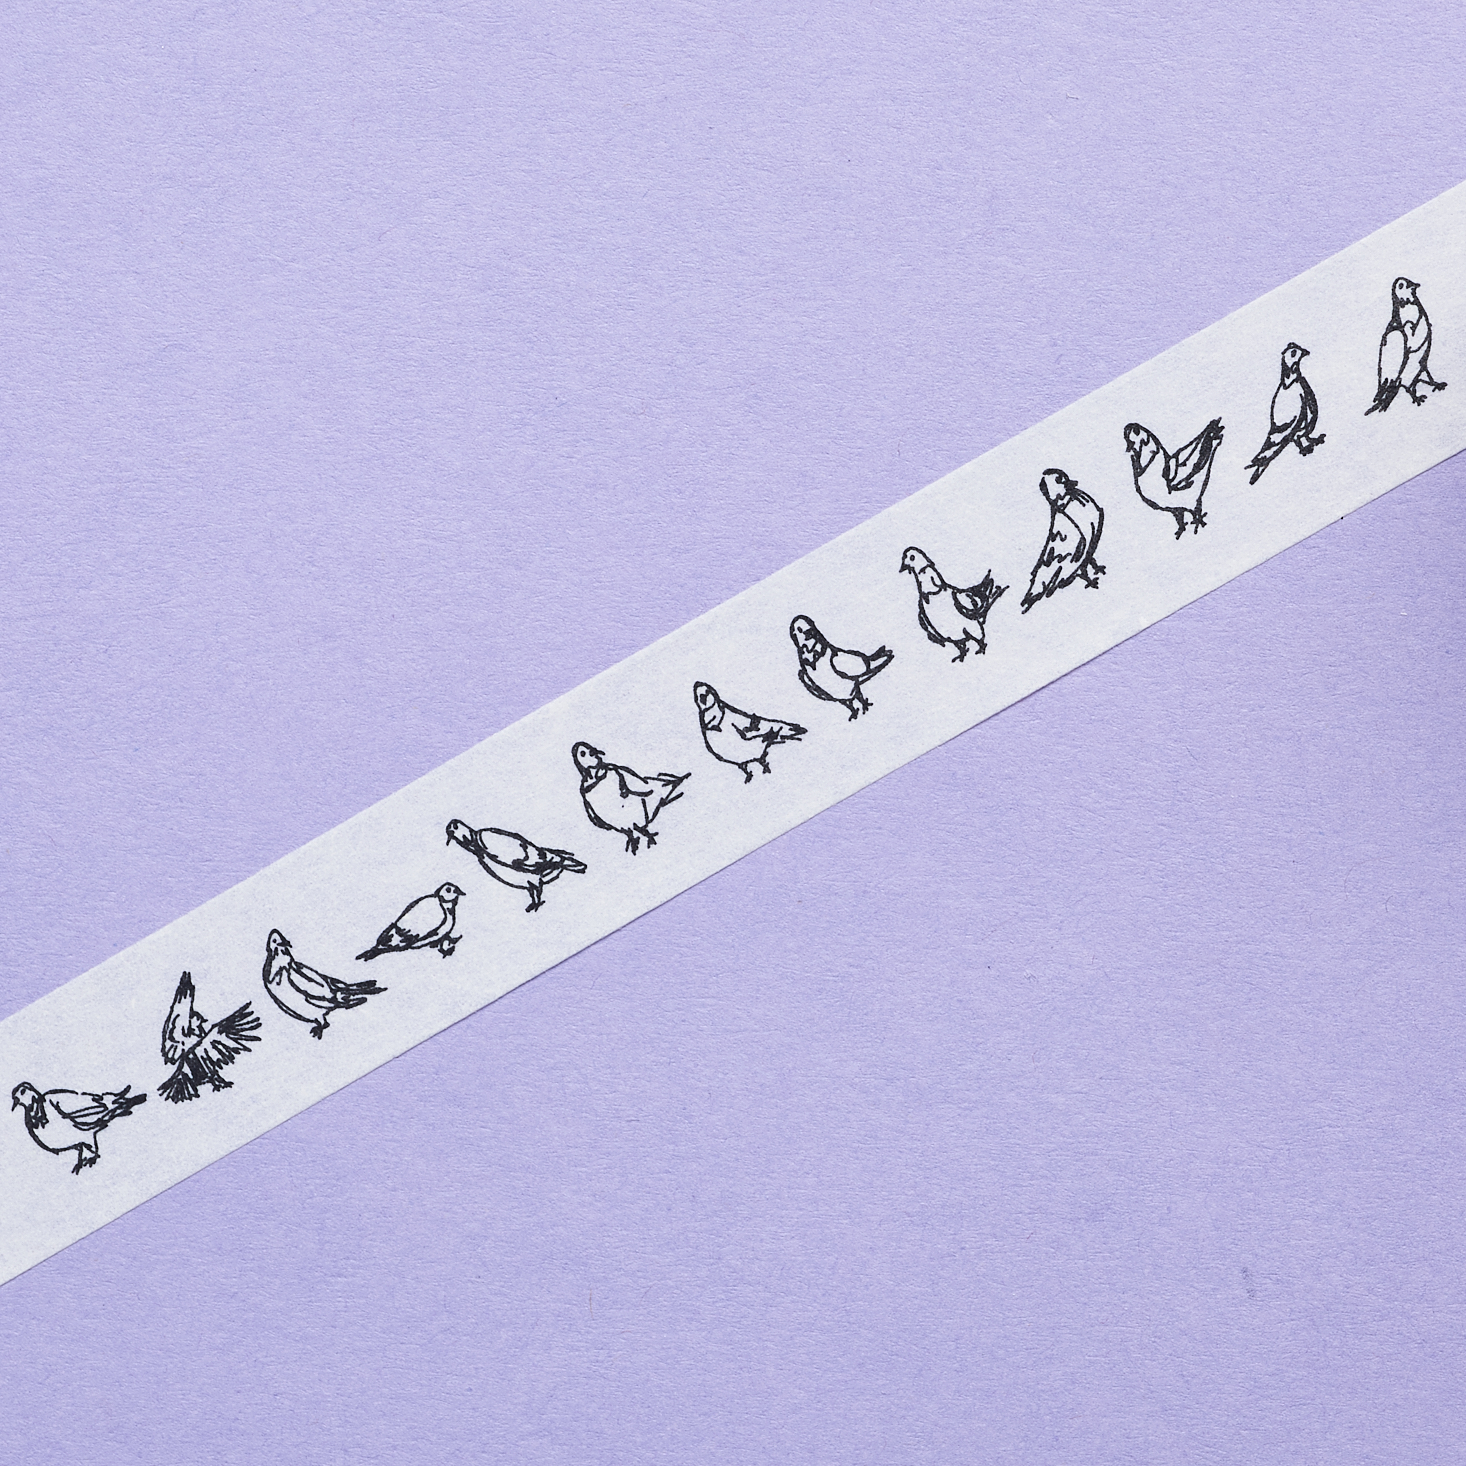
Pigeon Washi Tape
How cute is this pigeon washi tape? We only need a small amount of this to secure our pieces this month, so you'll have a lot of this tape left over.

Water Mister
The last item we received is this 2oz water mister. In order to preserve the green paint, it's actually better to let it dry and then mist it with water when you're ready to paint with it. I didn't end up using this because I didn't wait for the green paint to dry on my palette but it was good to learn this neat trick to extend the life of your expensive paint.

In addition to the tools and materials in this kit, our workshop also includes a digital workshop valued at $25 (this is the video access only price) and a live Q&A with the featured maker.
Now, let's get to painting!


1 of 3

I really like the fact that the video tutorials for the Crafter's Box feel like an actual class. In that, the maker explains how to set up everything and teaches you tips and best practices beyond what is strictly necessary for a particular project. For instance, we're told the first thing to do is to rub the palette with the rough edge of a kitchen sponge to prevent the paint from splattering too much. We're also taught how to squeeze out the paint -- around the edge first then fill in so that the paint shrinks when it dries in the right way. Next, we use the washi tape to secure the paper and so that it dries flats. Then we lay down the green background by picking up a small amount of green paint and applying it with the wash brush and a lot of water.

1 of 2
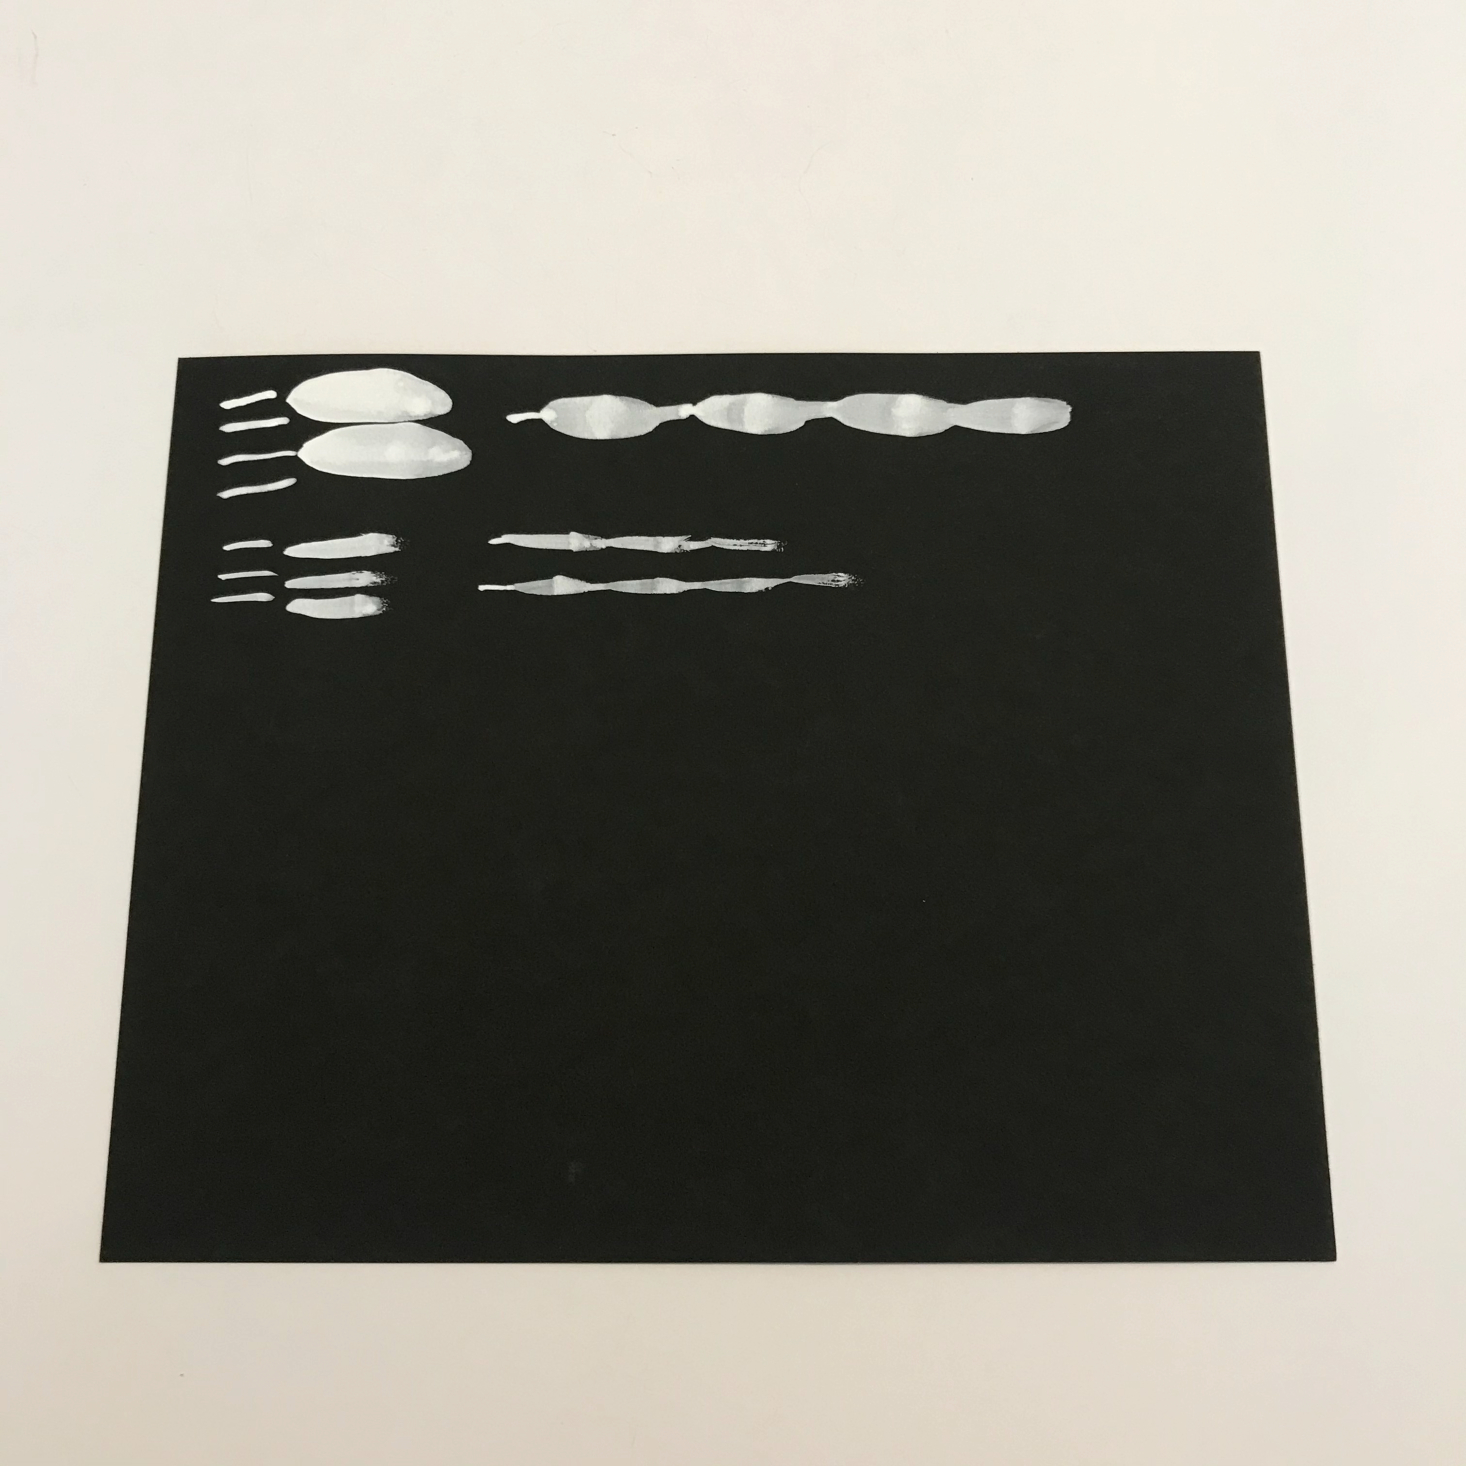
While we wait for the green background to fully dry, we can practice our brushstrokes and trees with the white ink on the black paper. While my testing didn't turn out as nice as Peggy's, she does provide detailed step by step directions on how to create the trees.


1 of 2
Our side project this month was experimenting with transparencies using the green paint and the same tree drawing technique. I was a little heavy-handed with the green at first but I figured out how to create a really light green on my second attempt.


1 of 2
Now, back to the main project! When the green is fully dried, you can start painting in your white trees. It definitely helps to practice your technique on the black paper first but as Peggy advises, it's best not to overthink it. I liked her technique of mixing trees with branches that slope down with trees with branches that slope up. I don't think I quite nailed the technique and I found using the smaller round brush to be quite difficult but it was fun to embrace the messiness and just go with it.


1 of 4


So, here's what I ended up with. A white ink forest painting on a green background and a contrasting green forest painting. You could have purchased an add-on custom wooden frame for this kit for an additional $34, but I'm not sure I ended up with a finished piece that was wall-worthy.
Verdict: I think I would enjoy painting more if I were better at it but right now I don't think I can create anything that I would actually hang on my wall. While I won't be displaying these pieces -- unlike last month's craft that is decorating my apartment -- it was fun to learn a new technique and I think I did a lot better than I thought I would thanks to the detailed instructions from our featured maker. I did swoon over the brushes though and maybe having them in my possession now will inspire me to practice painting. We only used a tiny squeeze of the green paint and two dropper's worth of the white ink, so I can definitely keep trying to work with this medium.
To Wrap Up:
Can you still get this box if you sign up today? No, but you can usually purchase past workshops as a single box for $75 in the Crafter's Box marketplace. You can see which workshop you'll receive before you sign up.
Value Breakdown: I calculated a value of $85.44 for all the items (except the washi tape and water mister) and the video tutorial. Of course, the true value of a craft box like this one is the experience of crafting, and while painting isn't really an activity I enjoy that much, it wasn't a bad way to spend a cold, winter afternoon.
Check out our other reviews of The Crafter's Box and the top-rated craft subscription boxes!
Keep Track of Your Subscriptions: Add this box to your subscription list or wishlist!
What did you think of The Crafter's Box for January 2021? Let us know in the comments!

Please do not enter your email address in the Name field or in the comment content. Your email address will not be published. Required fields are marked *. Remember to post with kindness and respect. Comments with offensive language, cruelness to others, etc will not be approved. See our full comment policy here.