Our reviewers research, test, and recommend the best subscriptions and products independently; click to learn more about our editorial guidelines. We may receive commissions on purchases made through links on our site.
Eureka Crate (from parent company KiwiCo) is a subscription box for teens and adults ages 14-104. It arrives every month with all the materials and instructions needed to create a functional, lasting object with a focus on engineering. The goal of these projects is to use science and math to solve real-world problems while inspiring the recipients to become creative innovators.
KiwiCo offers boxes for a variety of different age groups:
The Cost: $29.95 per month + free shipping. Save with longer subscriptions.
The Products: Detailed instructions and all of the high-quality materials needed to create a unique, lasting, and functional engineering project as well as a Maker's Guide that explains the science and technology behind it.
Ships to: The US for free, Canada for $3.95 per month, and worldwide from $4.95-$6.95.
KiwiCo Eureka Crate "Mechanical Globe" Review - November 2020
8 of 8
1 of 8
2 of 8
3 of 8
4 of 8
5 of 8
6 of 8
7 of 8
8 of 8
1 of 8
2 of 8
3 of 8
4 of 8
5 of 8
6 of 8
7 of 8
8 of 8
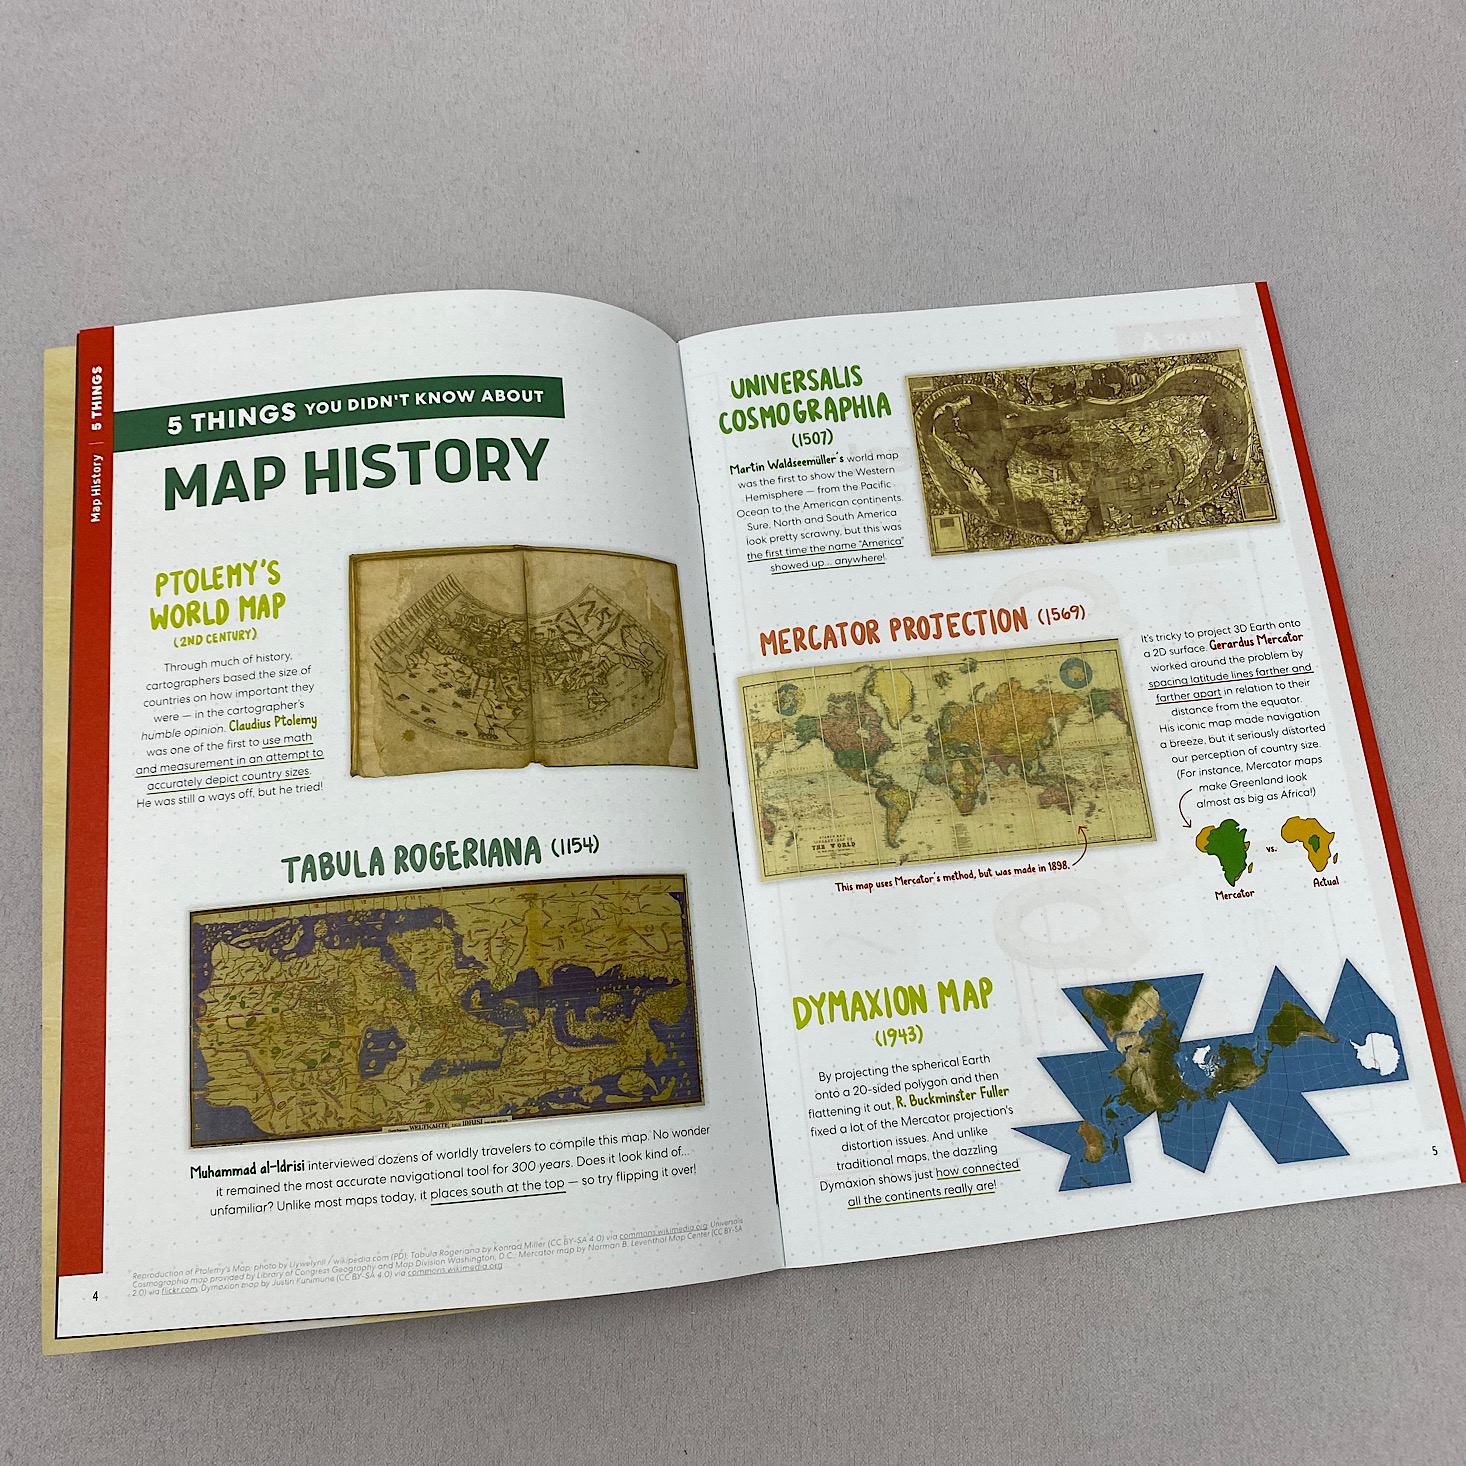
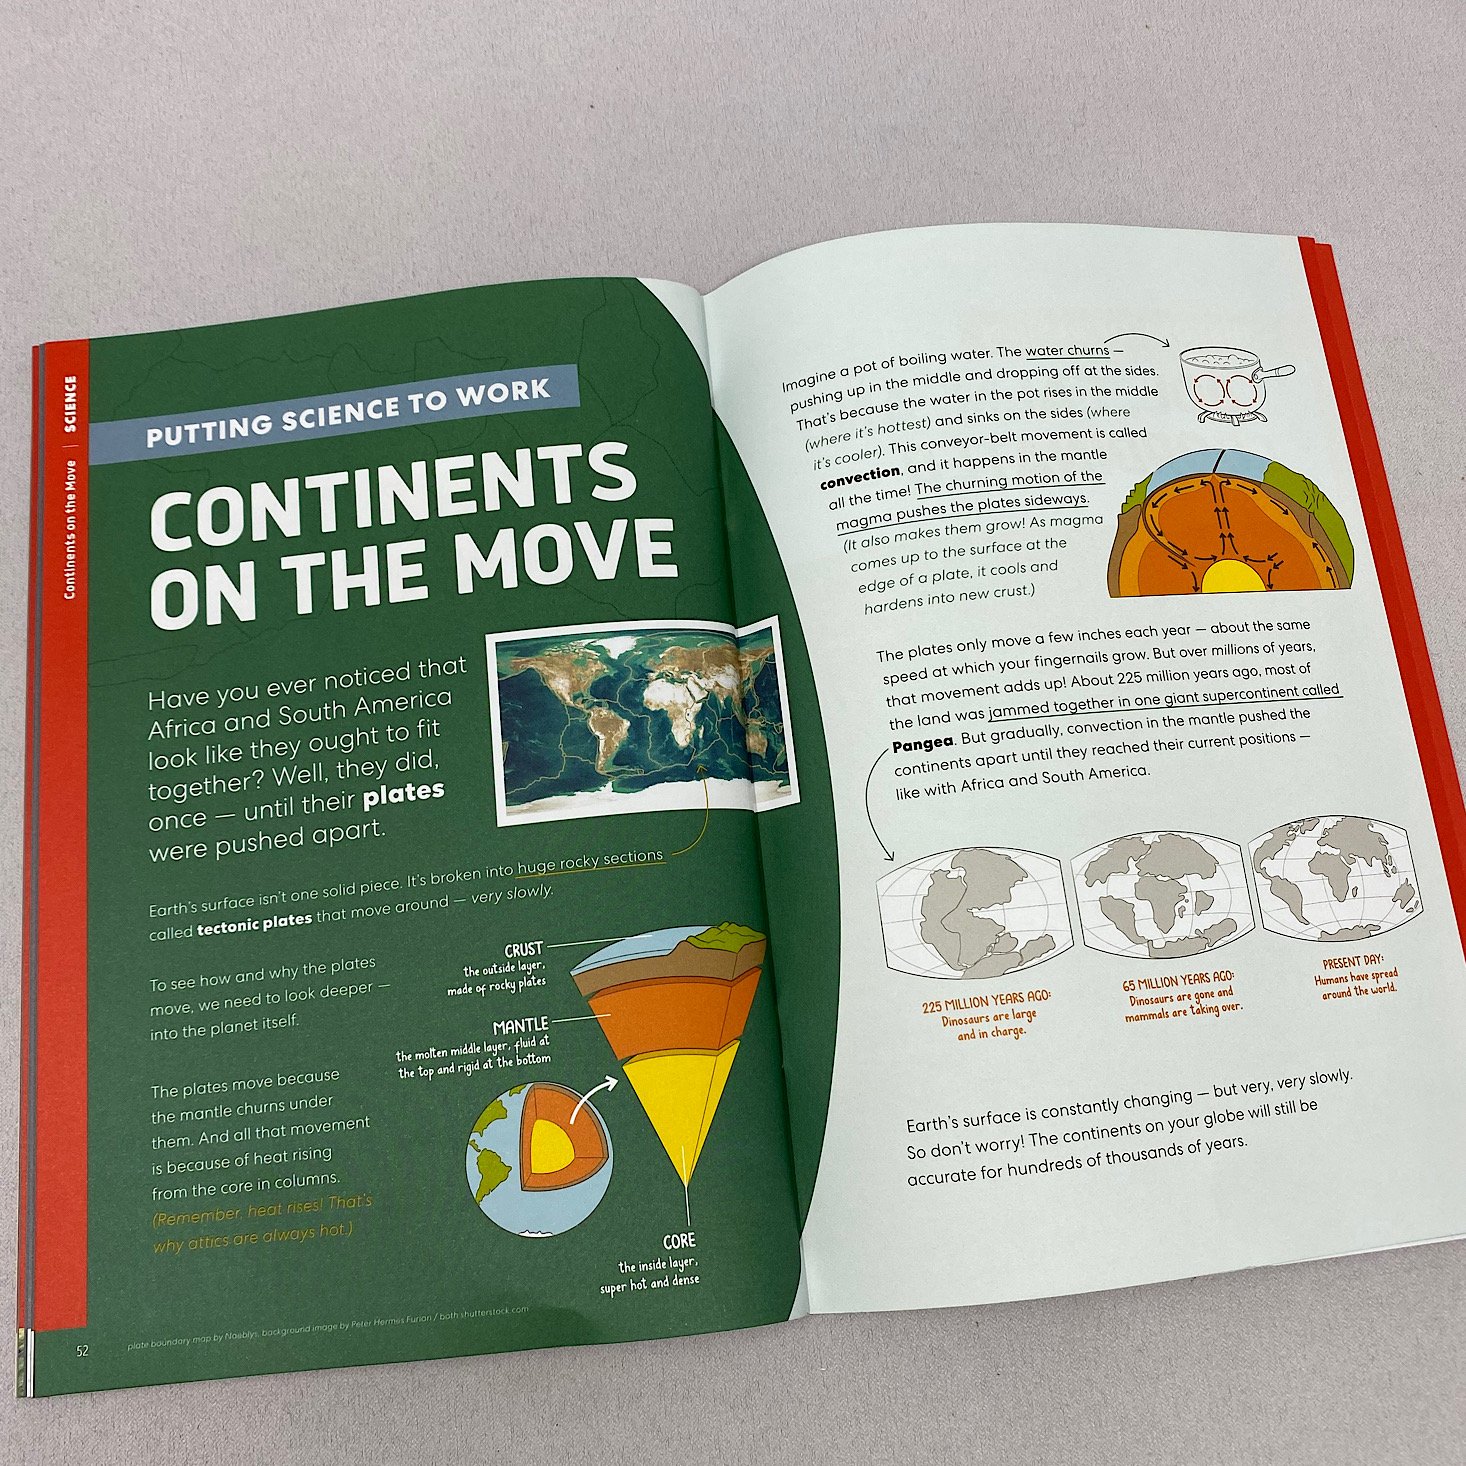
The project for this month was to create our own Mechanical Globe, which is such a cool idea! This Maker's Guide is full of educational information related to our project and on the "Behind the Design" page, they noted that they went through 35 map projection prototypes. It's so fun to hear about what goes into the process!
7 of 7
1 of 7
2 of 7
3 of 7
4 of 7
5 of 7
6 of 7
7 of 7
1 of 7
2 of 7
3 of 7
4 of 7
5 of 7
6 of 7
7 of 7
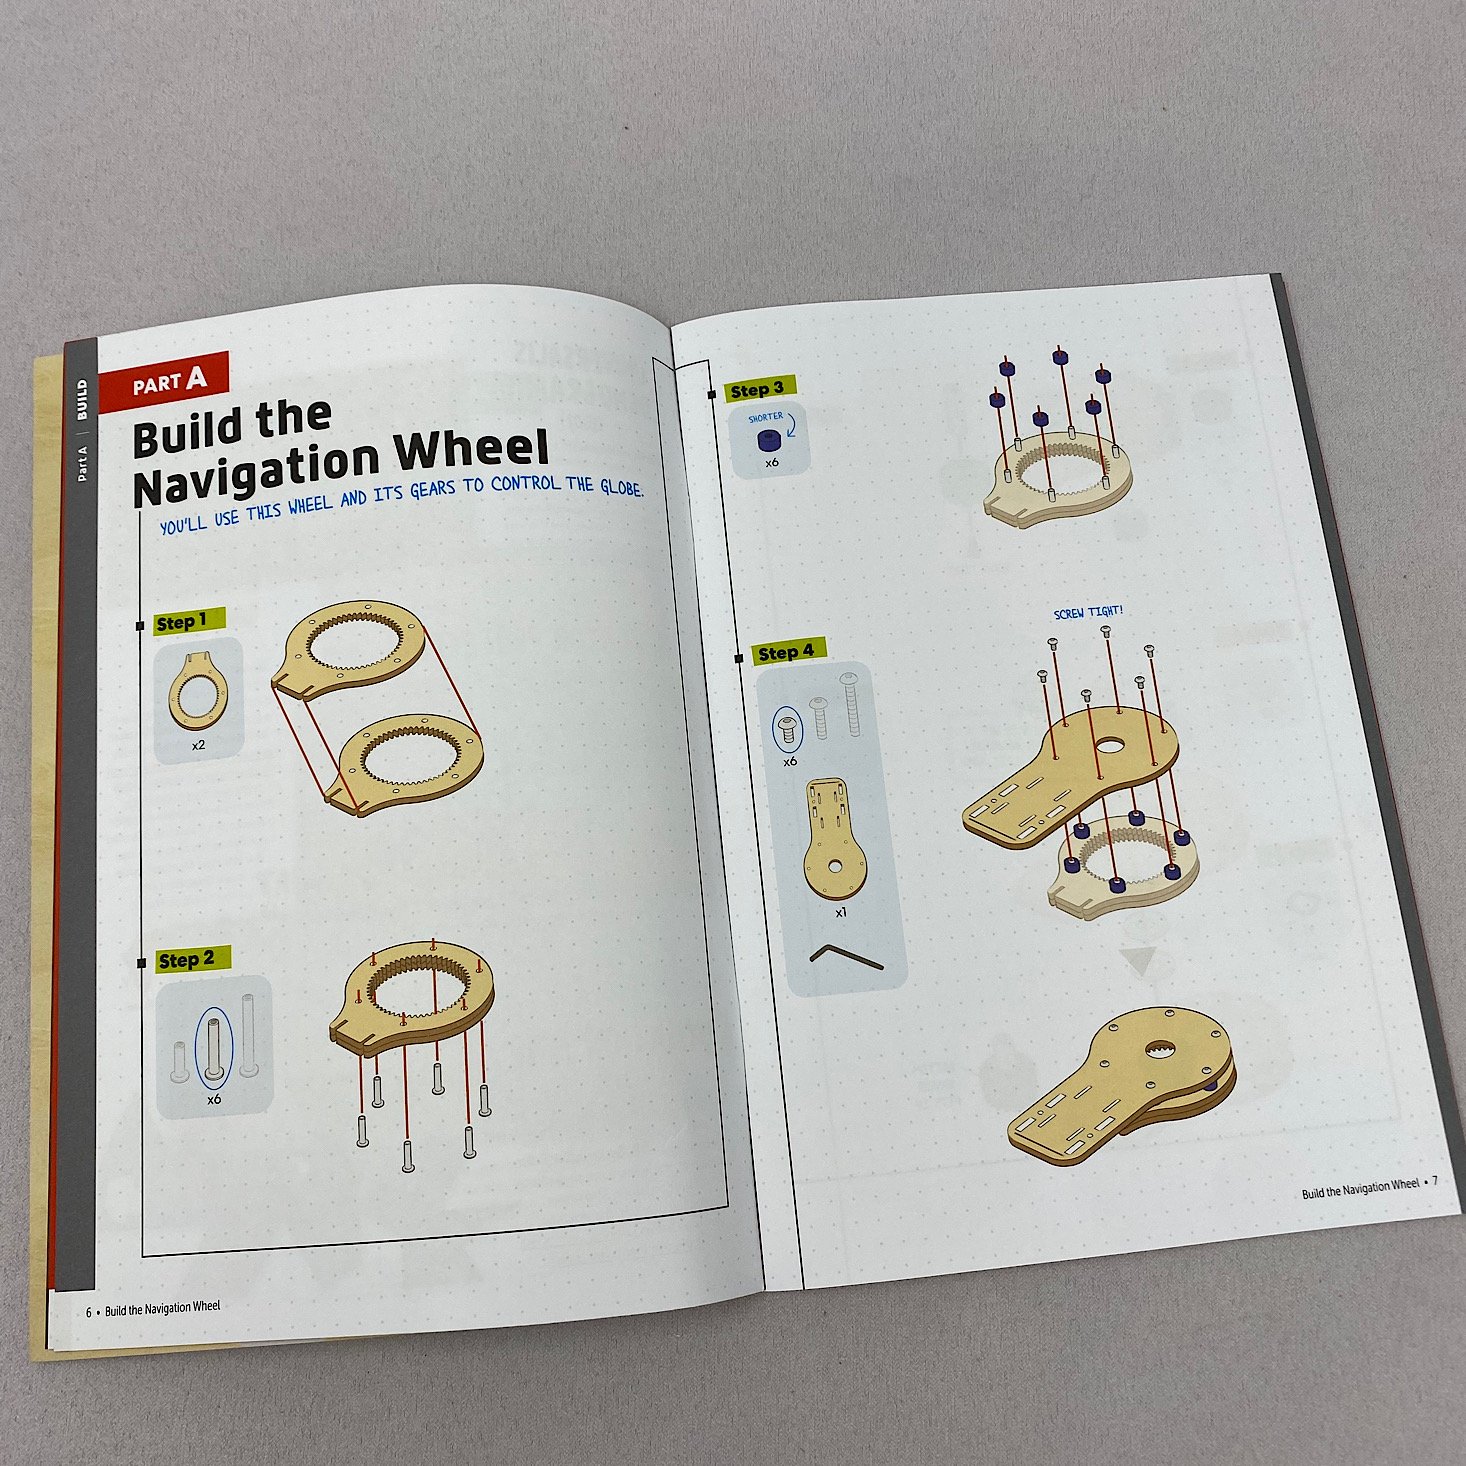
Our directions are separated into various sections which makes it so much easier since it breaks it down into smaller, more manageable tasks. The instructions are always clear and easy to follow with detailed, colorful pictures to reference. They even include information on troubleshooting, which can be very helpful!
Part A: Build the Navigation Wheel
3 of 3
1 of 3
2 of 3
3 of 3
1 of 3
2 of 3
3 of 3
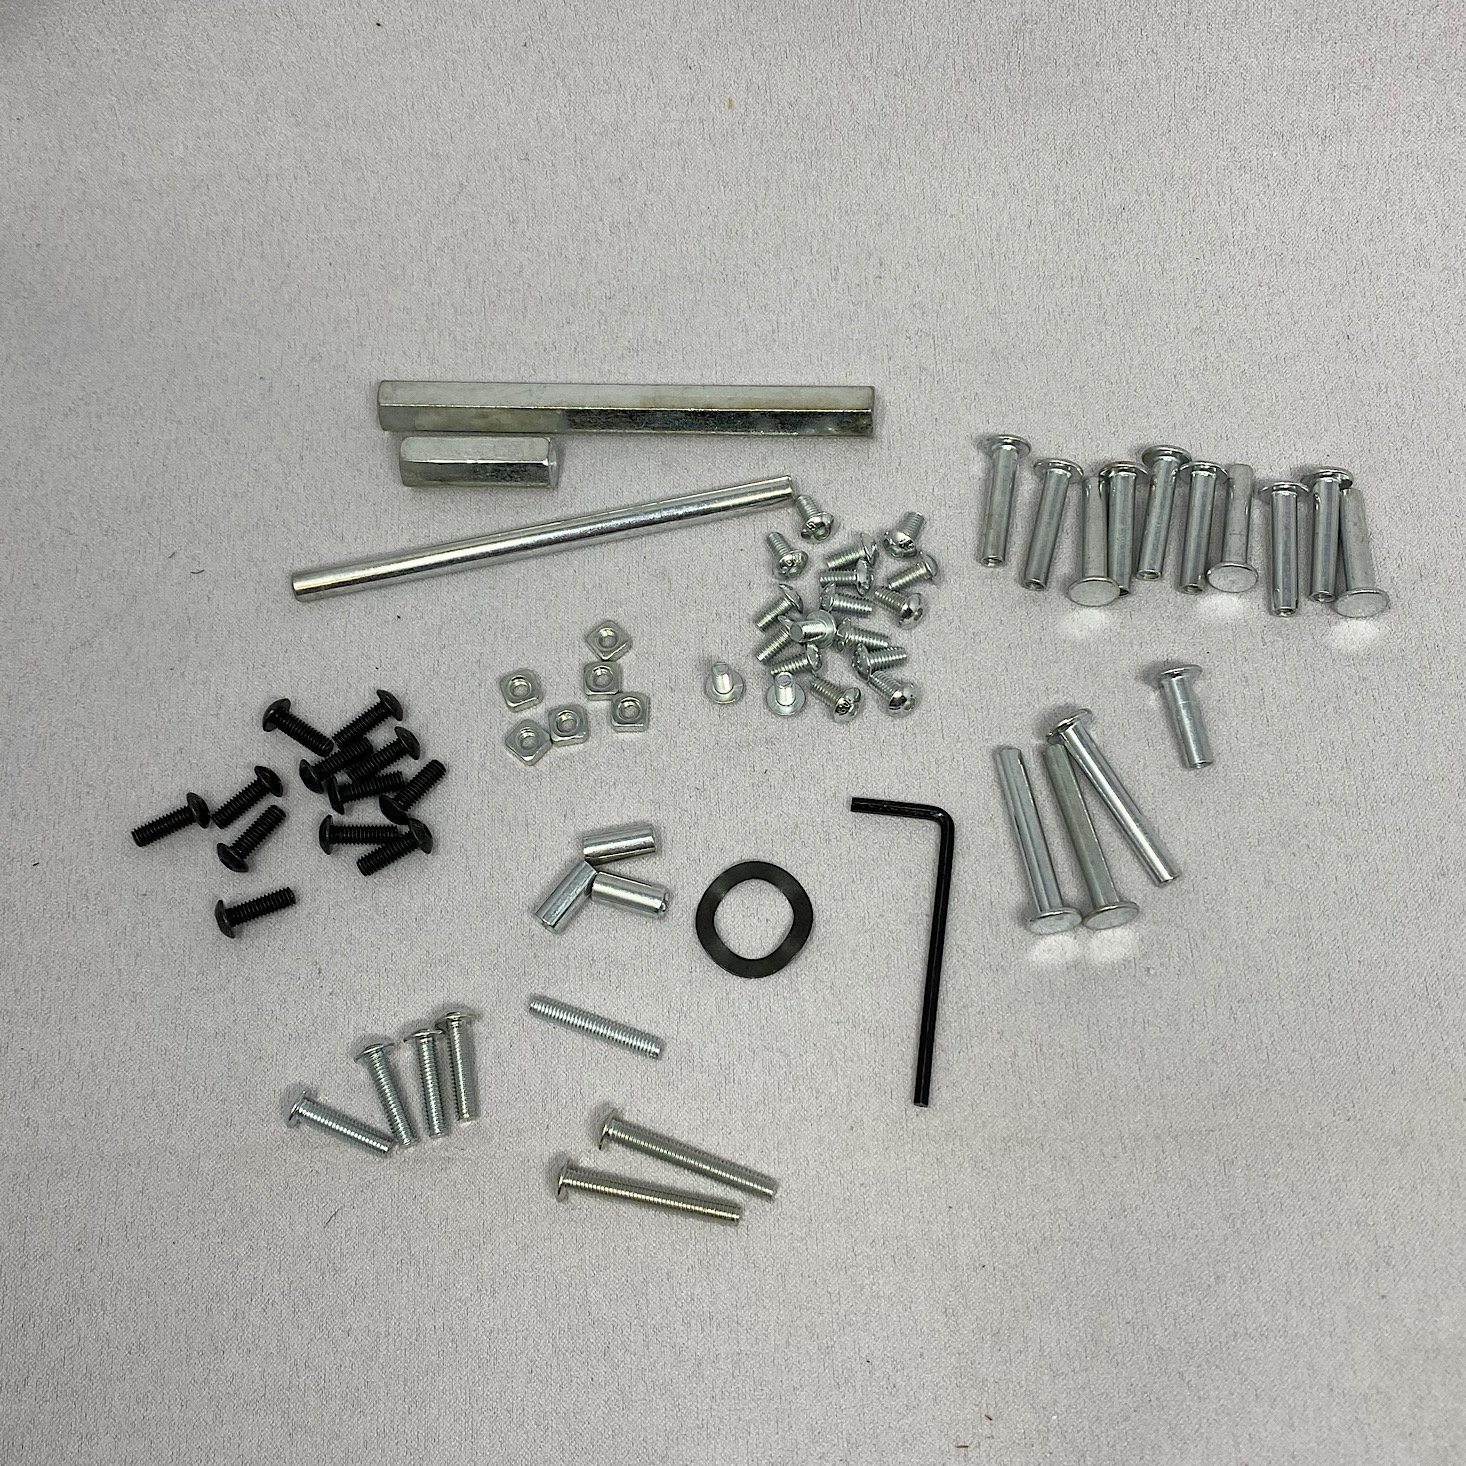
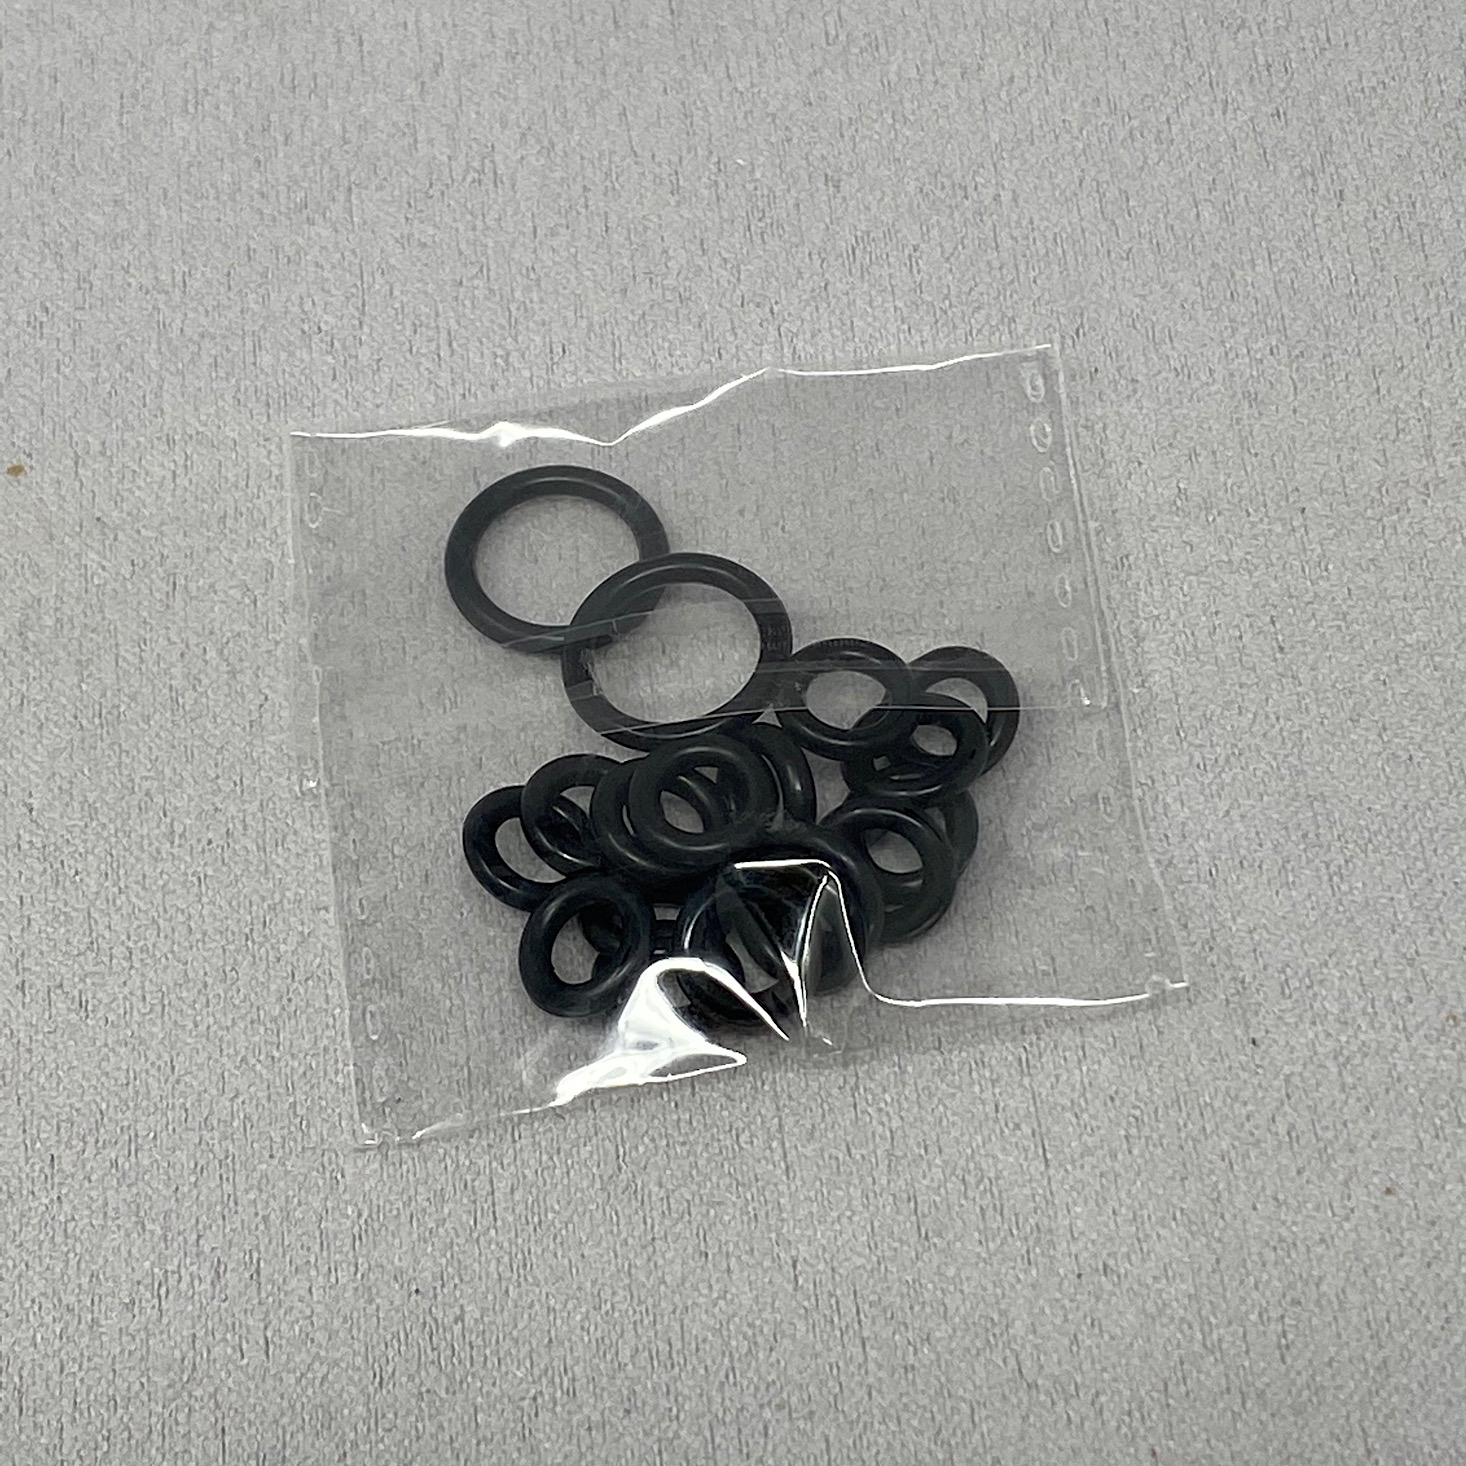
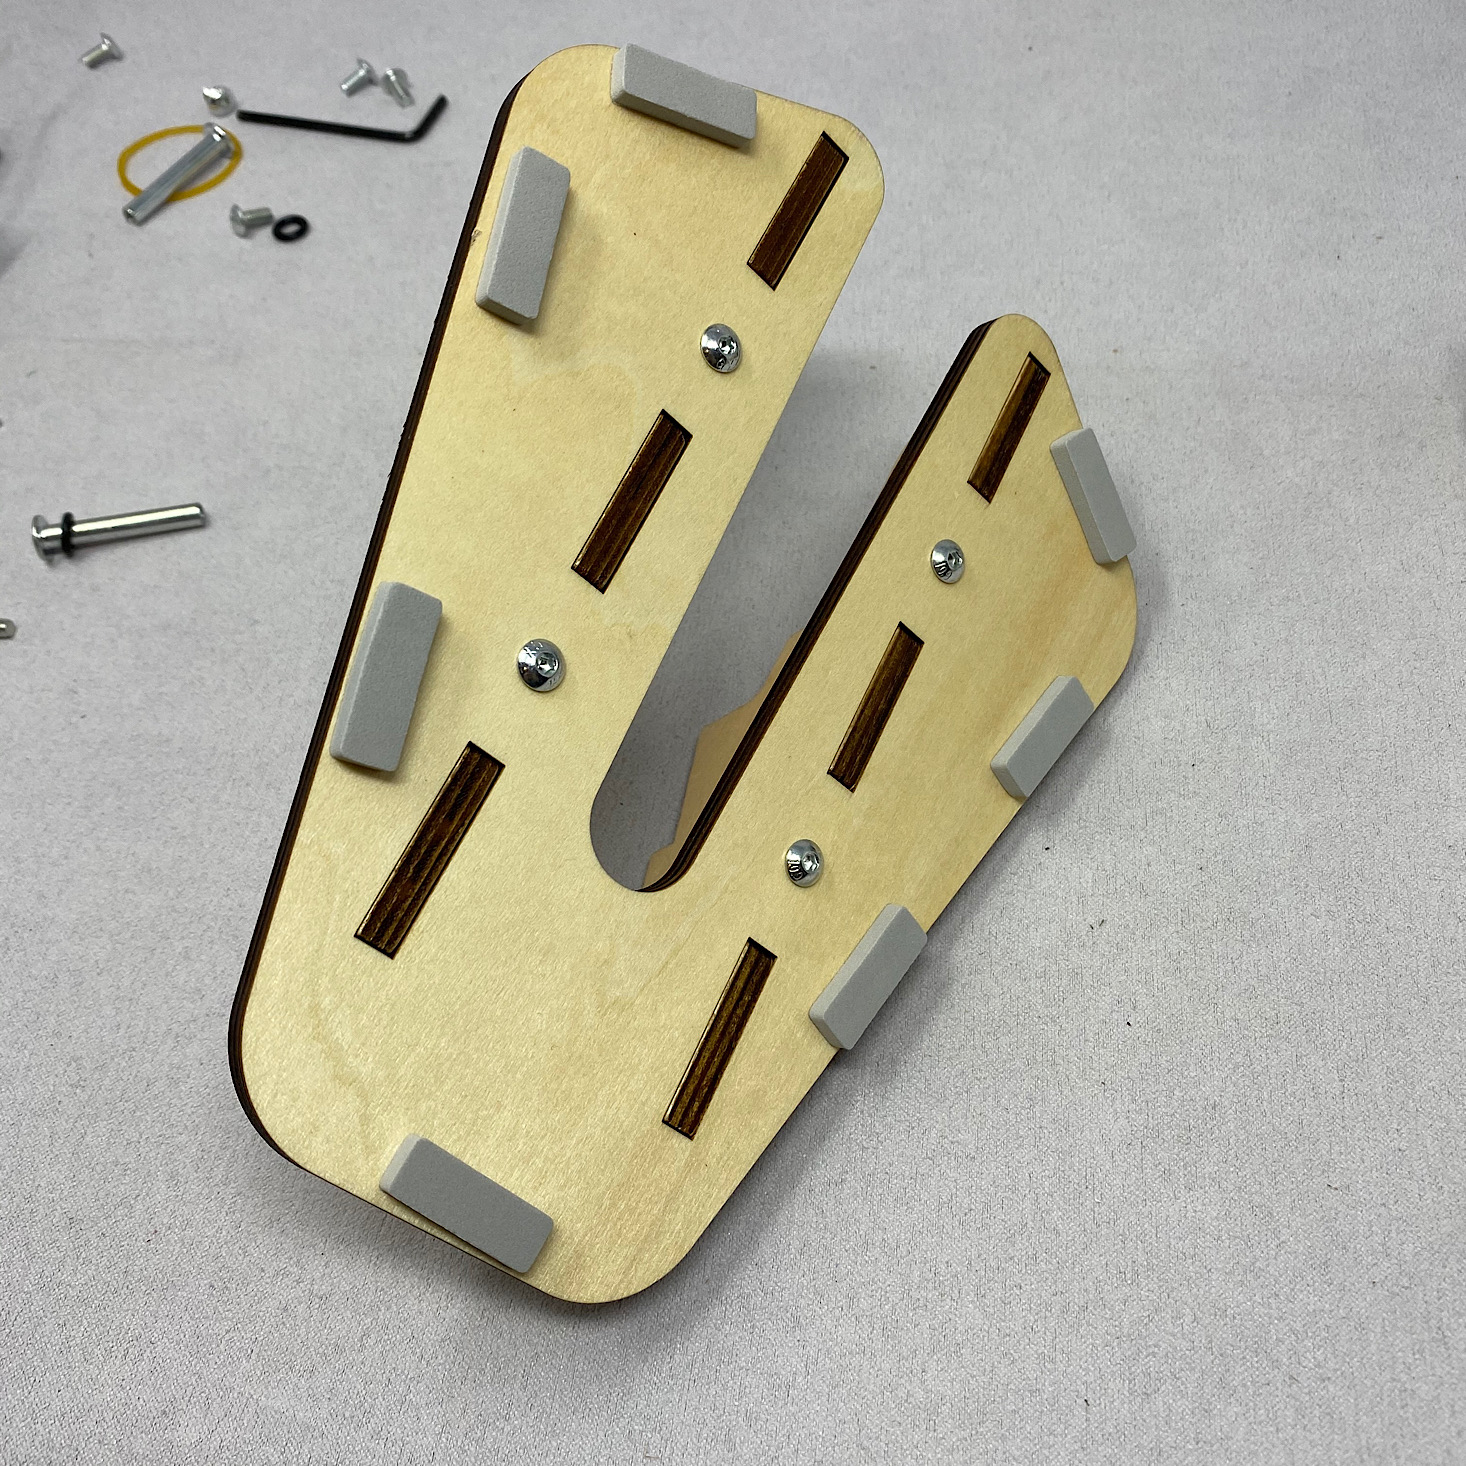
The first step was to build the navigation wheel. This set came with a lot of hardware and several rubber rings. I sorted out my hardware in preparation.
6 of 6 | I made sure to get the screws all on tight.
1 of 6 | First, I placed these two pieces on top of one another.
2 of 6 | Then I added some bolts.
3 of 6 | These plastic pieces went on top of the bolts.
4 of 6 | Once I had those in place I placed a larger wooden piece on top.
5 of 6 | Then I began adding the screws and tightening them with the hex key.
6 of 6 | I made sure to get the screws all on tight.
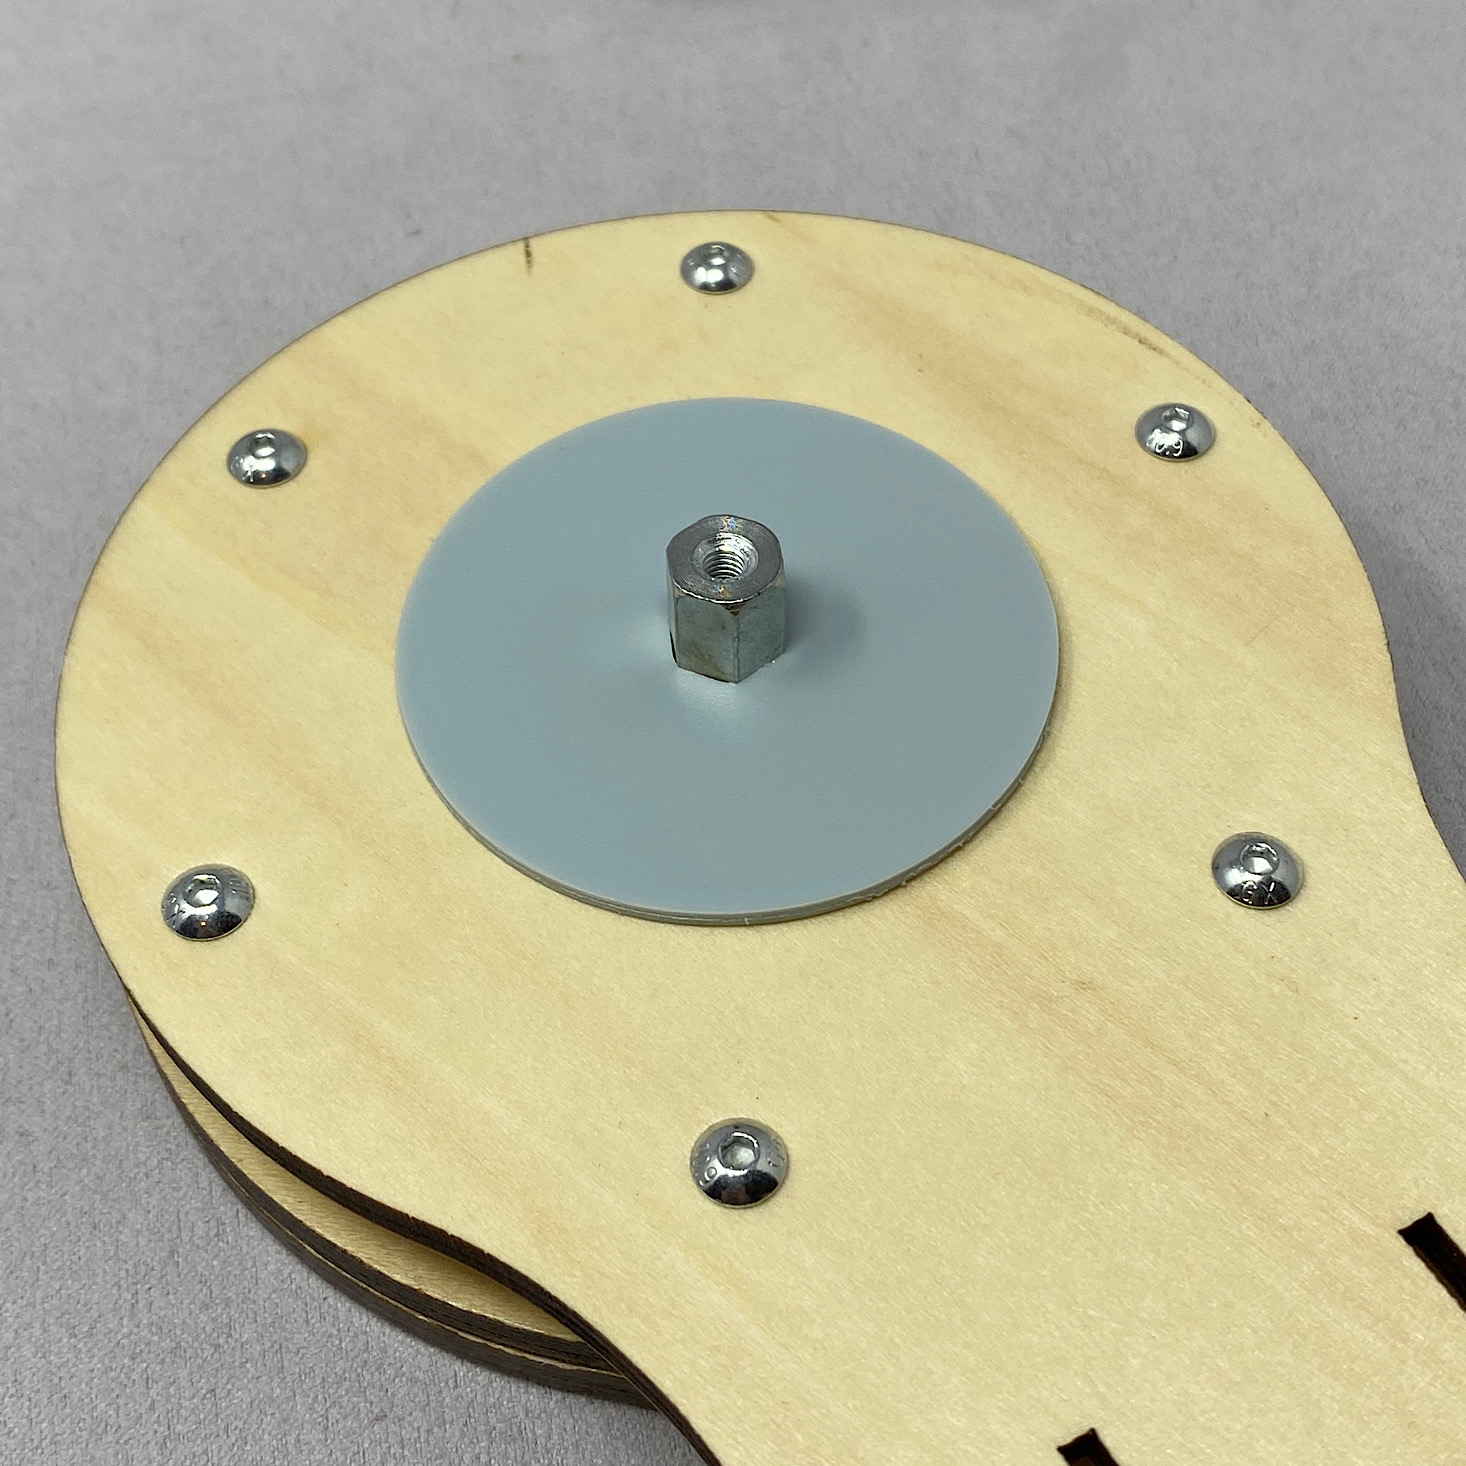
5 of 5 | Then I slid this piece underneath the wooden section I had assembled and added the gray circle on top of that.
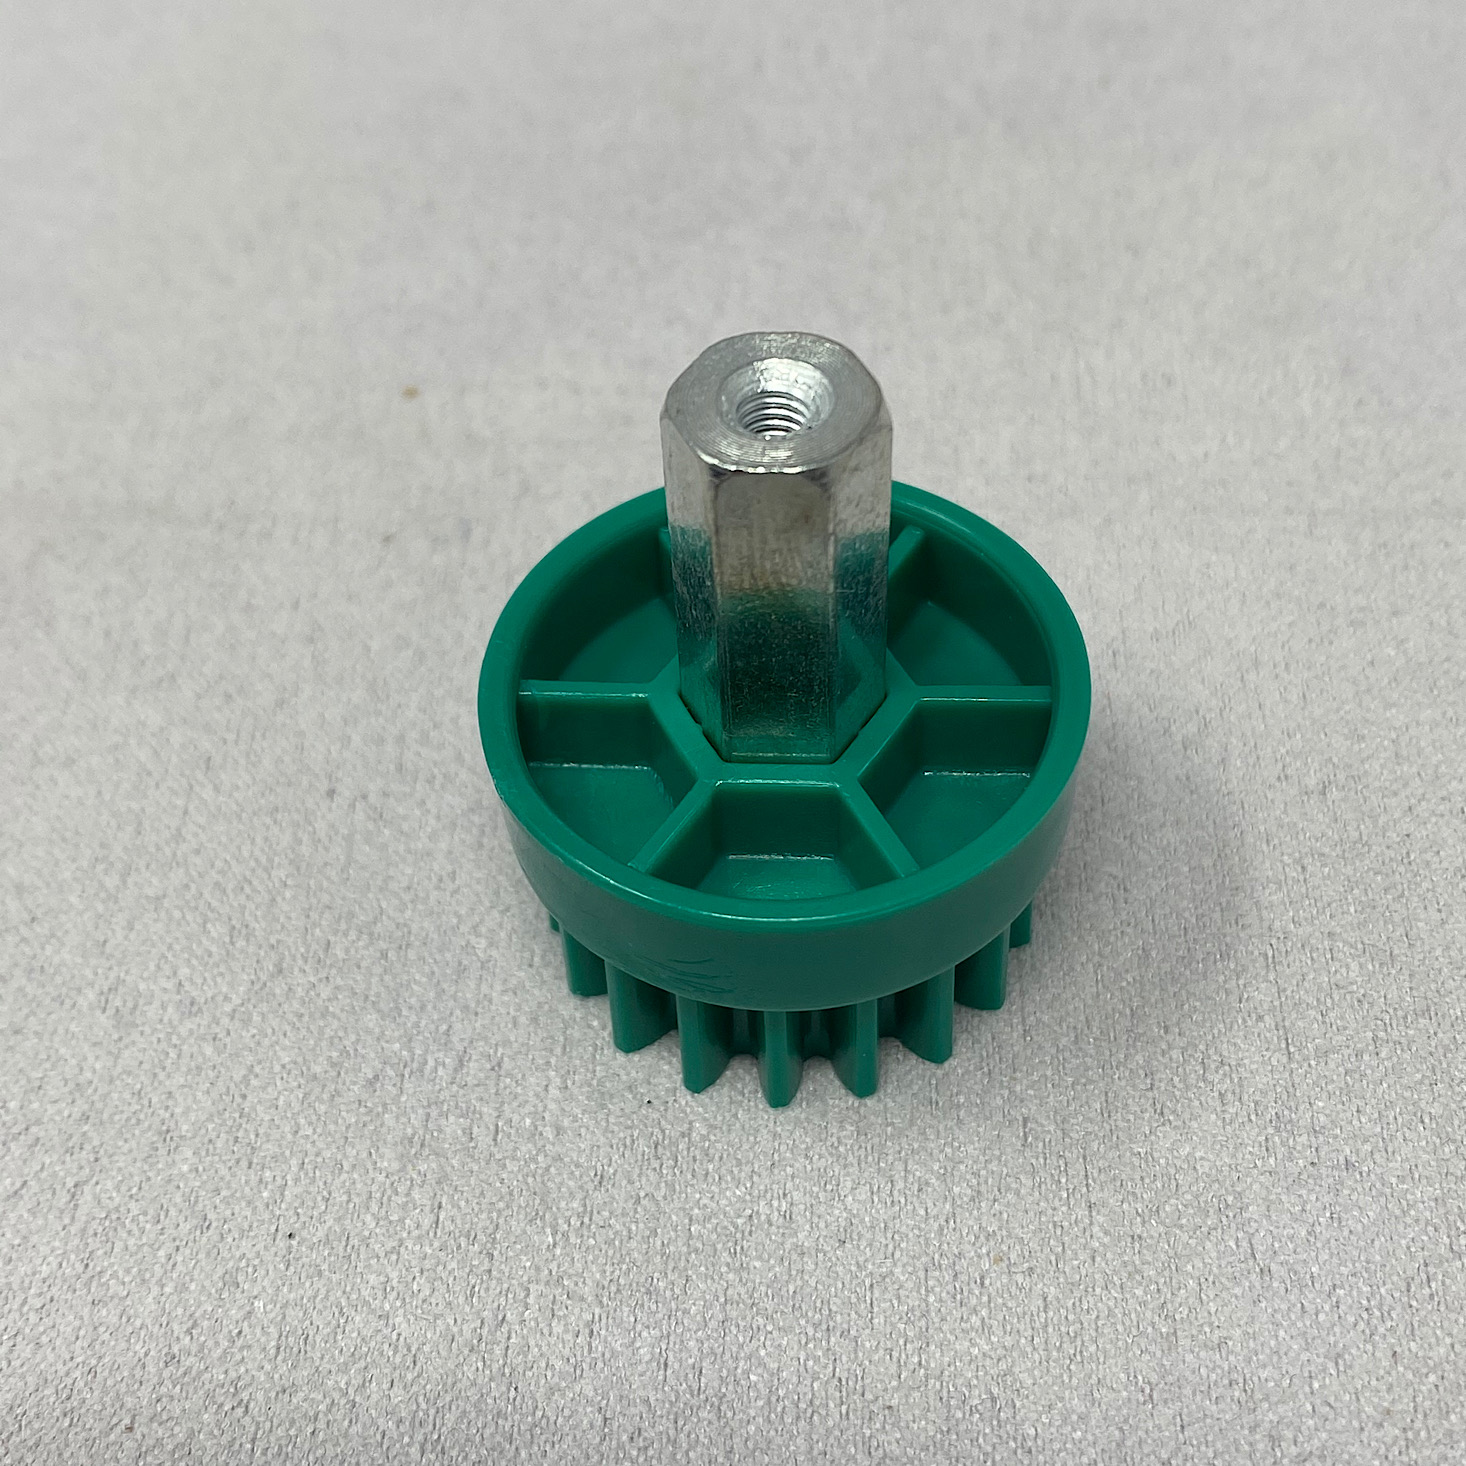
1 of 5 | I selected the larger of these green pieces.
2 of 5 | Then I placed the short hex rod in the center.
3 of 5 | I peeled the plastic off of these two small pieces.
4 of 5 | Then these fit over the top of the hex rod.
5 of 5 | Then I slid this piece underneath the wooden section I had assembled and added the gray circle on top of that.
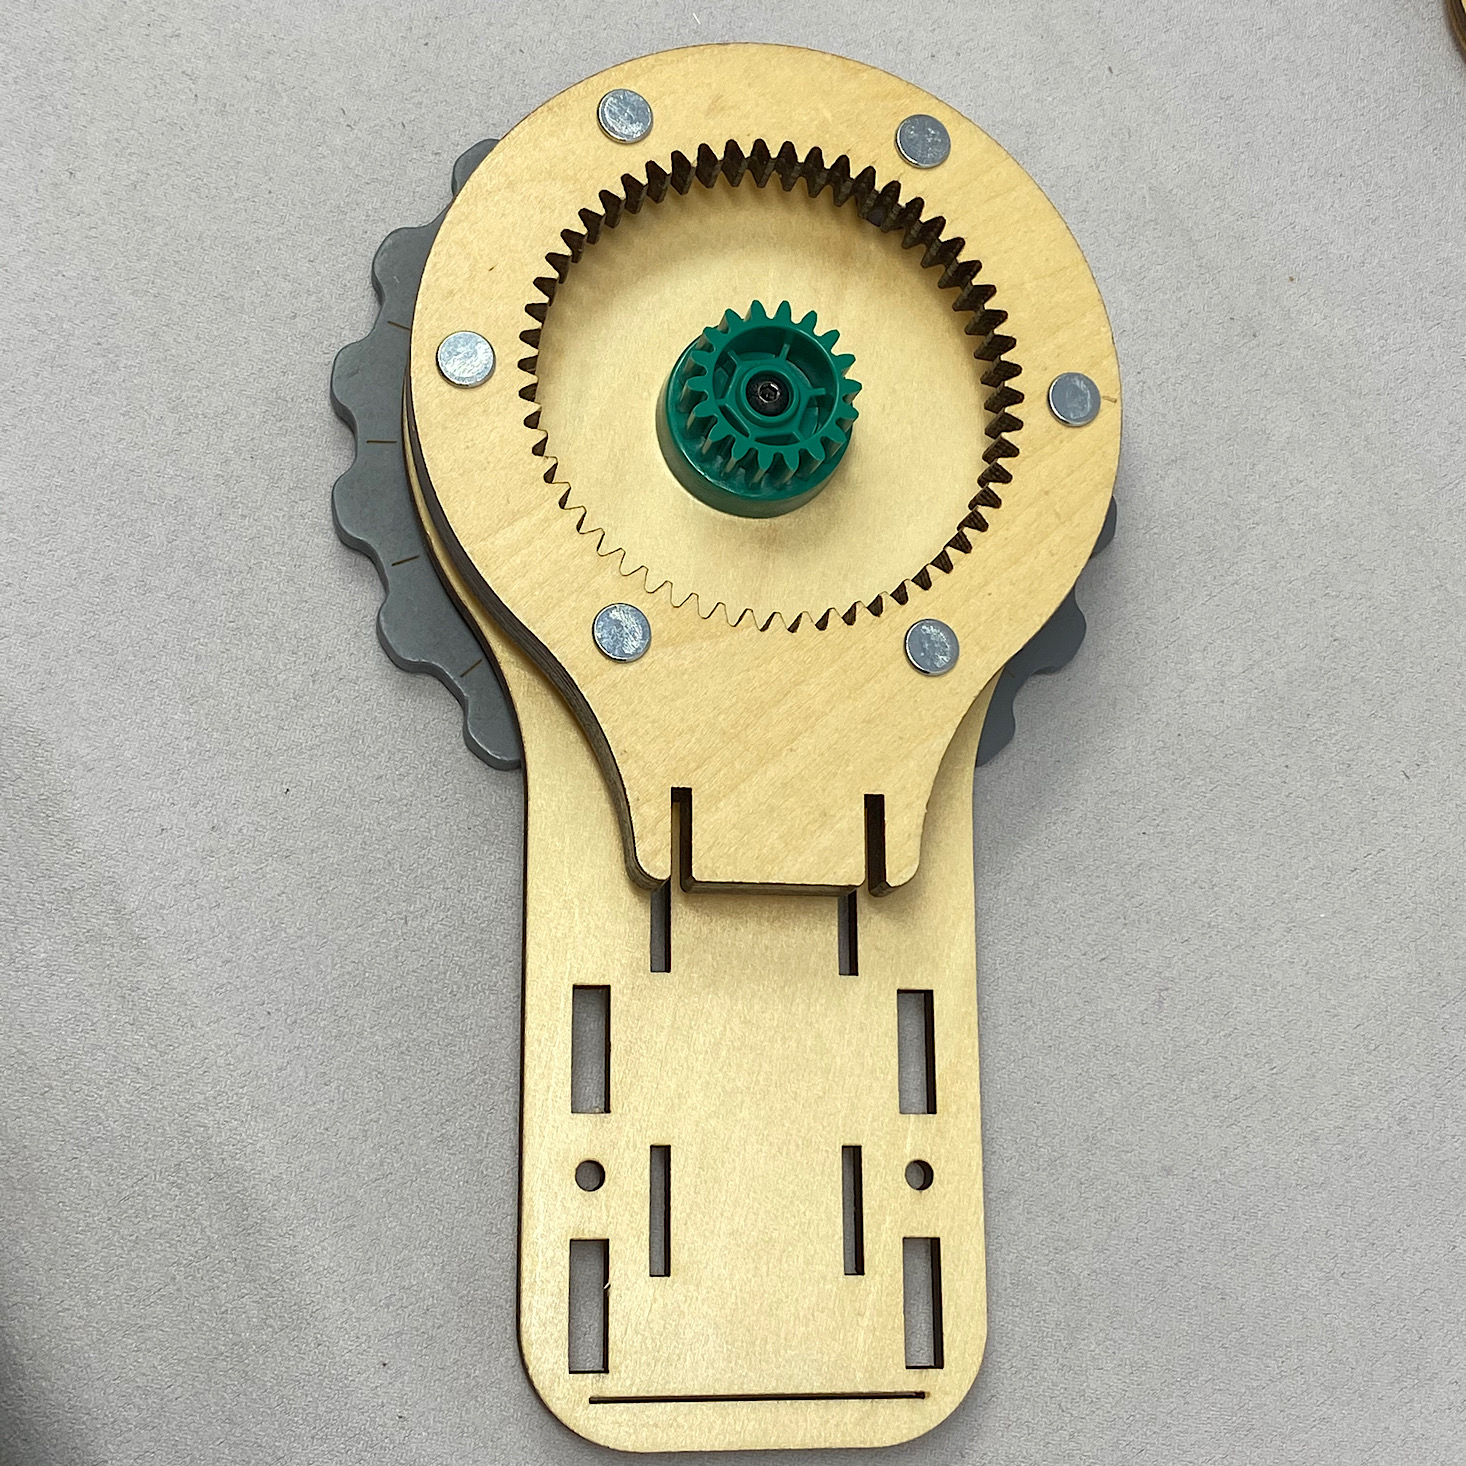
3 of 3 | I then layered two of these pieces with teeth and screwed them to the other side.
1 of 3 | I screwed this smaller circle to the wheel.
2 of 3 | Then I added the wheel to my wooden piece.
3 of 3 | I then layered two of these pieces with teeth and screwed them to the other side.
1 of 3 | I screwed this smaller circle to the wheel.
2 of 3 | Then I added the wheel to my wooden piece.
3 of 3 | I then layered two of these pieces with teeth and screwed them to the other side.
Part B: Finish the Gear Box
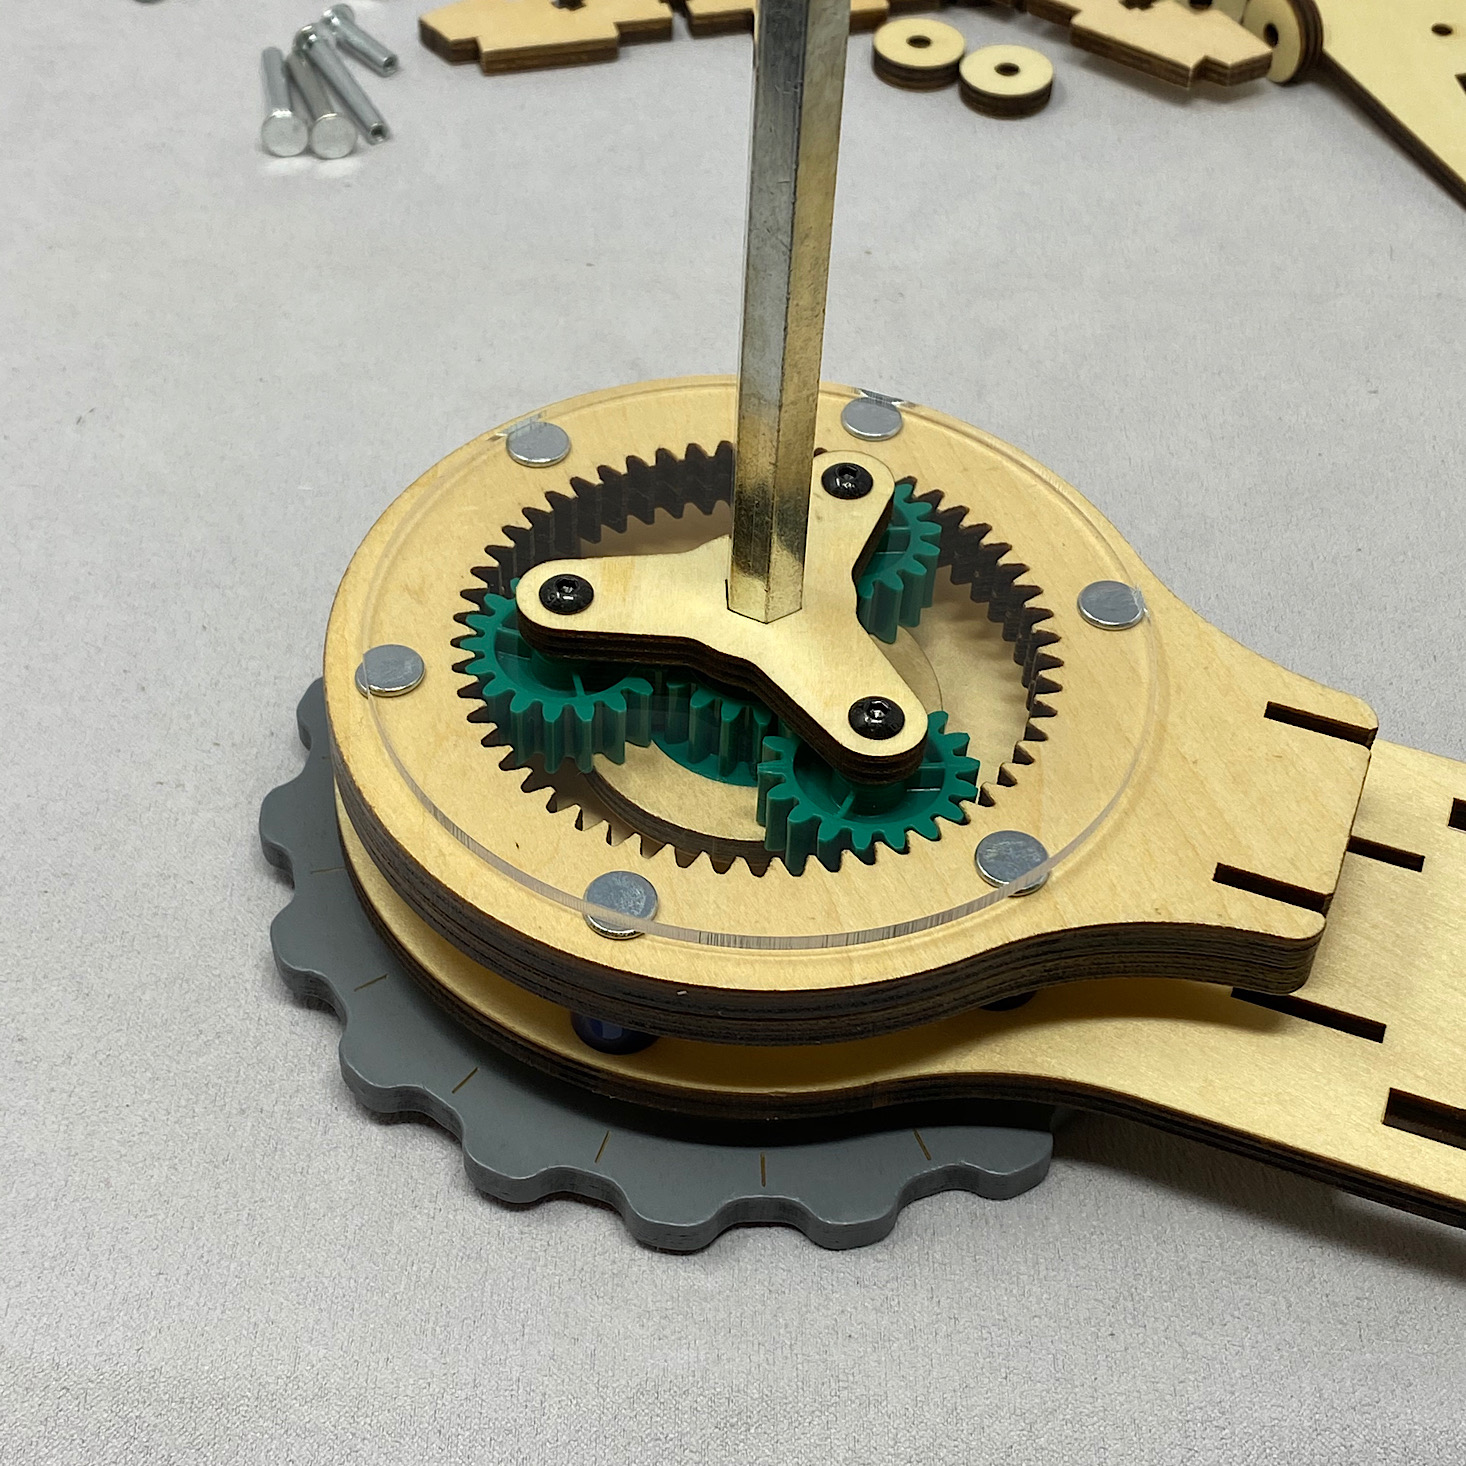
7 of 7 | Then this whole thing fits inside the larger wooden teeth after a bit of wiggling.
1 of 7 | Now it was time to finish the gear box.
2 of 7 | First I added bolts and screws.
3 of 7 | Then I peeled the plastic off the circle.
4 of 7 | Then I added the small green gears and the circle over the top of the bolts.
5 of 7 | I fit a smaller hex rod into the center.
6 of 7 | Then I added a long metal rod to the middle of the hex rod.
7 of 7 | Then this whole thing fits inside the larger wooden teeth after a bit of wiggling.
Part C: Assemble the Globe Frame
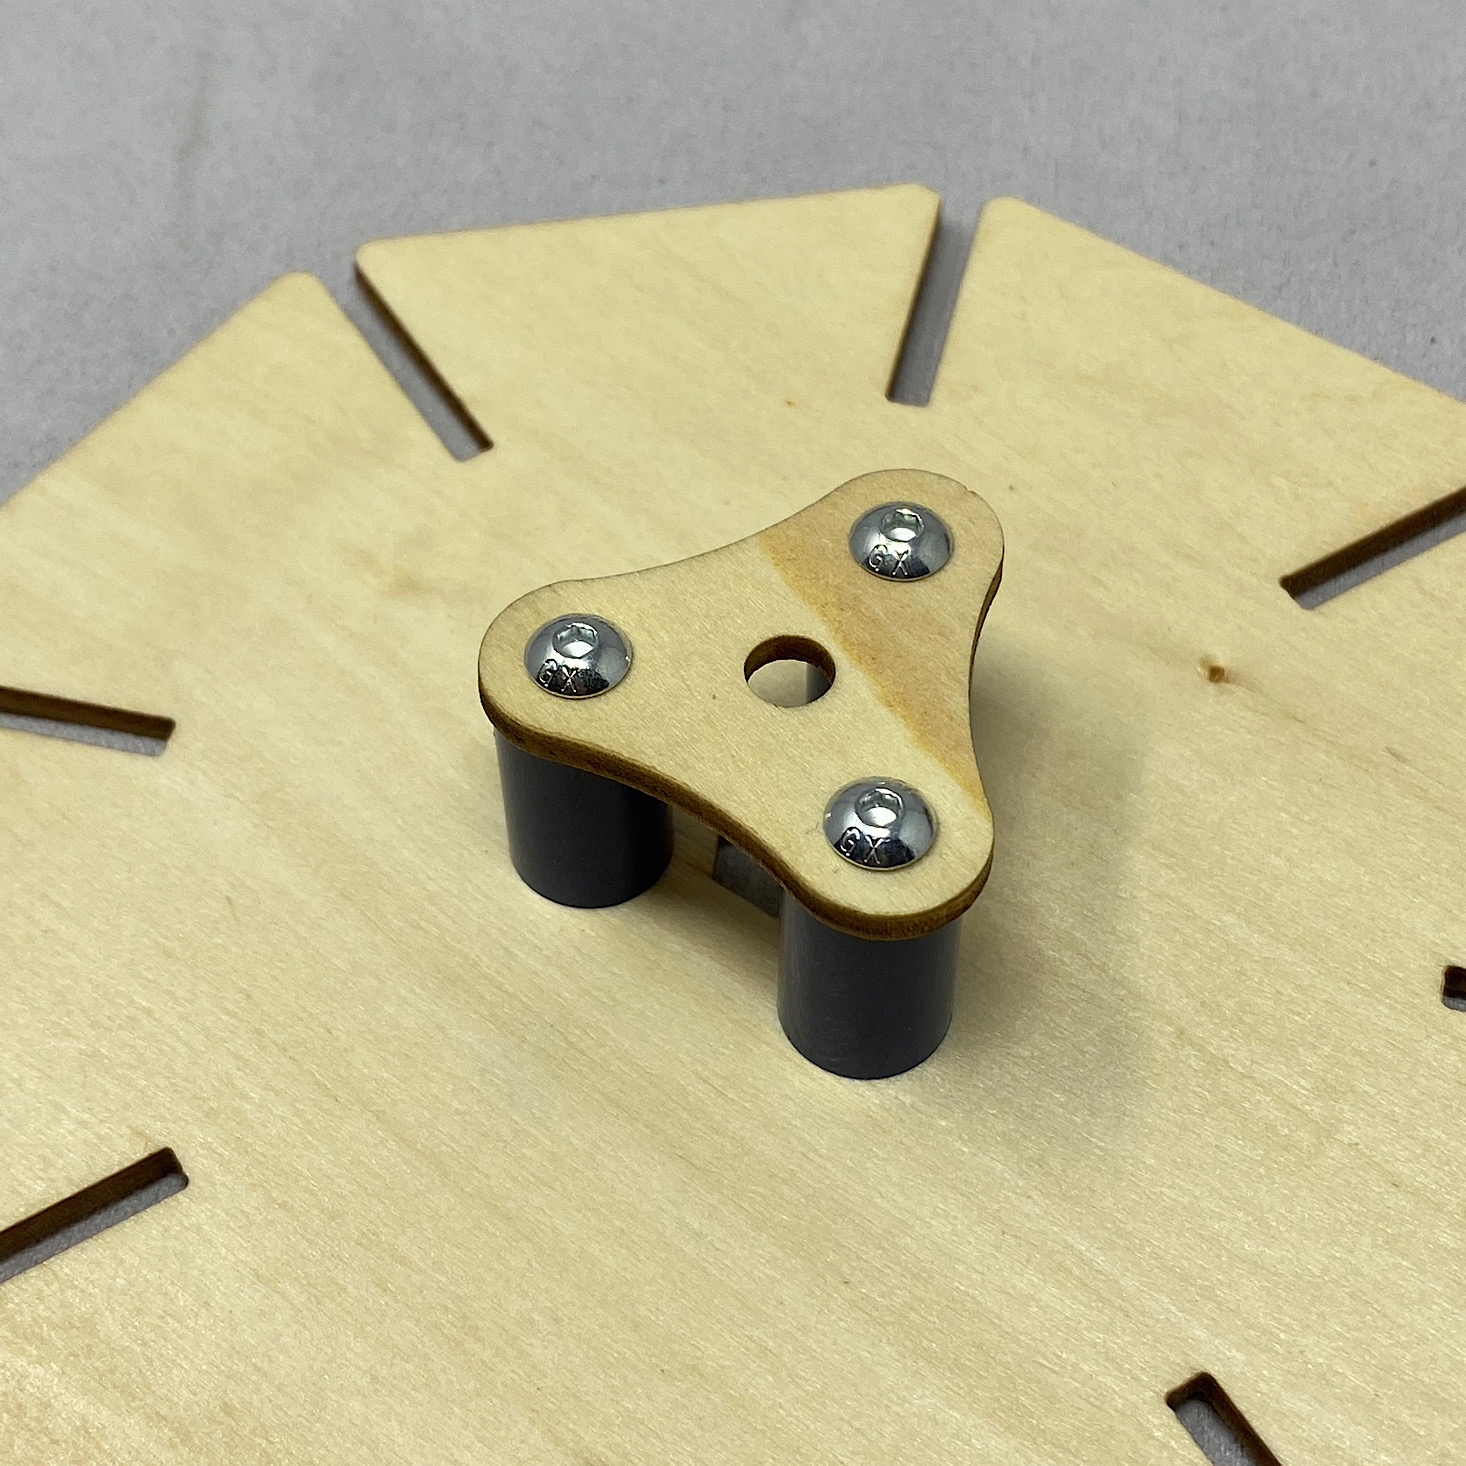
3 of 3 | Then I screwed this piece over the top.
1 of 3 | I added some rubber rings to these bolts.
2 of 3 | These slipped into the holes in the wooden piece. Then I placed plastic pieces over top of the bolts.
3 of 3 | Then I screwed this piece over the top.
1 of 3 | I added some rubber rings to these bolts.
2 of 3 | These slipped into the holes in the wooden piece. Then I placed plastic pieces over top of the bolts.
3 of 3 | Then I screwed this piece over the top.
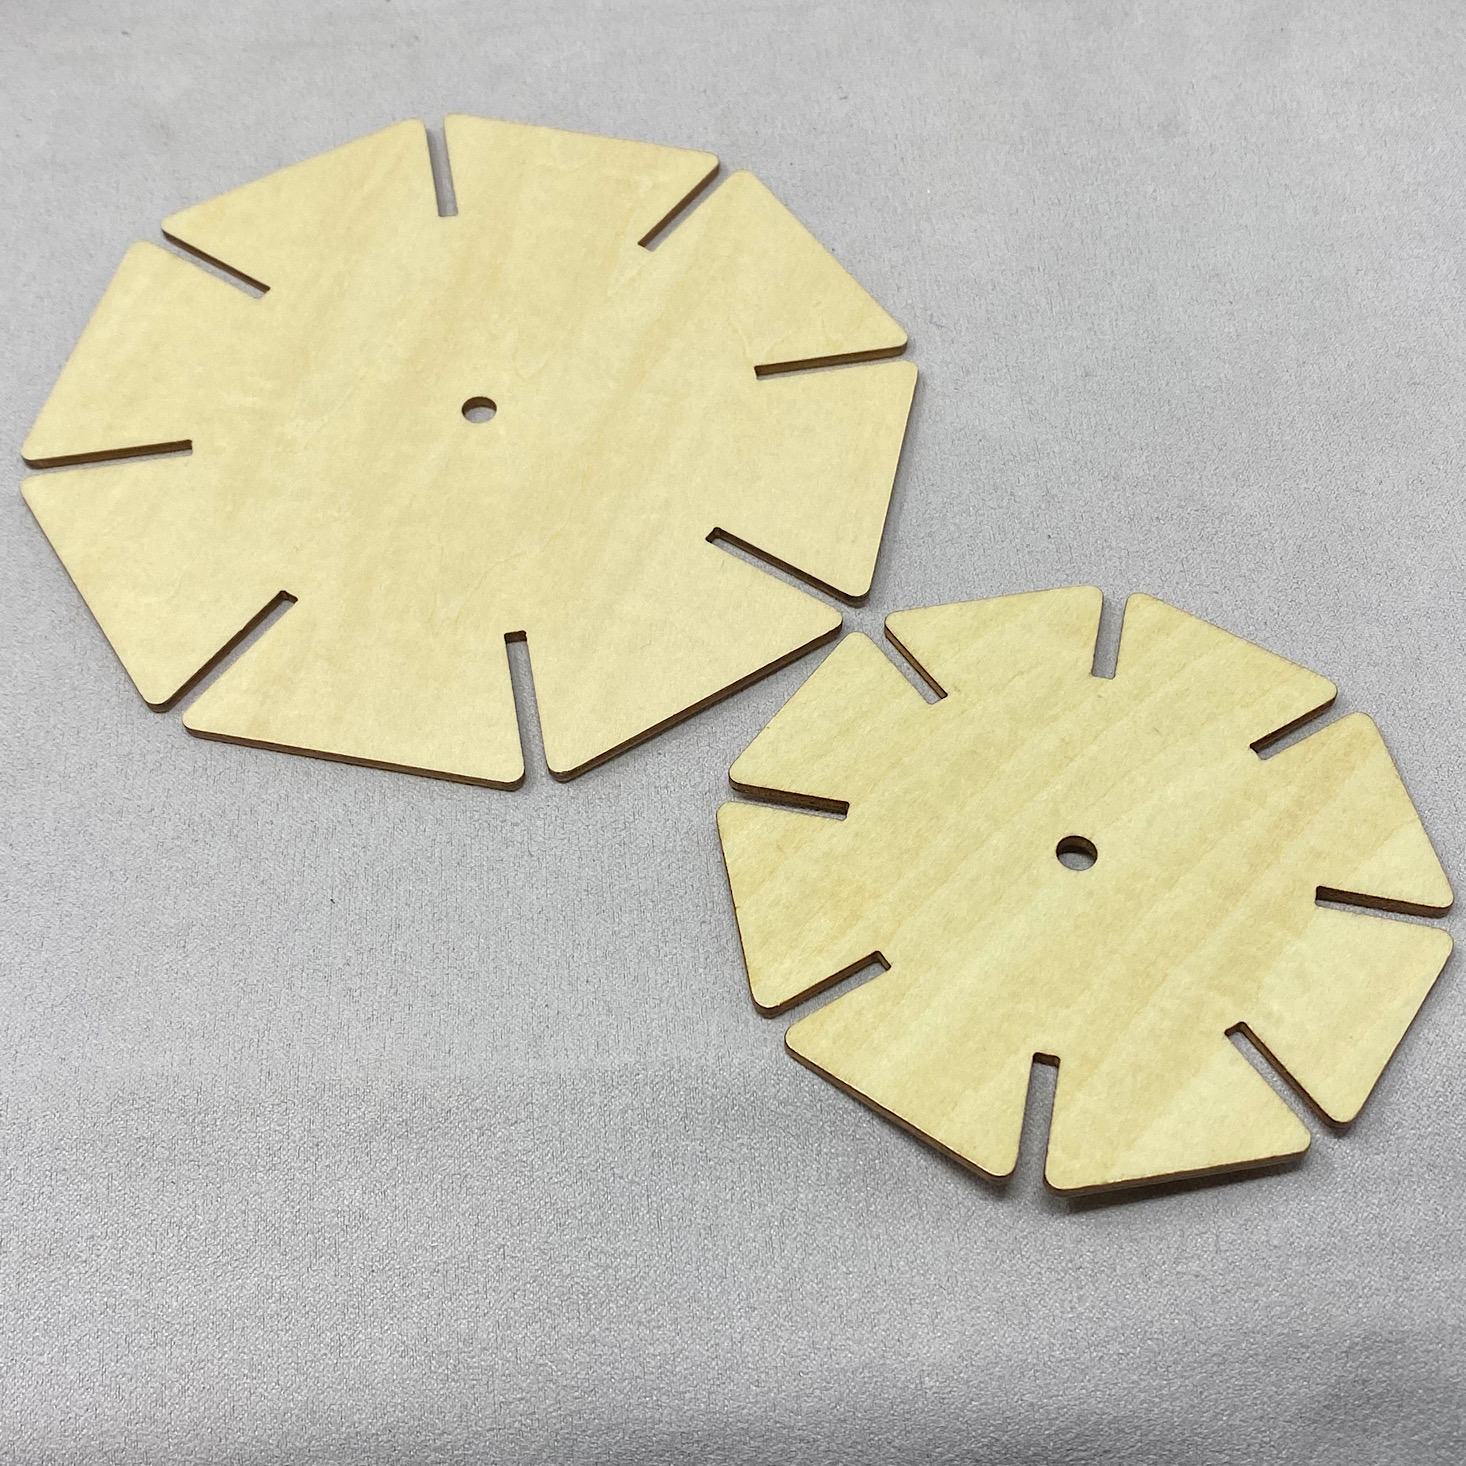
5 of 5
1 of 5
2 of 5
3 of 5
4 of 5
5 of 5
1 of 5
2 of 5
3 of 5
4 of 5
5 of 5
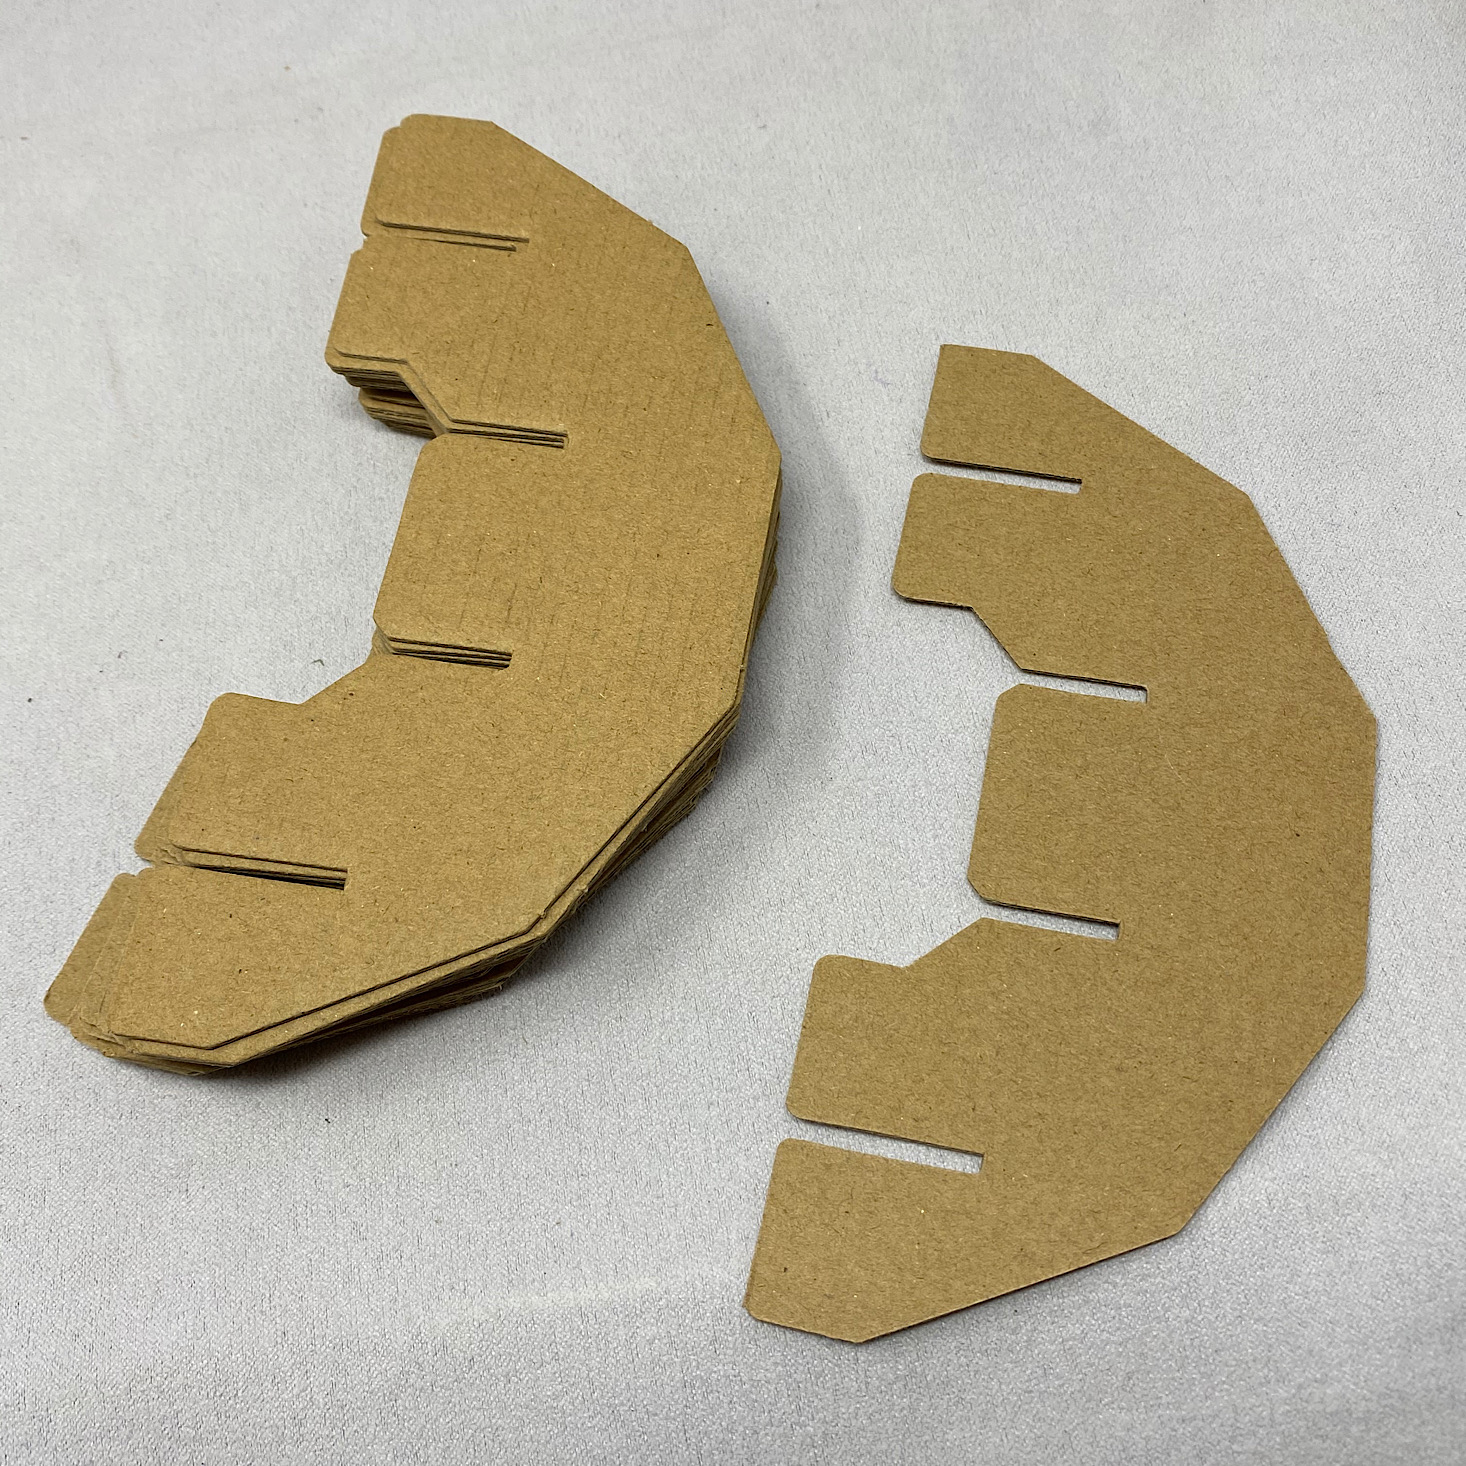
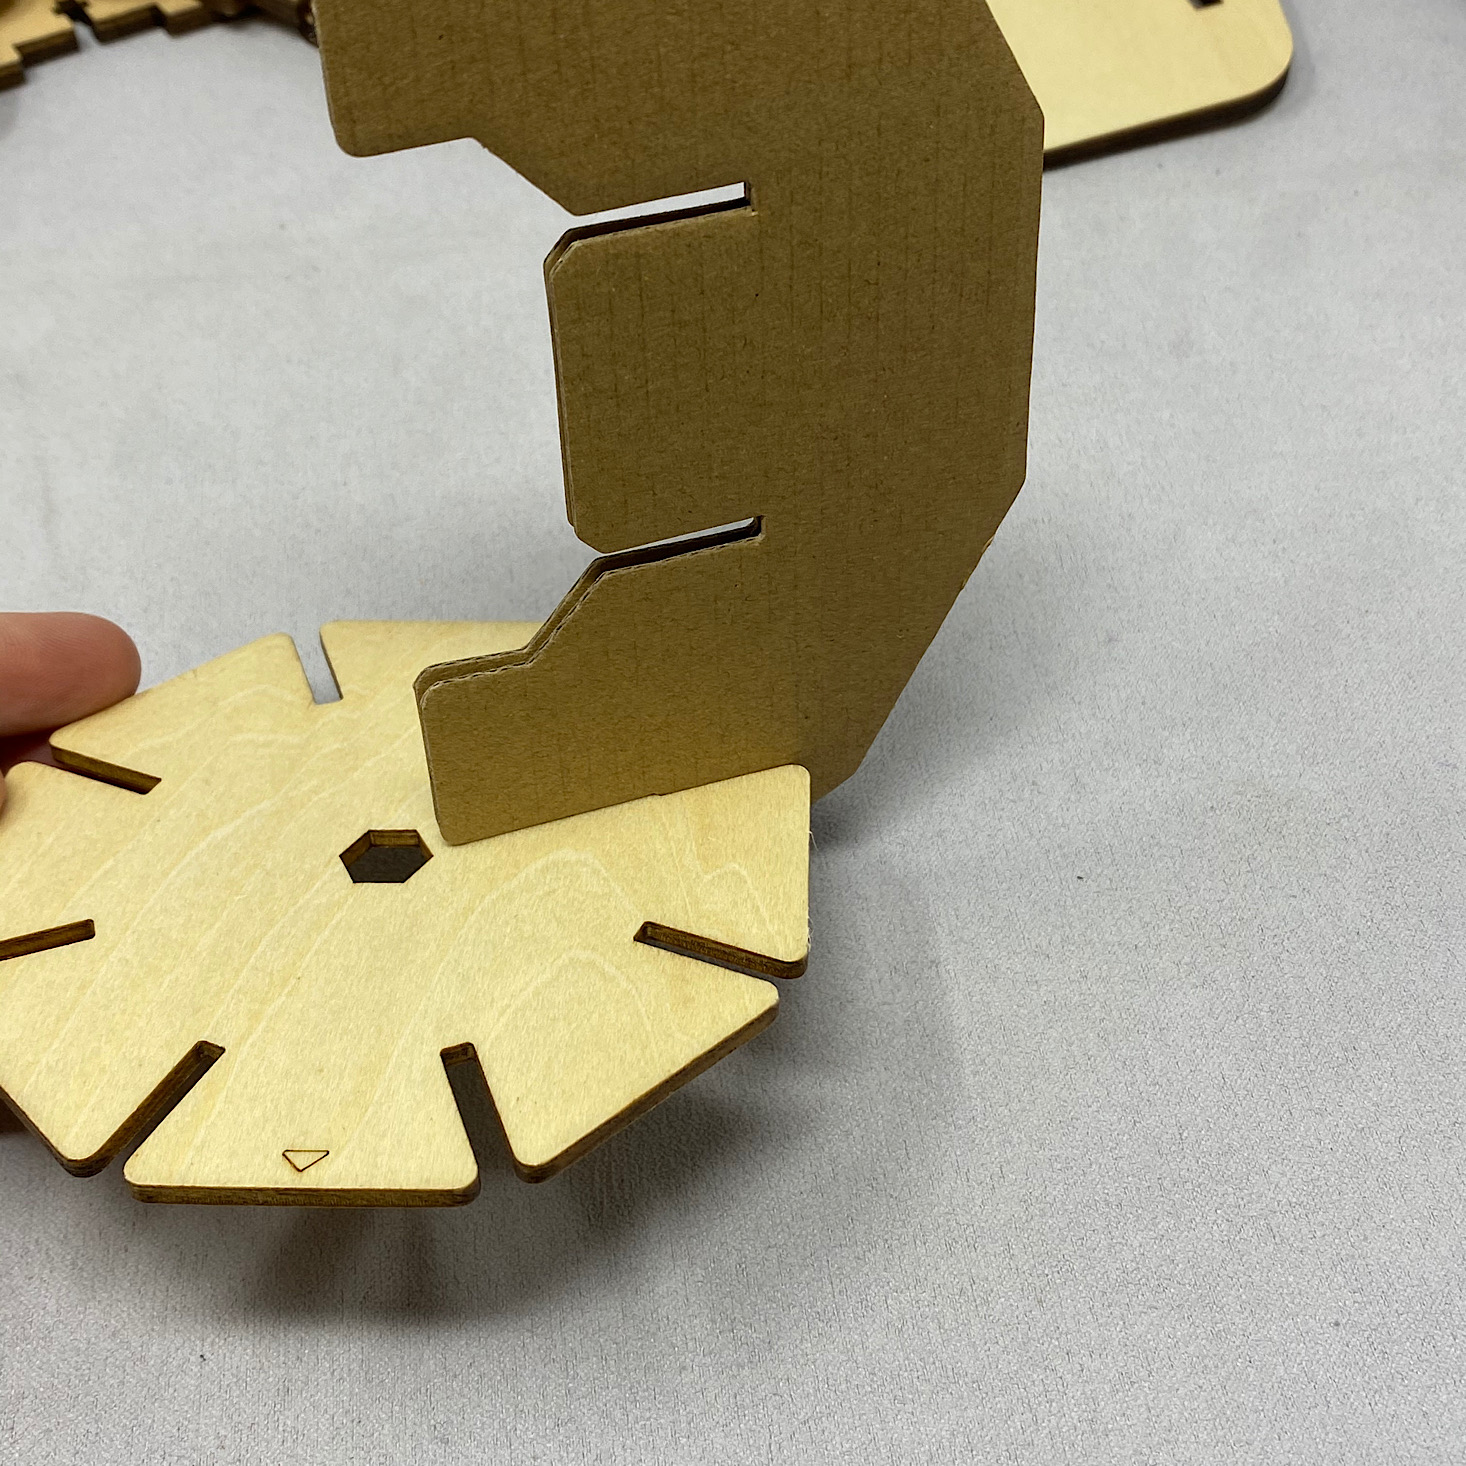
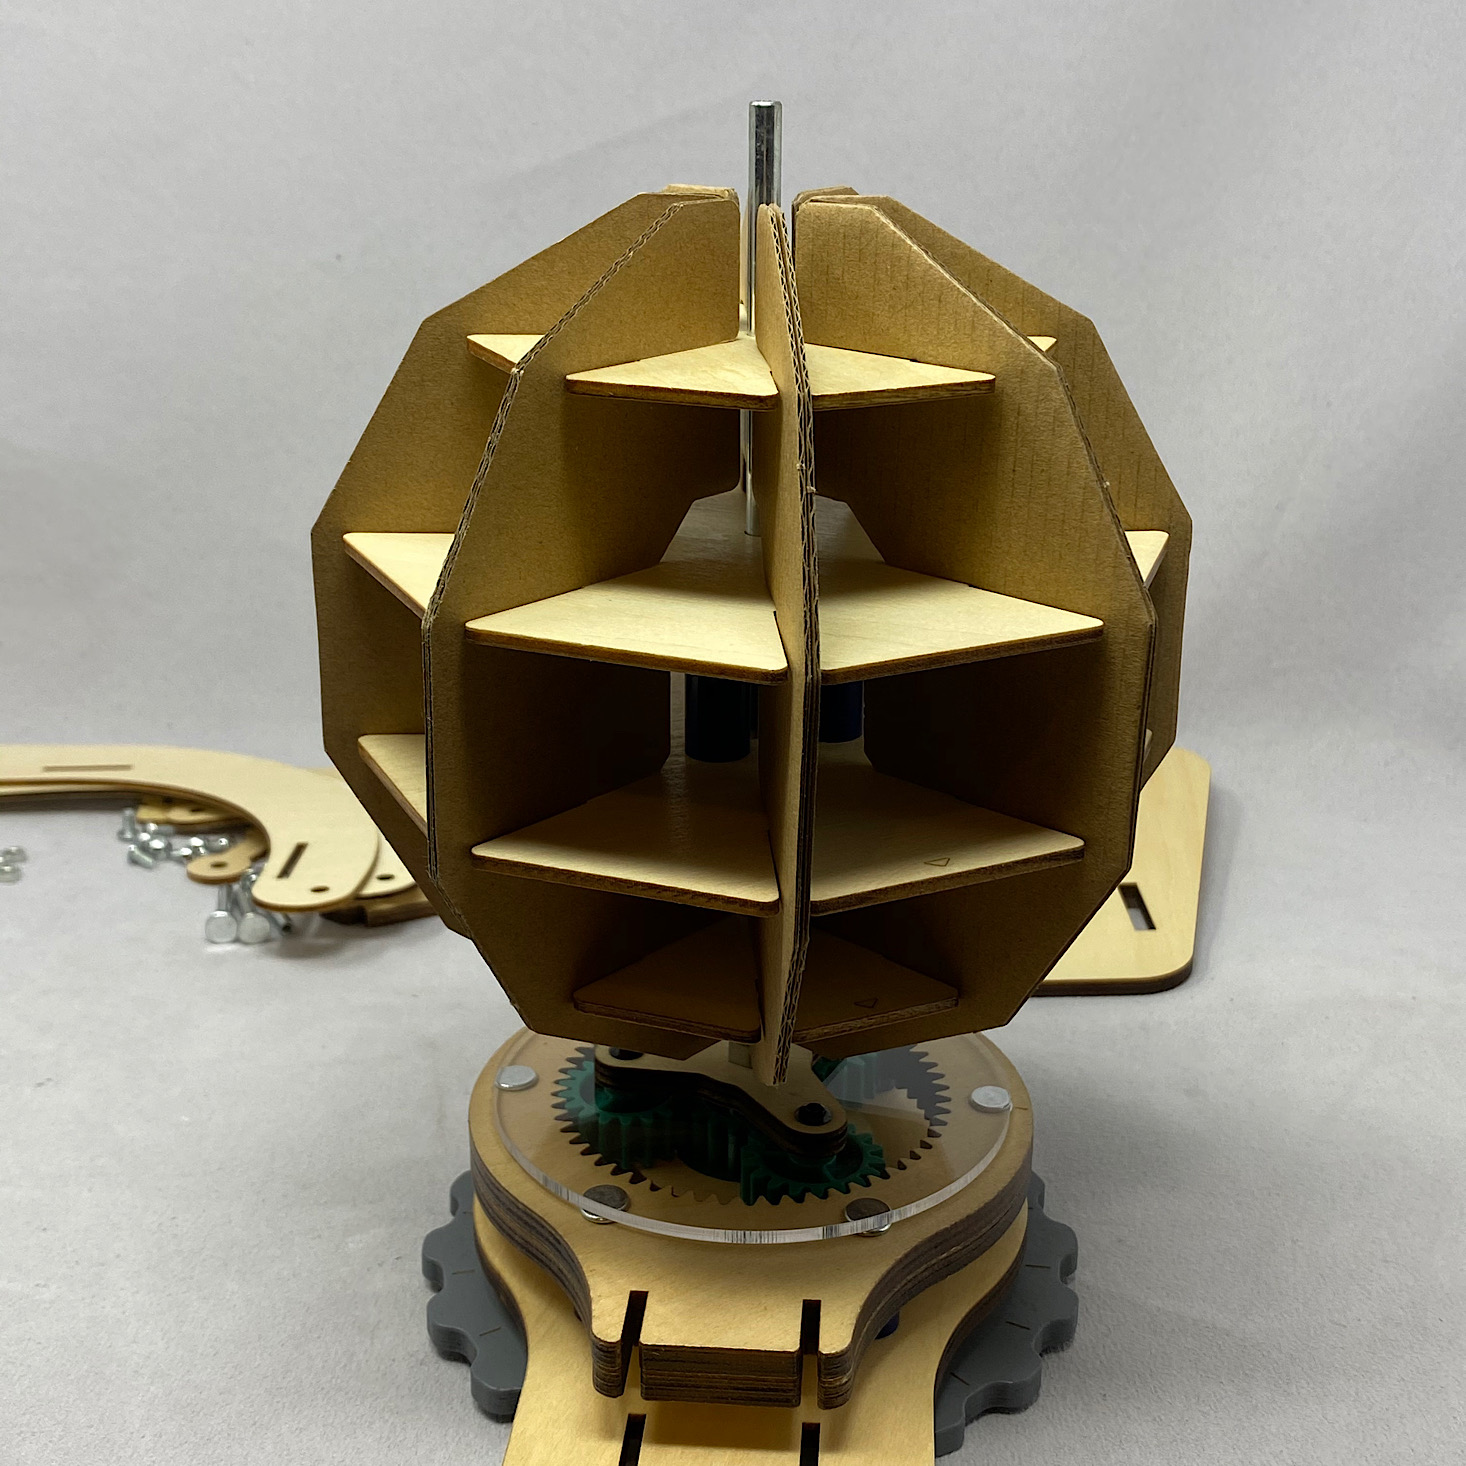
Next, I grabbed two of the cardboard pieces and fit them into one of the wooden discs. Then I added in the other disc layers.
3 of 3
1 of 3
2 of 3
3 of 3
1 of 3
2 of 3
3 of 3
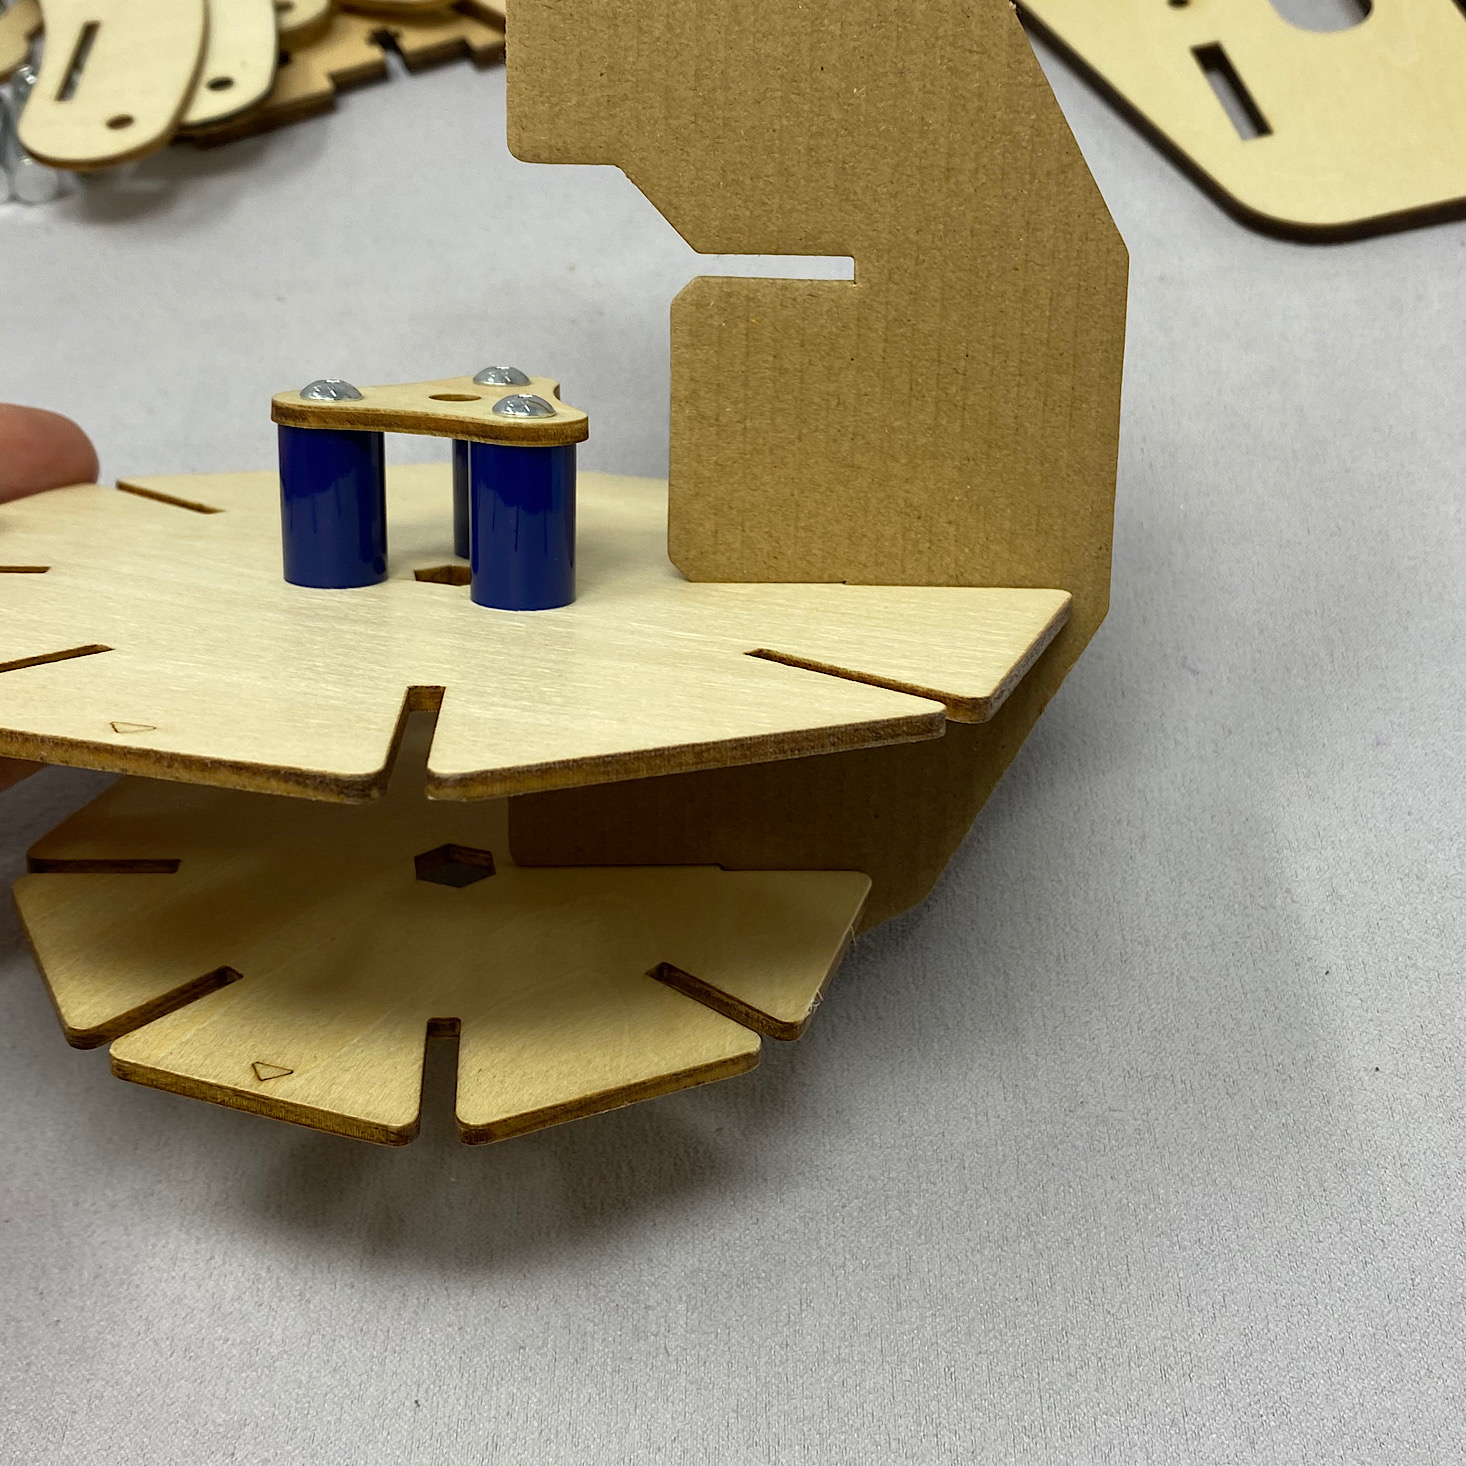
Then it was just a matter of adding the rest of the cardboard pieces into the slots around the edges.
Part D: Add the Globe Panels
7 of 7 | Then I fit the whole thing over the hex rod on my gear piece.
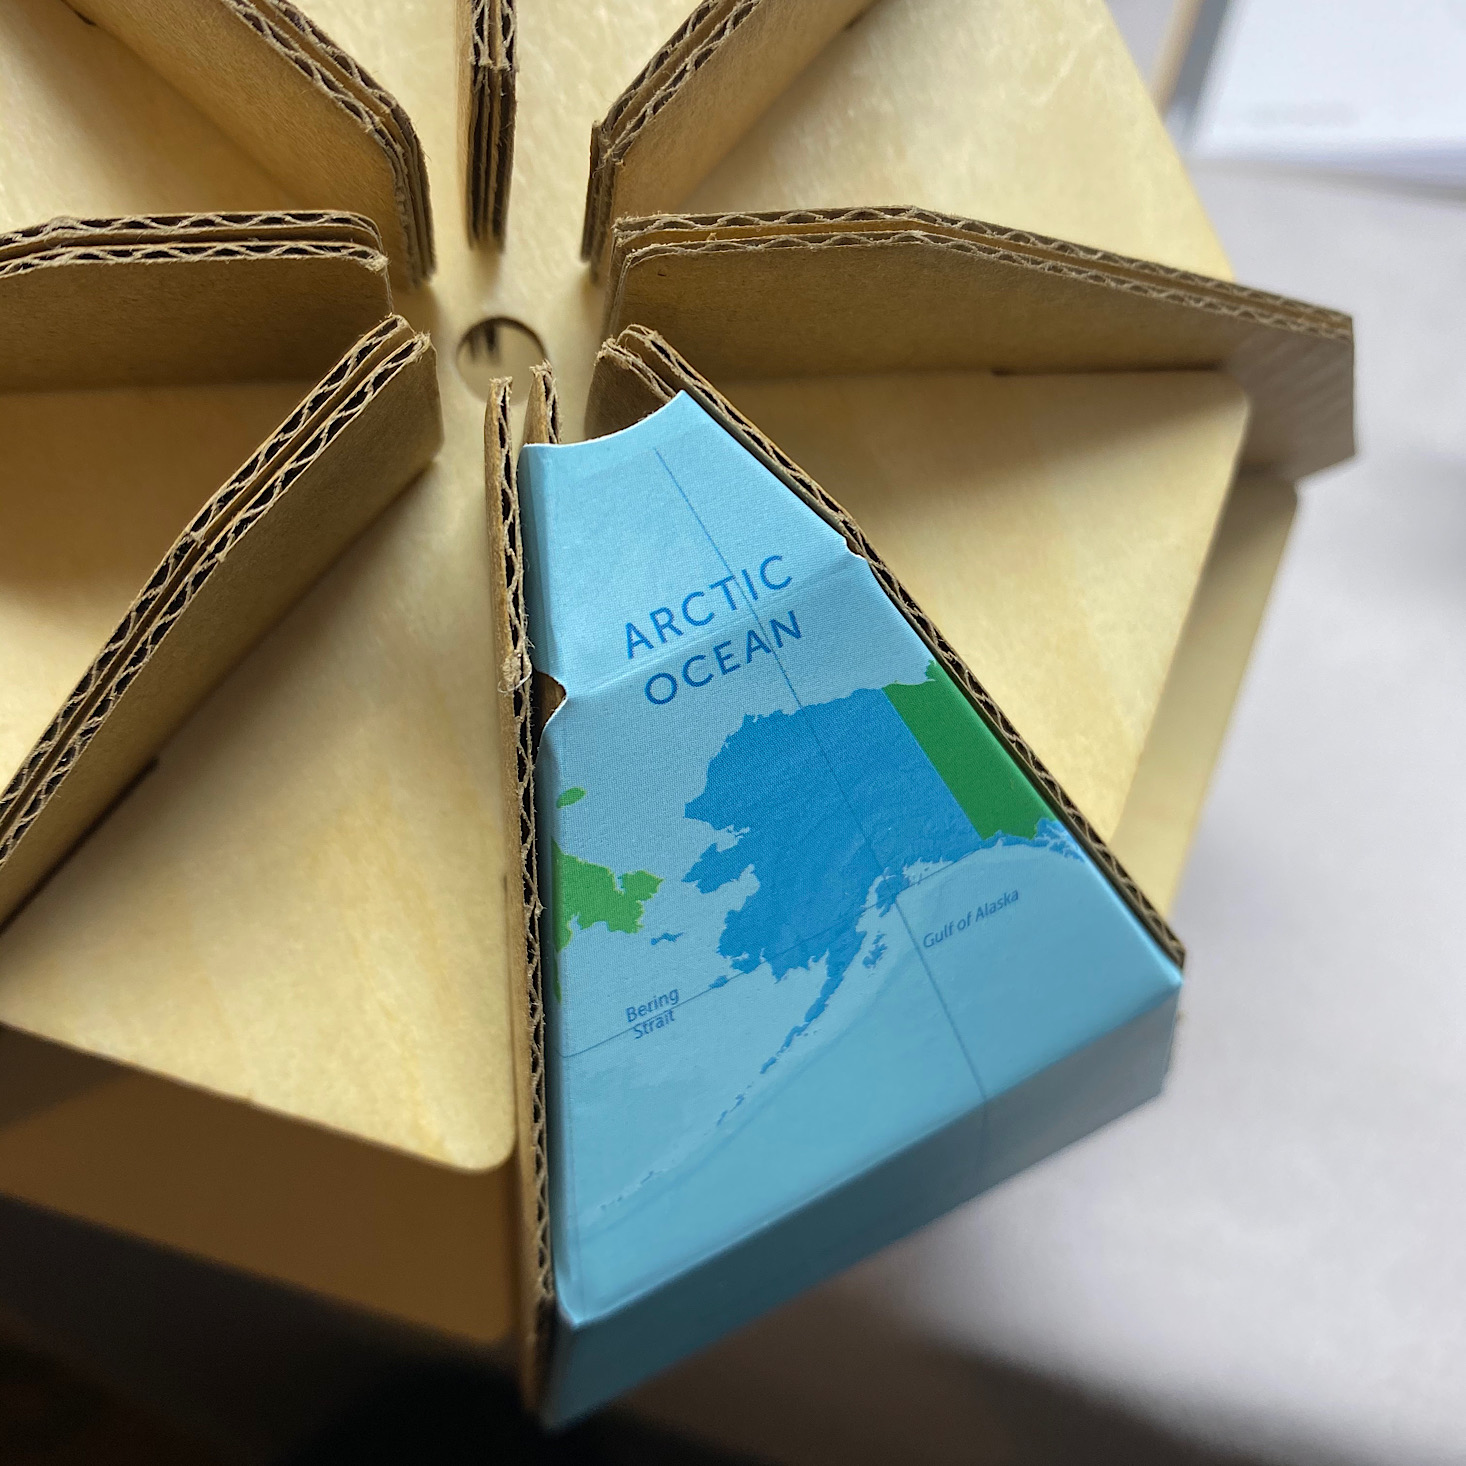
1 of 7 | These are the globe panels they provided.
2 of 7 | I began the tedious task of folding at all of the creases for each panel.
3 of 7 | Then these went around the globe with the tabs slipping in between the cardboard layers.
4 of 7 | I finally got them all in place!
5 of 7 | They provided some foam stickers to place at the ends.
6 of 7 | I placed one on top and the other on the bottom.
7 of 7 | Then I fit the whole thing over the hex rod on my gear piece.
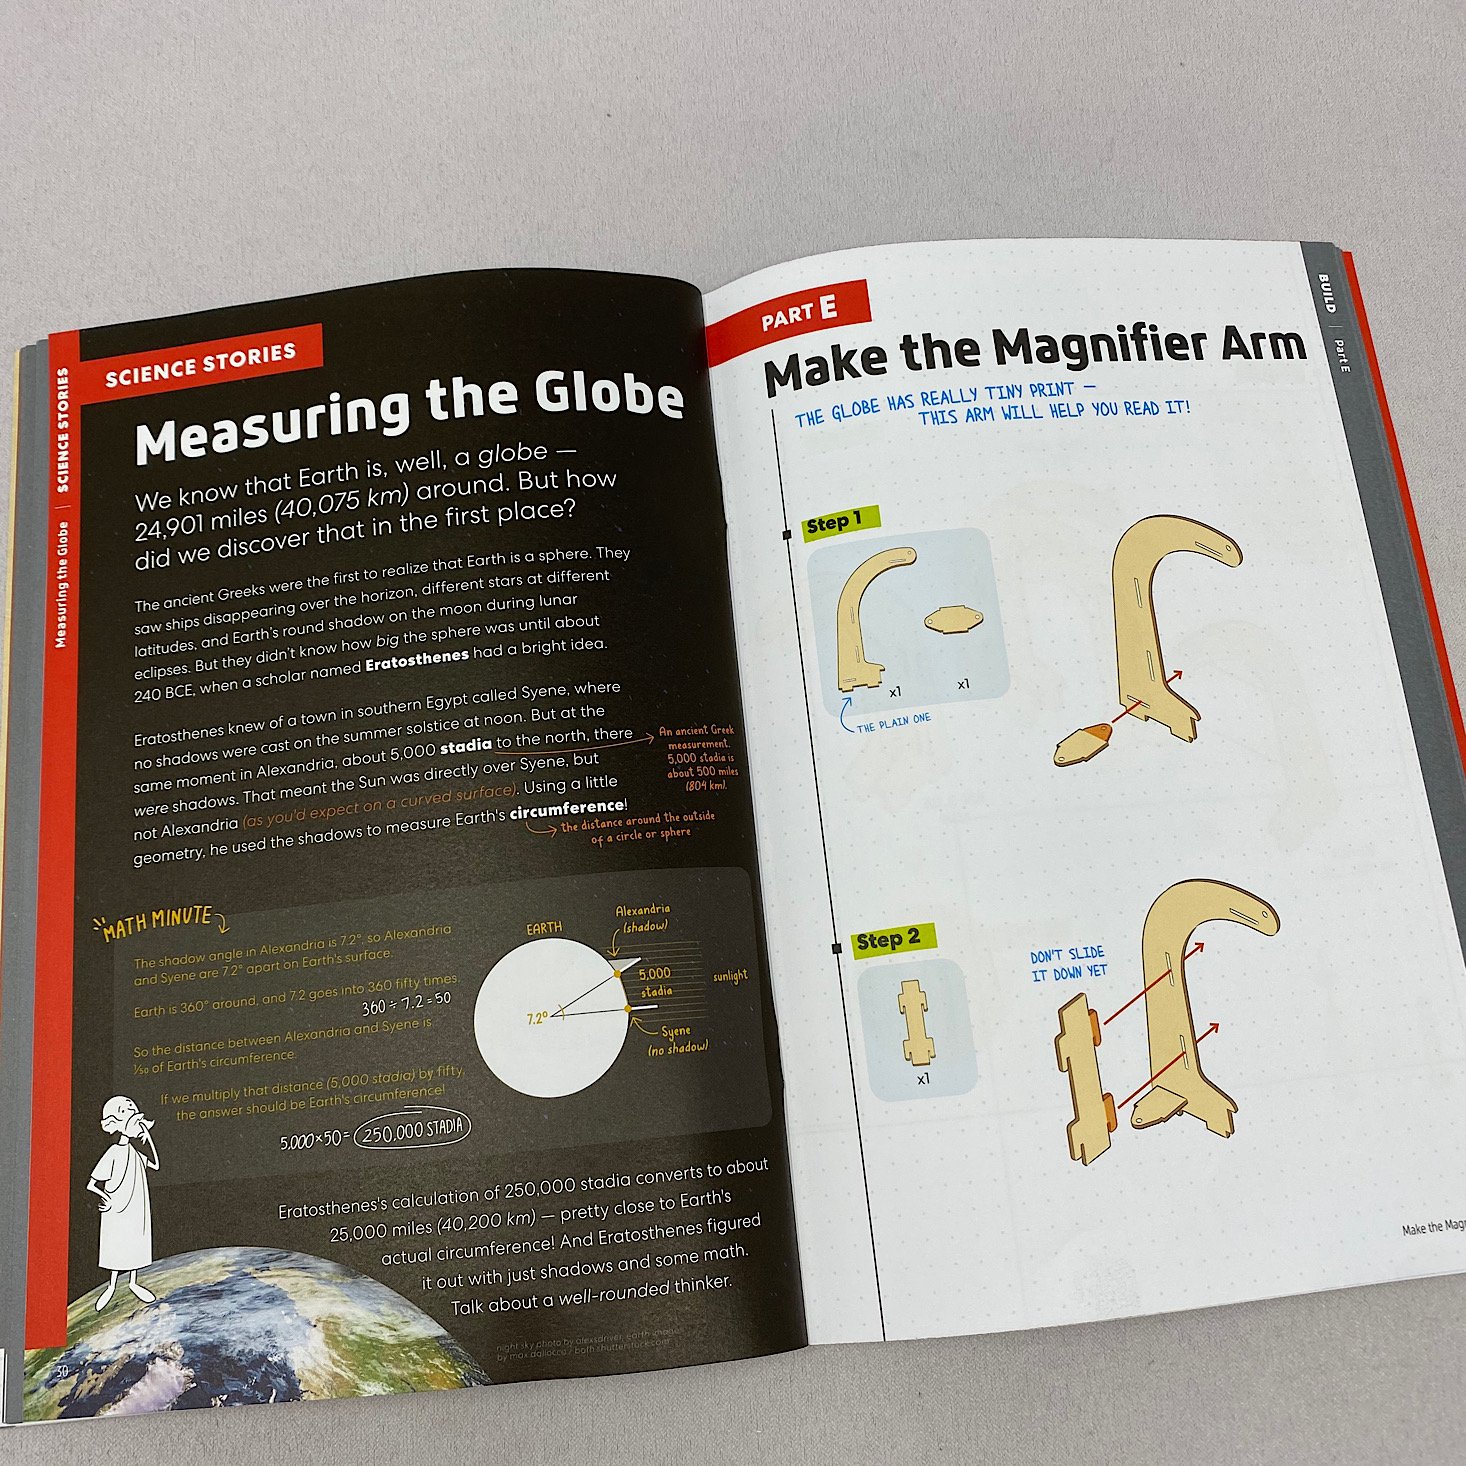
Part E: Make the Magnifier Arm
4 of 4 | I slid it through to hold the top of the arms together.
1 of 4 | These are the pieces for the magnifier arm.
2 of 4 | I placed the two pieces in the center of the two arms by sliding them into the slots.
3 of 4 | This piece got placed at the top.
4 of 4 | I slid it through to hold the top of the arms together.
1 of 4 | These are the pieces for the magnifier arm.
2 of 4 | I placed the two pieces in the center of the two arms by sliding them into the slots.
3 of 4 | This piece got placed at the top.
4 of 4 | I slid it through to hold the top of the arms together.
10 of 10 | When you don't, it gets tucked away!
1 of 10 | First I added a rubberband to one of the bolts.
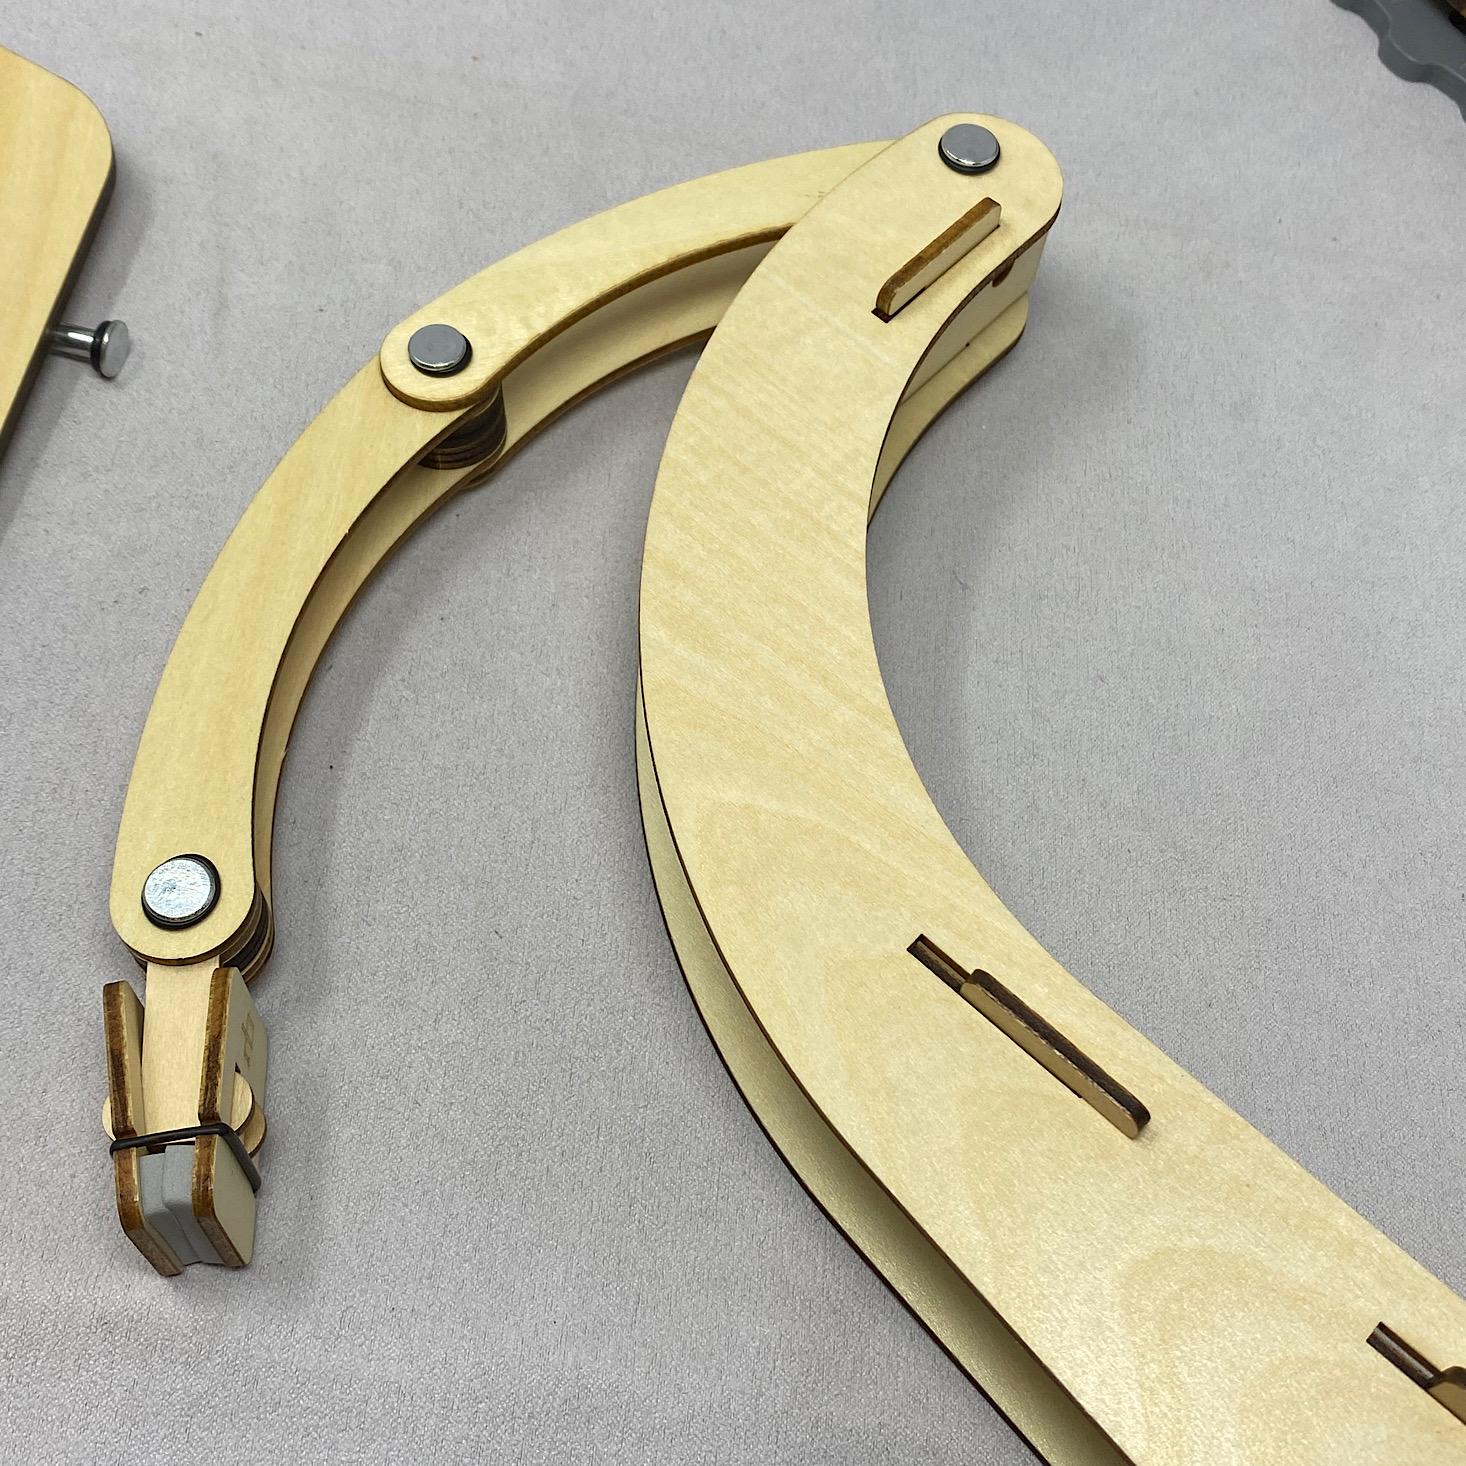
2 of 10 | Then I layered the two curved pieces with some of the wooden spacers and attached that to the end of the arm.
3 of 10 | Then there was another layer to assemble.
4 of 10 | This hooked onto the other curved pieces.
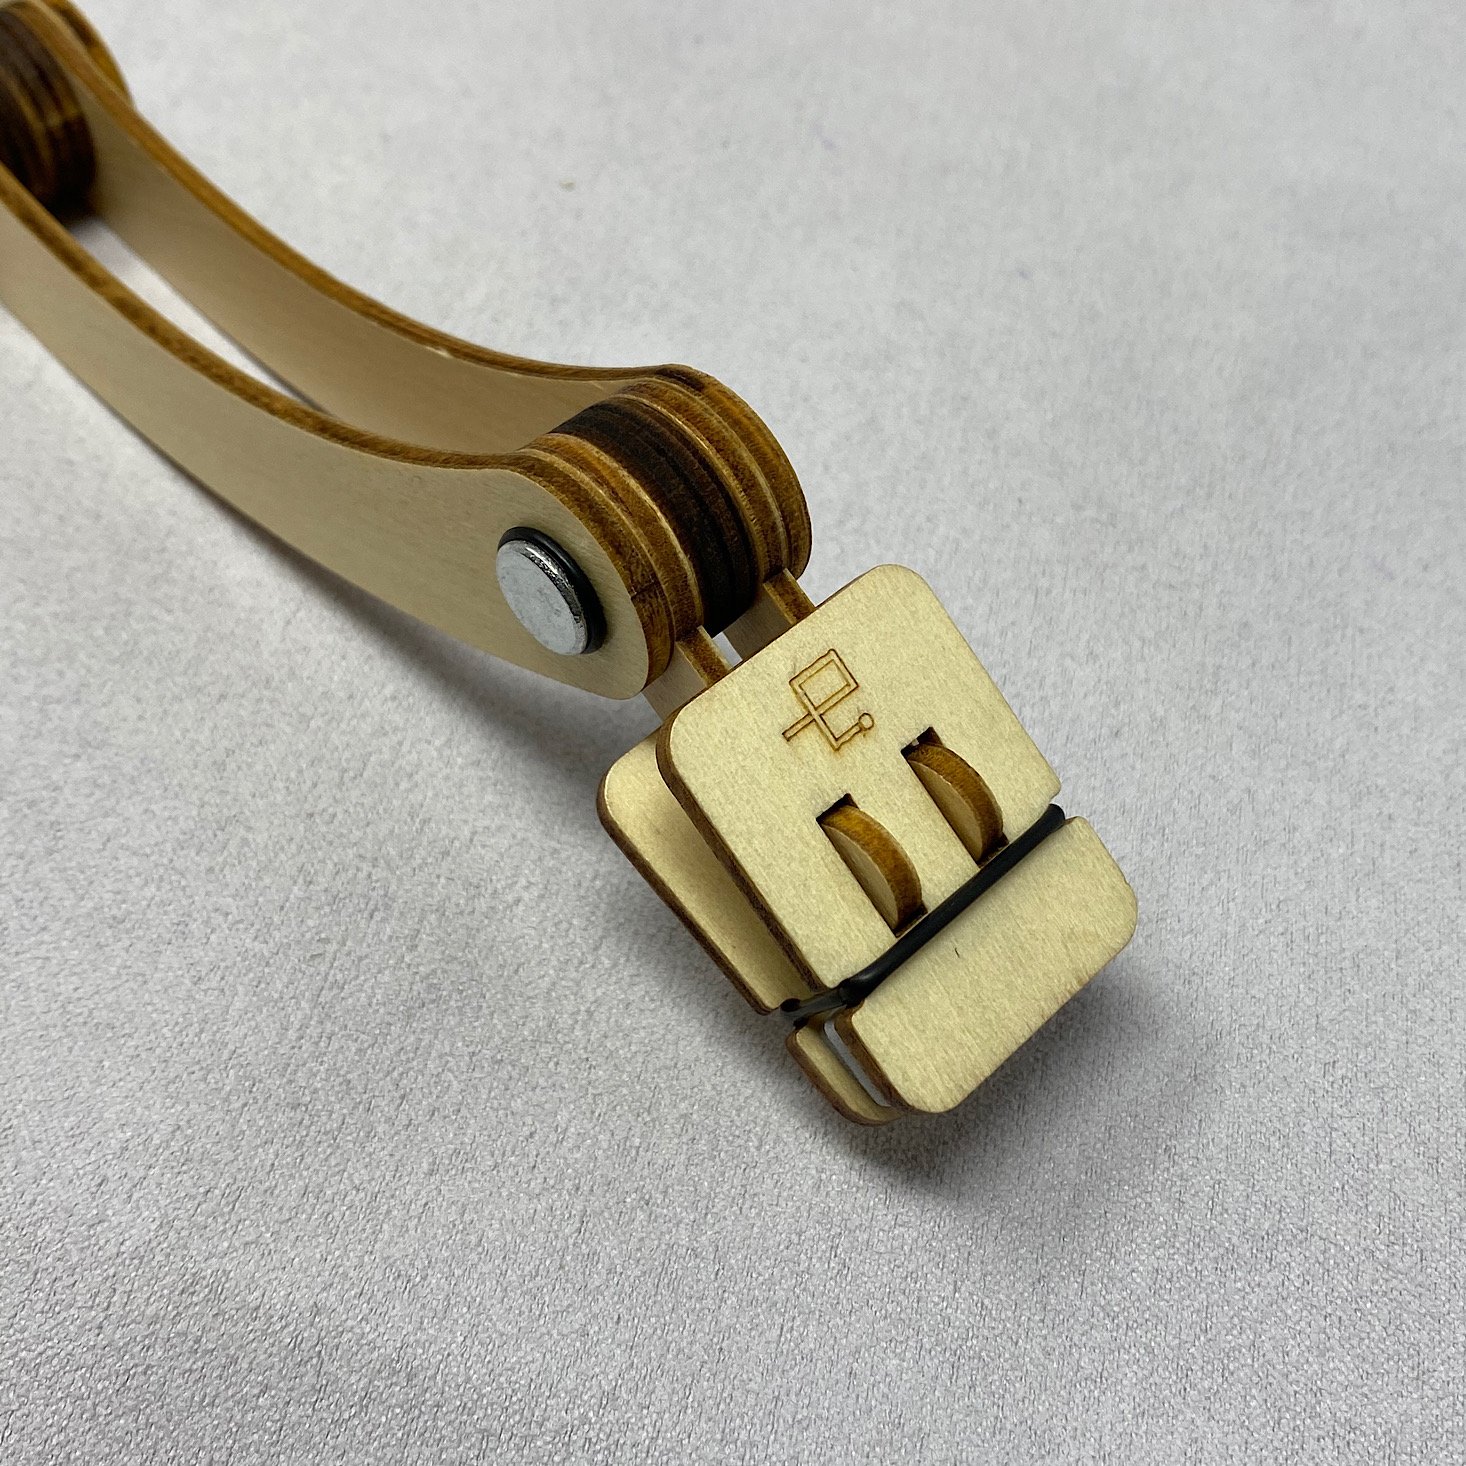
5 of 10 | Then I added some sticky foam to these two small pieces.
6 of 10 | I placed them on top of one another and added a larger rubberband around them.
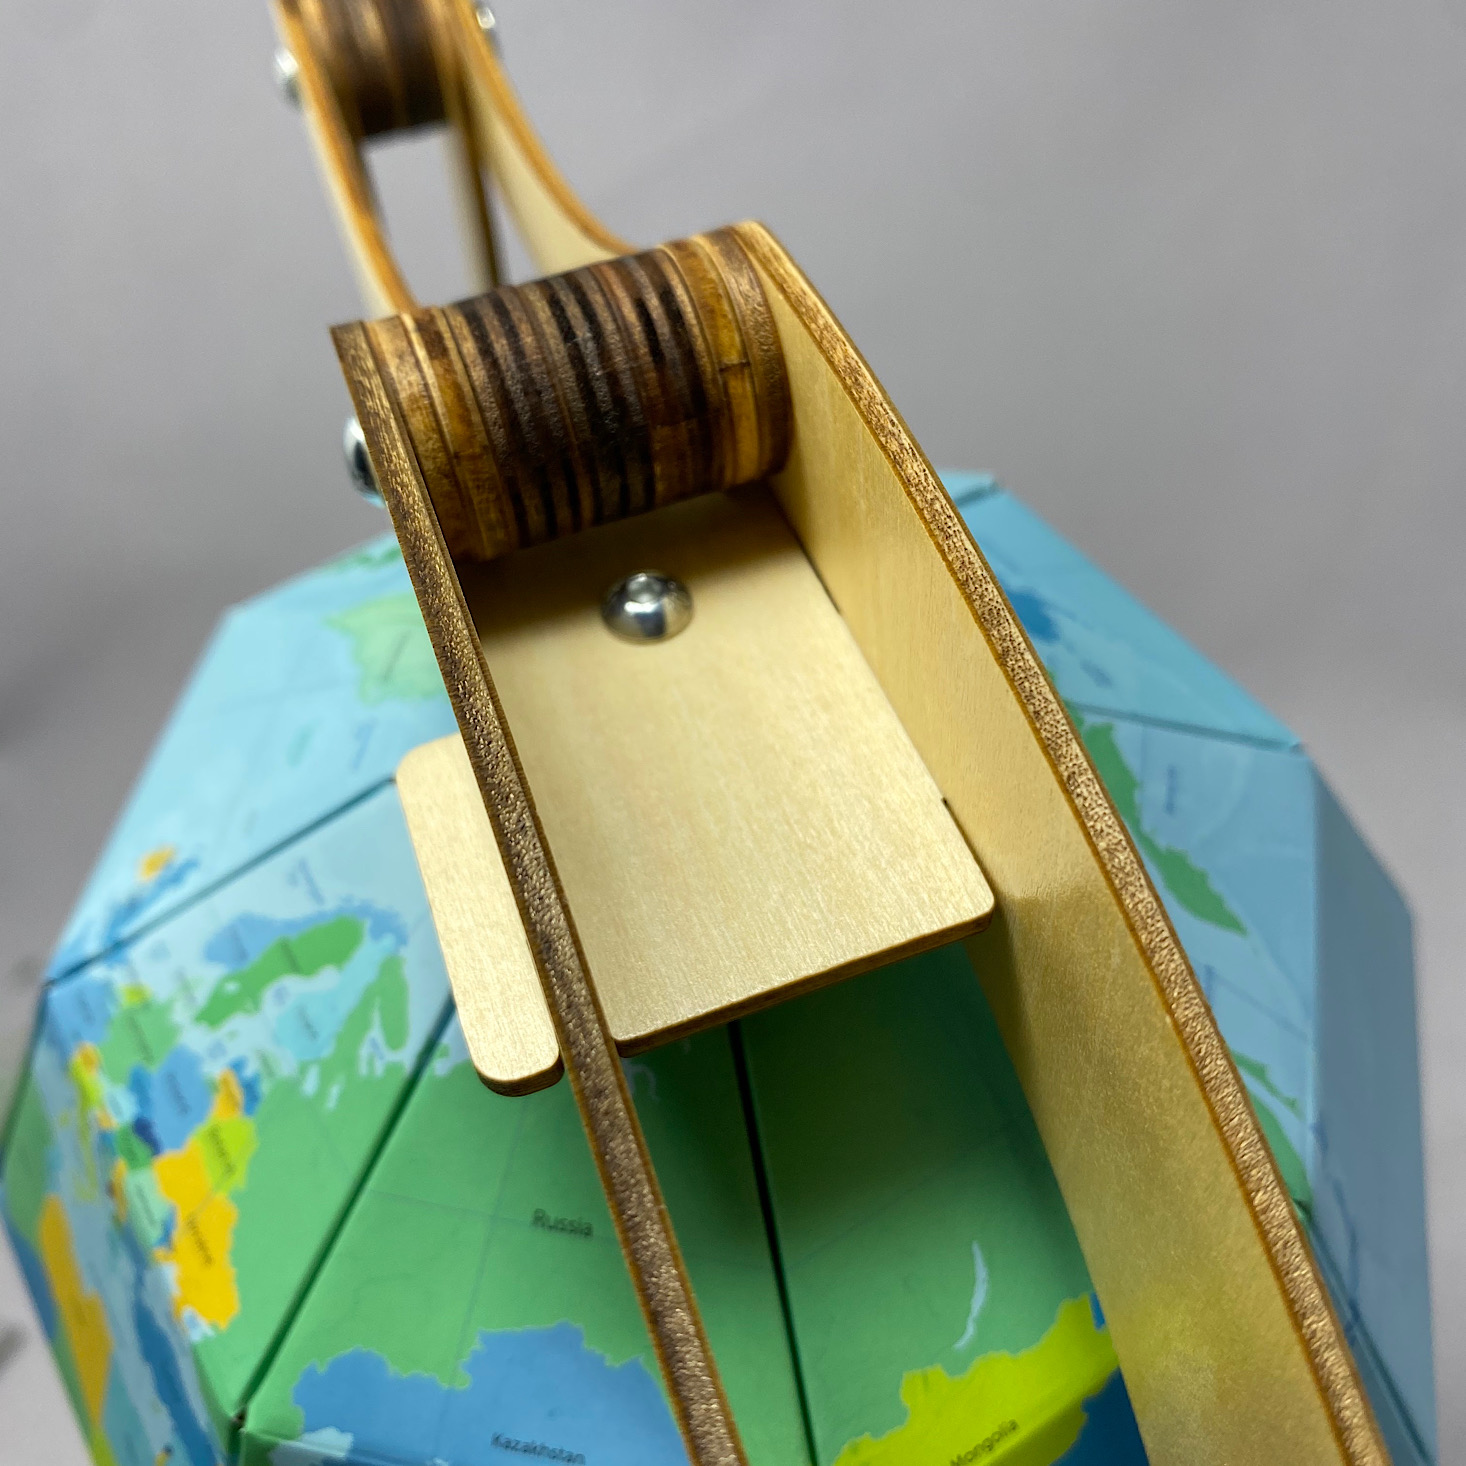
7 of 10 | Then two wooden pieces slipped in between them. This would hold our magnifier when you pinched it open.
8 of 10 | Next, I attached the magnifier holder to the very end and our arm was ready.
9 of 10 | The arm swings open when you need it.
10 of 10 | When you don't, it gets tucked away!
1 of 10 | First I added a rubberband to one of the bolts.
2 of 10 | Then I layered the two curved pieces with some of the wooden spacers and attached that to the end of the arm.
3 of 10 | Then there was another layer to assemble.
4 of 10 | This hooked onto the other curved pieces.
5 of 10 | Then I added some sticky foam to these two small pieces.
6 of 10 | I placed them on top of one another and added a larger rubberband around them.
7 of 10 | Then two wooden pieces slipped in between them. This would hold our magnifier when you pinched it open.
8 of 10 | Next, I attached the magnifier holder to the very end and our arm was ready.
9 of 10 | The arm swings open when you need it.
10 of 10 | When you don't, it gets tucked away!
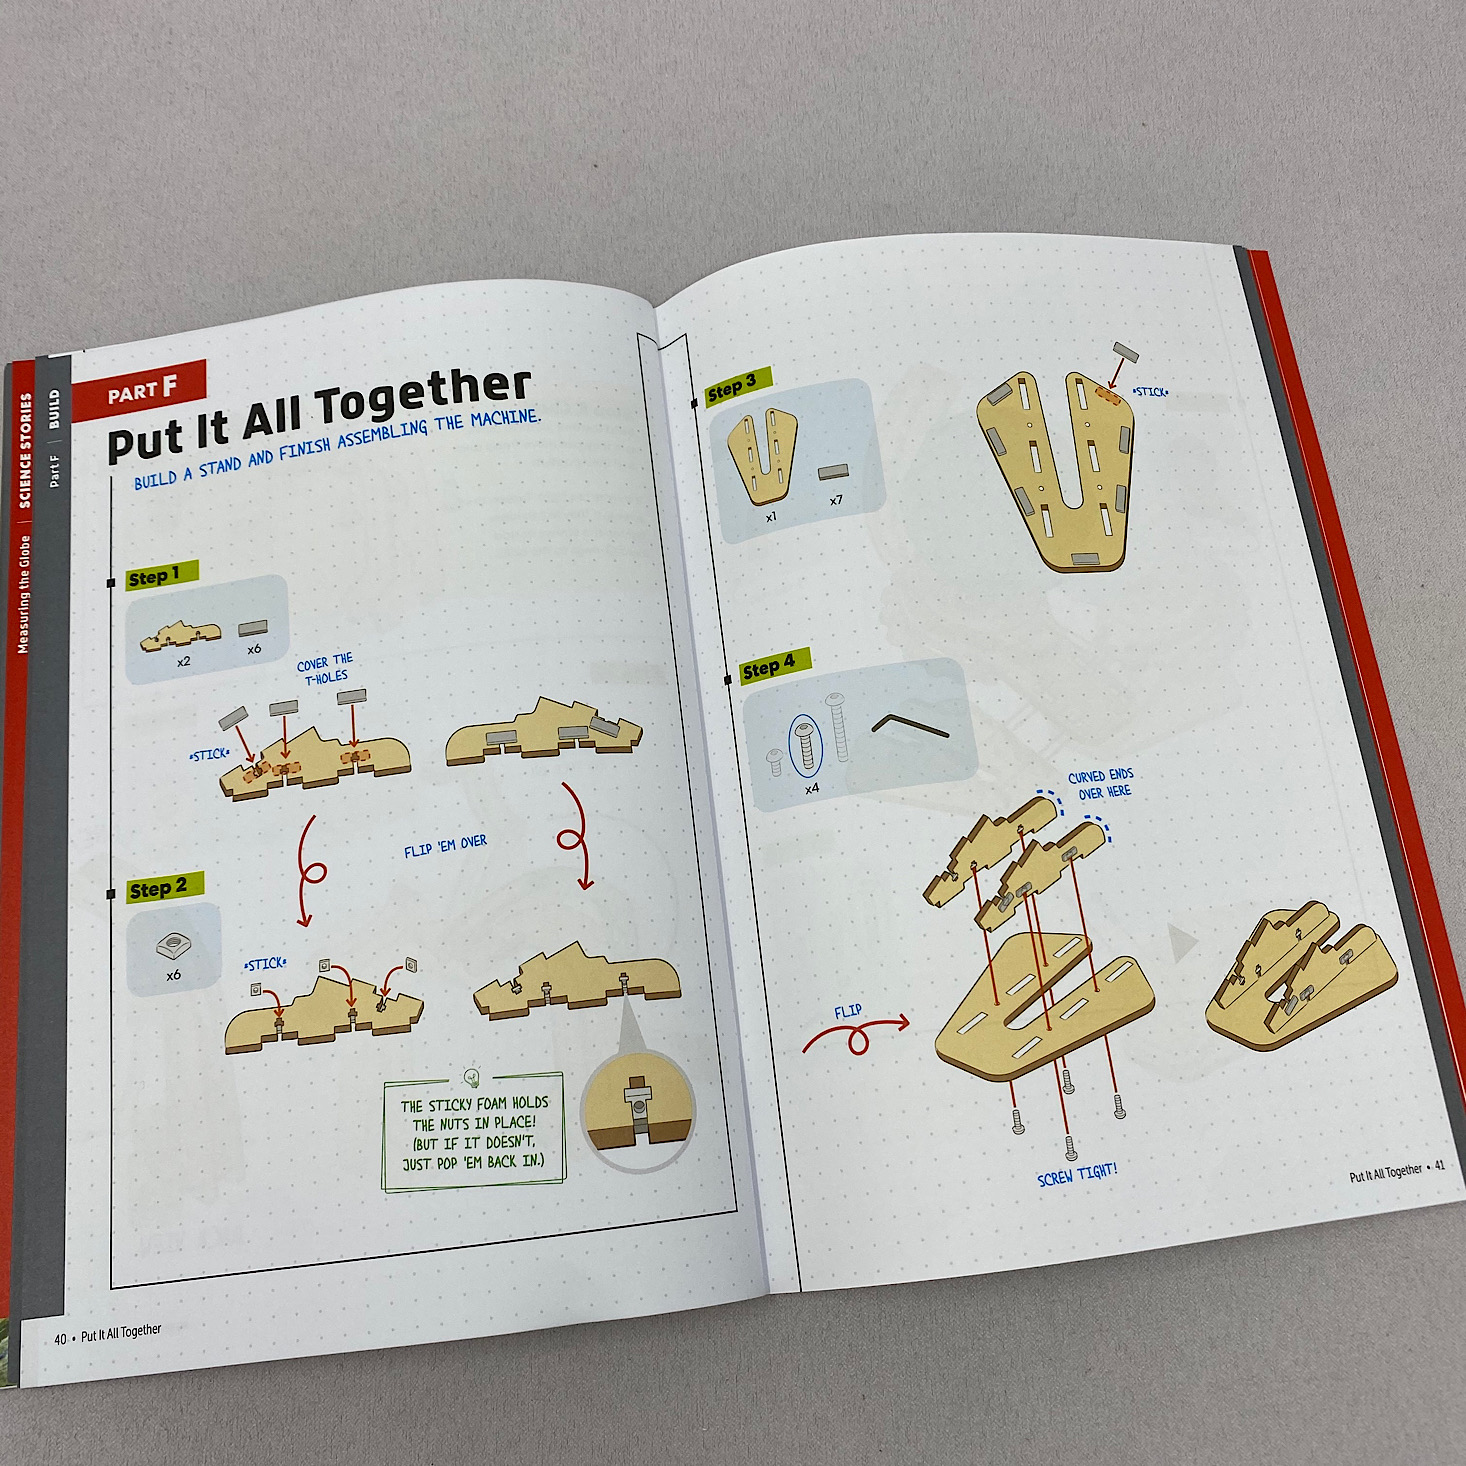
Part F: Put It All Together
6 of 6 | Now our base was ready for us to put our globe on.
1 of 6 | Now it was time to build the base. I added some foam stickers over the holes.
2 of 6 | Then the tiny square nuts stuck to them.
3 of 6 | I added some more foam to the very bottom of the base.
4 of 6 | Then I stuck some bolts up through them.
5 of 6 | Then I slipped the longer pieces into the slots and screwed them into the bolts.
6 of 6 | Now our base was ready for us to put our globe on.
3 of 3
1 of 3
2 of 3
3 of 3
1 of 3
2 of 3
3 of 3
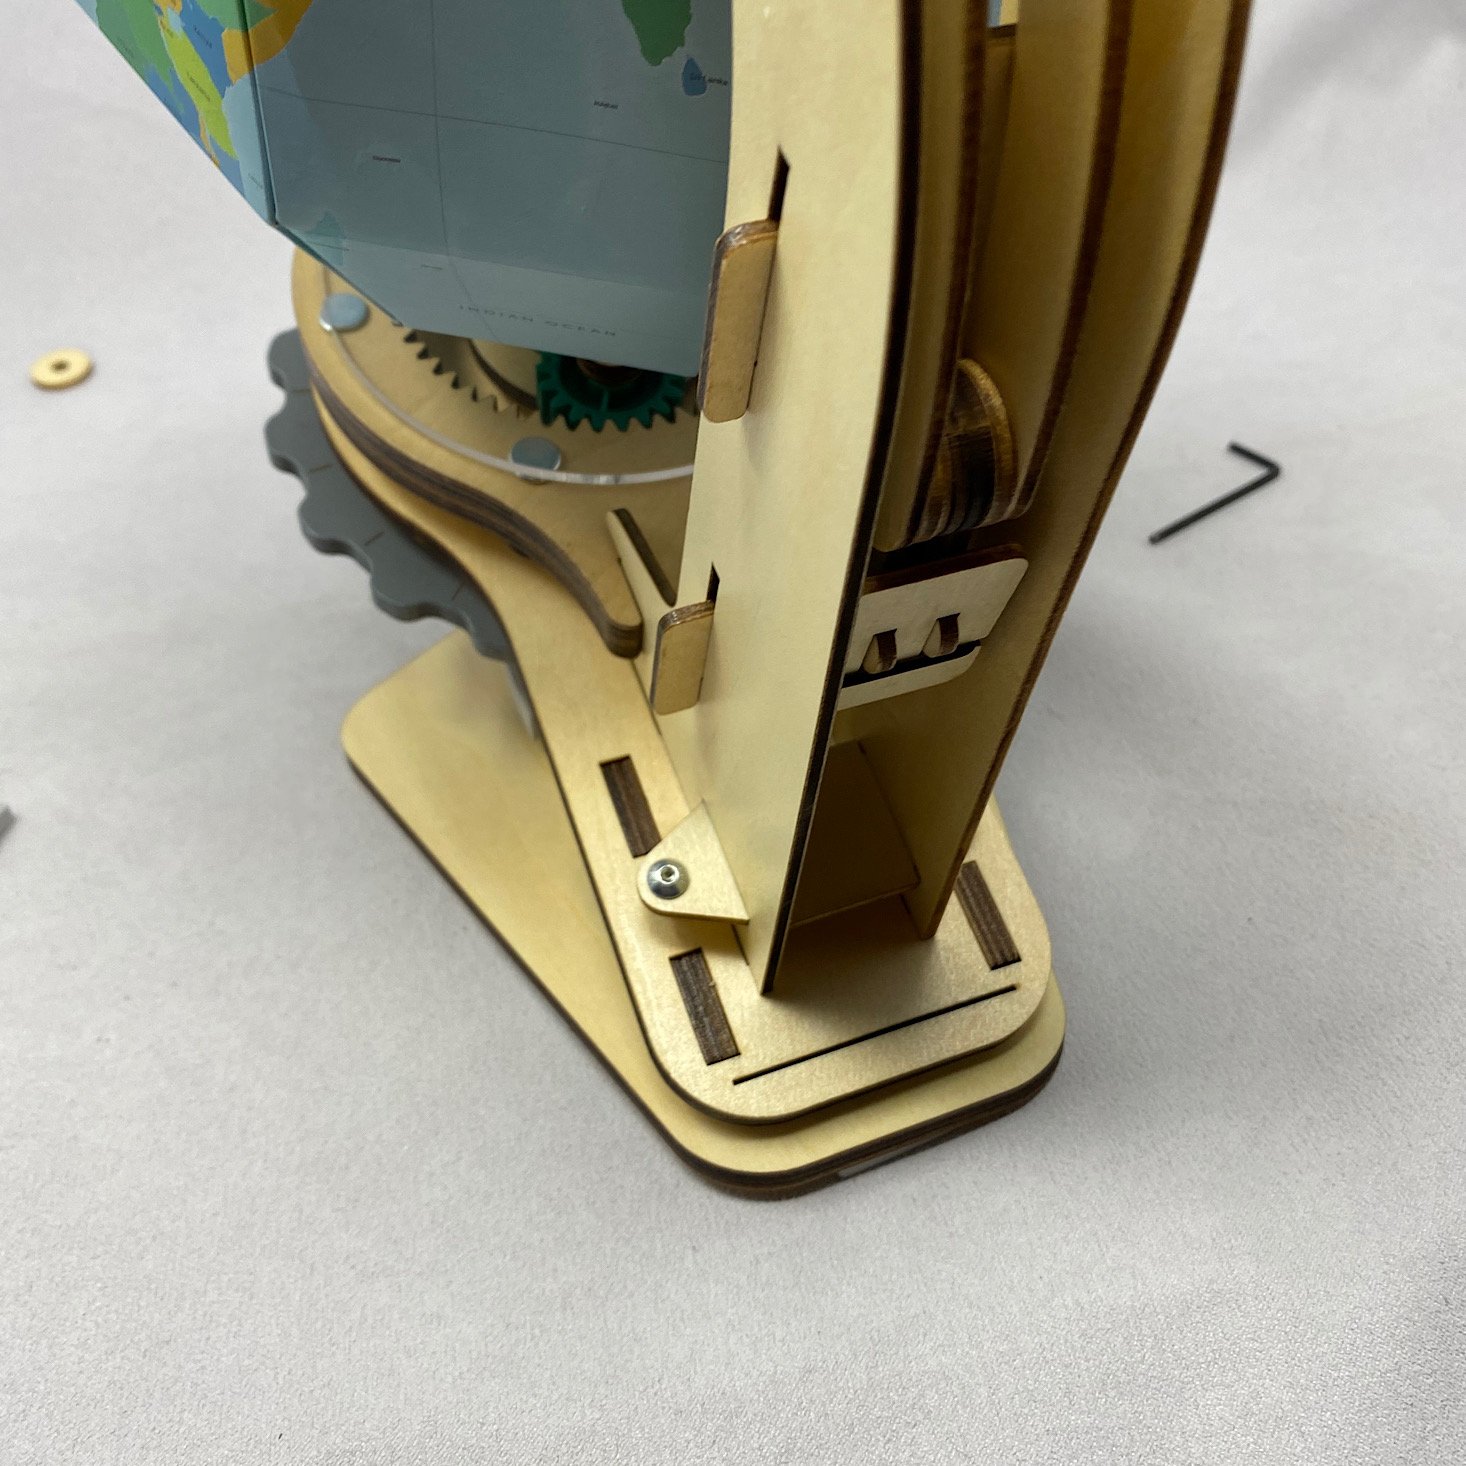
I placed the entire unit on the base and then added some screws at the bottom and one at the top and the globe was just about complete.
2 of 2
1 of 2
2 of 2
1 of 2
2 of 2
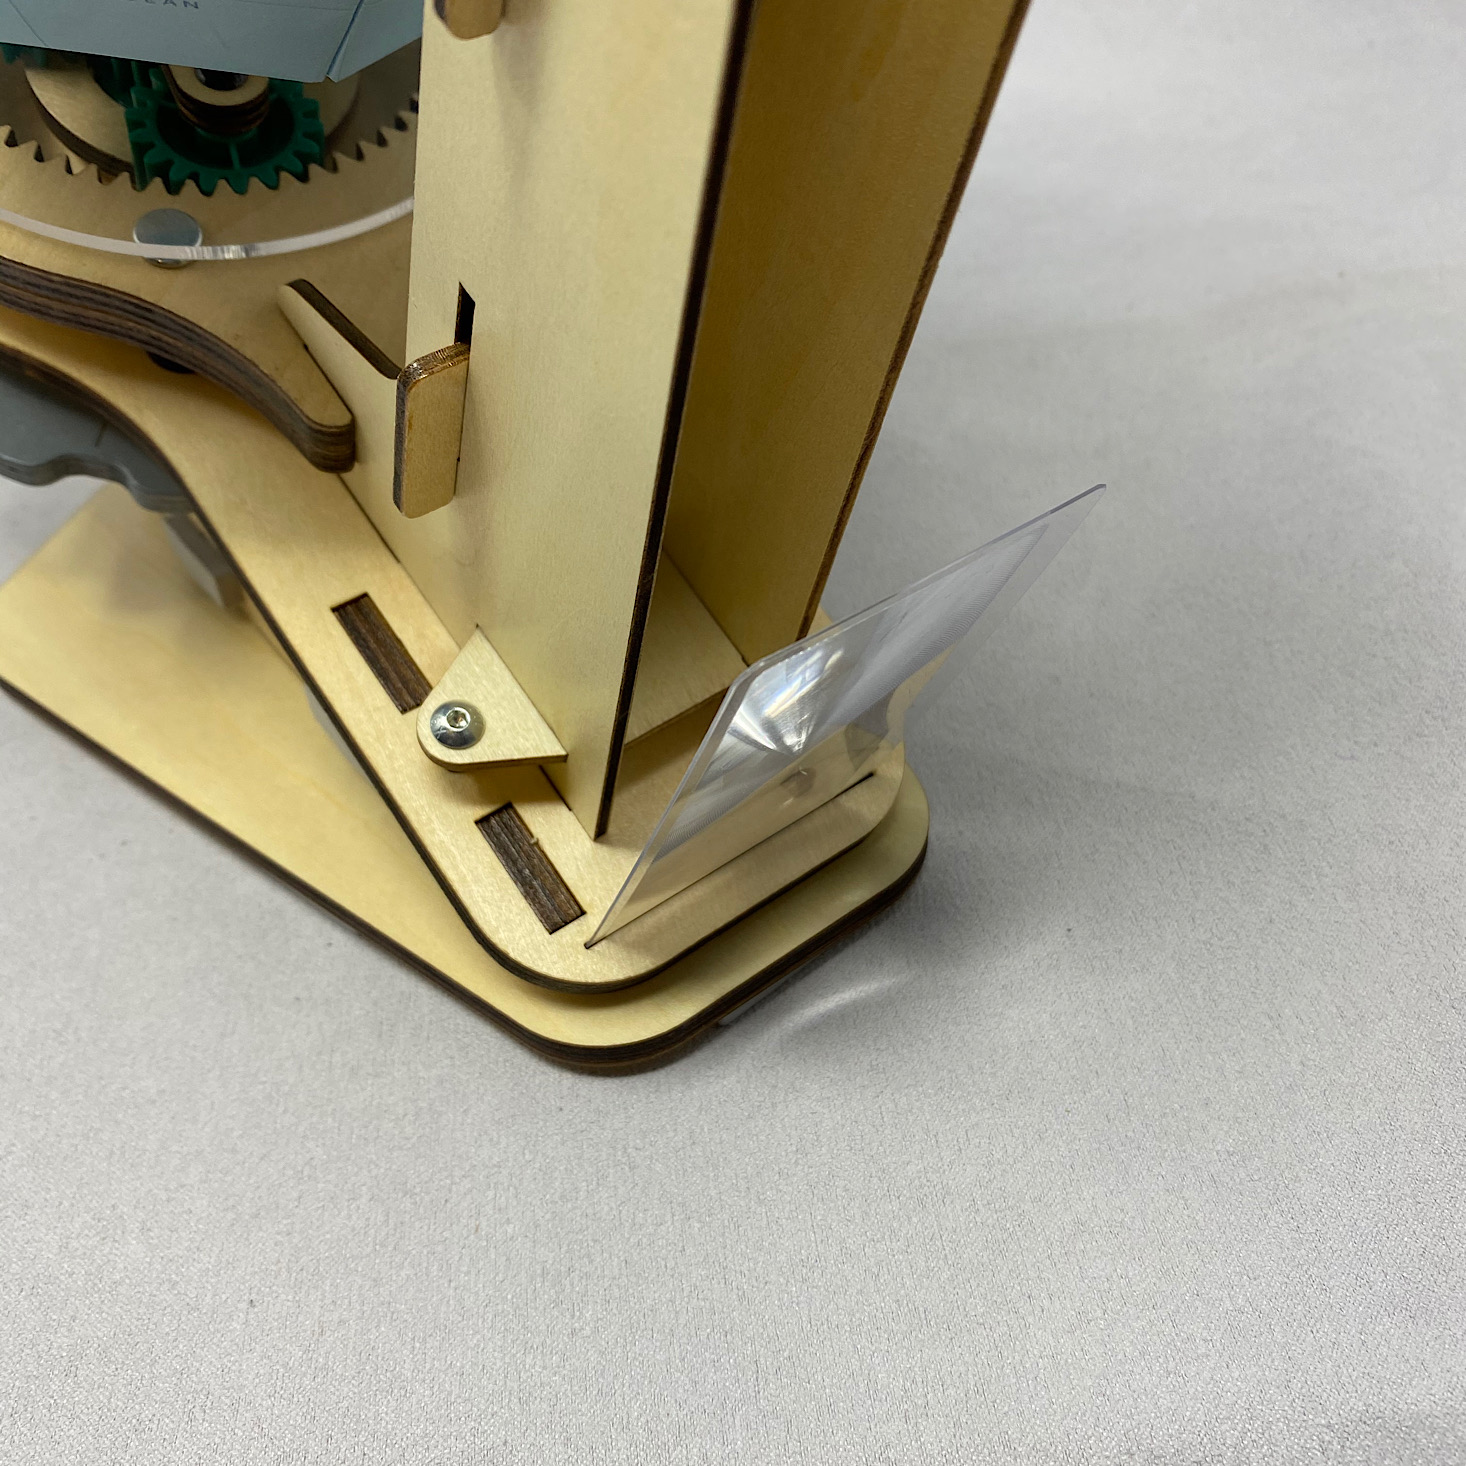
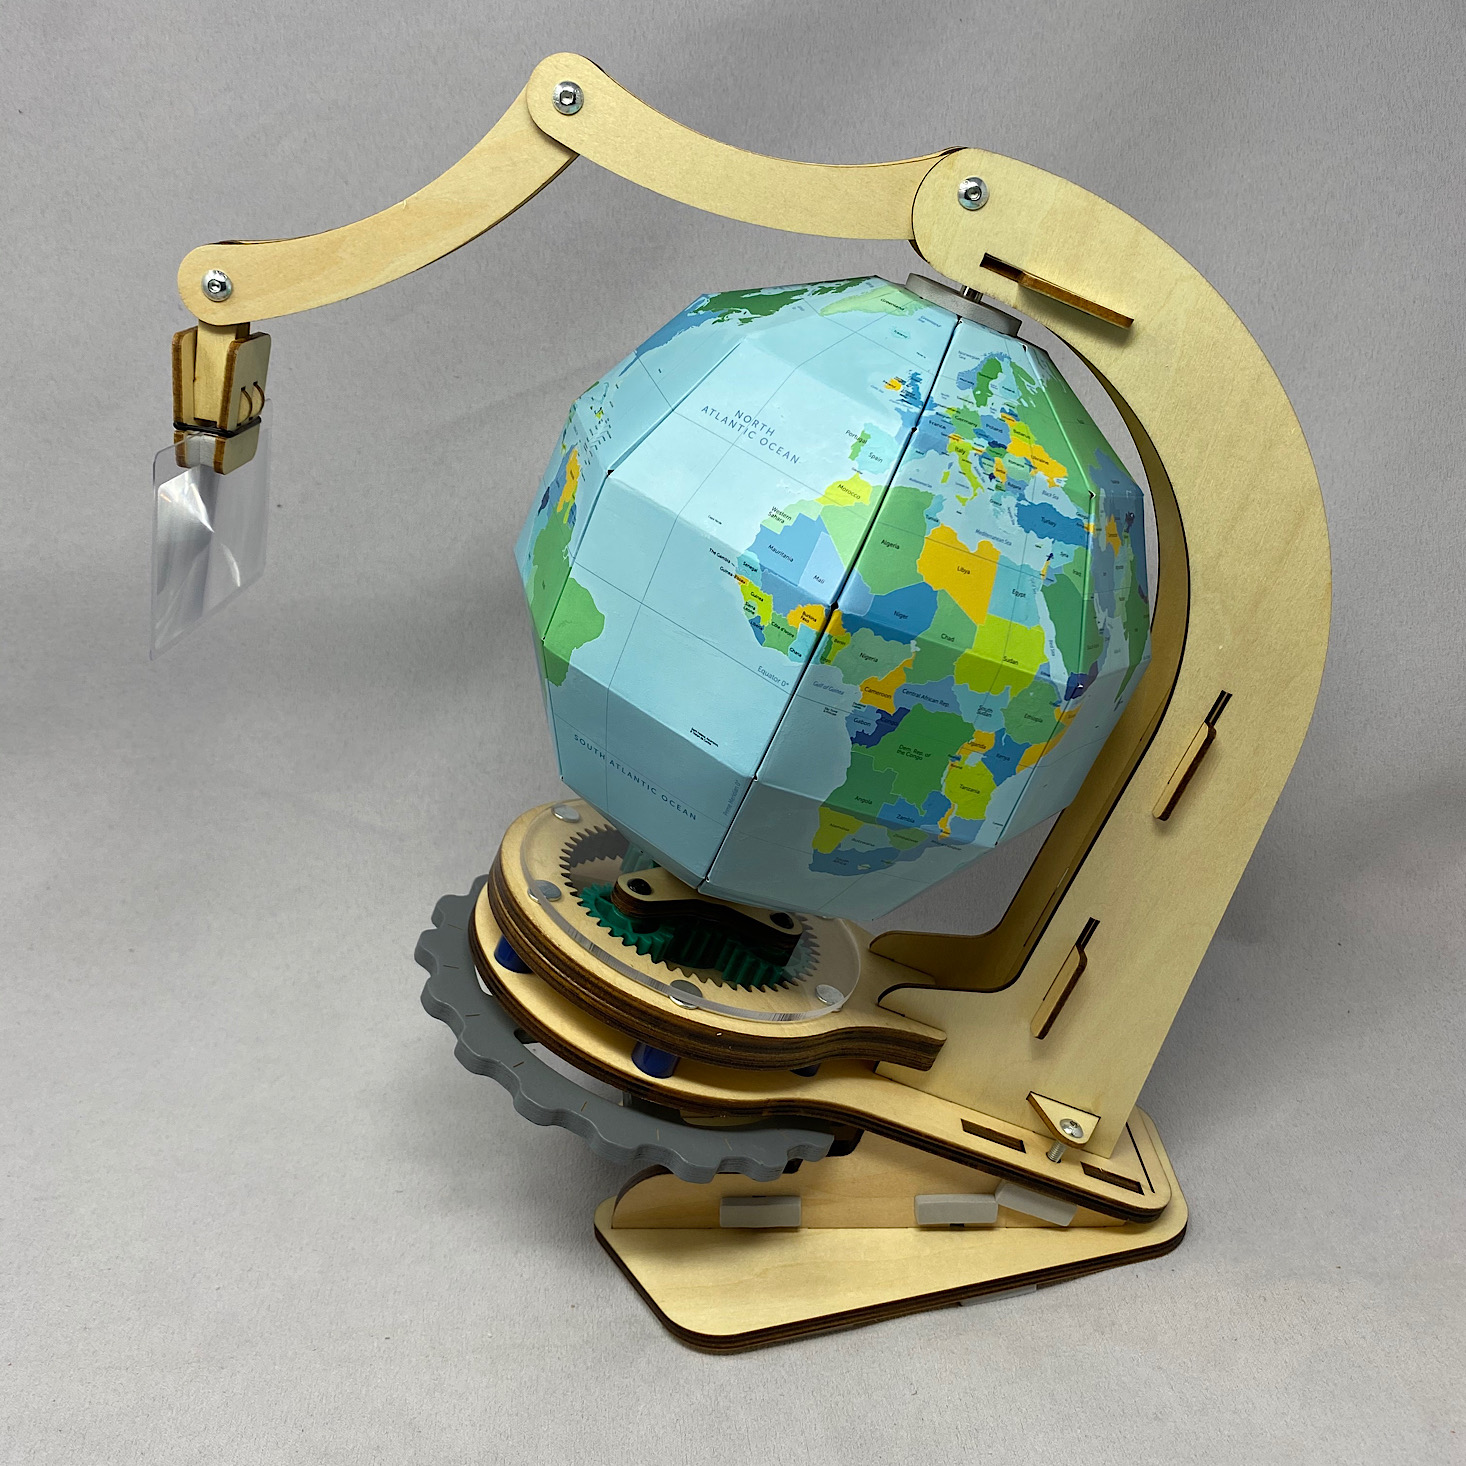
The last step was to add this magnifier they included which sits at the back of the globe when not in use.
4 of 4
1 of 4
2 of 4
3 of 4
4 of 4
1 of 4
2 of 4
3 of 4
4 of 4
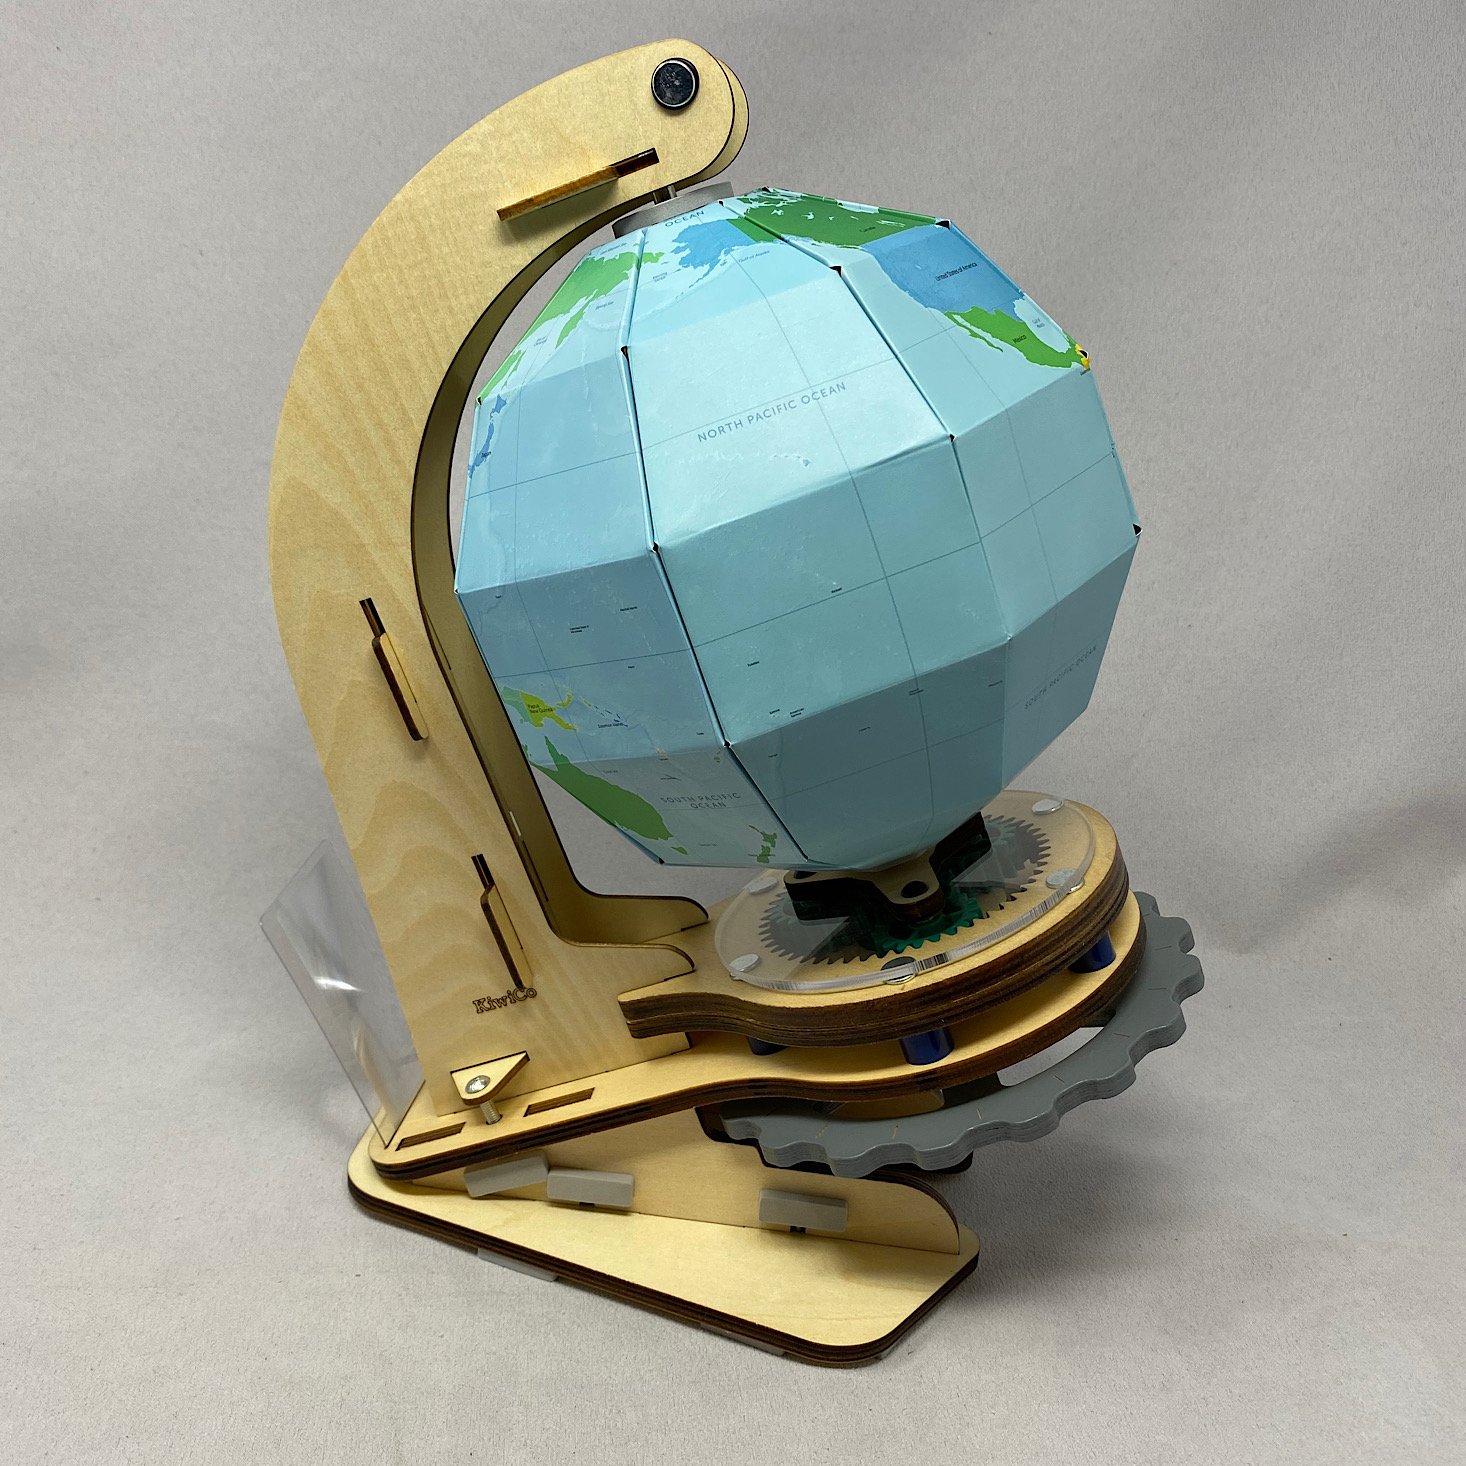
Here is the finished globe and a closeup of the wheel at the bottom that spins it. You can spin the globe around by hand.
This page provided some information about how to use our globe and how the magnifier works.
3 of 3 | Here you can see how well the magnifier works to highlight those smaller areas!
1 of 3 | The magnifier clips into the piece at the end of the arm and then the whole arm swings out so you can move it to where you need it.
2 of 3 | Here is the globe before the magnifier.
3 of 3 | Here you can see how well the magnifier works to highlight those smaller areas!
1 of 3 | The magnifier clips into the piece at the end of the arm and then the whole arm swings out so you can move it to where you need it.
2 of 3 | Here is the globe before the magnifier.
3 of 3 | Here you can see how well the magnifier works to highlight those smaller areas!
2 of 2
1 of 2
2 of 2
1 of 2
2 of 2
They even included a box full of pins for us so that we can mark the places we've been, or maybe considering the state of things in 2020, we'll just mark those places we hope to visit one day!
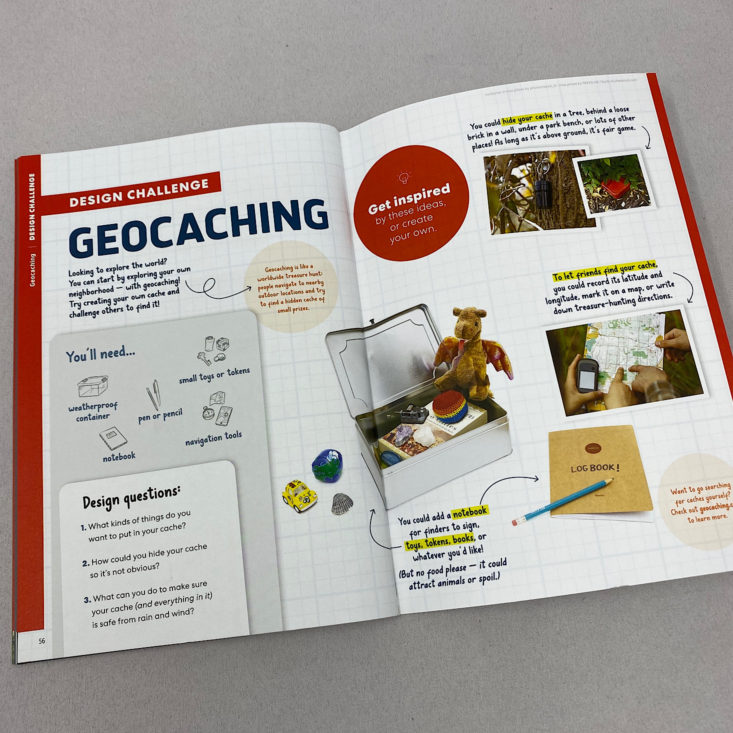
In our booklet, there is always a design challenge. This month they encourage us to do some geocaching which is a fun idea! My husband and I used to enjoy doing this and I love the idea of introducing this to younger kids!
Verdict: I thought this month's Eureka Crate project was really cool and I love that we have a globe complete with a magnifier to use in our home. This globe is just the right size to store on a shelf, but since it is so detailed and we can spin it and use the magnifier, it's really useful as well. I thought the directions were great and as always, everything was organized and the design itself was pretty neat to put together!
To Wrap Up:
Can you still get this box if you sign up today?It is possible you might get this crate, but it is not a guarantee. From KiwiCo:
Crates are assigned each month based on availability and your crate history - not all subscribers receive the same theme each month.
I am a homeschooling mom to 4 kids; 1 girl and 3 boys. While I have been reviewing boxes since 2018 and I love the luxury of trying new products, I'm also balancing it out by dabbling in a little bit of homesteading, too. We now have 4 chickens and a rabbit and my sourdough starter is going strong! I love learning about new brands and sharing the great things I find with others in hopes that they find something new to love or to fit their needs!
I am a homeschooling mom to 4 kids; 1 girl and 3 boys. While I have been reviewing boxes since 2018 and I love the luxury of trying new products, I'm also balancing it out by dabbling in a little bit of homesteading, too. We now have 4 chickens and a rabbit and my sourdough starter is going strong! I love learning about new brands and sharing the great things I find with others in hopes that they find something new to love or to fit their needs!
Join the Conversation
Please do not enter your email address in the Name field or in the comment content. Your email address will not be published. Required fields are marked *. Remember to post with kindness and respect. Comments with offensive language, cruelness to others, etc will not be approved. See our full comment policy here.
This project looks amazing. Kiwi is so thoughtful and detailed in their projects. They always impress me. We took a few months off this subscription so we are slightly behind their current curation. Can’t wait to get this box. Have a map loving kiddo!
Reply
Our reviewers research, test, and recommend the best subscriptions and products independently; click to learn more about our editorial guidelines. We may receive commissions on purchases made through links on our site.


Please do not enter your email address in the Name field or in the comment content. Your email address will not be published. Required fields are marked *. Remember to post with kindness and respect. Comments with offensive language, cruelness to others, etc will not be approved. See our full comment policy here.