


The Crafter's Box is a monthly maker subscription box:
As a member of The Crafter's Box, we'll send a lovingly kitted box of tools and materials to your doorstep on a monthly basis. Each month we feature a new expert maker and that maker has built for us a unique, grown-up, on-trend project that reflects their artistic style. In addition to the monthly box, our featured maker has created an educational, digital workshop to teach their crafting medium and to offer their tips and tricks.
The best part of this model is the ability to revisit workshops in the future to create again and again. Happy making!
The Crafter's Box offers three different subscription models:
- Individual Membership: $65 per month for a kit of curated tools and materials + a new digital workshop by the featured maker
- Crafter's Night: $60 per person (minimum of 3 people necessary) per month for a group kit of the curated tools and materials sent to one host + individual video access for each person
- Video-Only Access: $20 per month for access to the digital workshop created by the featured maker (no tools or materials included)
This review is of the Individual Membership for $65 per month.

My Subscription Addiction paid for this box. (Check out the review process post to learn more about how we review boxes.)
About The Crafter's Box
The Subscription Box: The Crafter's Box
The Cost: $65 per month + free U.S. shipping (other plans available from $20 per month)
The Products: A shipped kit of curated tools and materials + a new digital workshop by the featured maker of the month
Ships to: The U.S. for free and internationally for varying rates
Good to Know: Membership enrollment is open between the 10th - 20th of each month. Subscriptions automatically renew on the 15th. Projects are designed to be for ages 18+.
The Crafter's Box October 2020 Review
The Crafter's Box seems to be what my crafting subscription box dreams are made of! Each month they feature a different, unique craft that is designed with the crafty adult in mind. The items you get to create are thoughtfully curated and created with high-end materials so that your finished products are modern and luxe.
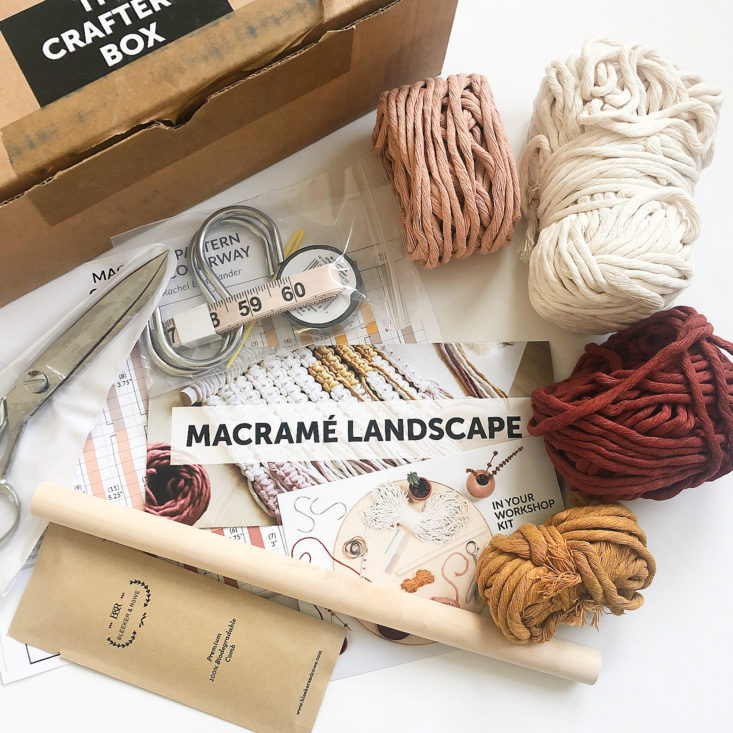
Let's take a look inside October's box - the craft this month is Macramé Landscape!


1 of 4


We received two info cards this month detailing information on what's included in the box, as well as a short bio on the featured maker this month, Rachel Breuklander of The Lark's Head Shop. Macramé art is created by tying a series of knots to create your design, and in this workshop, we learn how to make the Lark's Head knot as well as the square knot. The included pattern design is for a Southwestern-inspired sunset landscape with blush and rust-colored mountains beneath a golden sun.
Now, onto the items!

1 of 4


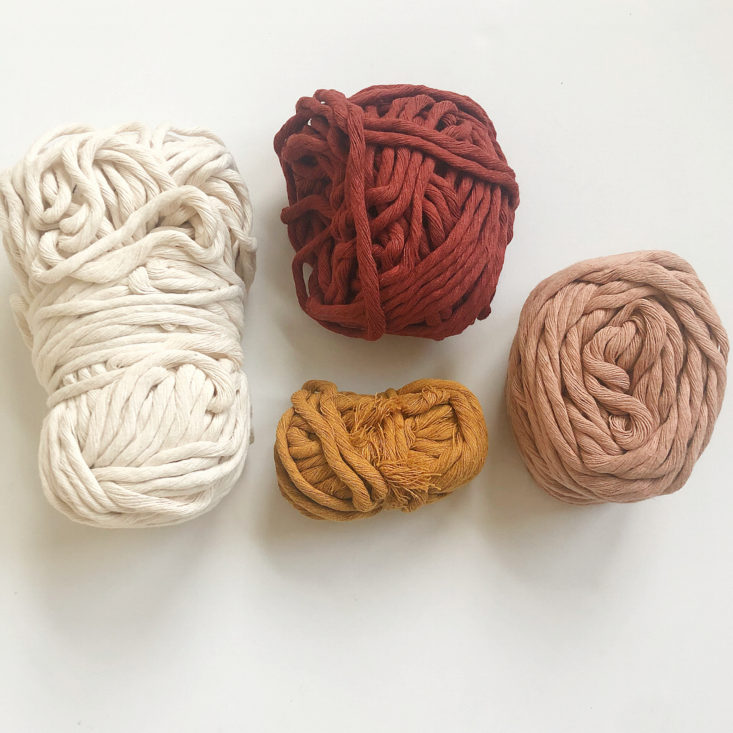
Macramé Cord in Cream, Mustard, Blush, and Rust - Estimated Retail Value $26.00 (a kit with four different colors plus the wooden dowel can be found here)
The cotton cord that we received to create our landscape with is so much softer than I thought it would be at first glance! It feels like it was made out of old t-shirts in the best way. We received four colors of the cotton string in varying amounts. The cord is quite thick and made up of many threads twisted together. In knitting terms, I would deem this "yarn" a super bulky weight.

Wooden Dowel
We also received a wooden dowel about 12" in length to hang our macramé project from.


1 of 2
Scissors
These are pretty hefty sewing shears! I've only seen small snips included in Crafter's Boxes before, so these were a pleasant surprise to open up. They are quite heavy and cut through the macramé cord with no issues.


1 of 2
Biodegradeable Comb
This small comb will be used to comb out our fringe for a fluffy effect, and it was sent in very cute packaging. I love the eco-friendly biodegradable option, and this would be great to keep to use for other craft projects or even for your hair!

1 of 7


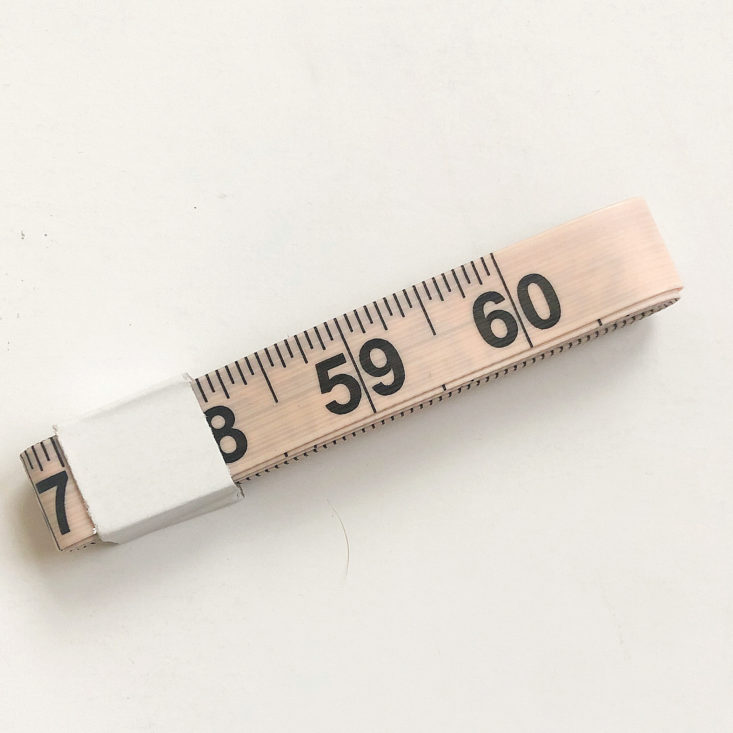
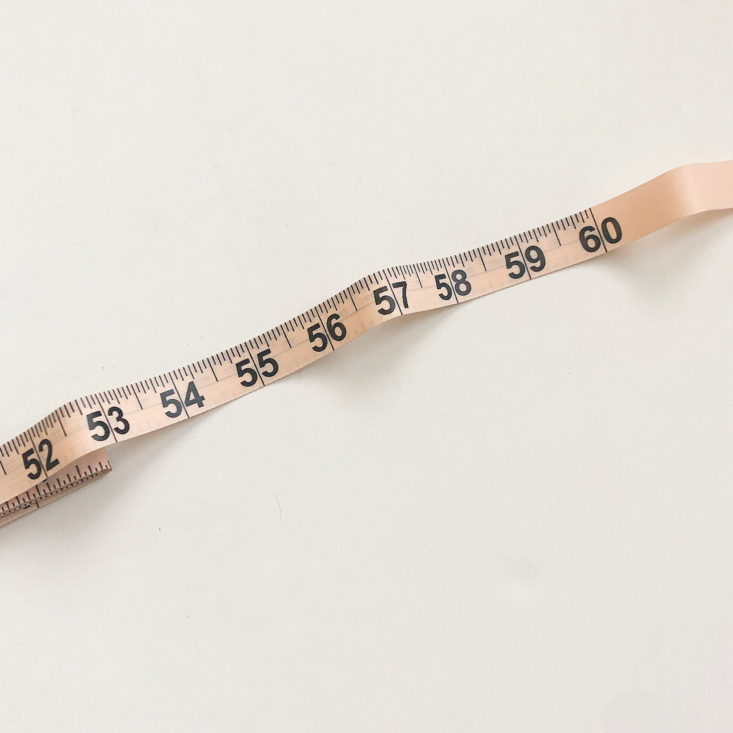
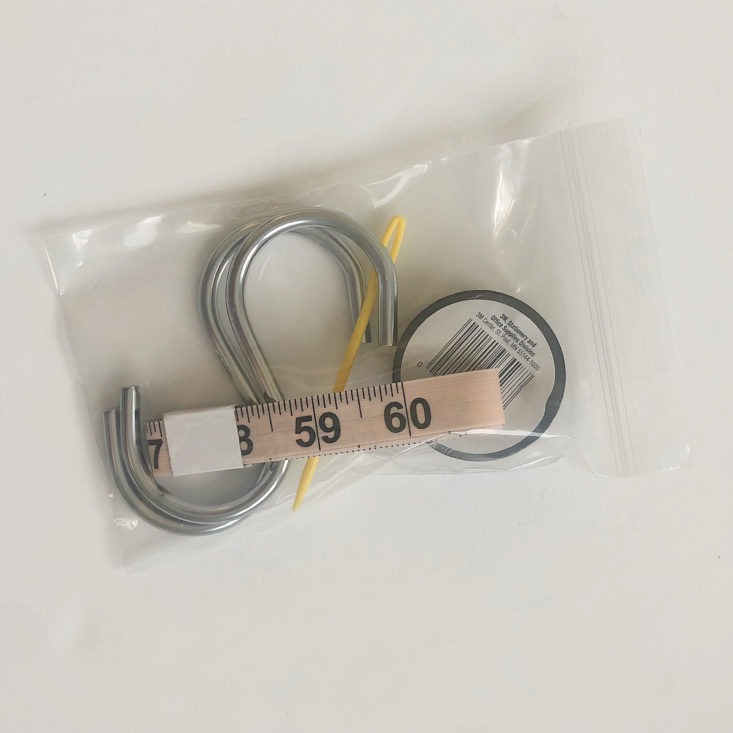
Extras - S hooks, Washi Tape, Measuring Tape, Plastic Needle
Finally, we have a bag of extras for our project, including S hooks to hang the dowel from as we work on our knotting, washi tape, a 60" measuring tape, and a plastic needle with a large eye.

Paper Pattern
We also received a paper pattern with the number of knots and inches for reference on the sample design that Rachel walks us through.
Now, let's get knotting!


1 of 2
The first step was to cut my macramé cord into specified lengths. We cut the medium-sized white cord to use as the warp strings (vertical hanging ones), and then different lengths of all four colors to use with the actual knotting around the warp strings. These scissors cut really sharp!

1 of 2
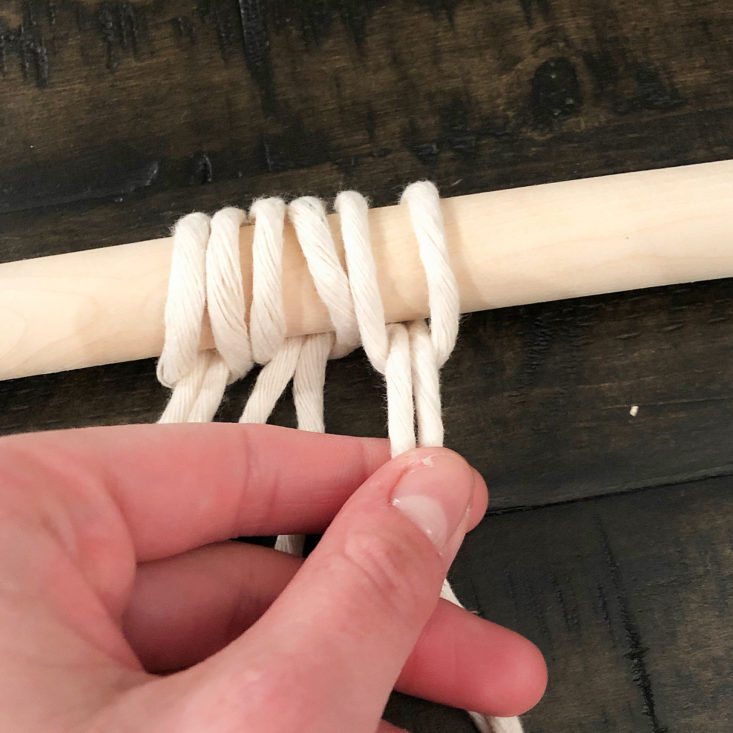
The next step was to make the Lark's Head knots around the dowel to fasten the warp strings to it. We made these knots by doubling the cord and then pulling the tails of each strand through the loop in the middle.


1 of 3
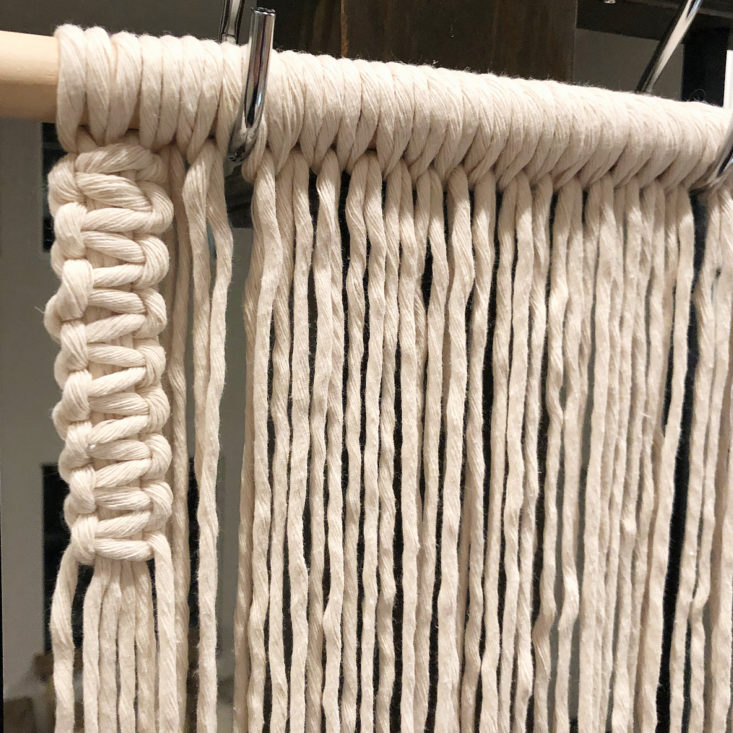
Now, the real fun! Here we learned how to do the square knot, which is actually made up of two knots that mirror each other. You do a left-leaning pass and then a right-leaning pass, which creates the final square shape. We did square knots in the white cord all the way across the piece in the number of knots specified in the paper pattern.
I had to get creative when it came to where I hung my project to work on it! I ended up putting a plastic hanger around my railing banister and hanging the S hooks from it. It worked pretty well!


1 of 2
Next, we started adding in the other colors. I started with the golden sun, and we learned a neat trick to hold the white knotting cords behind the gold as we made our gold knots. Then we could pick back up the white knotting cord when it was time to keep working with that one!


1 of 4
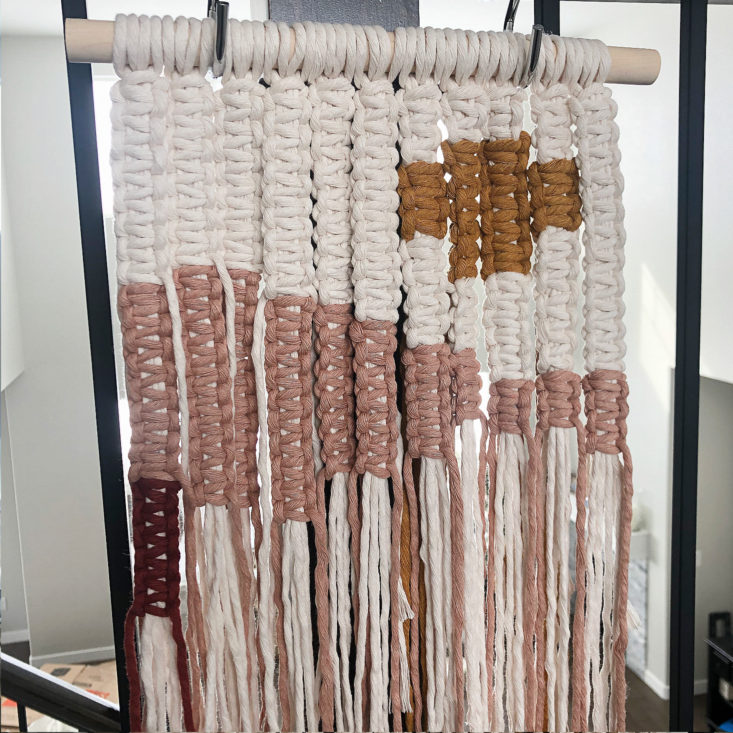

After we learned how to do color changes, the rest of the design was easy going! We did the blush pink and then the berry/rust color to finish out the mountain part of the landscape. You can see that my ends were loose and messy from all the color changes.
The type of knots didn't change throughout the piece, and I found myself getting faster and faster as I went through each section of the design.


1 of 2
After all the knots were complete, it was time to weave in those messy ends! The video suggested that we use the included washi tape to tape the end of each free cord to make it easier to pass through the eye of the needle, but I found that I didn't need to do that step and found it cumbersome and unnecessary. It was easy enough to pass the free end of the cord through the eye of the needle for threading.
After the ends were woven in, the knots looked much neater!


1 of 2
Here's what my piece looked like once all the knots were complete and the ends were woven in. I love the colors!

1 of 4


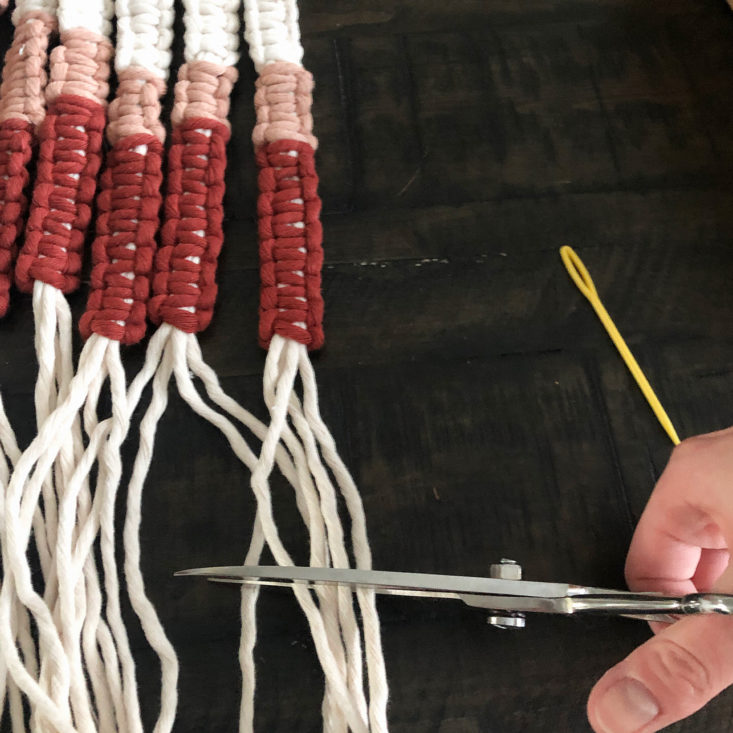
The final step was to trim the fringe and fluff it out. Rachel recommended cutting the fringe at alternating high and low levels to give the final piece some extra movement. We then used the comb to brush the cord out so that the multiple strands fanned out and fluffed up. This step was especially fun!
Verdict: The Crafter's Box is usually my favorite box I get each month, and this box was no exception. I've never done macramé before, and this was such a fun craft to make! The finished project looks like something I could have bought in a store like Anthropologie to decorate my house, and it feels very on-trend. The presentation is lovely, and I thought it was great how the box includes absolutely everything you need to create the project. I like that The Crafter's Box showcases a more unique variety of crafts than a lot of other craft subscription boxes, and I love that I was able to experiment with a new-to-me craft. I also really appreciate the modern, upscale vibe that I get from this box - it feels like I'm making and creating for a purpose, rather than just crafting for the sake of crafting.
For $65, we received tools and supplies to make a macramé landscape art piece – many of them reusable, like the scissors. The box has a very careful curation and extremely well-made video tutorial content. The video tutorial was so well done and very in-depth, and I really enjoyed learning tips and tricks on how to get the best final results.
To Wrap Up:
Can you still get this box if you sign up today? No, you will receive the December 2020 box (if you sign up between November 10th - 20th). However, this exact box will be available in the marketplace here after November 1st.
Check out our other reviews of The Crafter's Box and the top-rated craft subscription boxes!
Keep Track of Your Subscriptions: Add this box to your subscription list or wishlist!
What did you think of The Crafter's Box for October 2020? Let us know in the comments!

Please do not enter your email address in the Name field or in the comment content. Your email address will not be published. Required fields are marked *. Remember to post with kindness and respect. Comments with offensive language, cruelness to others, etc will not be approved. See our full comment policy here.