

MEL Chemistry is a subscription service for kids ages 12 and up that sends 4-6 chemistry experiments every month. We love science at my house, so we were happy to have the opportunity to try them out!
This box was sent to us at no cost to review. (Check out our review process post to learn more about how we review boxes.)
The Subscription Box: MEL Chemistry
The Cost: $49.90 $39.90 per month
The Products: Two chemistry experiment sets each month with 4-6 experiments total
Ships to: U.S., U.K., and Russia (from the U.K.)
Check out the Kids Subscription Box Directory for more activity boxes and make sure to add MEL Chemistry to your subscription list or wishlist!
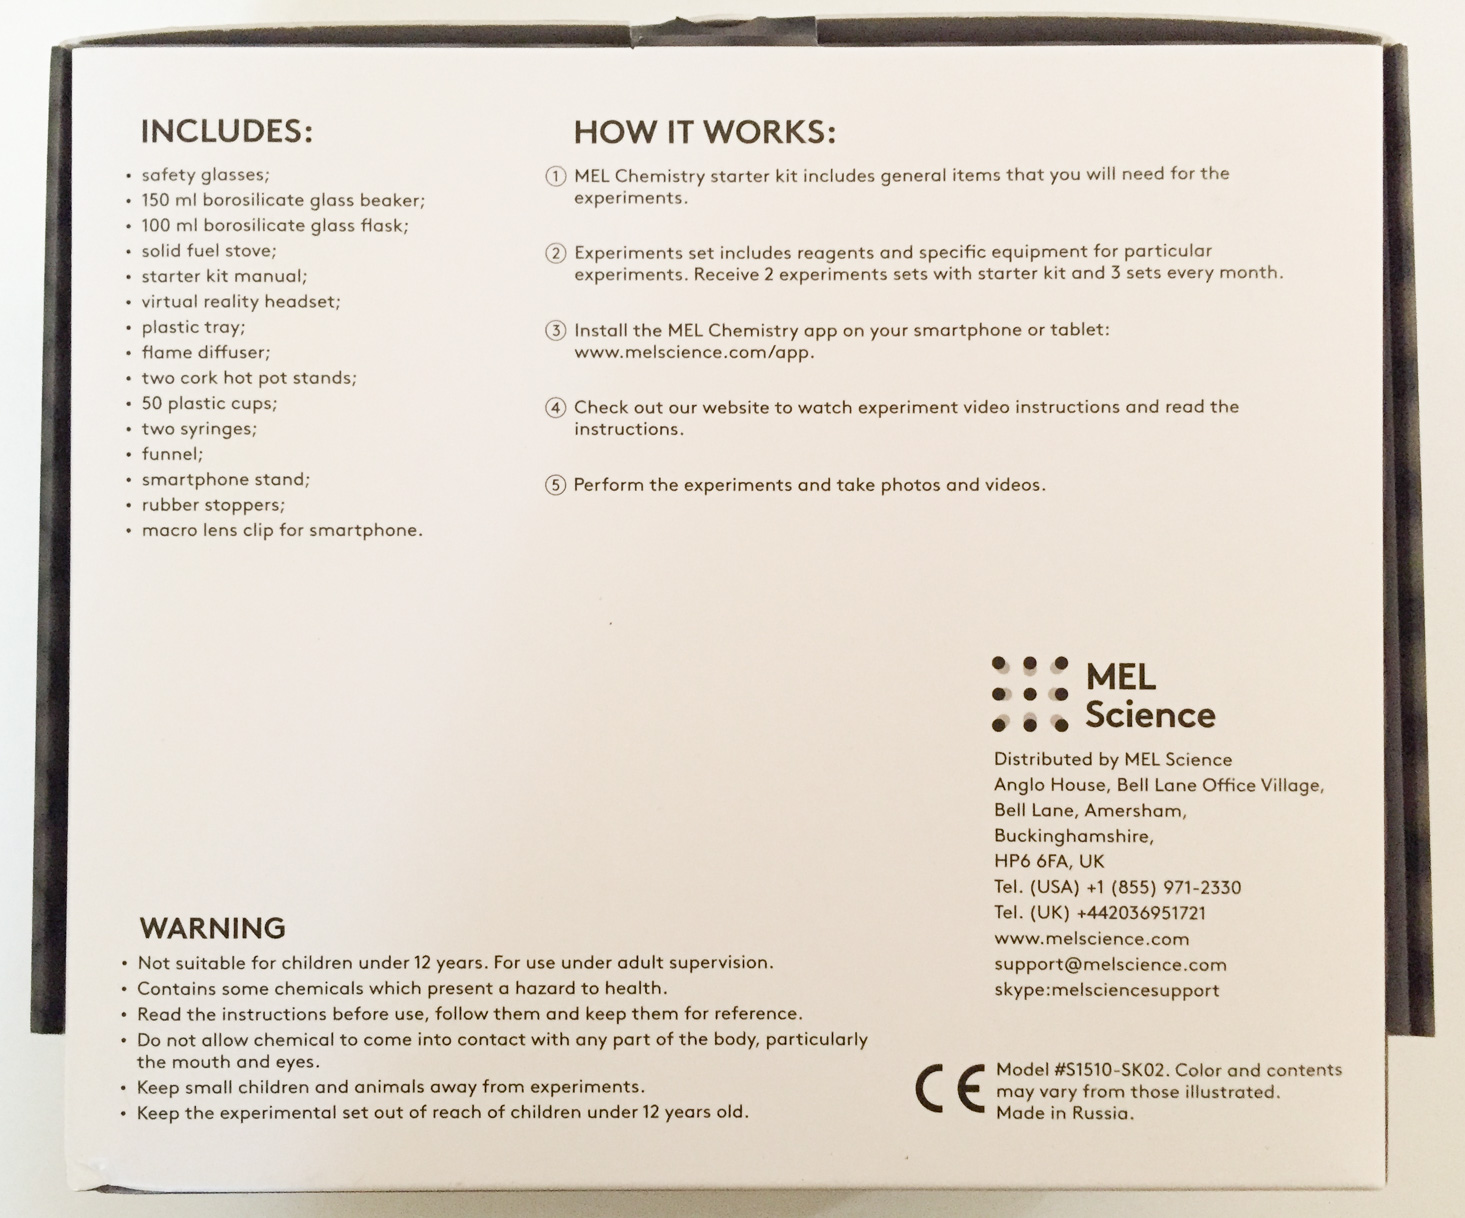
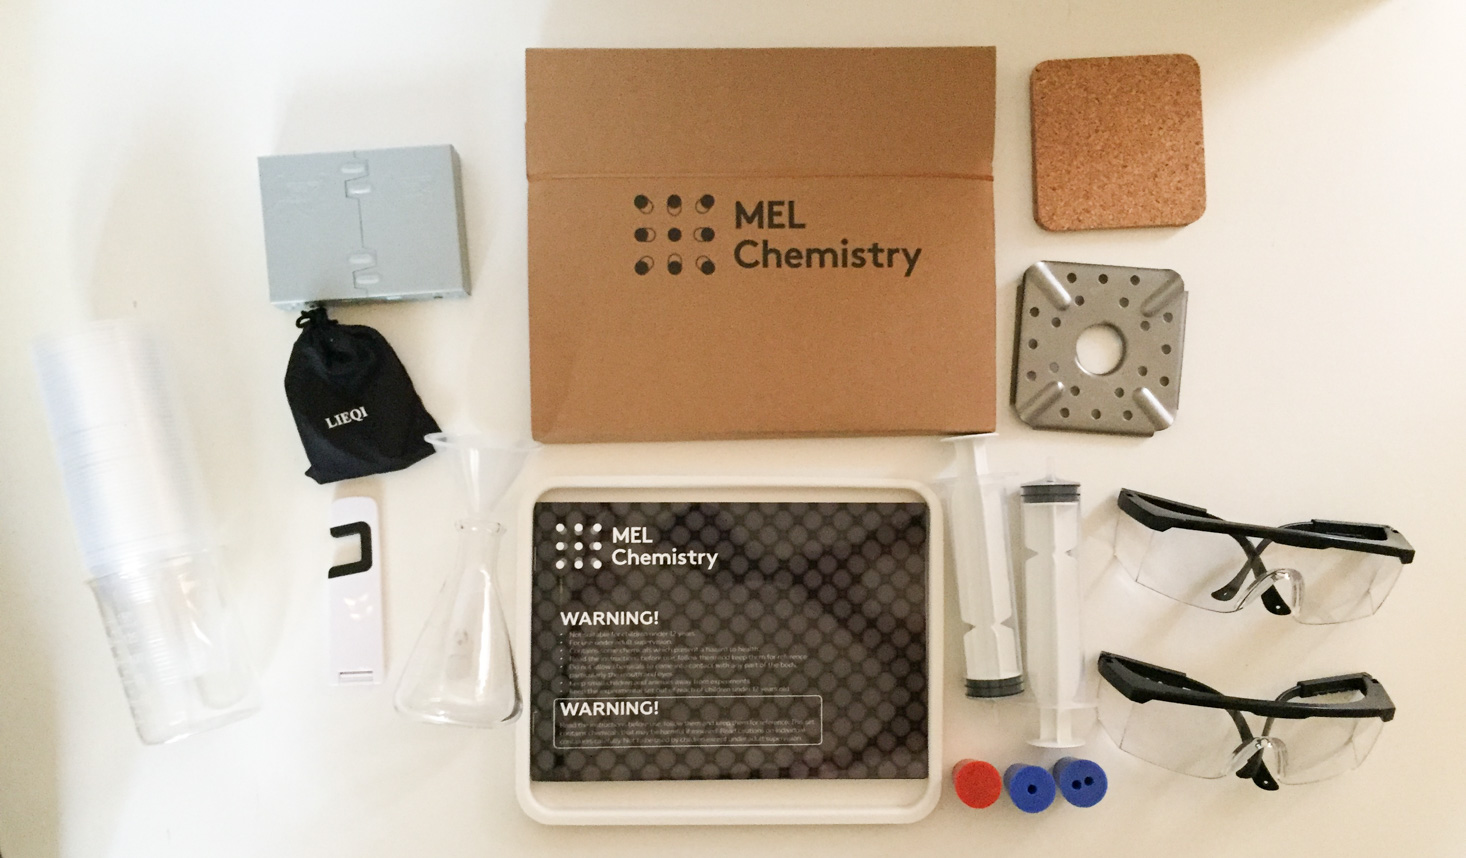
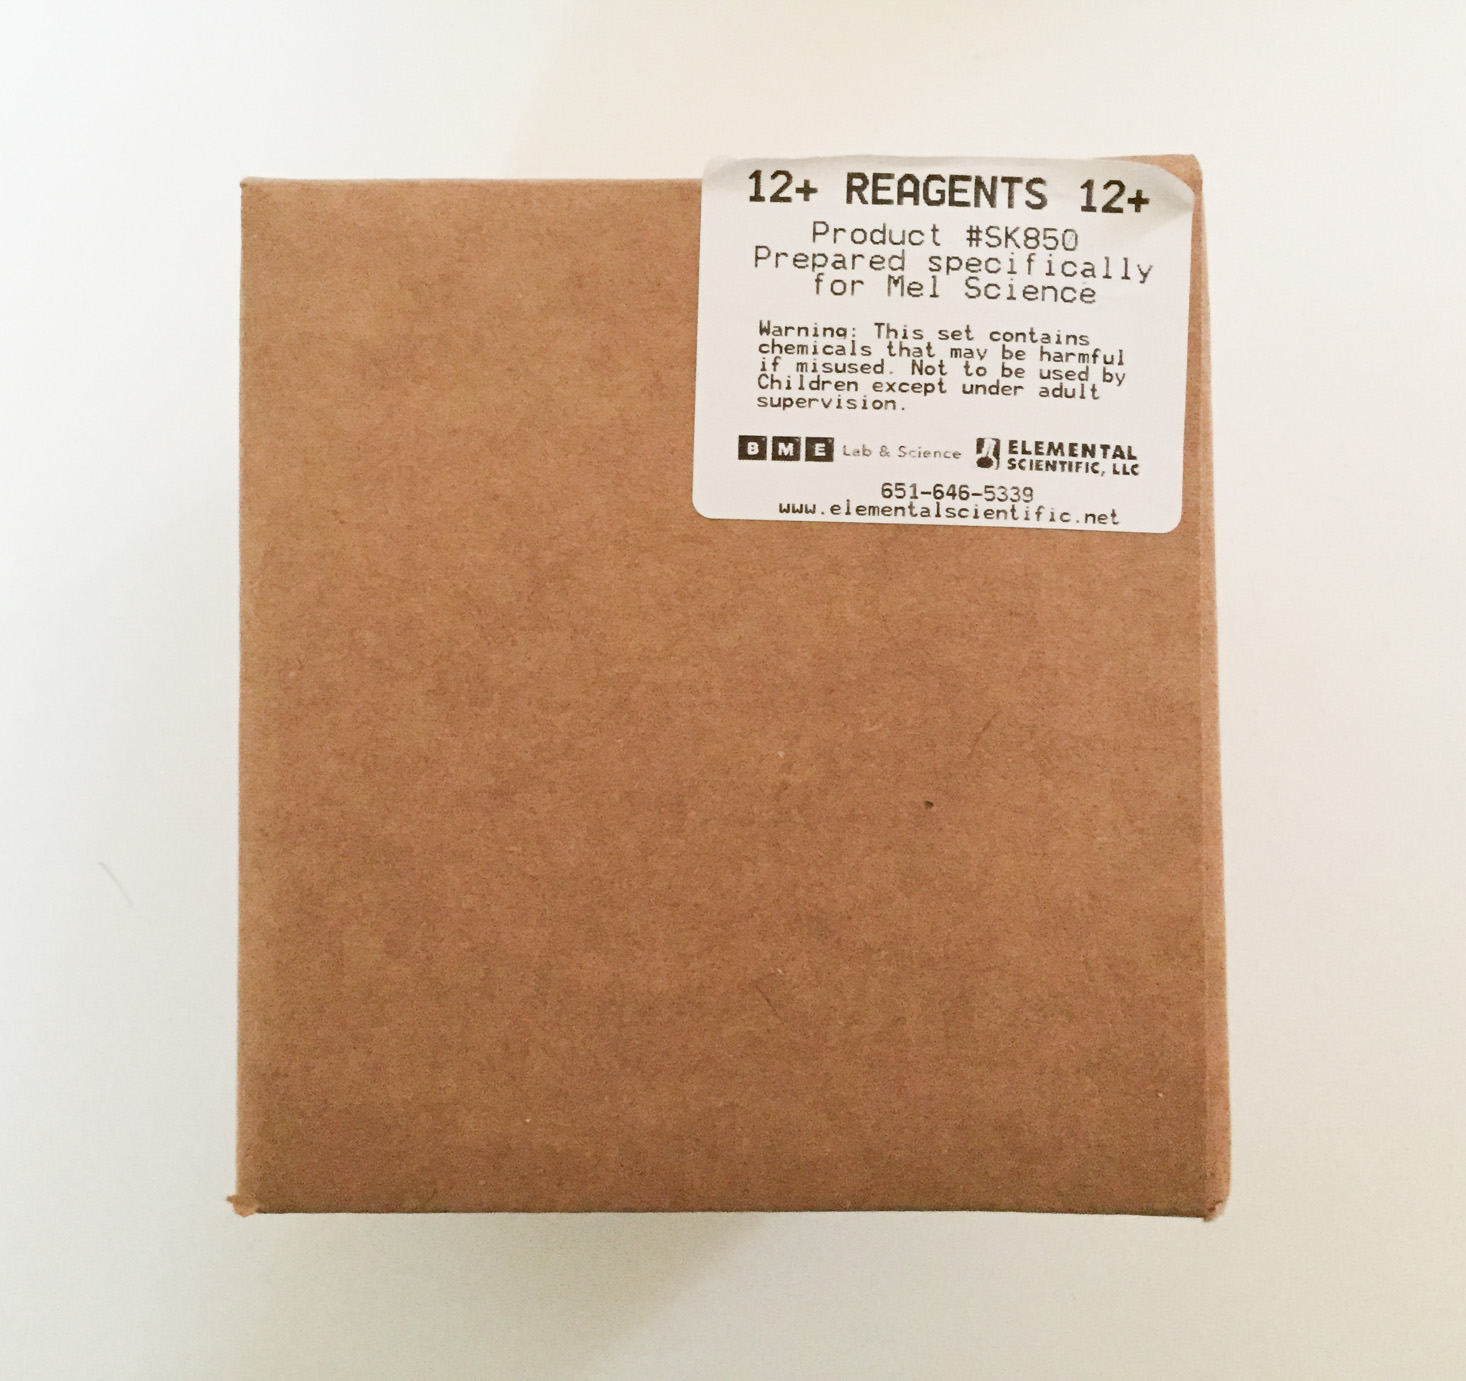
The first shipment a starter set that includes several other items you will need throughout the life of your subscription, such as a safety manual, goggles, a tray, a stove, a beaker, in addition to the two experiment sets. The back of every box for every set includes information on the contents.
Another box included with the first shipment was a box of commonly used reagents.
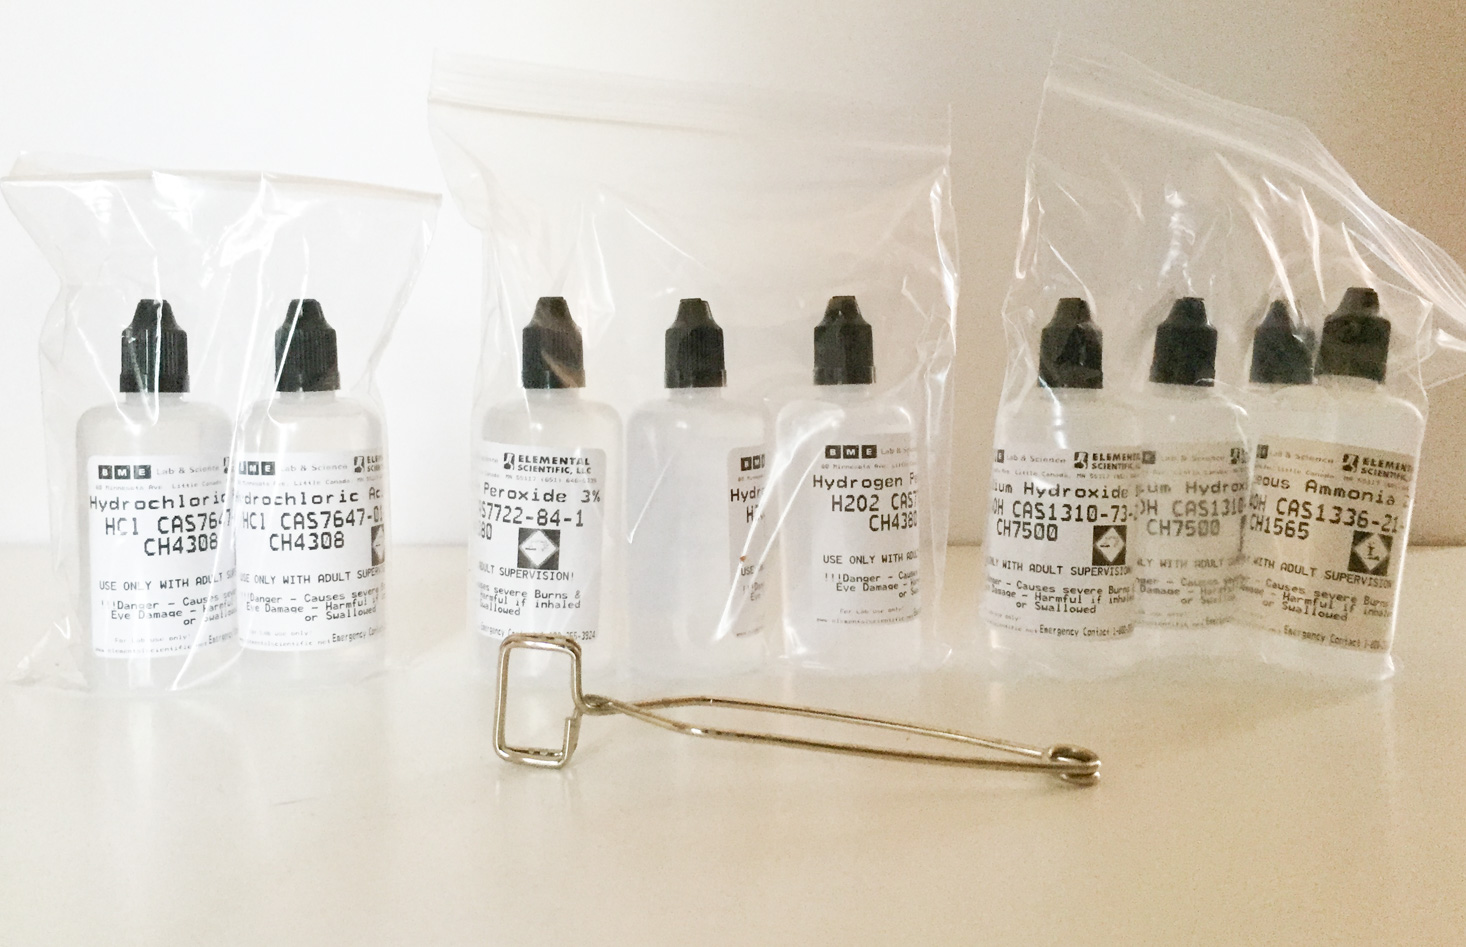
Here are the reagents that were included. They include hydrochloric acid, ammonia, and hydrogen peroxide. These will be used in future chemistry sets.
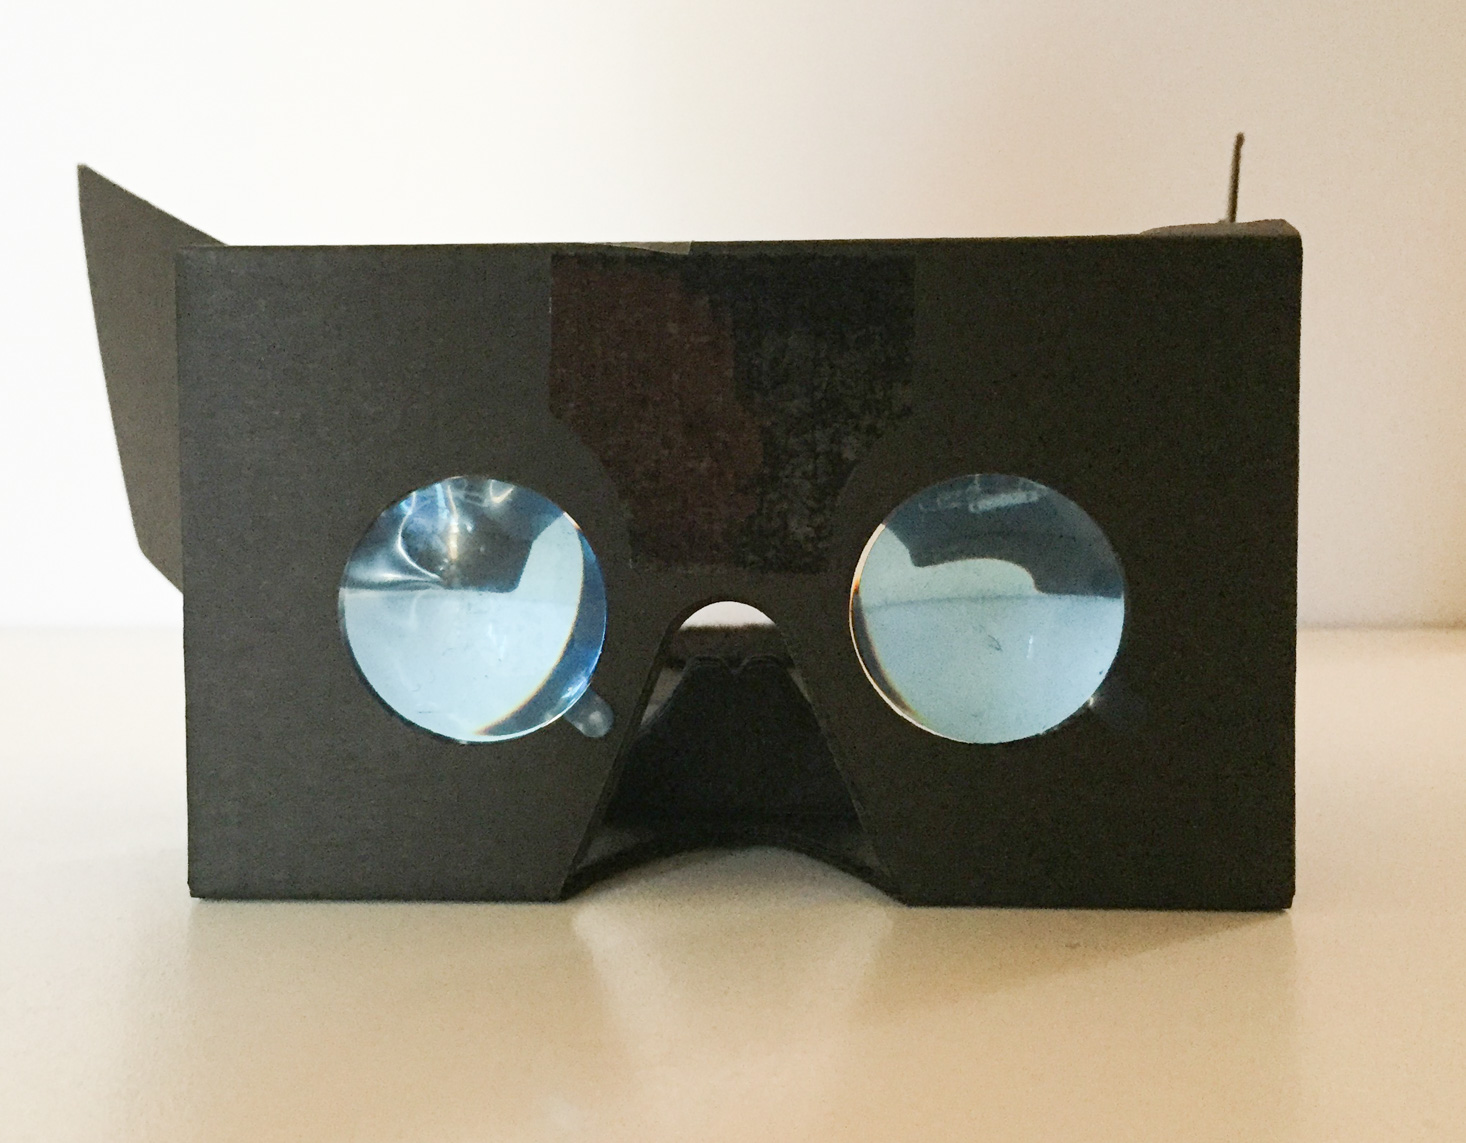
These virtual reality viewers were also included in this first shipment. These are for use with the MEL Chemistry app.
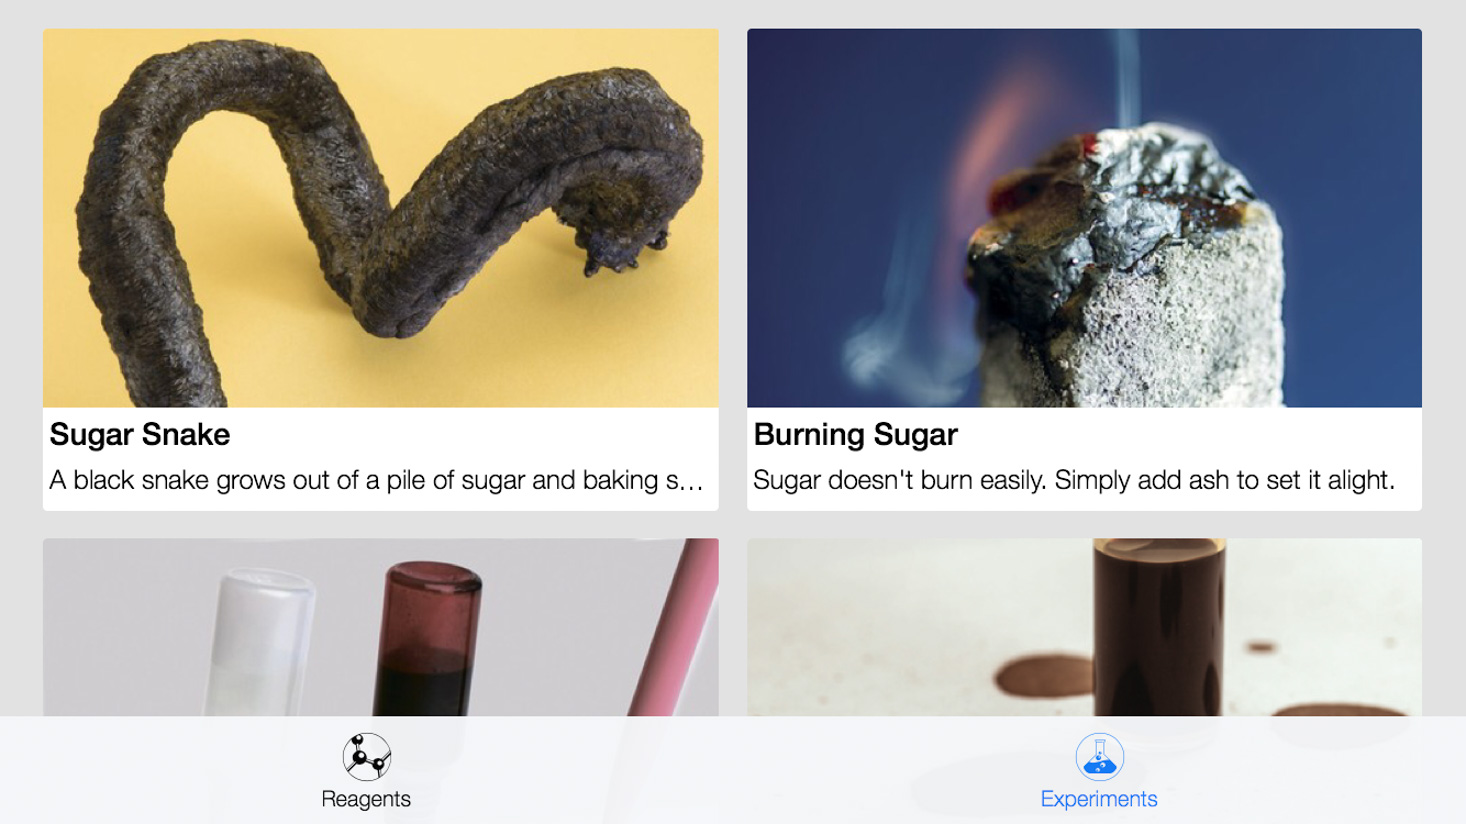
Here's a look at the app. It has videos illustrating the method for each experiment.
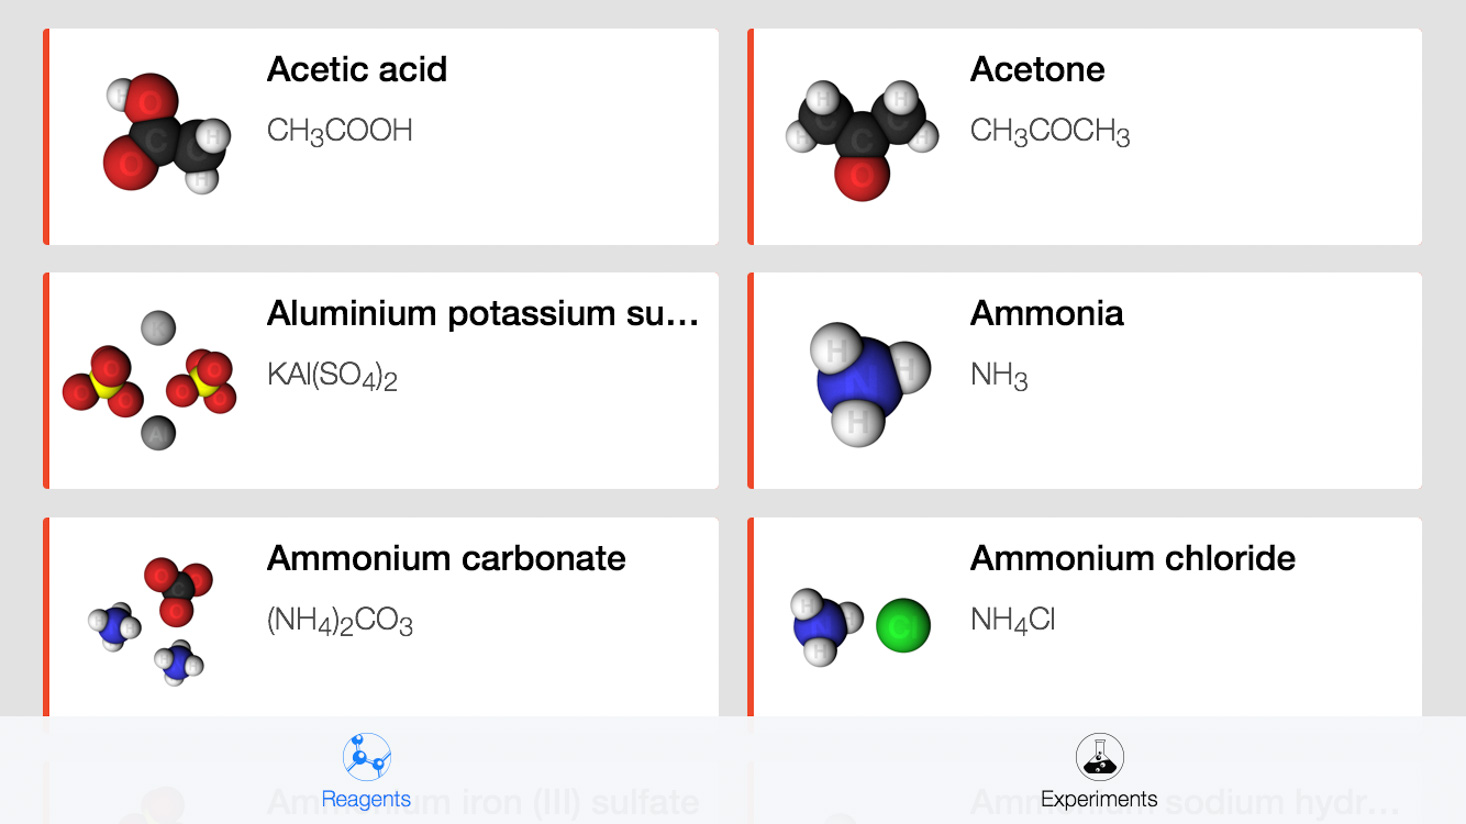
It also shows all the chemicals used in the experiments.

You can take a closer look at the molecular structure of each chemical, plus you can use the VR glasses to see how the chemicals interact. Pretty cool!

Now on to the experiments! Our first experiment set was called "Chemistry of Monsters." Fun!
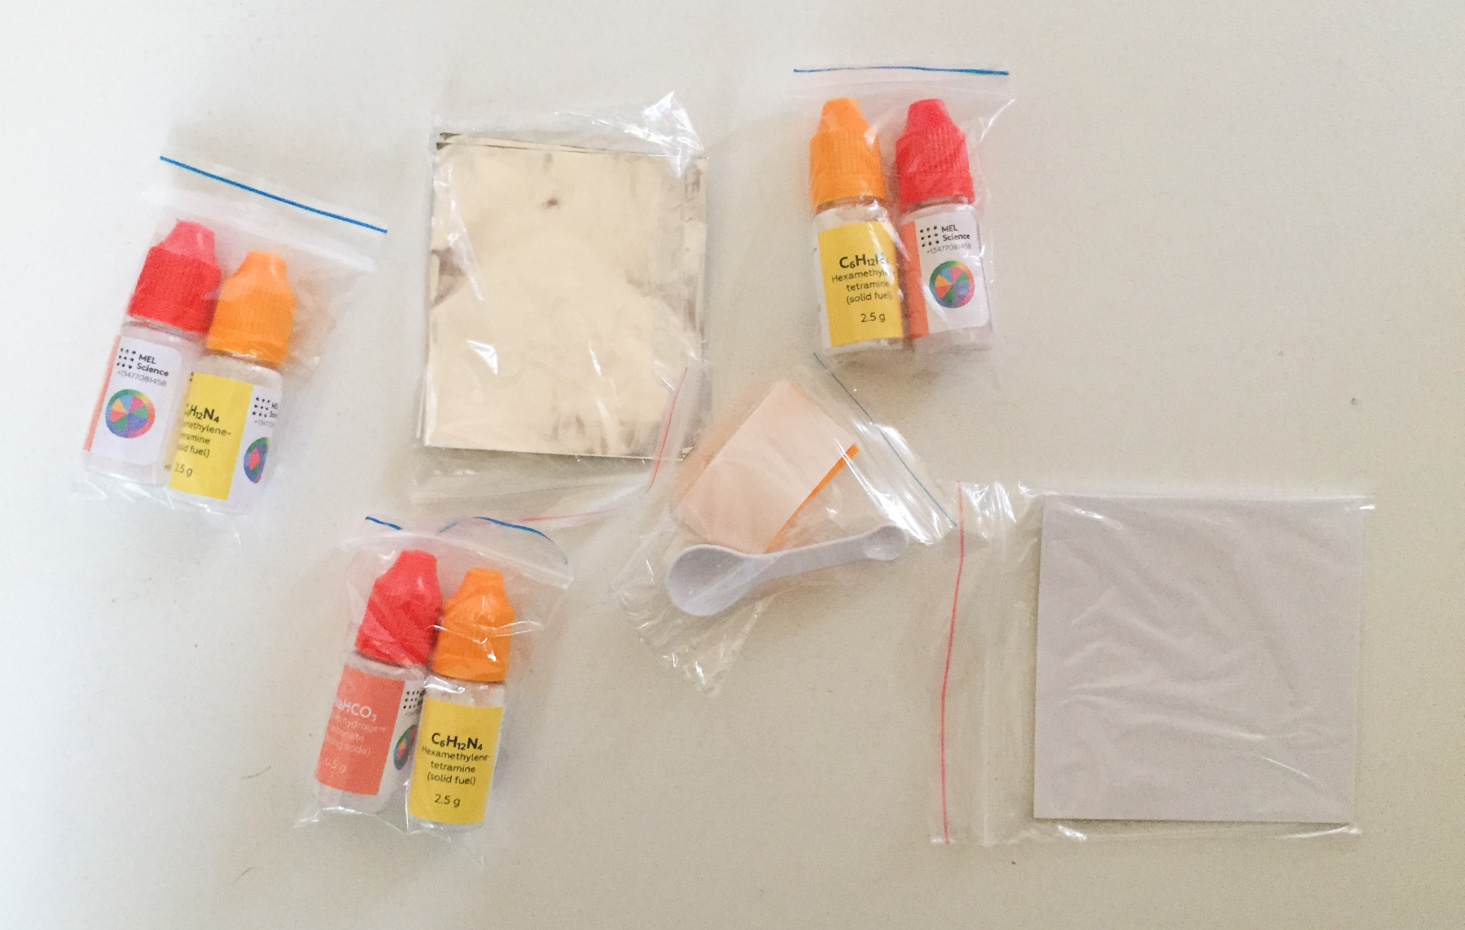
This is everything that was included in this set. There were enough supplies to do each experiment 2-3 times, which is really nice. For this set, we had to supply sugar, a lighter, and water from home.
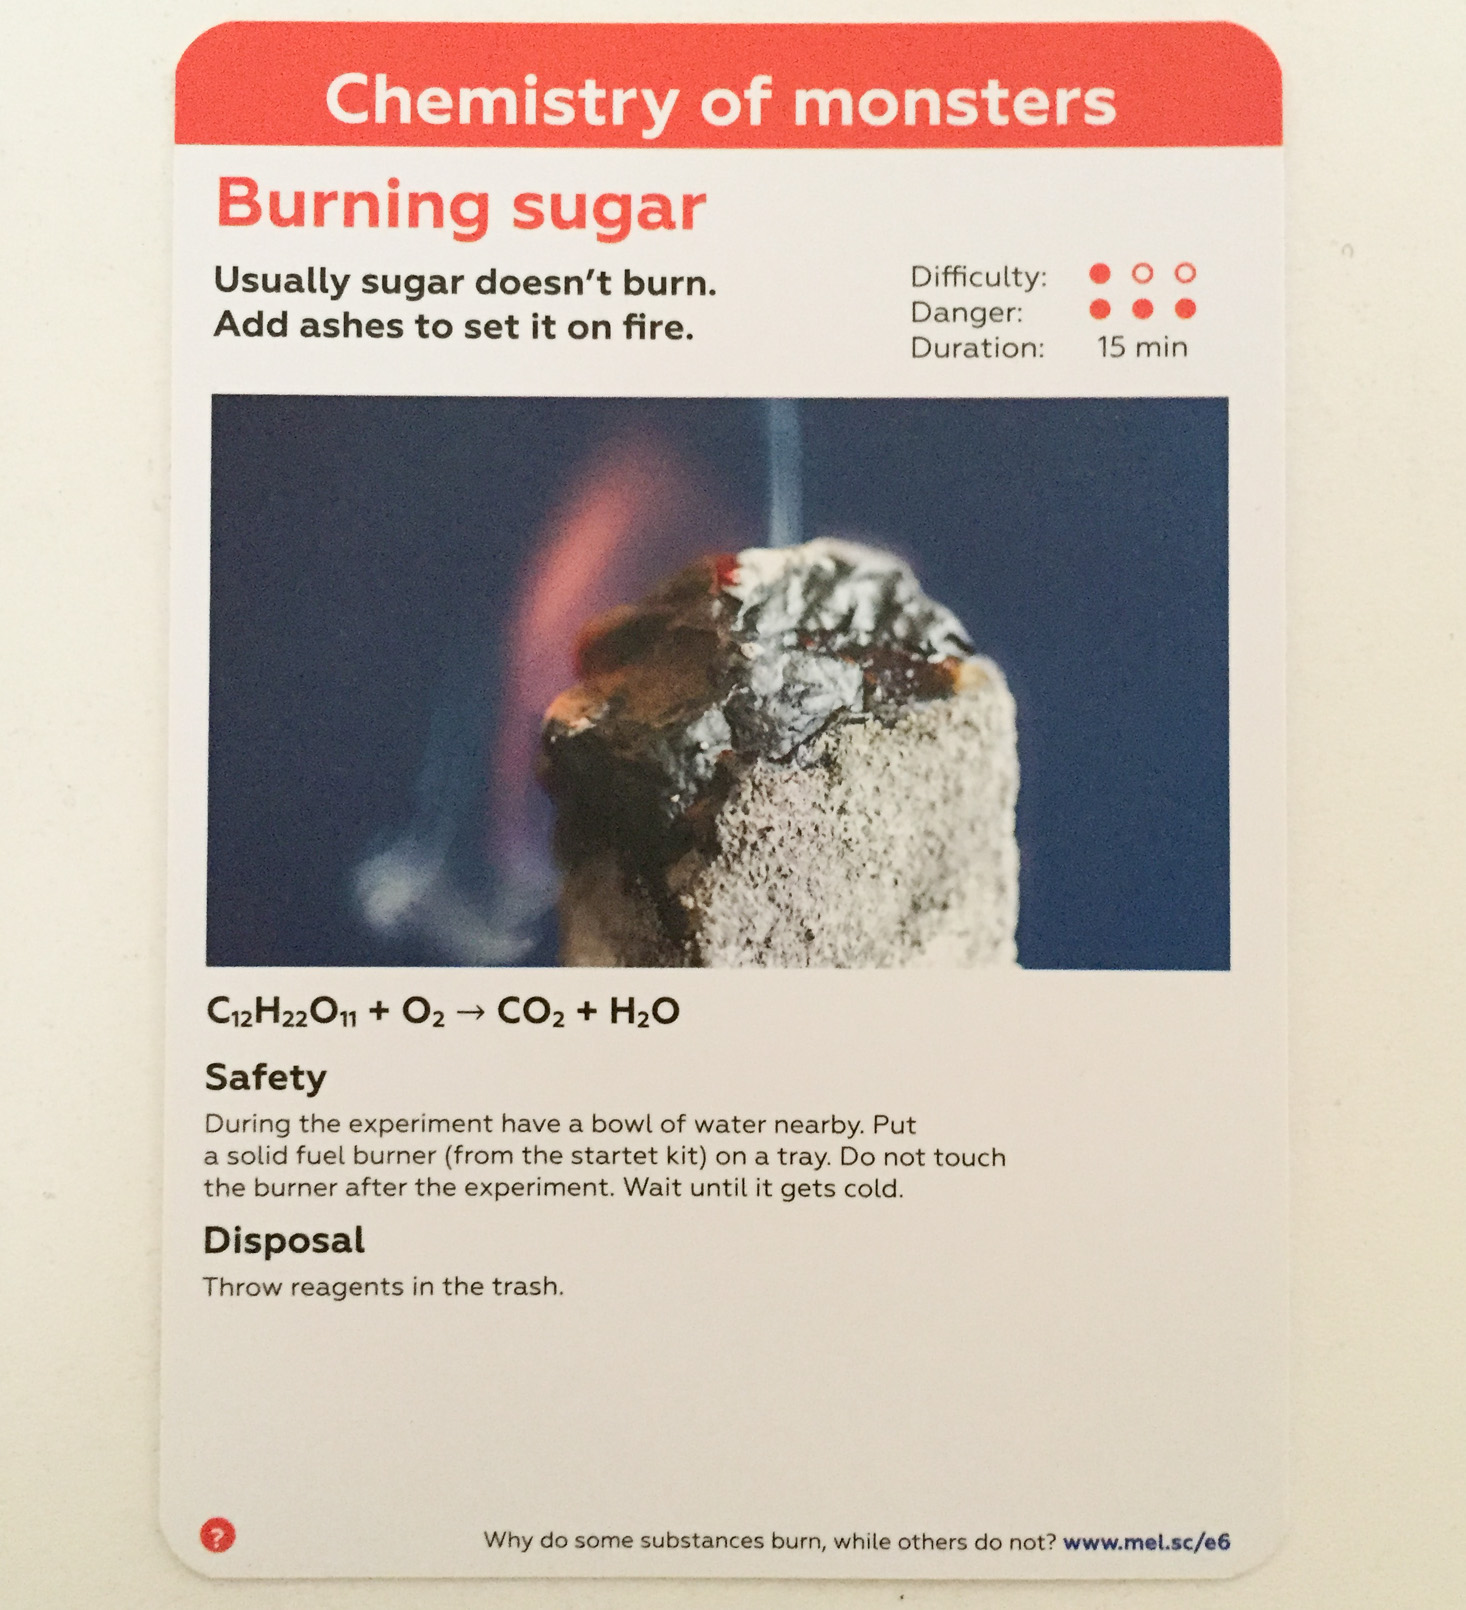
Our first experiment was burning sugar.
The reverse side had complete instructions, and we also watched the experiments on the videos provided in the app. There is safety information and reminders printed everywhere as well as on the video!
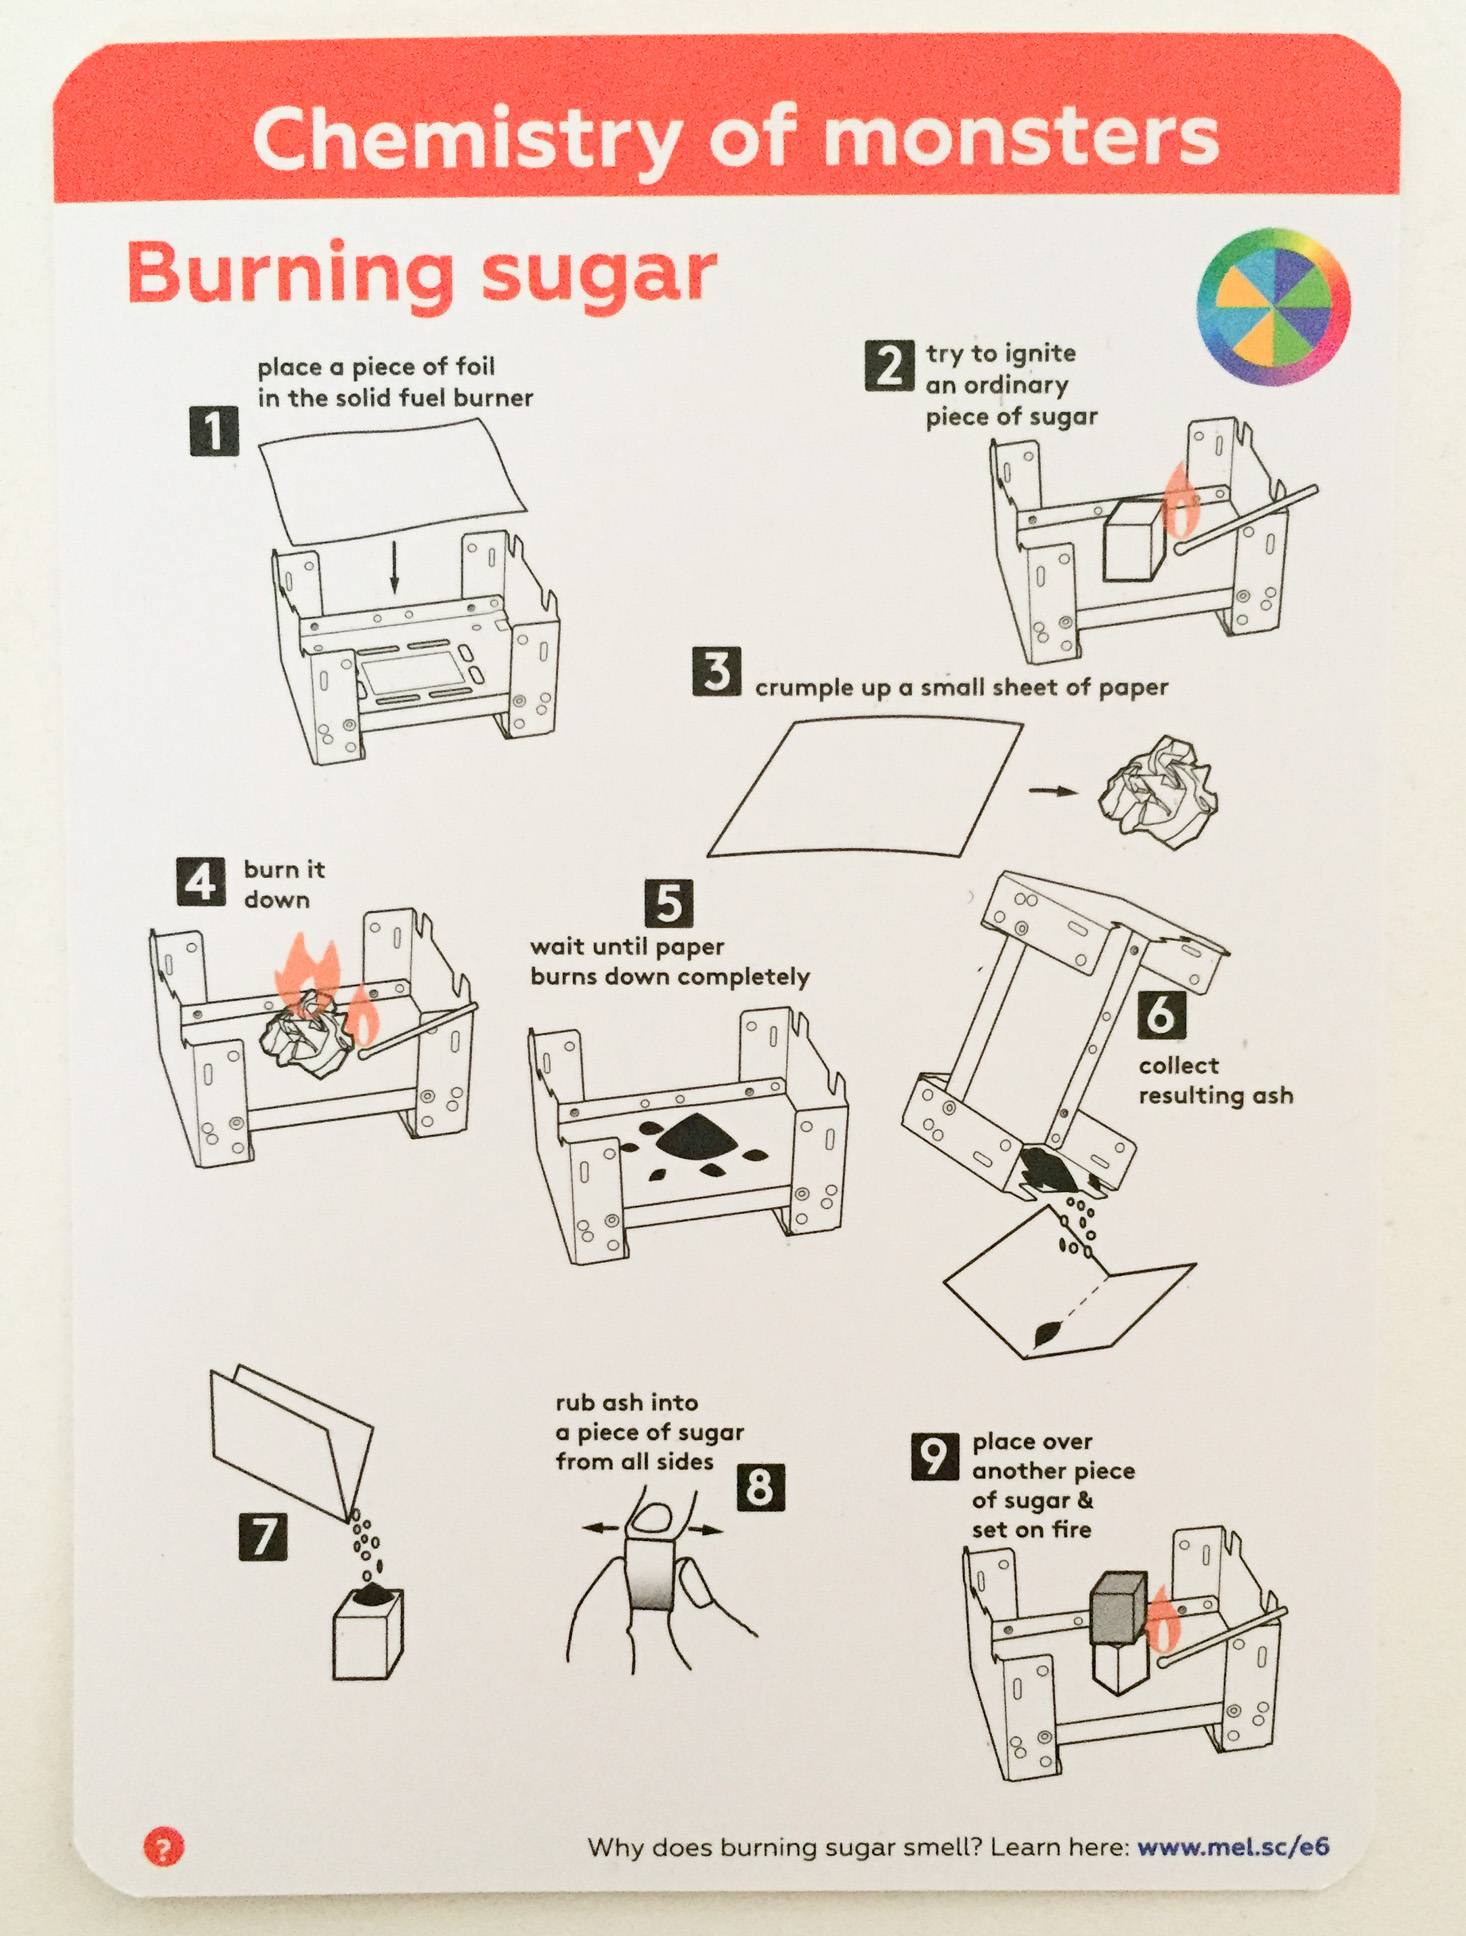
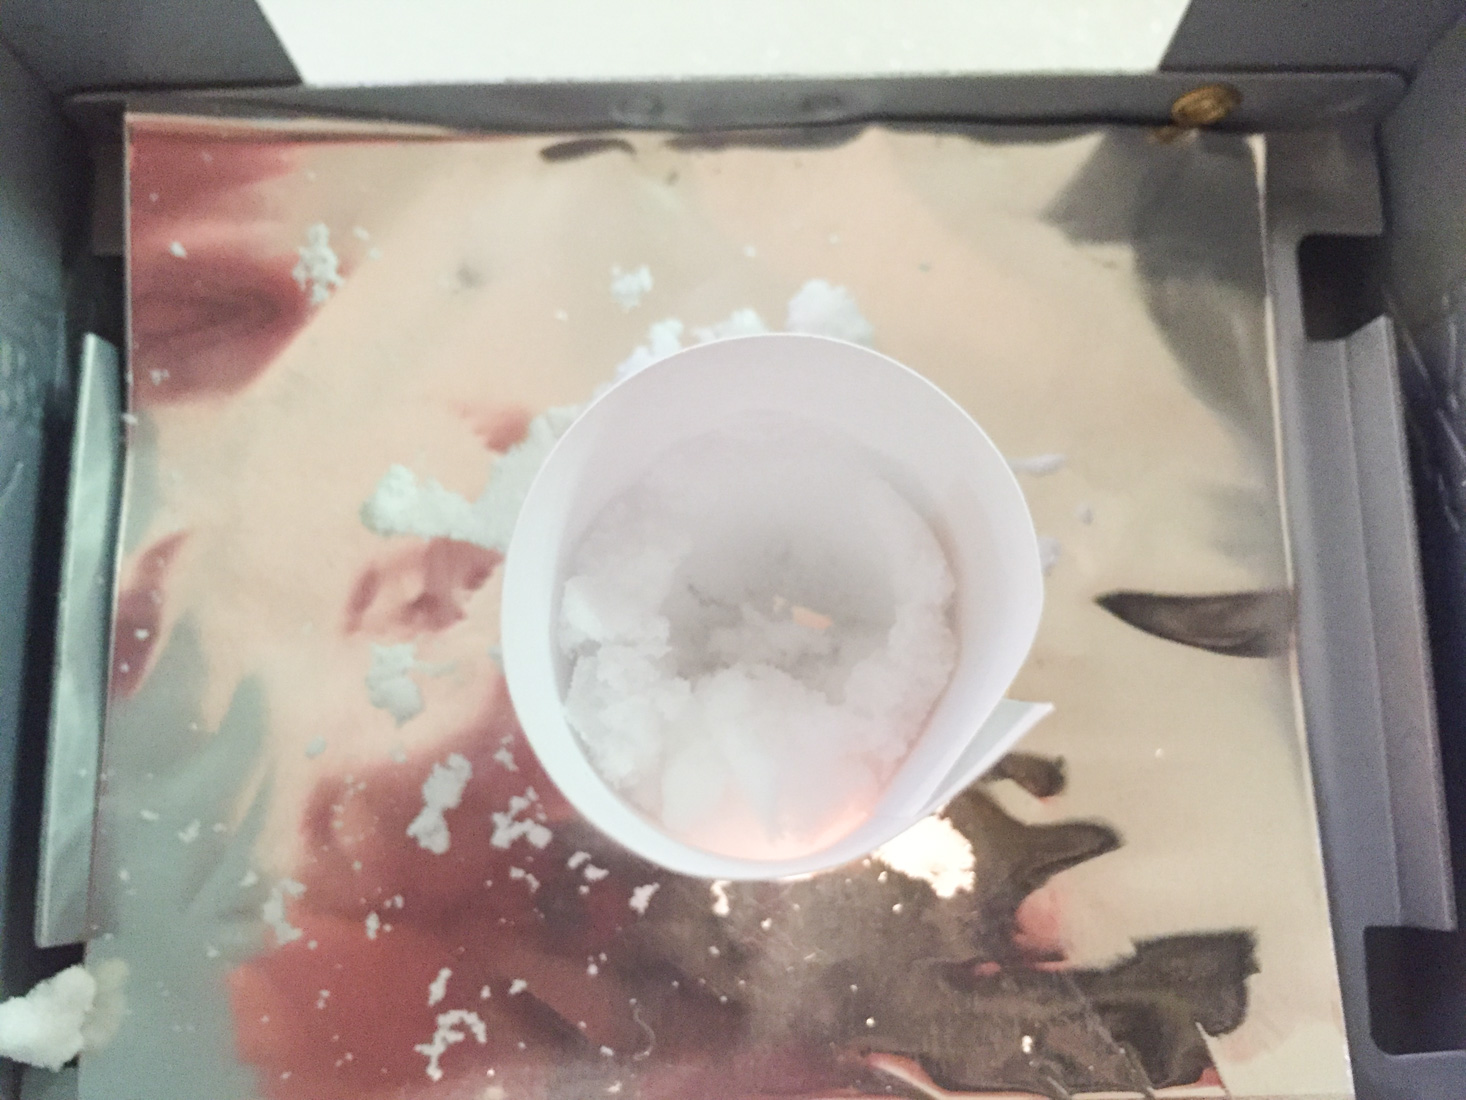
This was our setup for the sugar burning experiment. My ten-year-old son and I set up our stove from the starter set and lined it with foil. We were supposed to use sugar cubes for this experiment, which I know is a very common household item in the UK, but we didn't have any. They didn't even have any at the grocery store down the street! So we used a little pile of sugar.
After applying a safety lighter to the sugar for several seconds, it didn't burn at all! It just melted a little in that one spot.

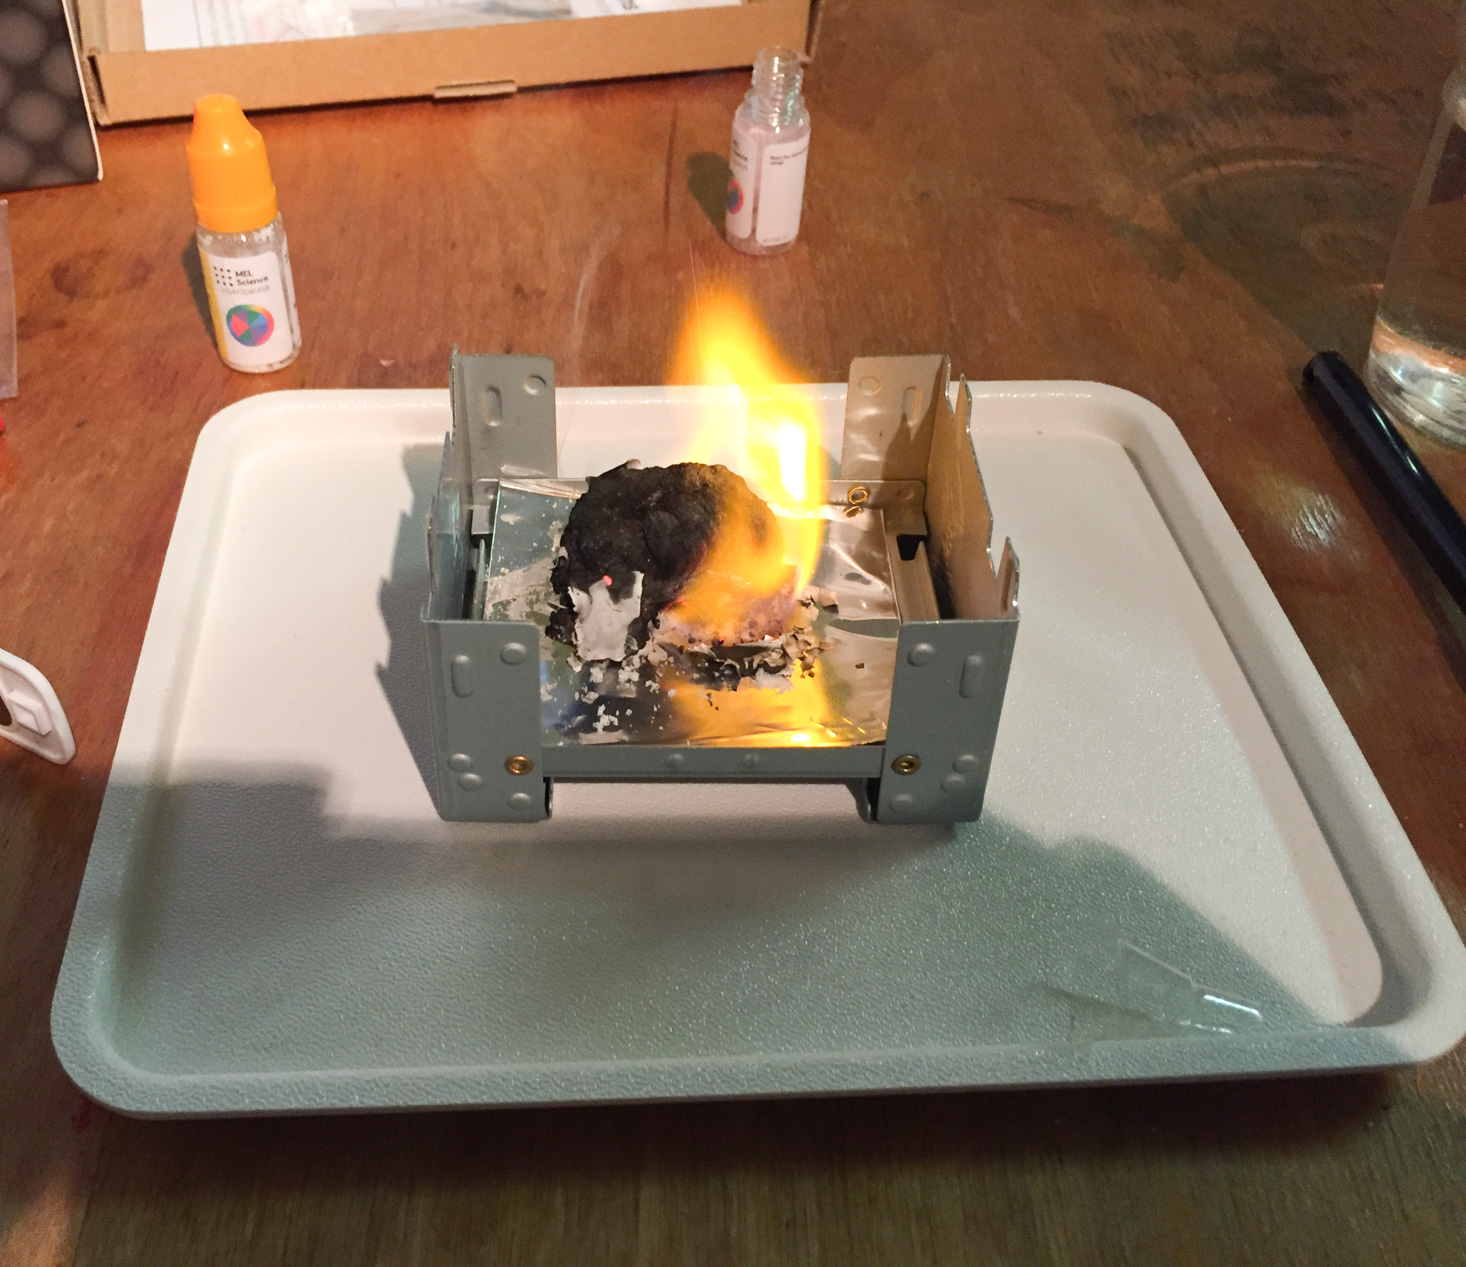
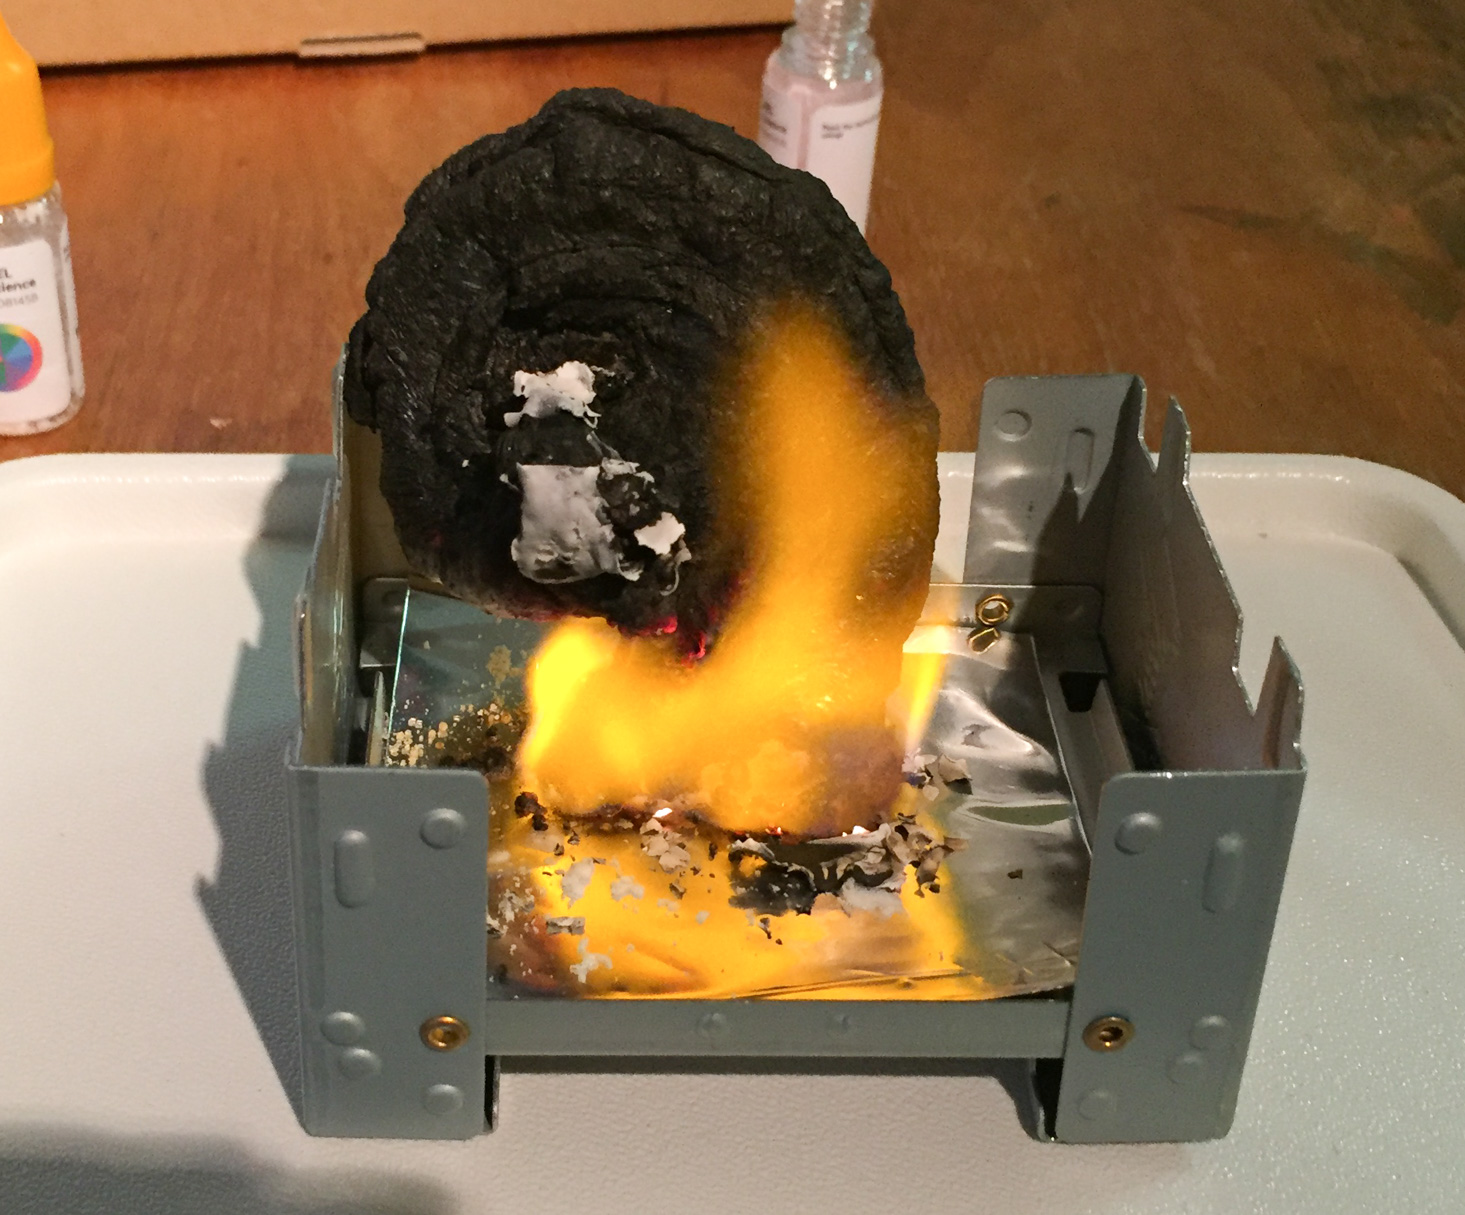
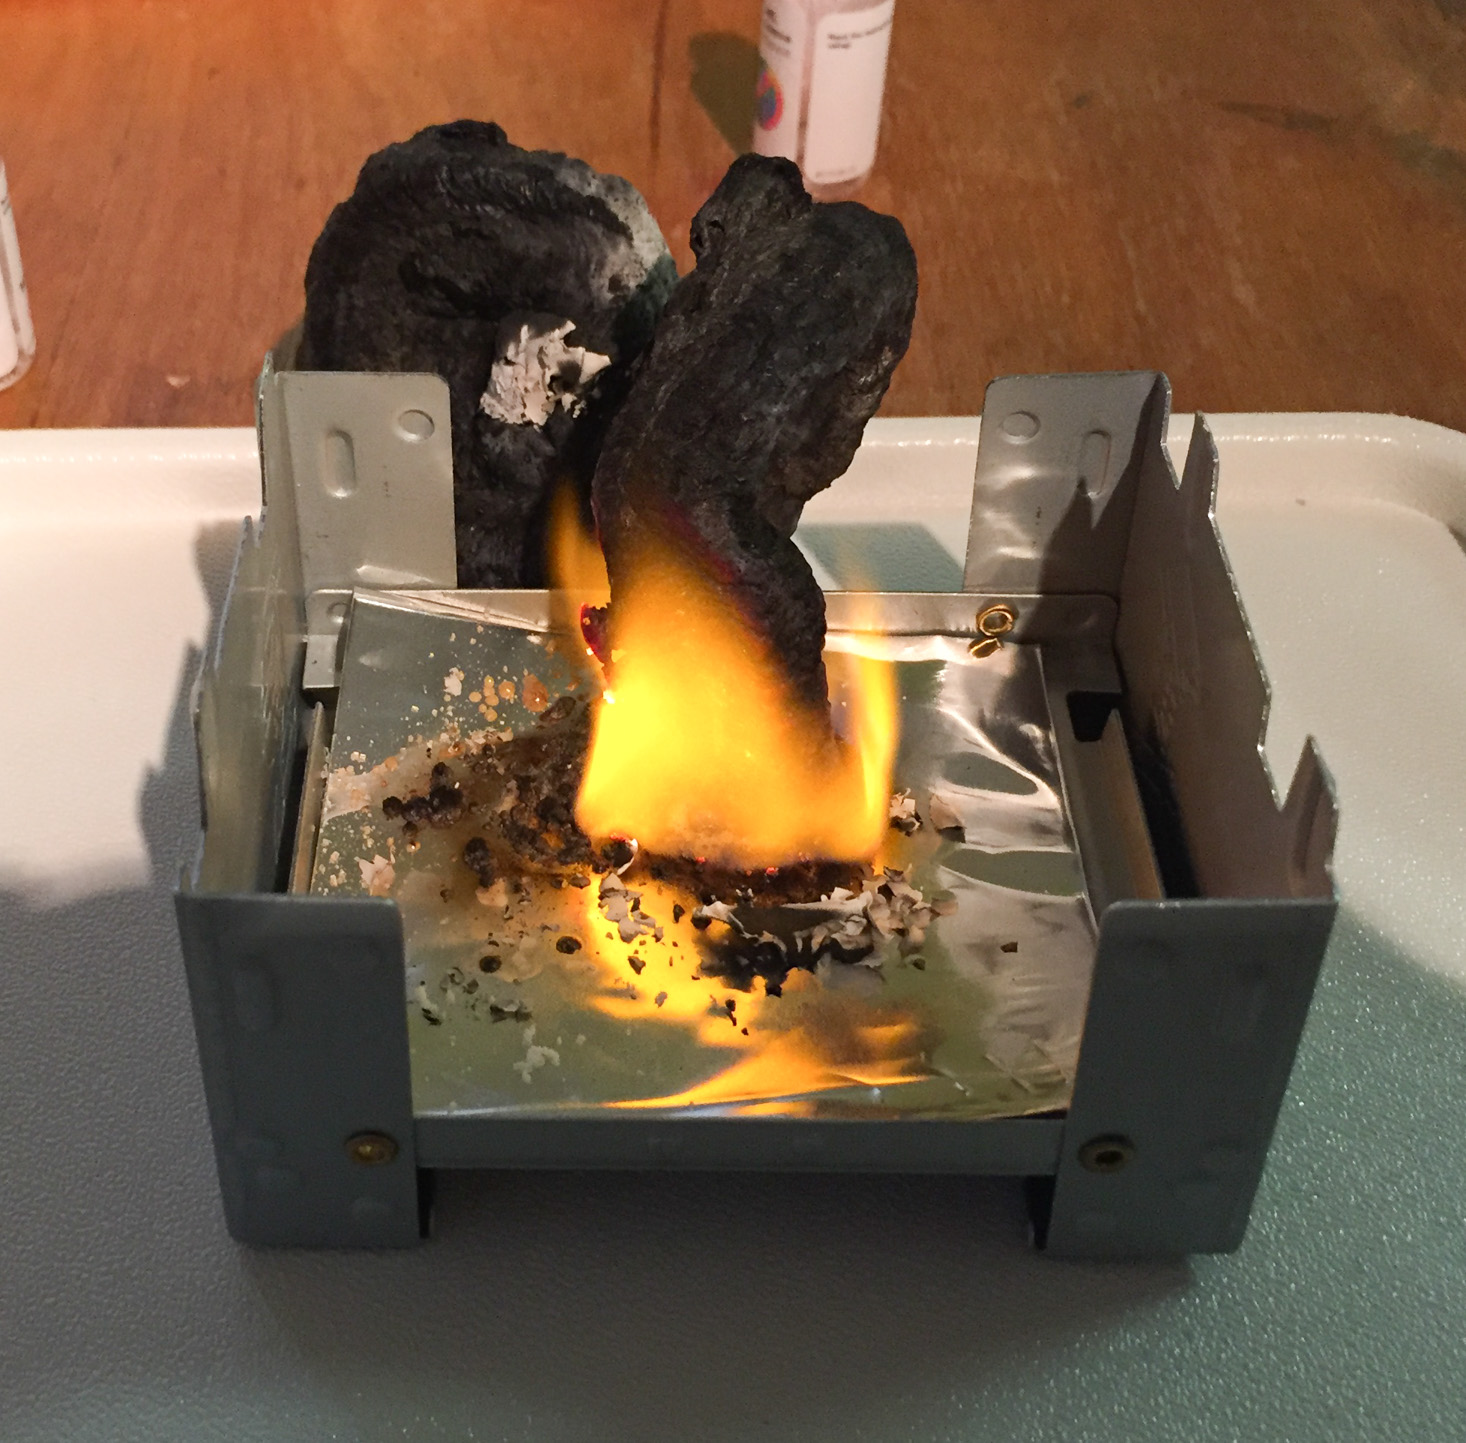
We then burned a little sheet of paper and mixed the ash with the sugar.
And here it is burning! Success! I'm sure this would have worked better with a sugar cube, but this was definitely proof of the concept at hand.
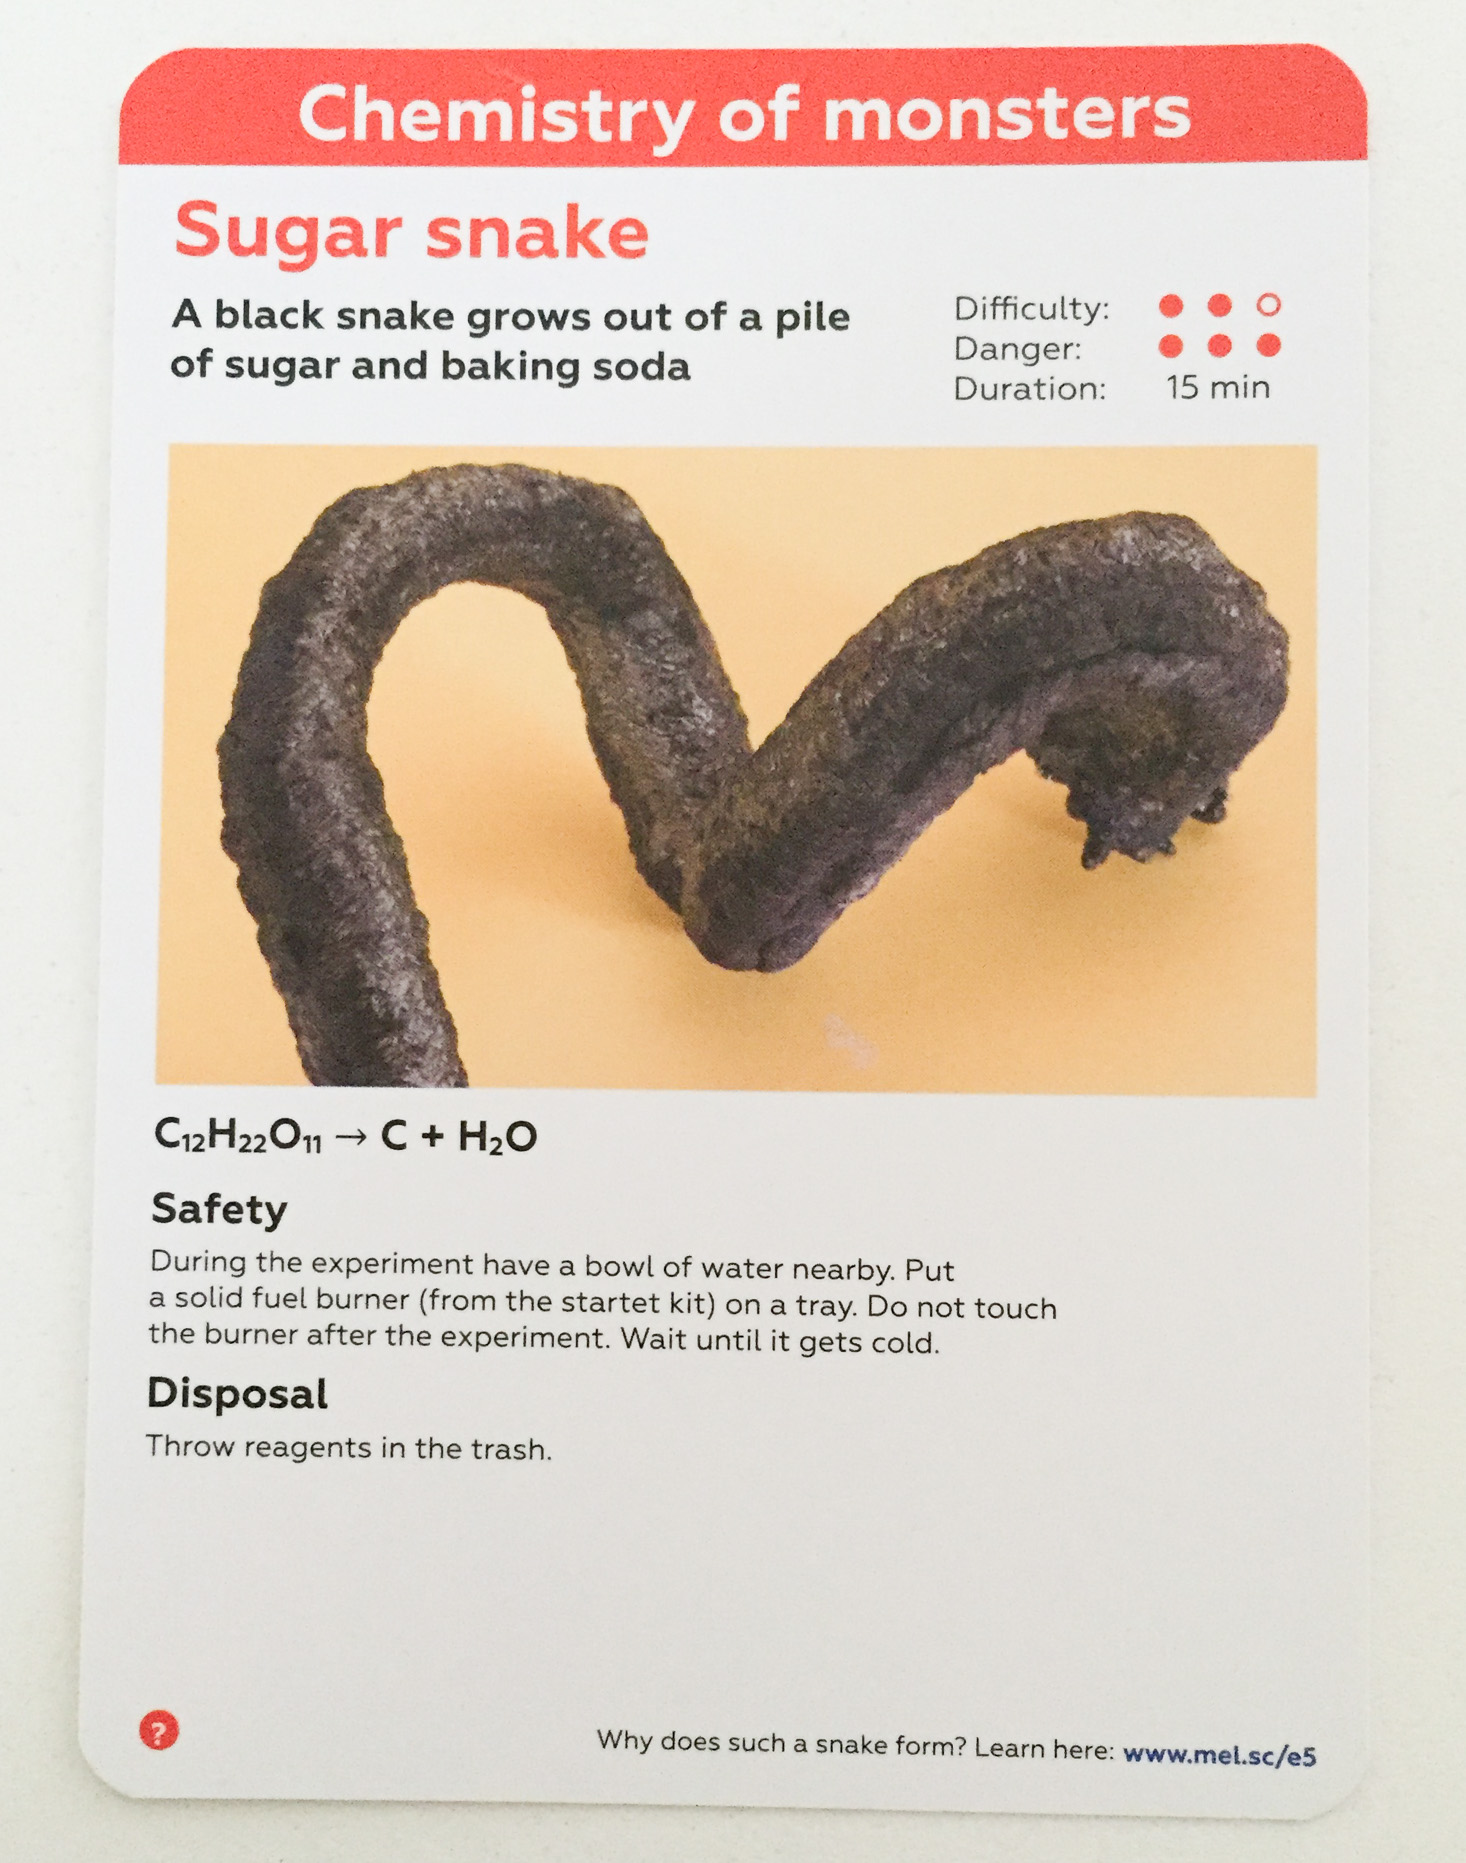

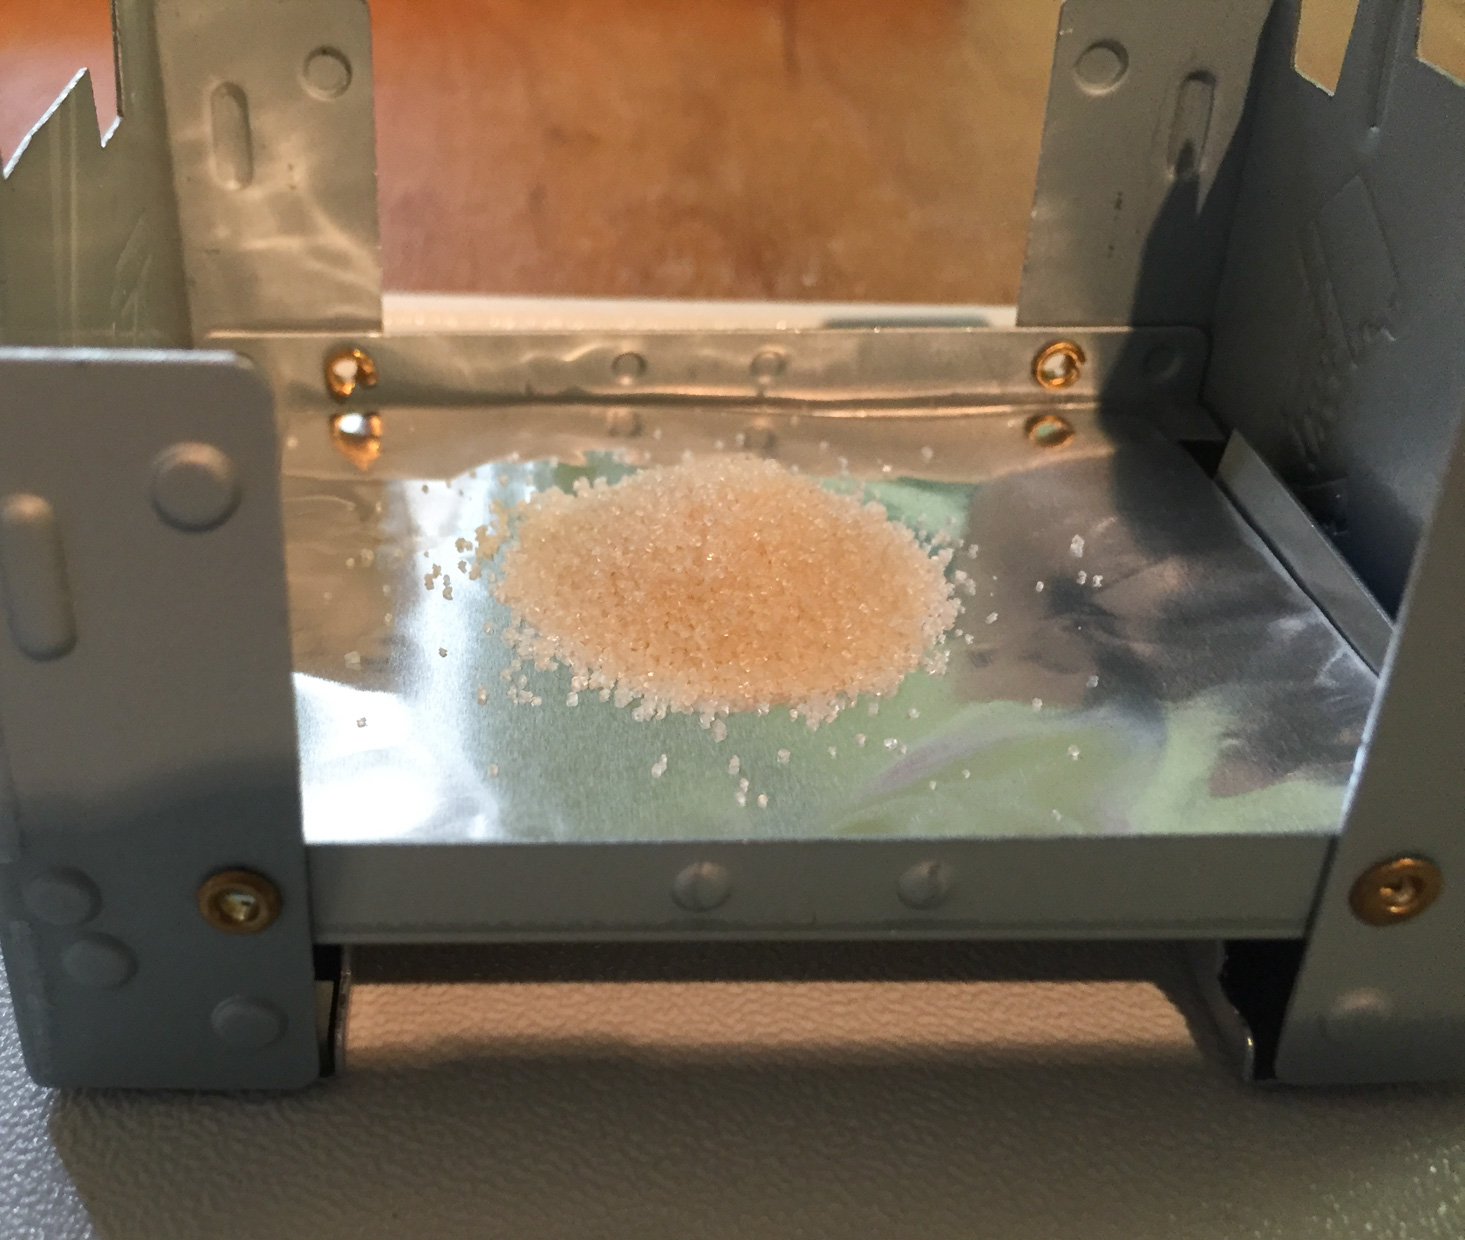
Our second experiment was to create a sugar snake!
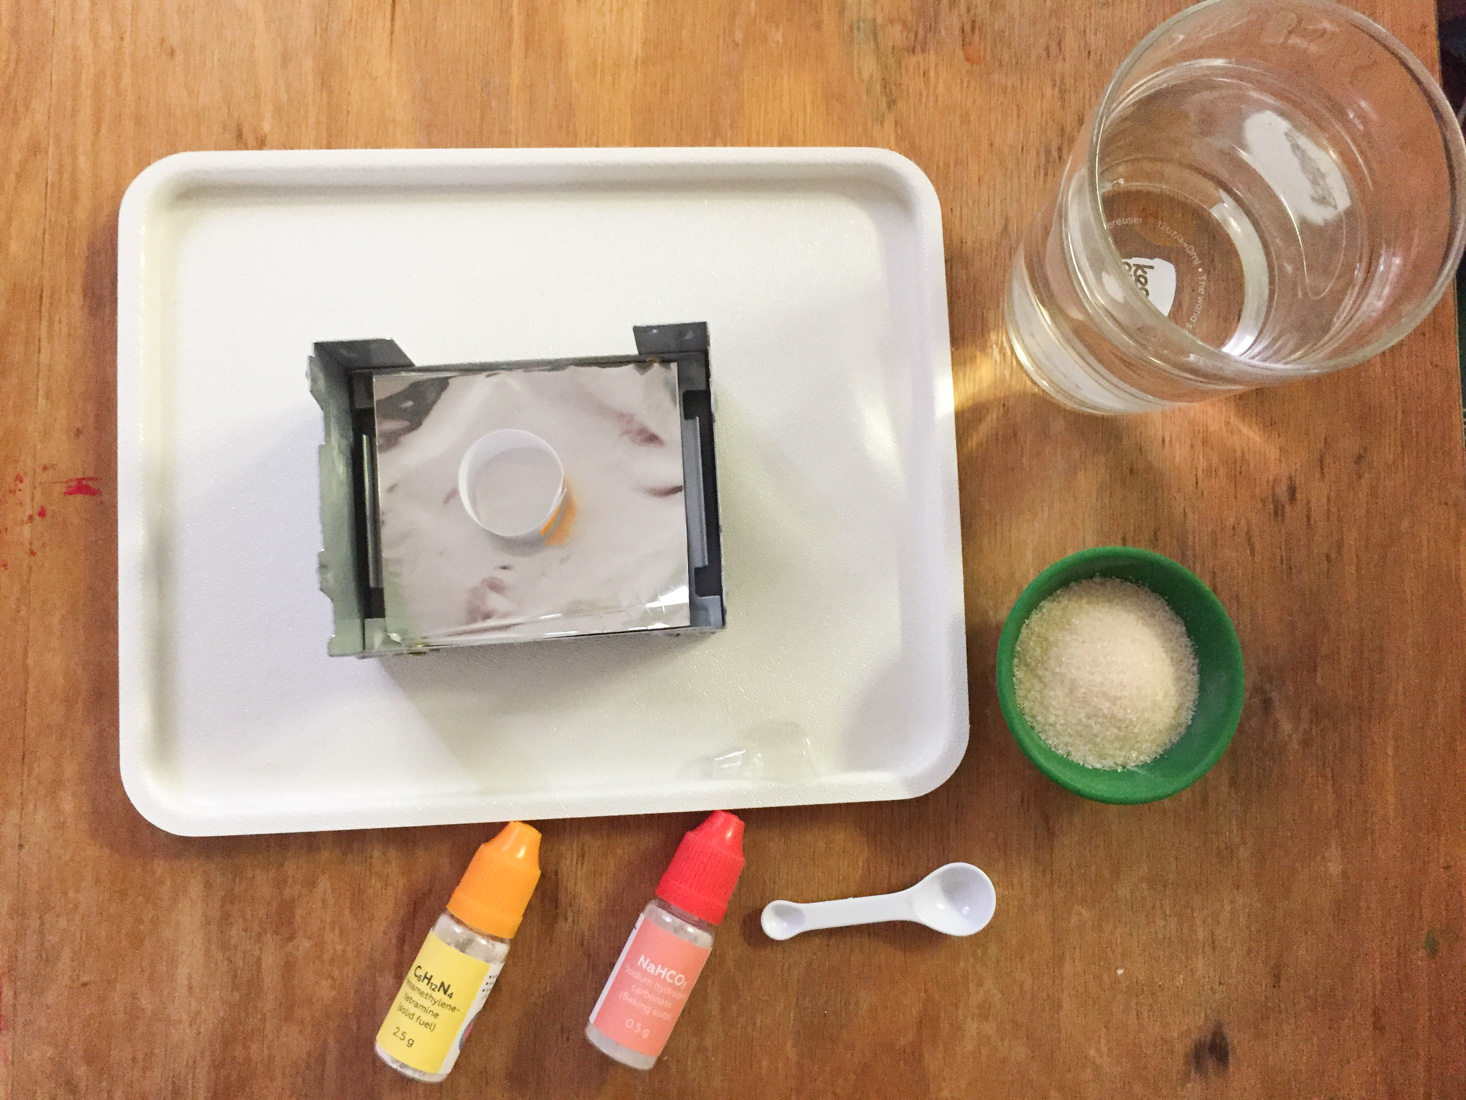
This was our setup for the sugar snake experiment.
We placed a clean foil liner on our little stove. We then made a little paper tube and filled it with solid fuel. Then we dug a little hole in the middle with the scoop provided.
We then mixed some sugar with baking soda and poured it into the tube. Then we set it on fire!
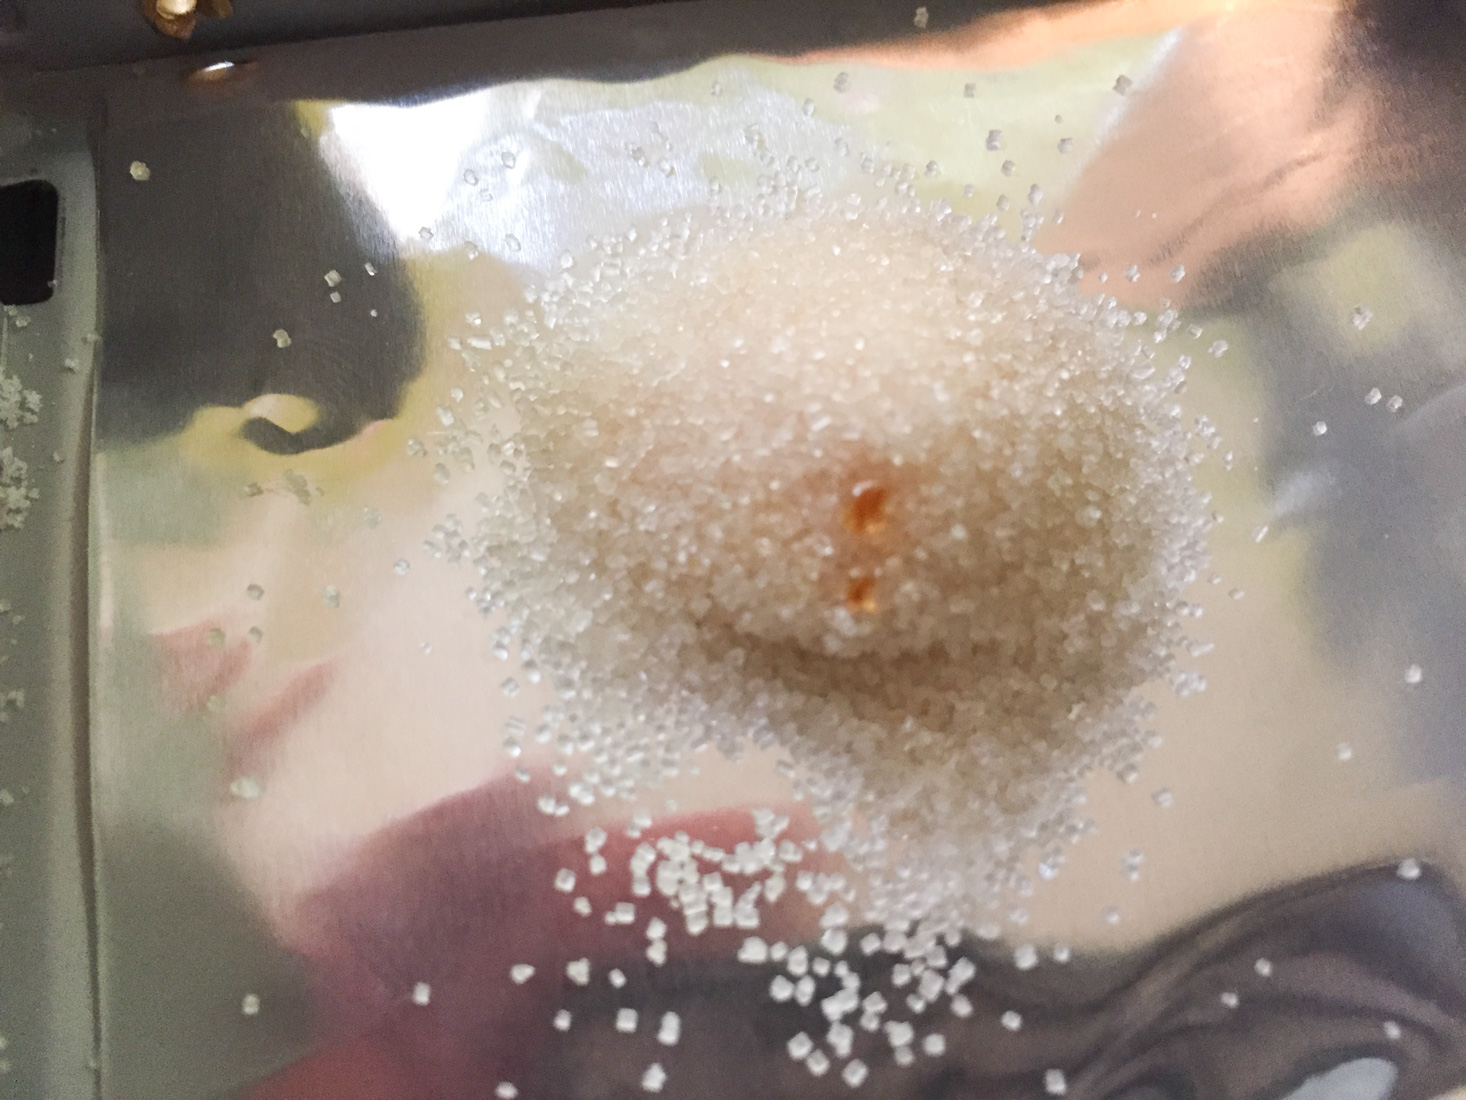
Here's the snake as it starts to grow...
... and grow...
... and grow! It got quite long! We have seen this type of reaction before in "fireworks" snakes, and now my son knows how it works!
Our second set was "Chemistry of Tin."
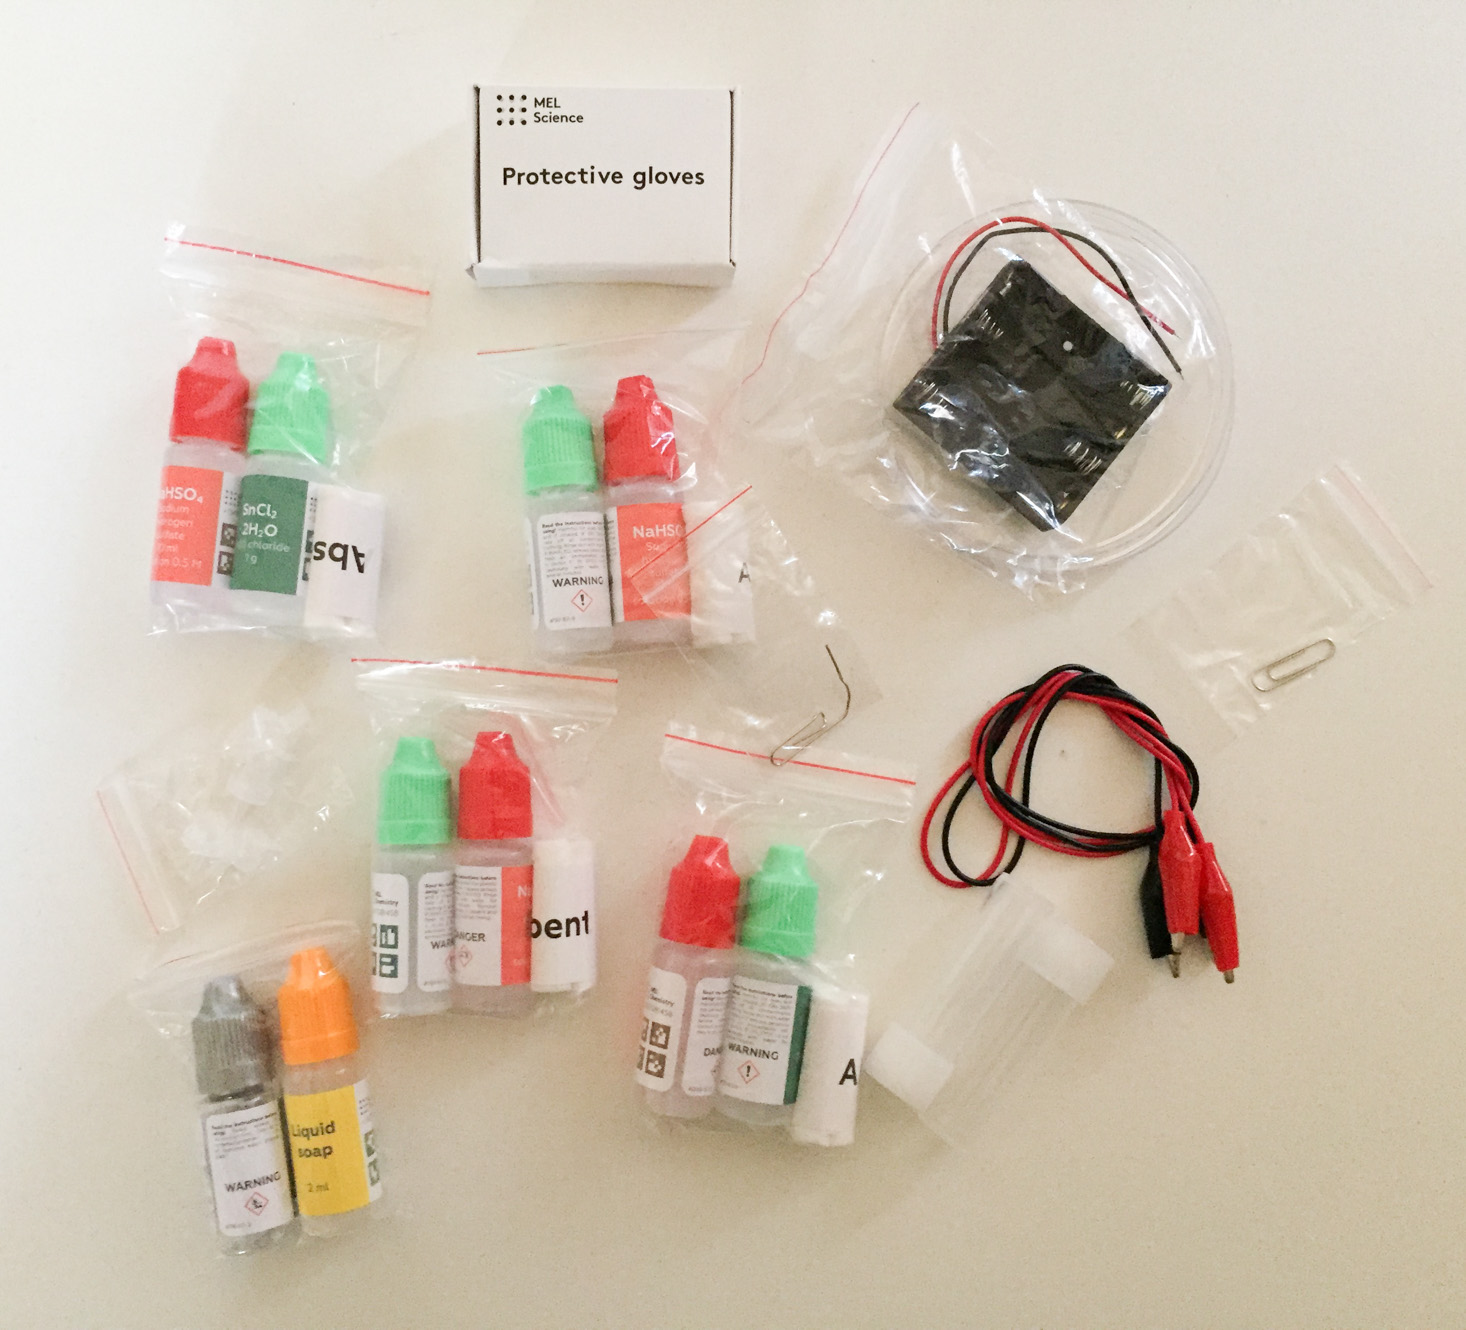
These are the supplies that were included. For this set, we needed three AAA batteries from home.
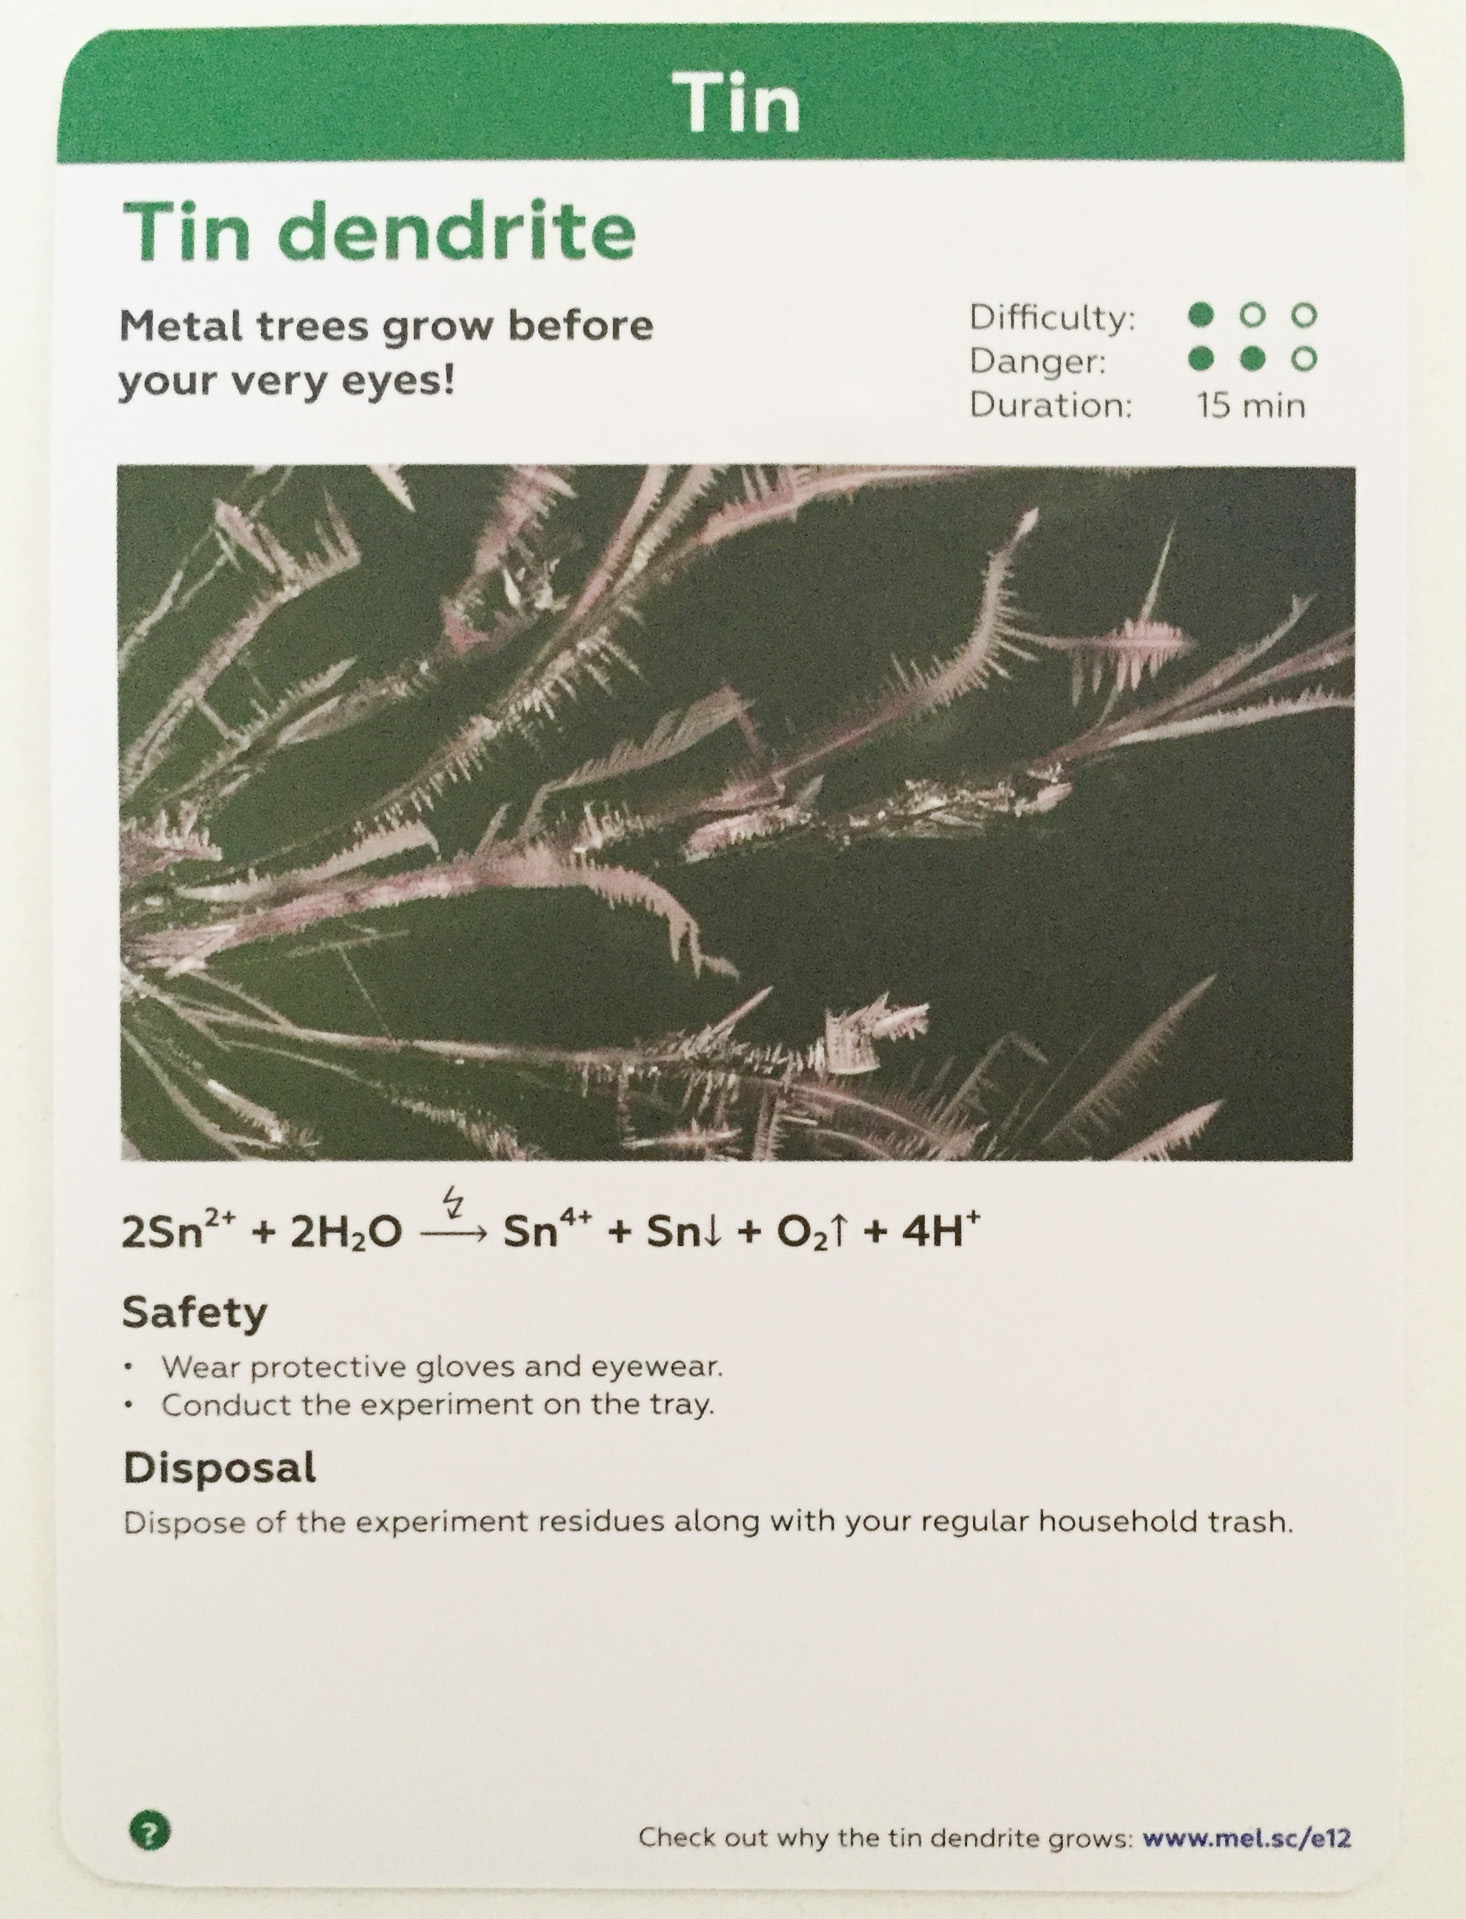
Our first experiment in this set was creating tin dendrites.
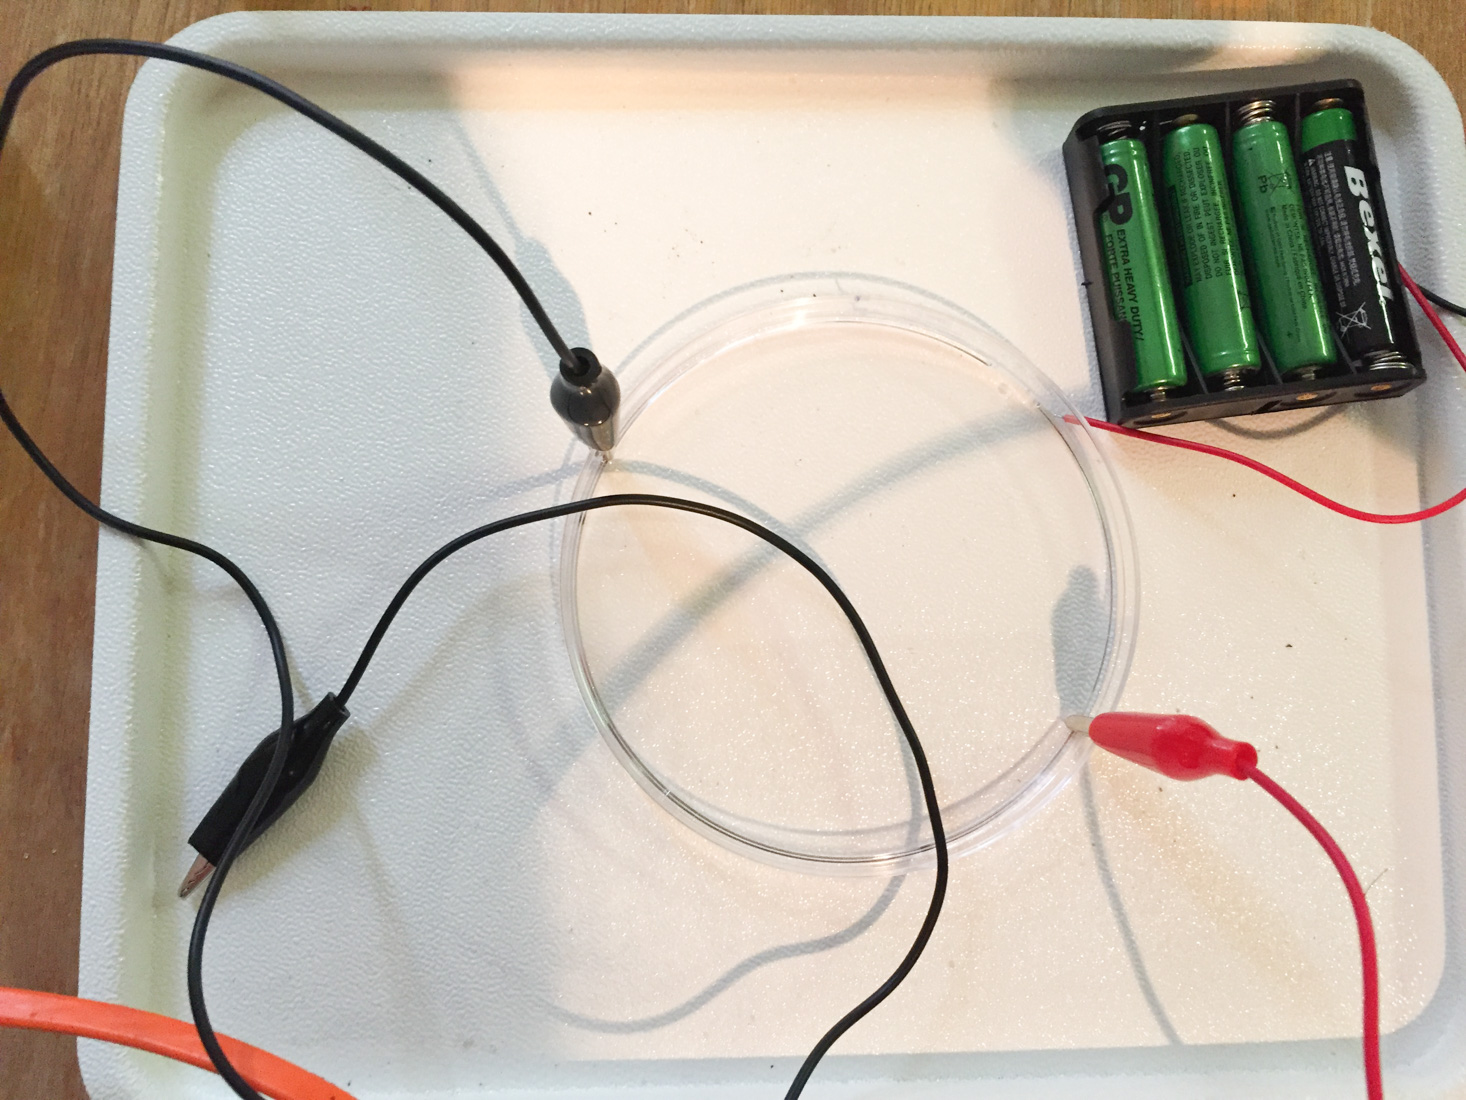
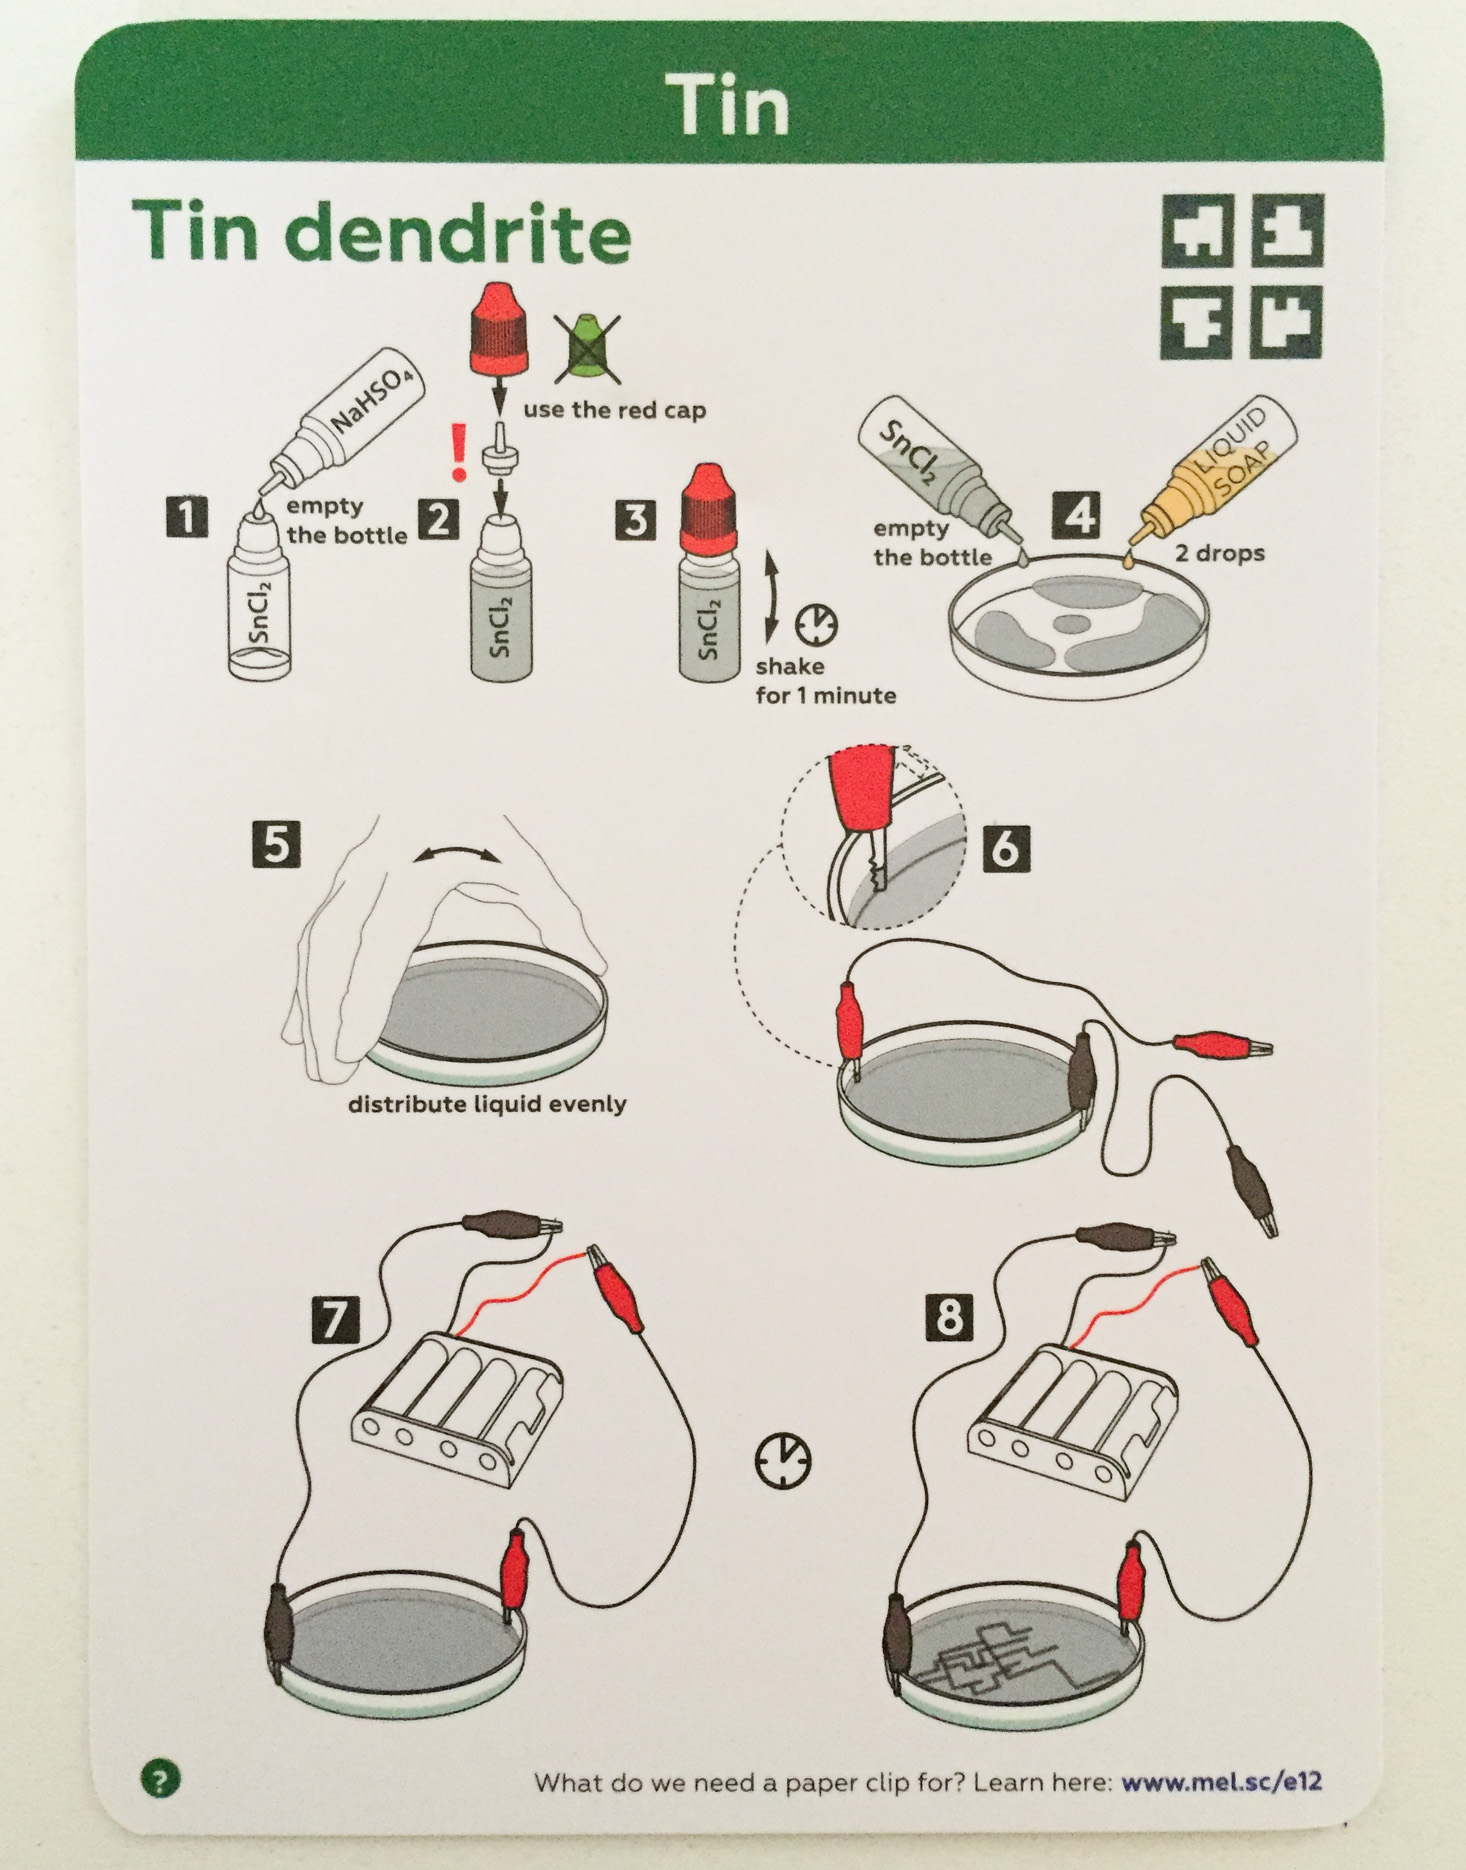
For this experiment, we loaded the batteries in the pack and put alligator clips on either side of a Petri dish.
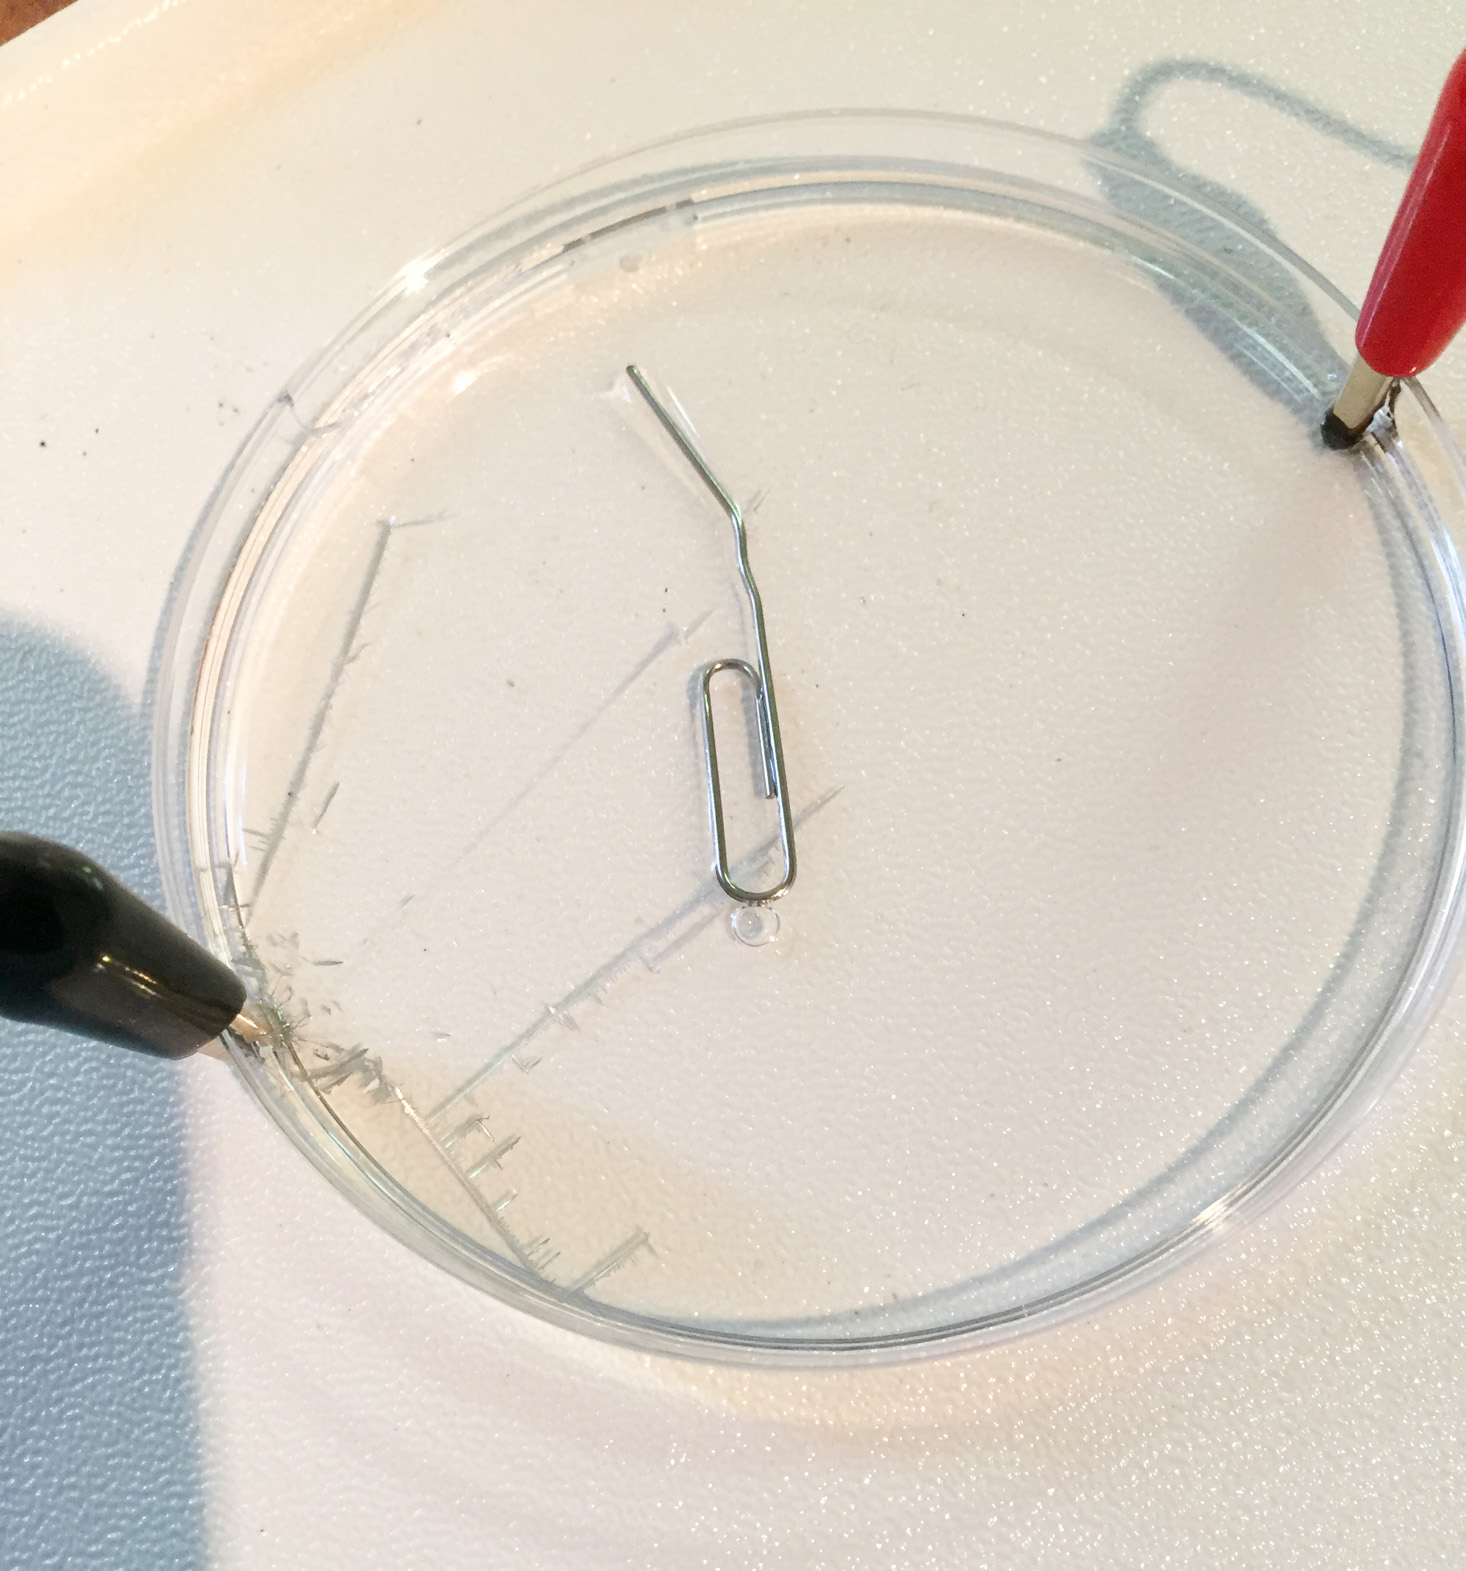
We then mixed tin chloride with sodium hydrogen sulfate and poured it into the dish. Then we attached the alligator clips to the wires on the battery pack. The electric current running through the liquid caused a push of electrons, which made the tin dendrites grow from left to right. When the clips were reversed, the dendrites grew in the other direction. Cool! We also added a paper clip in the middle at one point to watch the reaction start at that point as well.

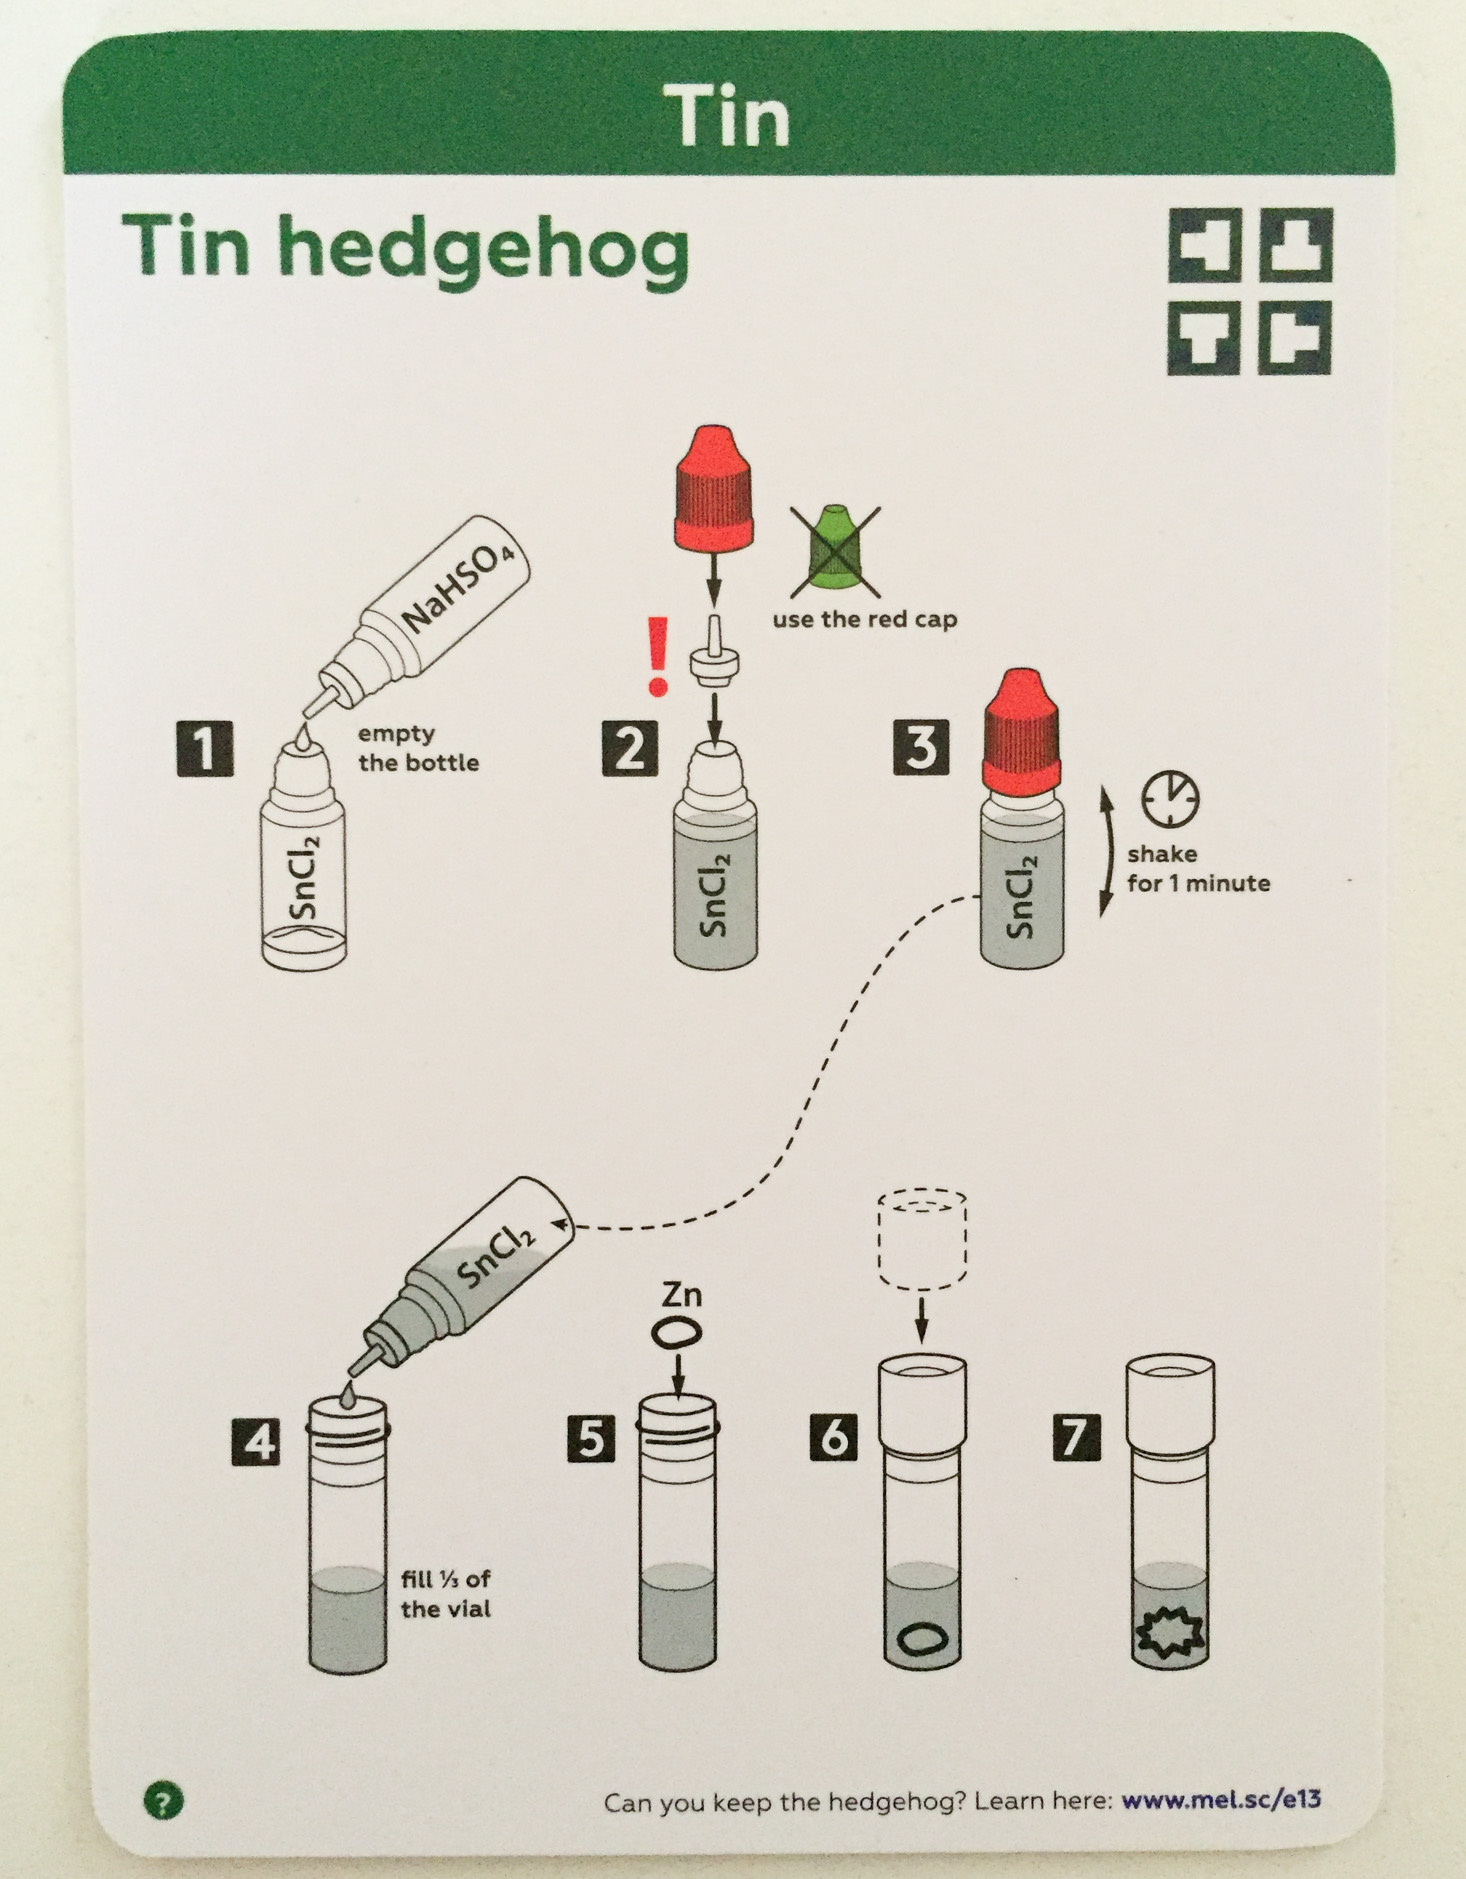
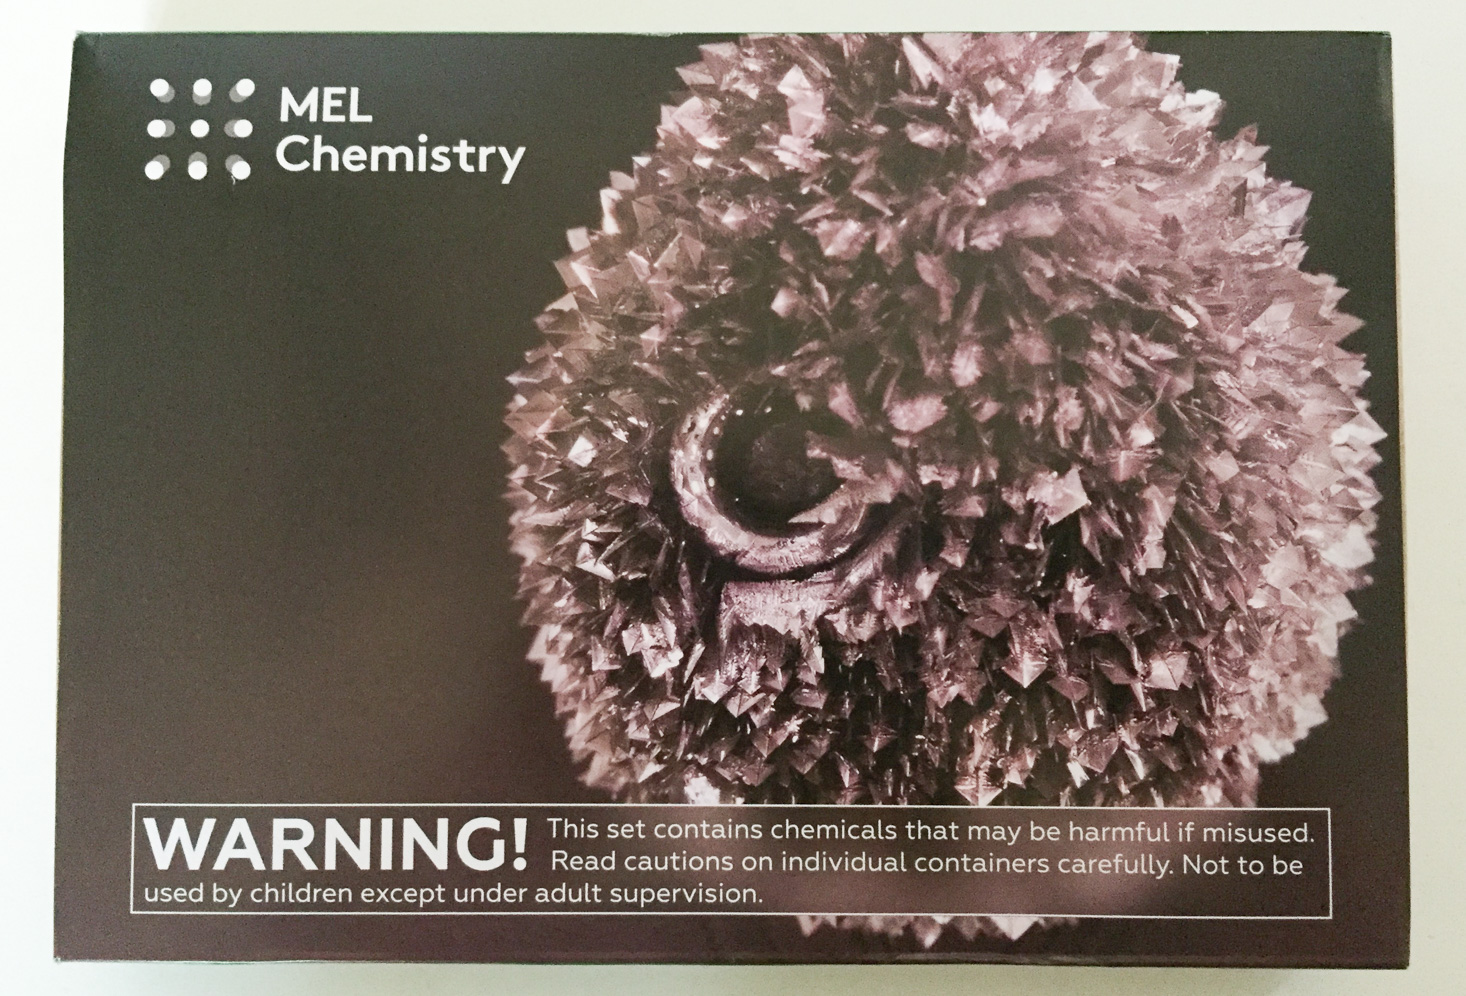
Our last experiment was to create a tin hedgehog!
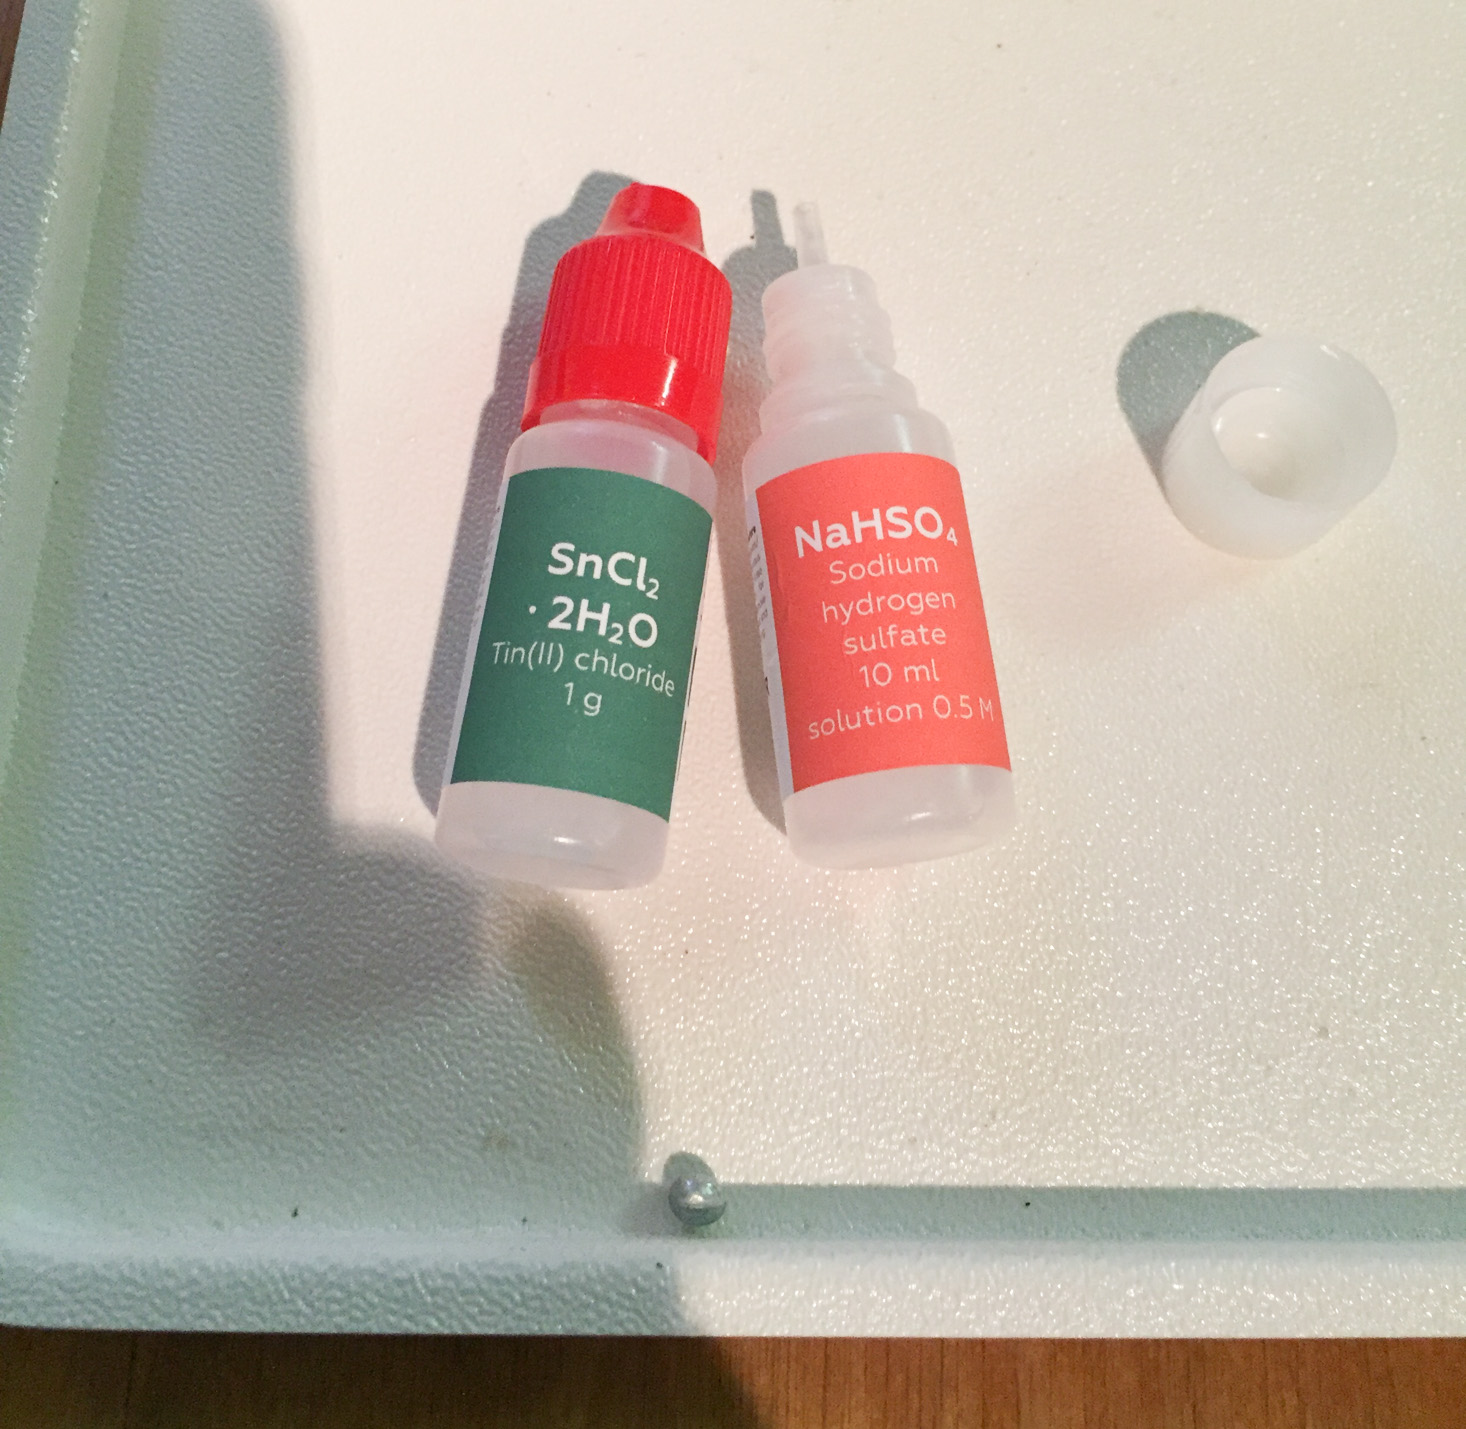
This was our setup for this experiment. We started by mixing the tin chloride and sodium hydrogen sulfate.
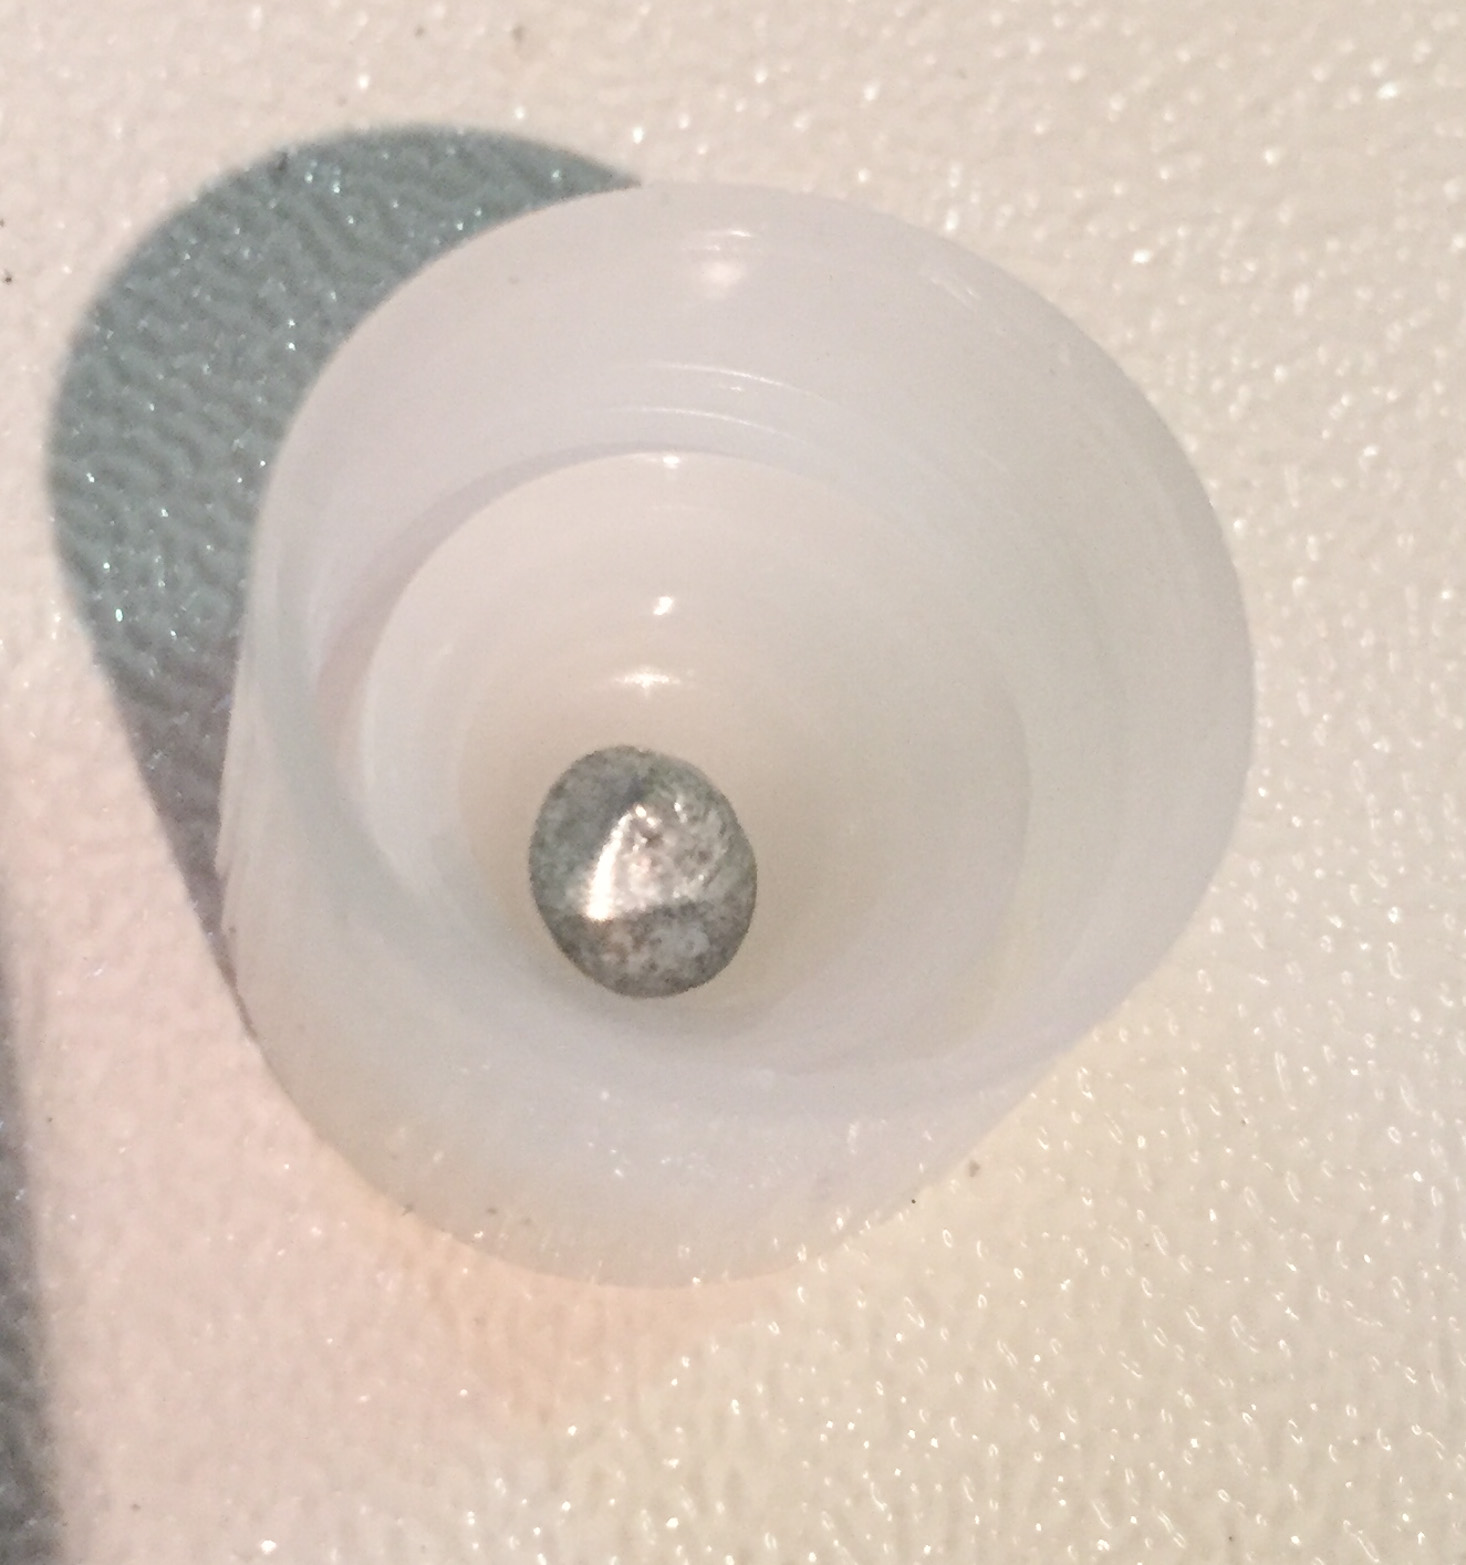
We then put the little piece of zinc in a cap and poured the solution over it.

The starter kit came with this micro lens clip, which we put over my phone's camera lens to take the following picture.
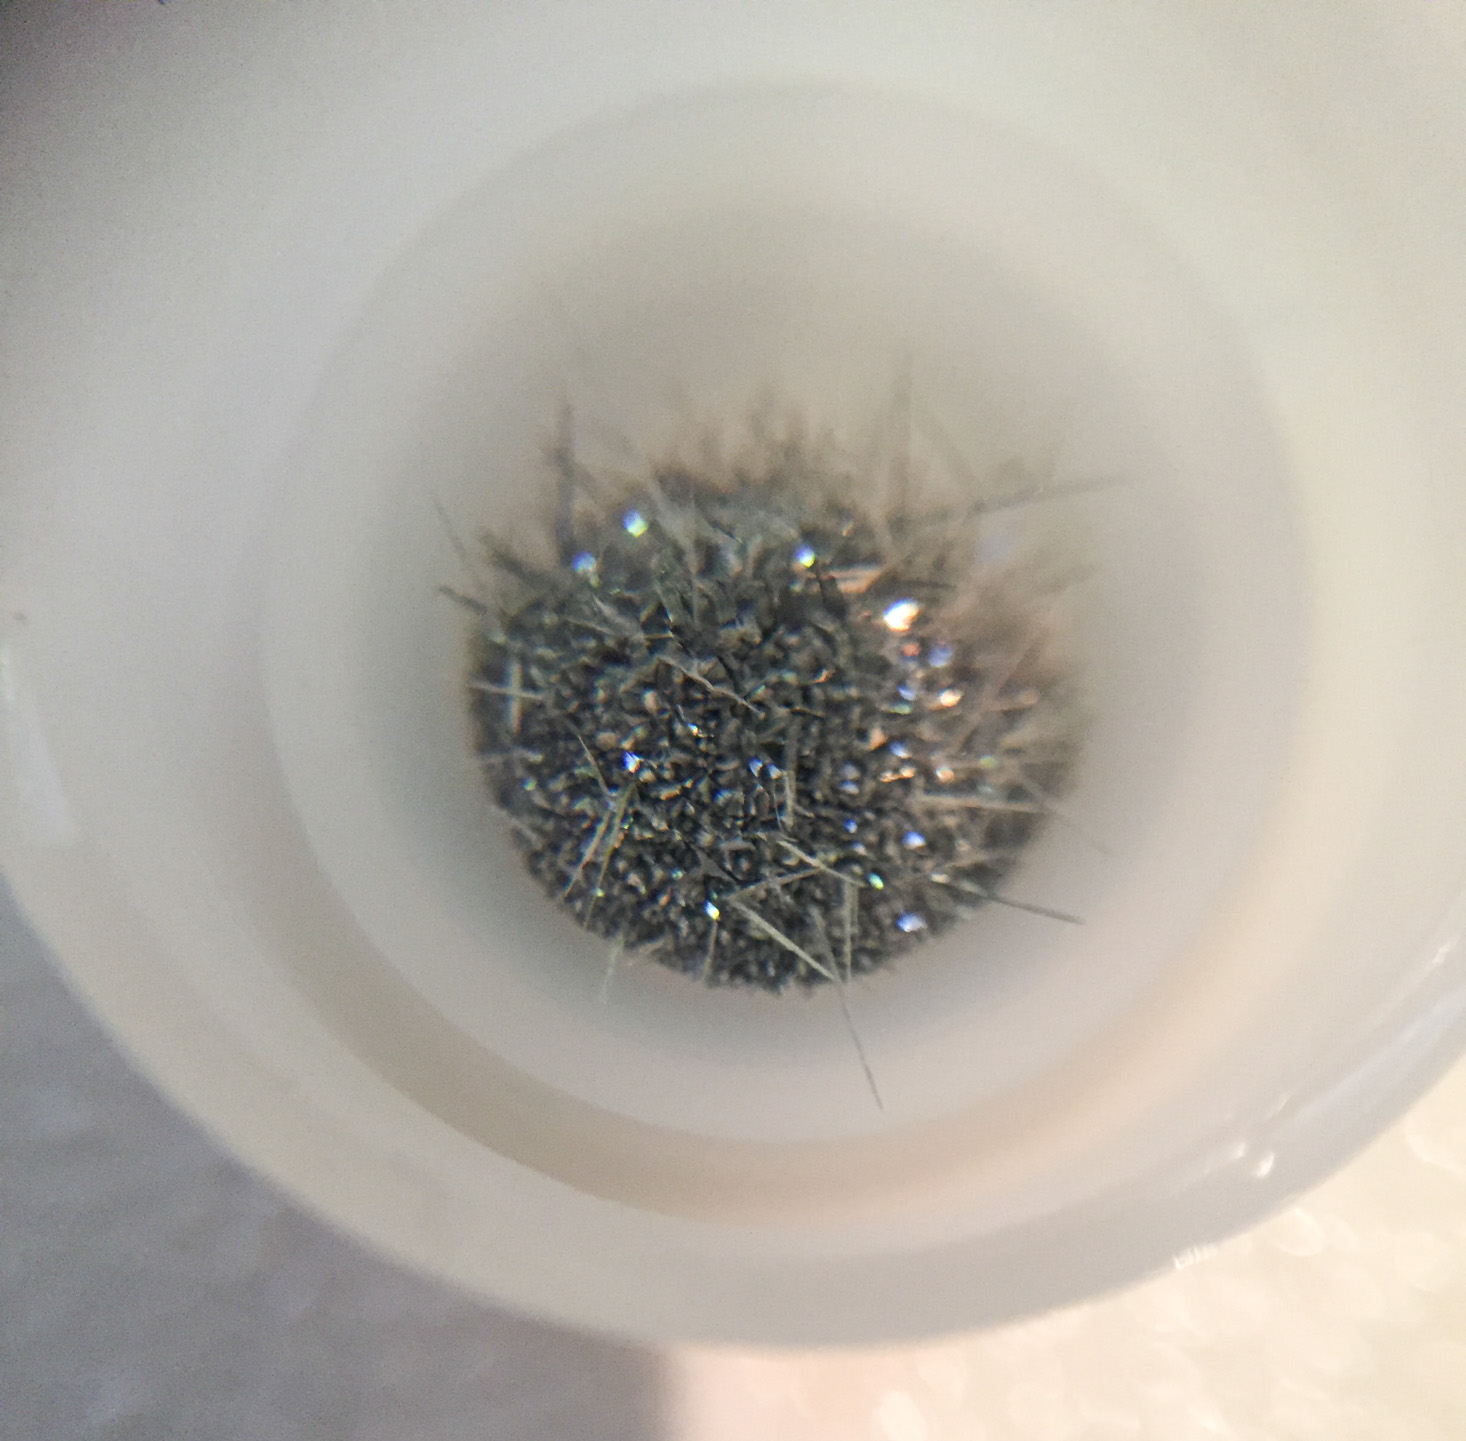
Here's an extreme close-up of the finished product. Our tin hedgehog grew loads of quills!
Verdict: Wow, I'm pretty blown away by our first box from MEL Chemistry! We received an awful lot, and all the items that were included with the starter set have us ready for a year or more of chemistry! The experiments were also very cool! My son is a little young for this subscription, so I had to help him out a lot. I actually think 12 may be a little young, but perhaps a very mature and motivated 12-year-old would do well with it. I obviously had to help my son a lot, but I think a teenager would do fine with this subscription. I think it's incredibly educational, and would be a big help to students learning chemistry. We had a fun time trying it out!
What do you think of MEL Chemistry?

Please do not enter your email address in the Name field or in the comment content. Your email address will not be published. Required fields are marked *. Remember to post with kindness and respect. Comments with offensive language, cruelness to others, etc will not be approved. See our full comment policy here.