


Sometimes an eyeshadow palette comes along and it is complete perfection. You know that you can use it most days; build a daytime look, then go a shade darker to use for a night out or special occasion. And then there are times when a palette arrives, and the shades feel so wrong for you.
I felt the latter after receiving my June So Susan Color Curate Bag palette. The colors were so bright and bold, I didn't see a single color that I could use for an easy day vibe, and they felt way too bright for an evening look. Following my last eyeshadow tutorial and review of the June So Susan Color Curate Bag, your requests for another How To round were heard! I called in the help of my mom, professional makeup artist and owner of Esthetics of Sewickley Salon and Spa, to help all of us navigate this oh-so-bold palette. Trust me, she worked wonders. I learned so much on how these colors can work during the day or at night. Let's see how this makeup lesson went!
Jelly Pong Pong Cosmetics Biosphere Vegan Eyeshadow Palette


1 of 5

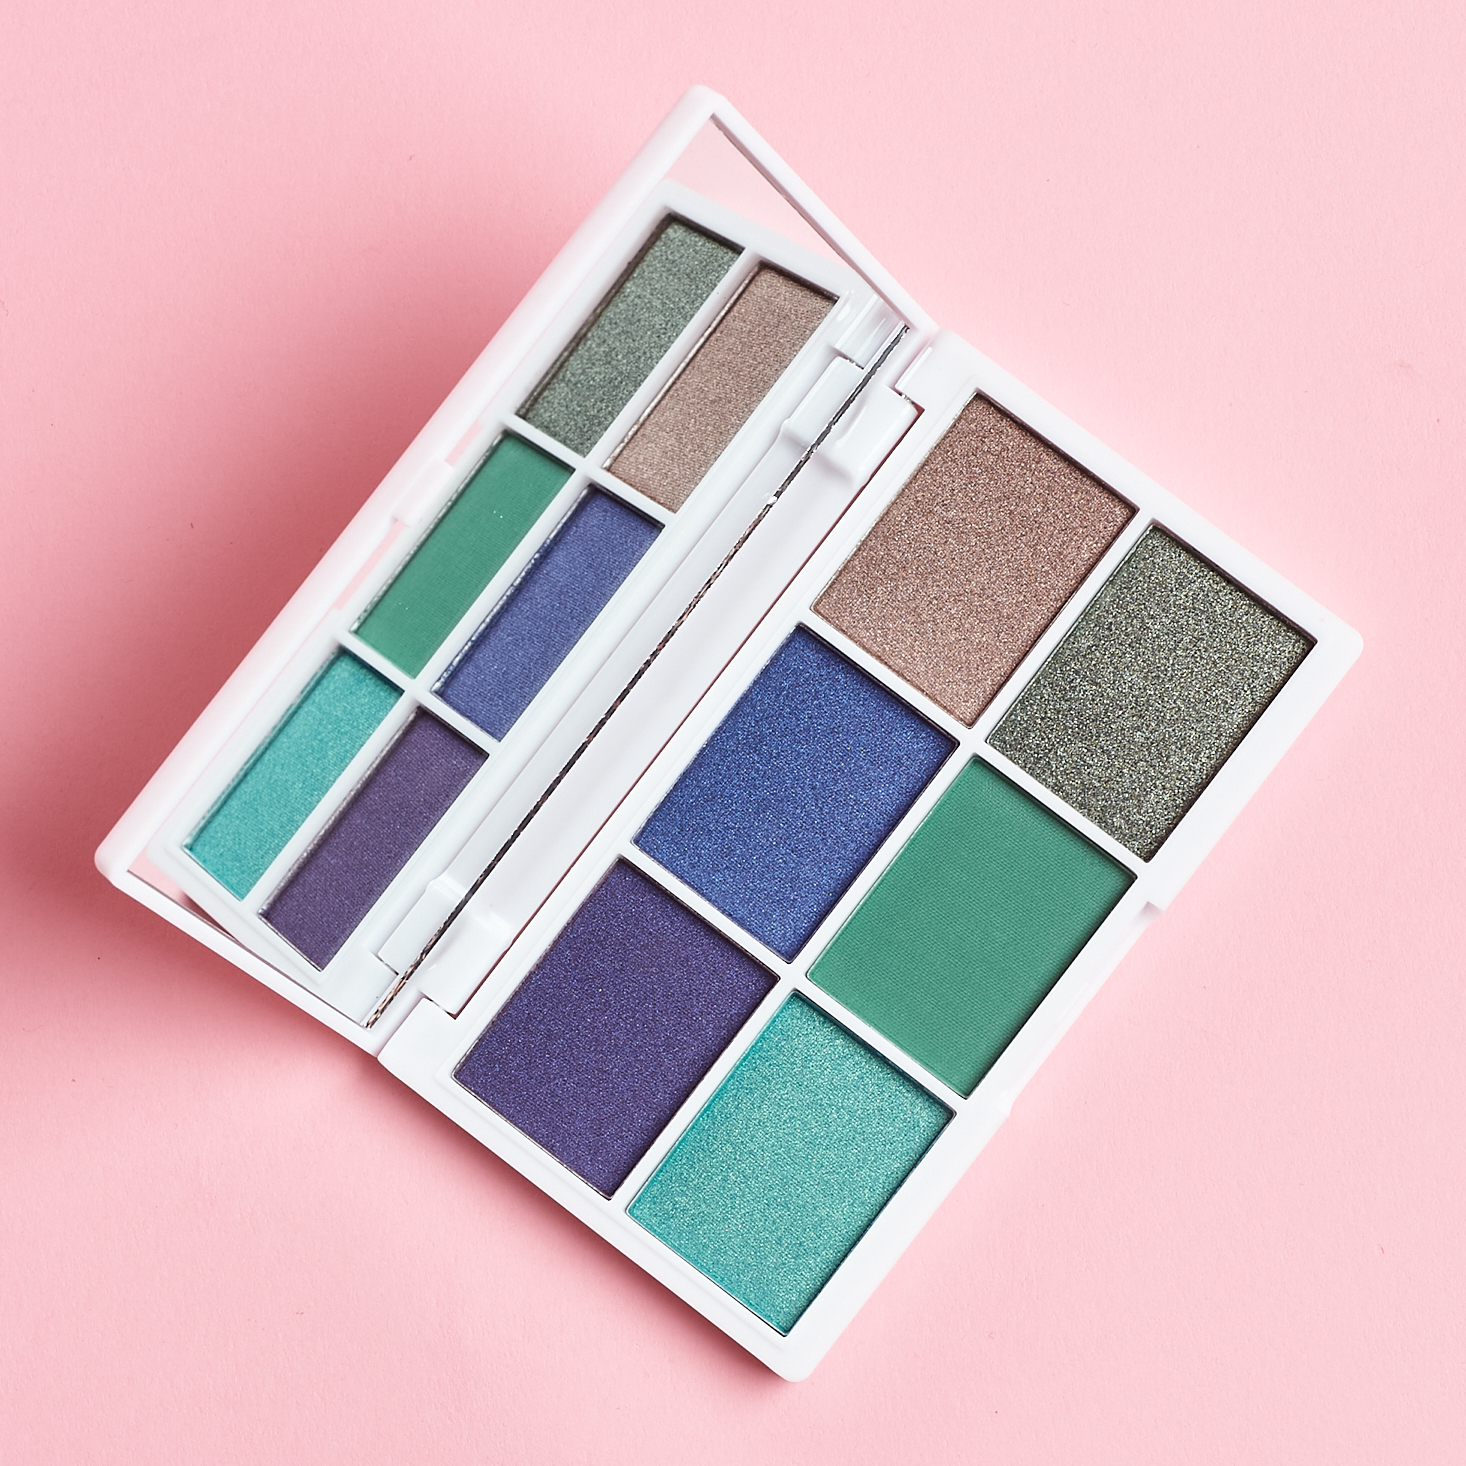

The Product: Jelly Pong Pong Cosmetics Biosphere Vegan Eyeshadow Palette
The Cost: $38.00
The Matchmaker: So Susan Color Curate
I normally love the palettes that I get each month from this box, but I was not feeling these shades. The Jelly Pong Pong palettes are always beautiful and so well made. They are vegan, plus the colors are highly pigmented while also blending well. They do have some fallout though, so always be sure to test these on your arm for that before using. I will say that this palette had a lot more fallout than others from this brand, perhaps due to its darker tones.

Here is a glimpse at the brushes, powder, mascara, and eyeliner that my mom used to create my latest look.

Beginning with a fresh face to start with, I did my typical skincare routine, and applied a little foundation and cream blush.

To create this look, we used only two colors from the palette. To start, my mom applied the lightest shade in the palette, which is on the top right corner. She used this as a base on the lid.

After testing the palette on her arm, she realized there was a lot of fallout from these shades since they are darker. She applied a powder under my eye to help keep the area clean from any fallout.

My mom then moved on to the second color that will create this look, which was the center shade on the top row that is more of a blue/purple hue. She started by applying this shade at an angle, coming off of the outer eye, moving it in an upward motion towards the end of the eyebrow.

As she started working more with this shadow, her biggest suggestion was to tap the brush to get any excess shadow off before applying. She also suggested that you should start the application by gently pressing the shadow in before doing any sort of big movements to blend-- this will really help with the fallout and give you more control, so that you don't end with a big smudged mess over your eyelid. This technique was used in her next step. She tapped off any excess shadow before gently pressing the shadow in from the edge, and then began to lightly blend over the entire lid.

After pressing and blending to cover the entire lid, she got more of the shadow on to the brush, and tapped the majority of it off of the brush to ensure less fallout, allowing her to blend without adding too much more of the shadow. She went in on the eyelid to blend the shadow line in an upward motion to give it a smudged look. This really allows you to smooth the line, so the color doesn't look so harsh, but also creates a smooth, smokey look. This is a great technique to use if you want to create an evening look.
You can see thecircular blending motion that she uses to blend the line. This also really helps to life and open the eye.


1 of 2
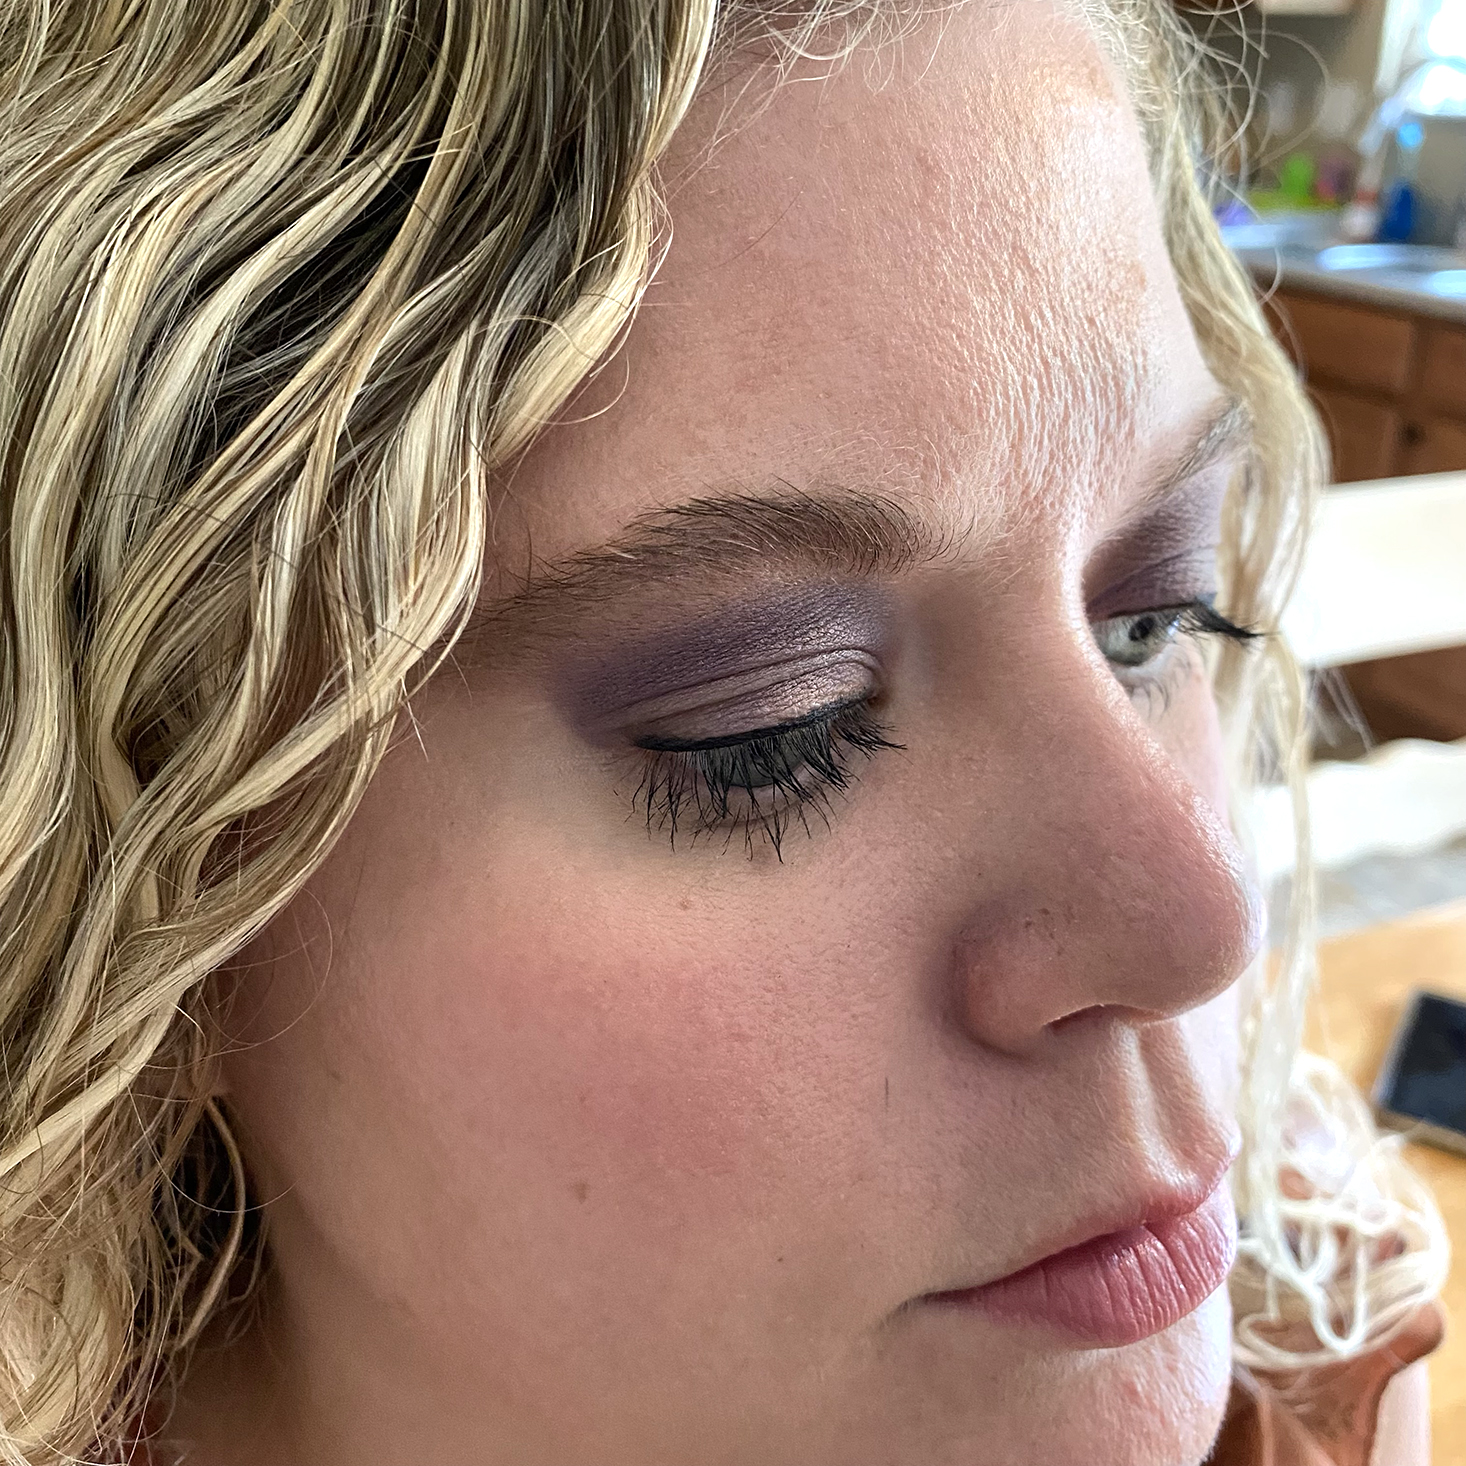
As the final touch to the shadow, she went back with the lightest copper shade, and pressed it gently into the middle of the eyelid. This technique won't work for all eye shapes, but by adding a highlight to the center of the lid, you bring focus to the center of the eye, which makes it appear larger. She also added a bit of the copper tone under the eyebrow to add a bit of a highlight.
Finally, she finished this look with eyeliner and mascara. She started by applying the eyeliner, and then used an eyebrow pencil to smudge the liner to make the line less harsh. For the mascara, she applies it by starting at the top of the upper lashes, and then doing the bottom side of the upper lashes to make the eye appear fuller.

As you can see, this shadow really went on more like a purple shade, while it looks very blue on the palette. My mom said that by mixing this dark shade with the copper, you are able to create a more dusty purple hue, rather than a harsh bright tone. The biggest takeaway from my mom was that we shouldn't be afraid of palettes, but we also have to remember that you don't have to use a ton of colors to create a fun look. You also don't have to use just one color to create a daytime look. It really is all about the blending; this will make it look like you have more colors on (or that you spent more time on it than you actually did!). Technique is everything, even when using only two colors.

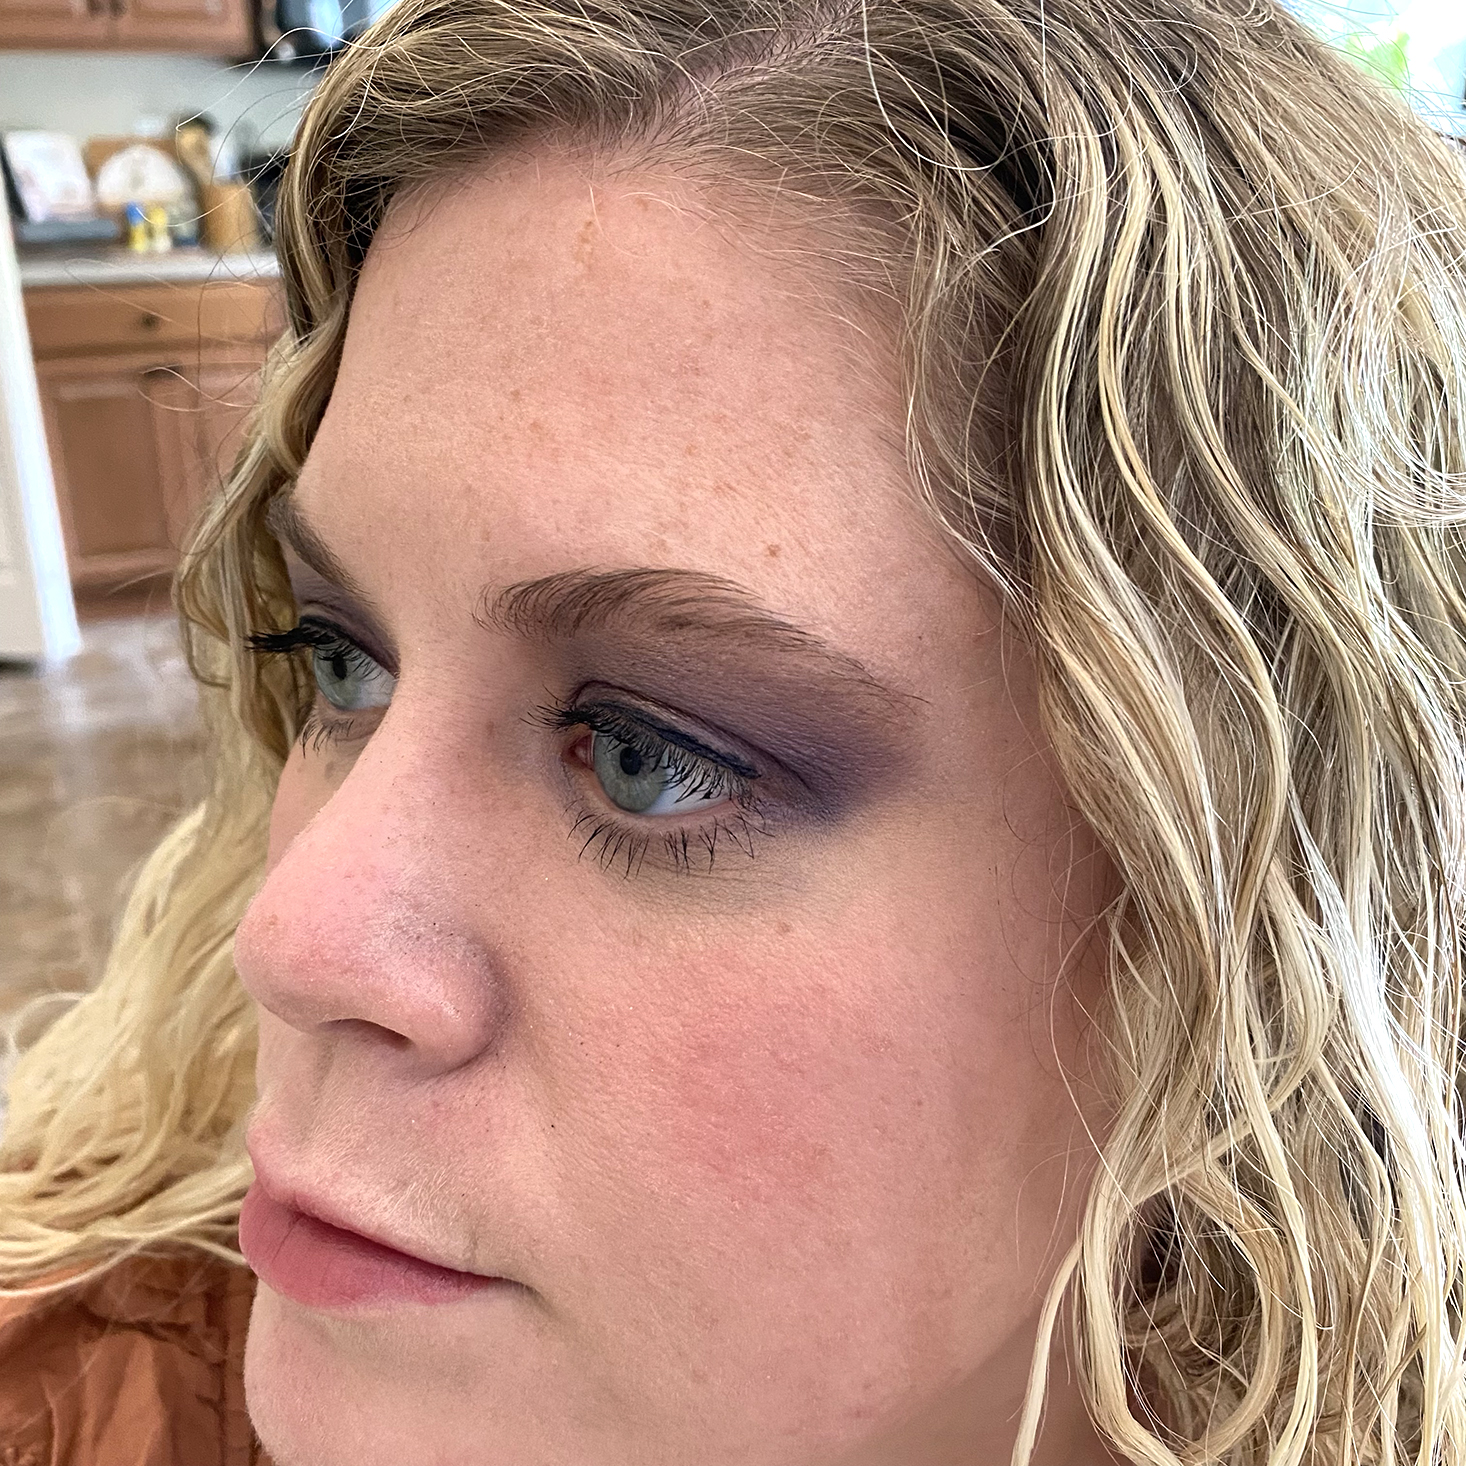
Since our first look was with two shades, my mom wanted to try the same blue/purple shade (center top row) on my other eye on its own. You can really see the difference between the two eyes in this photo and that without that copper tone-- this color really is more bright and bold with hints of blue and purple. She started this eye by pressing the color into my eye from the corner, up towards the edge of my eyebrow.

She used circular motions for this next step along the crease of the eye to blur the harsh line. She went in an upward motion (similar to the video), towards the end of the brow to lift and open the eye.

She finished by patting some of that copper tone into the middle of my eye to help give me more of a pop, and to match my other eye a bit more. She did note that the coverage was just not the same with this shadow when she didn't use the copper tone as the base. The color didn't go on as well; it was very vibrant, but the lines were harsh, and it was also very hard to blend, which is why it is so important to use that pressing in motion to start.

1 of 3
This look was completed with eyeliner and mascara, both applied the same way that she did for the other eye. You can see both looks here a bit closer. They look similar with slight differences, but the key contrast is that you can really see that beautiful blending. It didn't take much and it didn't take long for her to create these looks, but I think you can see the technique and the attention to detail here.


1 of 3

I wanted to take a final look photo in a few different locations to see how this shadow looks in various lighting. Both of these looks are very similar to how I did my makeup every day in high school and college. I was big into purple eyeshadow, and this sort of reminds me of that confident girl that rocked a smokey eye just because I was going to school or to cheer at a Friday night football game. It also reminded me that you don't have to spend a ton of time to look like you spent a lot of time doing your makeup. One or two shadows and a lot of blending are all it took to create these two fabulous looks. This might be too much or too dark for some people to wear during the day, but no worries, this is the perfect smokey look that you can use for a night out or a special occasion. Add more of a cat-eye to really spice it up! My biggest takeaway from this lesson with my mom is that you need to blend, blend, blend!
Would you rock this look? Let me know in the comments how practicing these techniques goes for you at home, and be sure to follow more how-tos with me and my mom! And as you curate your shadow collection, be sure to check out some of our best beauty subscriptions of 2021!

Please do not enter your email address in the Name field or in the comment content. Your email address will not be published. Required fields are marked *. Remember to post with kindness and respect. Comments with offensive language, cruelness to others, etc will not be approved. See our full comment policy here.