


BoxyCharm is a popular full-size beauty and makeup subscription box. (Check out our full review of the December 2020 BoxyCharm box to learn more about each of the items this month.)
Today, I’ll be showing you how I used some of the items in my December BoxyCharm box! I’d love it if you shared what products and techniques worked for you in the comments as well! What items were your favorites? Which products have you been reaching for all month? Let’s talk about all things December BoxyCharm.
But first, here are the box basics:
About BoxyCharm
The Subscription Box: BoxyCharm
The Cost: $25 a month
The Products: 5-6 beauty items that will include nail care, skincare, makeup, haircare, fragrances, and more. (At least 4 of those items will be full-sized).
Ships to: The contiguous US for free, Hawaii, Alaska, and Canada for $5

- Artist Couture Caliente Palette- Retail Value $ 30.00
- Glamnetic Bella Lashes & Black Liquid Liner - Retail Value $63.00
- Elemis Superfood Glow Priming Moisturiser- Retail Value $49.00
- Viseart Seamless Eye Primer- Retail Value $24.00
- Butter London Melt Away Cuticle Exfoliator- Retail Value $18.00
This month's boxycharm theme is “Bubbles & Glitz”, a fun reminder of the holidays ahead. I’m hoping this month we get something special that will scream happy holidays. Let’s jump in and see what’s in store.

Butter London Melt Away Cuticle Exfoliator- Retail Value $18.00
Our first product is from a very familiar brand called Butter London. It's their Melt Away Cuticle Exfoliator. It’s been a while since we have received a product for nails, so this is nice to see. This product is made to gently remove excessive cuticle growth in a pain-free way. It's pretty easy to over cut your cuticles and end up causing more harm than good when using sharp tools, so I’m glad to see that there is a safer way to remove dry and thick cuticles. This formula makes it much easier to push cuticles back and achieve healthier looking nails.
To use I simply used the brush and painted a small amount of product on top of each nail and cuticle. The product suggests you leave it on for a full two minutes before you push the cuticle back with a cuticle stick. The product has no smell and since it's not too thick, it went on pretty easily. I also noticed that there was a small tingle to my nails as the product was working. After two minutes, I pushed my cuticles back and noticed how easy it was to do so. With so much going on, it's pretty easy to forget and overlook the health and care of our cuticles so I’m glad to receive a product like this. I think it’s a pretty good product that I will definitely be using on a regular basis.

Elemis Superfood Glow Priming Moisturiser- Retail Value $49.00
Our next product is from Elemis, a top quality brand that Boxycharm has sent us products from many times before. This time we received their Superfood Glow Priming Moisturiser. This product stands out because it's a multi use product that serves many different purposes. This product can be used as a daily moisturizer, a makeup primer, or as a highlighter to enhance either certain areas of your face or your entire face. There are loads of special ingredients such as fermented green tea seed oil that helps to nourish your skin and an active prebiotic which helps to protect your skin. Since I will be adding my own primer, I choose to use this as a moisturizer today.
It's a lightweight peach serum that has a slight sheen to it for highlighting purposes. There is also a fragrance to the product that could either be pleasant or bothersome to some depending on who you are. However, the fragrance is 100% all natural and comes from the kombucha and ginger which is also inside the formula. It’s also pretty simple to use, I added a pea size amount to clean dry skin and used an upward motion as I applied it. If you plan on using this as a highlighter, then you will be placing the product on certain areas you would like to highlight and enhance. What I love about this product is how a little bit goes a long way and how it adds a slight glow to my skin that's non-greasy. I plan on using this more often and cant wait to see how it will look as a highlighter.

Here is how my face looks with this product worn as a Moisturiser.

Viseart Seamless Eye Primer- Retail Value $24.00
I was super excited to receive our next product because if I haven’t mentioned it before, I am a primer junkie. I love all primers from face to eyes and more. I especially love to try out new primers from different brands. This particular primer is from Viseart a company with which I am not familiar. It's their Seamless Eye Primer and I can't wait to give this a try. This primer is made to extend the wear of whatever eyeshadow you use and to also prevent them from creasing. I have very oily skin and eyeshadow primers help me a lot. I also like to use a little bit of setting powder after using an eyeshadow primer but in order to give you guys a good review, I skipped that step.
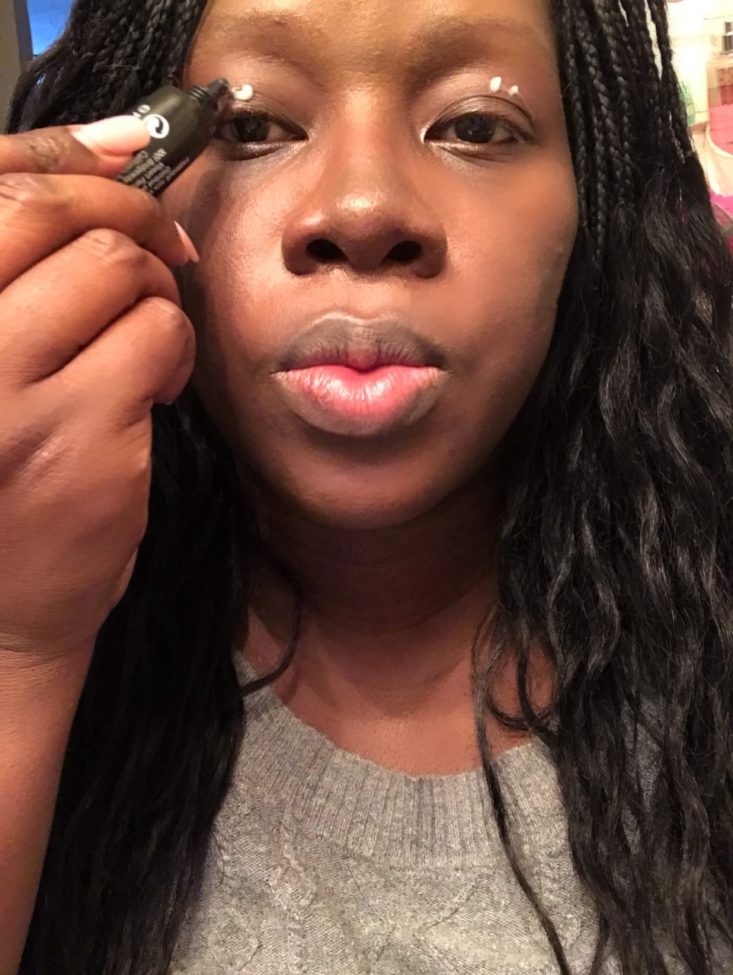
I used the nozzle tip of the product to place a few dots of primer onto each eyelid. I patted the primer into place using my fingertips and I noticed how quick it dried down. There is no scent and the product itself isn’t too thin or too thick. I will give you guys my opinion later after I use the eyeshadow palette on top.

Artist Couture Caliente Palette- Retail Value $ 30.00
Our next product is from Artist Couture and it's the Caliente Palette. This palette has eight very vibrant shades mixed with five mattes, two metallics, and one high pearl shade. The first thing that came to mind when I saw this palette was a holiday makeup look. Something that can be worn to any Christmas party either in person or on zoom. I wanted to create a look that would stand out but also simple to create.

For this simple eyelook, we will be using four shades from this palette and a matte black from another shade. Let’s get started with our transition shade and a medium flat and fluffy brush. I will be using the shade “ Sensual”. It's a burnt orange shade that we will be placing on our entire lid area.

Here is how that transition shade looks alone.

Next, we will be using a medium fluffy brush and the shade called “ Mamacita”. I placed this shade right on top of the first shade, also going above the crease area and slightly above it.

This is how that shade should look and where the color should be placed. It's a deep fuschia shade that pops on any skin tone. I know right now it may look like a bit too much color but trust me, it will come together nicely once we're done. I did experience a tiny bit of fall out with this shade but nothing too bad or hard to clean up. I find that using a q-tip dipped into micellar water makes any fall out super easy to clean up.

Now it's time to add some holiday shimmer to this eyelook. To do this I sprayed a tiny bit of setting spray to my finger and patted the shimmer shade,“ Brillo” to my entire lid. This shade comes to life against that matte fuschia shade and I’m loving it! After placing that shimmer shade on, I grabbed a dense fluffy brush and blended the shade out evenly. I made sure to use windshield wiper motions when I hit the crease area.

Here is how that shimmer shade looks on top.

Next, we will be using a matte black shade from another palette to place on the outer corners of our eyes. I used a small dense brush to do this. I love to add my darker colors to the outer V area of my eyes, I think it meshes the colors together blending from bright to dark.

After filling in my brows, we finally go back into our palette to finish this holiday eyelook. Using a small pencil brush I used our last shade “Mangorita”. It's a fancy gold shimmer shade that we are going to place under each brow and in the inner corners of our eyes. It's the perfect touch we needed to complete this simple five step holiday eyelook. After adding some black eyeliner and later lashes, this eyelook will be ready to stand out in any holiday pictures.
I love the way these shades were easy to work with and blend out, I honestly think that the eyeshadow primer we used before really helped the colors to pop and even blend out well. Hopefully, this primer will also help my eyelook to last as long as I need it to.
Before moving on to our final product, I completed the rest of my makeup. I added a face primer, foundation, highlighter on the tip of my nose and my cheekbones, and tons of setting powder for that flawless and blurred look to my skin. I also added a very bright liquid lipstick from Revlon (matte hot pink #609) to match my eyes.

Glamnetic Bella Lashes & Black Liquid Liner - Retail Value $63.00
I’m surprised to see our final product in this month's box. It's the new Glamnetic magnetic lashes and liner. I am hoping that these lashes are as easy as they say they are to apply because if I am honest, I happen to be really really bad at wearing lashes. I love the way fake lashes look on but I've never really been good at putting them on and I became so frustrated with lashes that I wrote them off altogether. I have seen tons of YouTube videos when it comes to these particular lashes so I am super excited to give them a try, but I must say I am a bit intimidated.

I began with the liquid magnetic eyeliner and to me, this was probably going to be the hardest part because I don't have a steady hand. Before adding the liner, I made sure that the lashes were cut down to fit my eyes. The majority of the videos suggested that one coat was not enough for the lashes to hold, so you should use at least three coats of this liner in order to get a decent hold.

I allowed the glue to dry in between all three coats, and on the final coat, I grabbed my handy dandy tweezers and simply placed each lash in place. I was super surprised at how easy they popped into place. I must say that I am very impressed with this product and so happy that we received it in this month's box. Since I am horrible when it comes to applying lashes, this was the perfect Christmas gift for me. I have been wanting to try this product out for months now, so thank you Boxycharm!

Here is my makeup look all completed and I think that the lashes came out nicely and they also look and feel natural. I hope you guys enjoy this holiday look and found it easy to follow. I also want to wish you all a Happy Holiday!
Verdict:
I really enjoyed this month’s Boxycharm and found it full of interesting and useful products. I always like to choose a favorite and this month that was pretty easy to do. I love the magnetic lashes and I’m so happy that I finally found lashes I can actually do myself! As always I can't wait to hear from you guys and read what items you were fond of this month.
To Wrap Up:
Can you still get this box if you sign up today? No, you'll get the January box, but there are variations! Subscribe by 11:59 p.m. ET on the last day of the month to receive the current month's box.
Check out all our BoxyCharm tutorials and BoxyCharm reviews, as well as the best beauty subscription boxes of 2020, as recommended by our readers!
Keep Track of Your Subscriptions: Add this box to your subscription list or wishlist!
What was your favorite item from the December BoxyCharm box?

Please do not enter your email address in the Name field or in the comment content. Your email address will not be published. Required fields are marked *. Remember to post with kindness and respect. Comments with offensive language, cruelness to others, etc will not be approved. See our full comment policy here.