


Creation Crate is a subscription box for teens and adults ages 12 and up who want to learn how to build and program electronics. Each month you will receive the necessary electronic components and access to a thorough online curriculum to create your tech projects. These projects build on skills learned and increase in difficulty. You'll need access to a computer, the internet, and a USB port, but everything else you need is included in the box!
FYI - COVID-19 Update:
This box was sent to us at no cost for review. (Check out the review process post to learn more about how we review boxes).

About Creation Crate
The Subscription Box: Creation Crate
The Cost: $29.99 per month. Save with longer subscriptions.
The Products: All of the required components to complete the month's project along with access to an online classroom with tutorials, exercises, and instructions on how to write your code.
Ships to: The U.S. for $4.99, Canada and worldwide for $8.99
Creation Crate Project 8: "Audio Visualizer" Review


1 of 8


Bonus Gifts: Component Case XL, Soldering Kit, and Digital Multimeter
When you subscribe to a quarterly, semi-annual, or annual plan, you will receive a few bonus gifts depending on which subscription option you choose. Creation Crate was kind enough to send me a few items to share with you! To read more about the component case and soldering kit, check out my first review here! To learn more about the multimeter, check out the details in this review! While these are great to have on hand, they are not necessary for your projects each month.
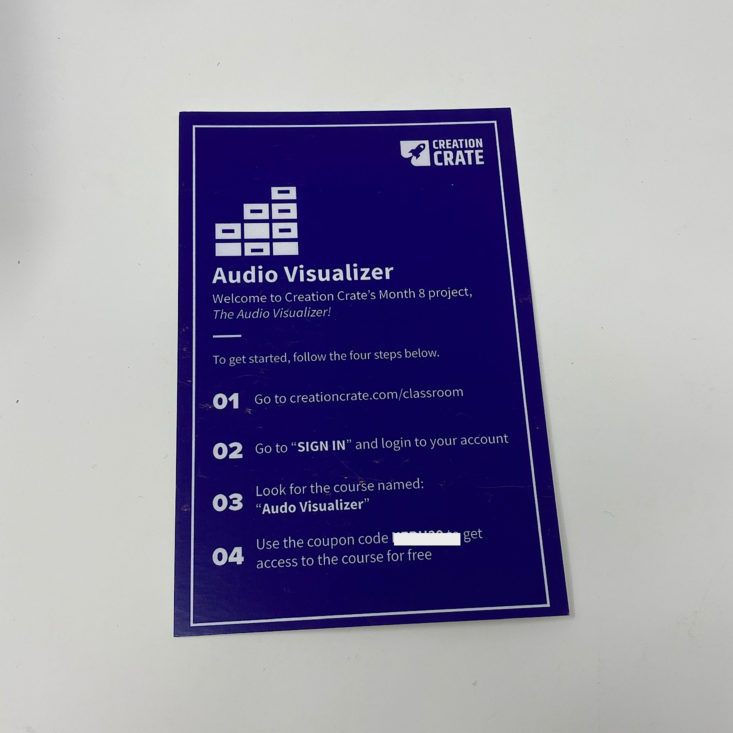
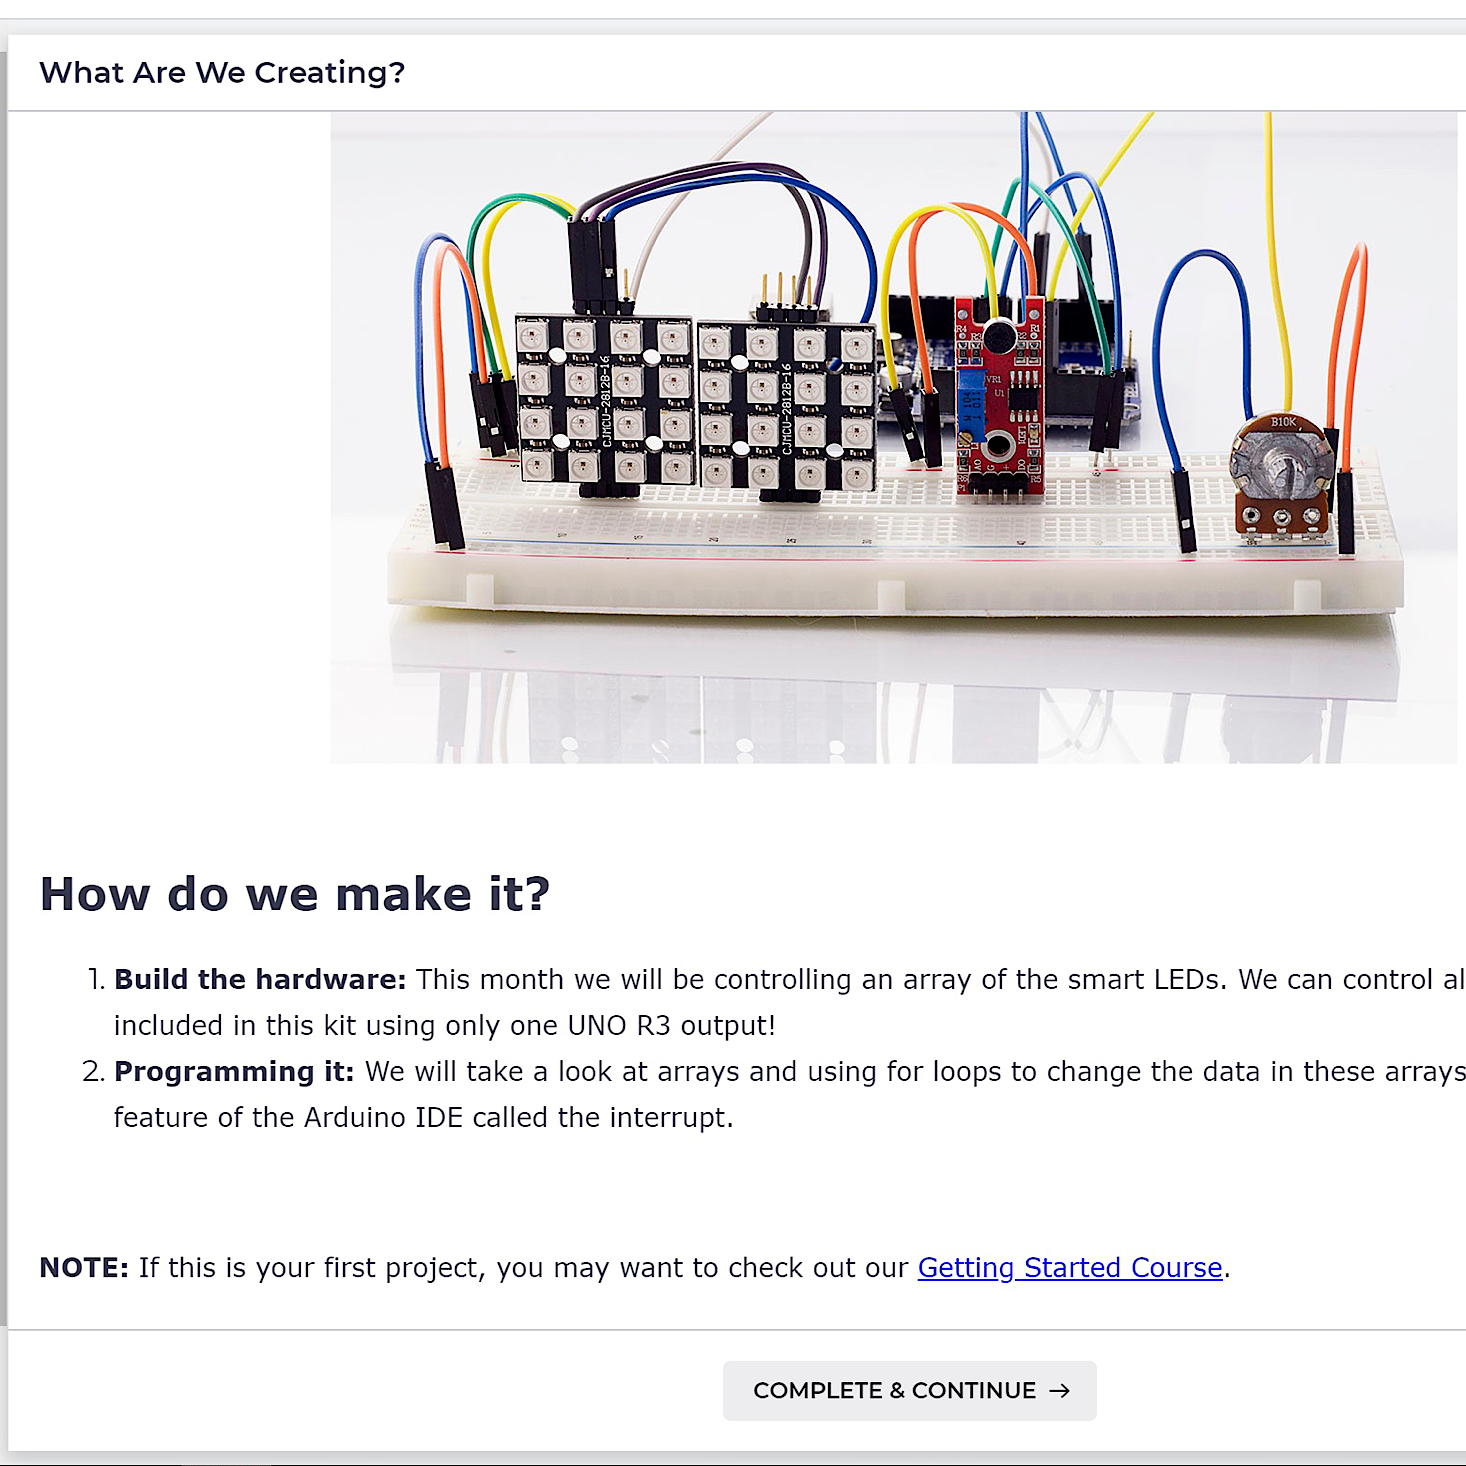
The project for this month is to make our own Audio Visualizer. This sheet provides instructions on how to access the online course. While the projects do build upon one another in skill each month, I did not need any other items besides what is in this month's box and my computer.
1 of 2
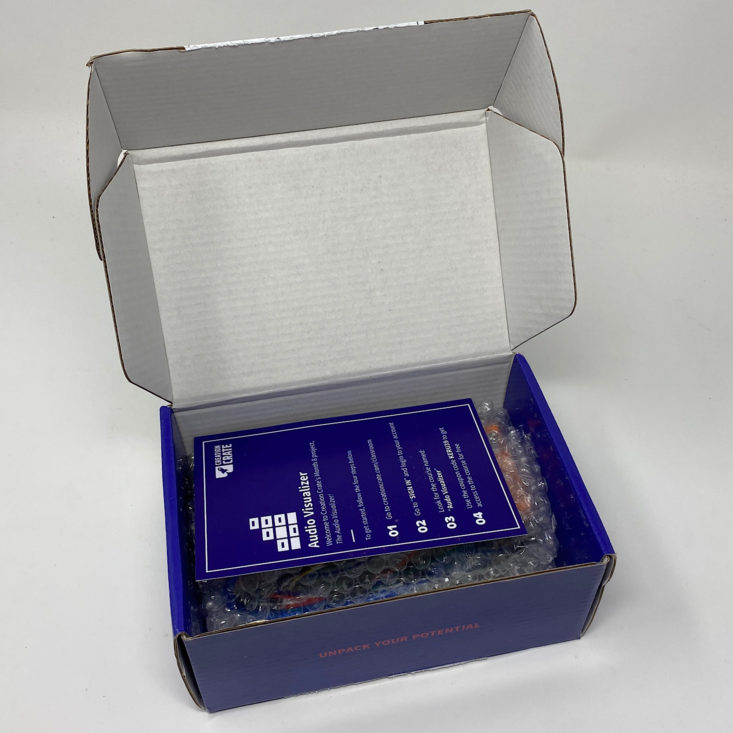
All of our supplies were packaged neatly and protected by a piece of bubble wrap.
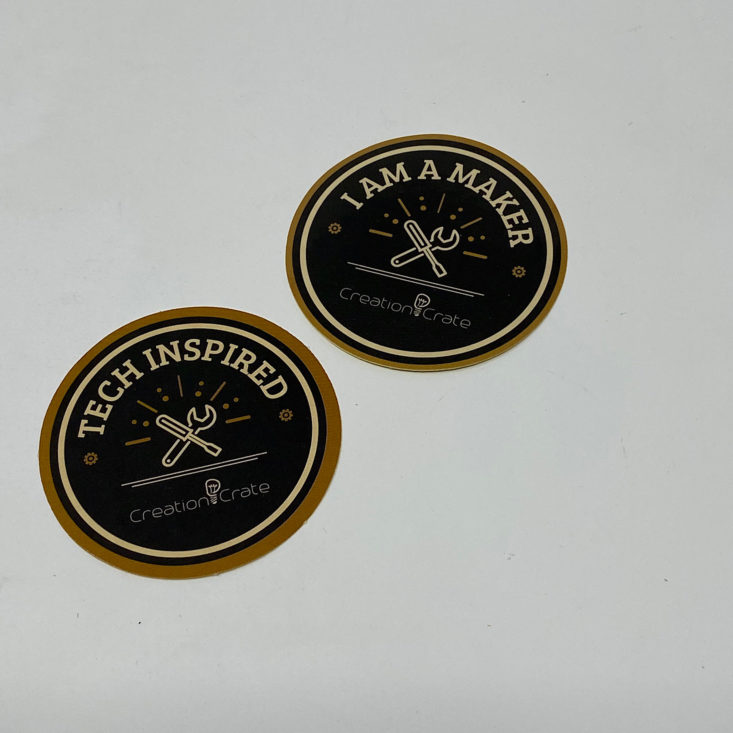
I received these nice stickers with all of my parts.

1 of 6
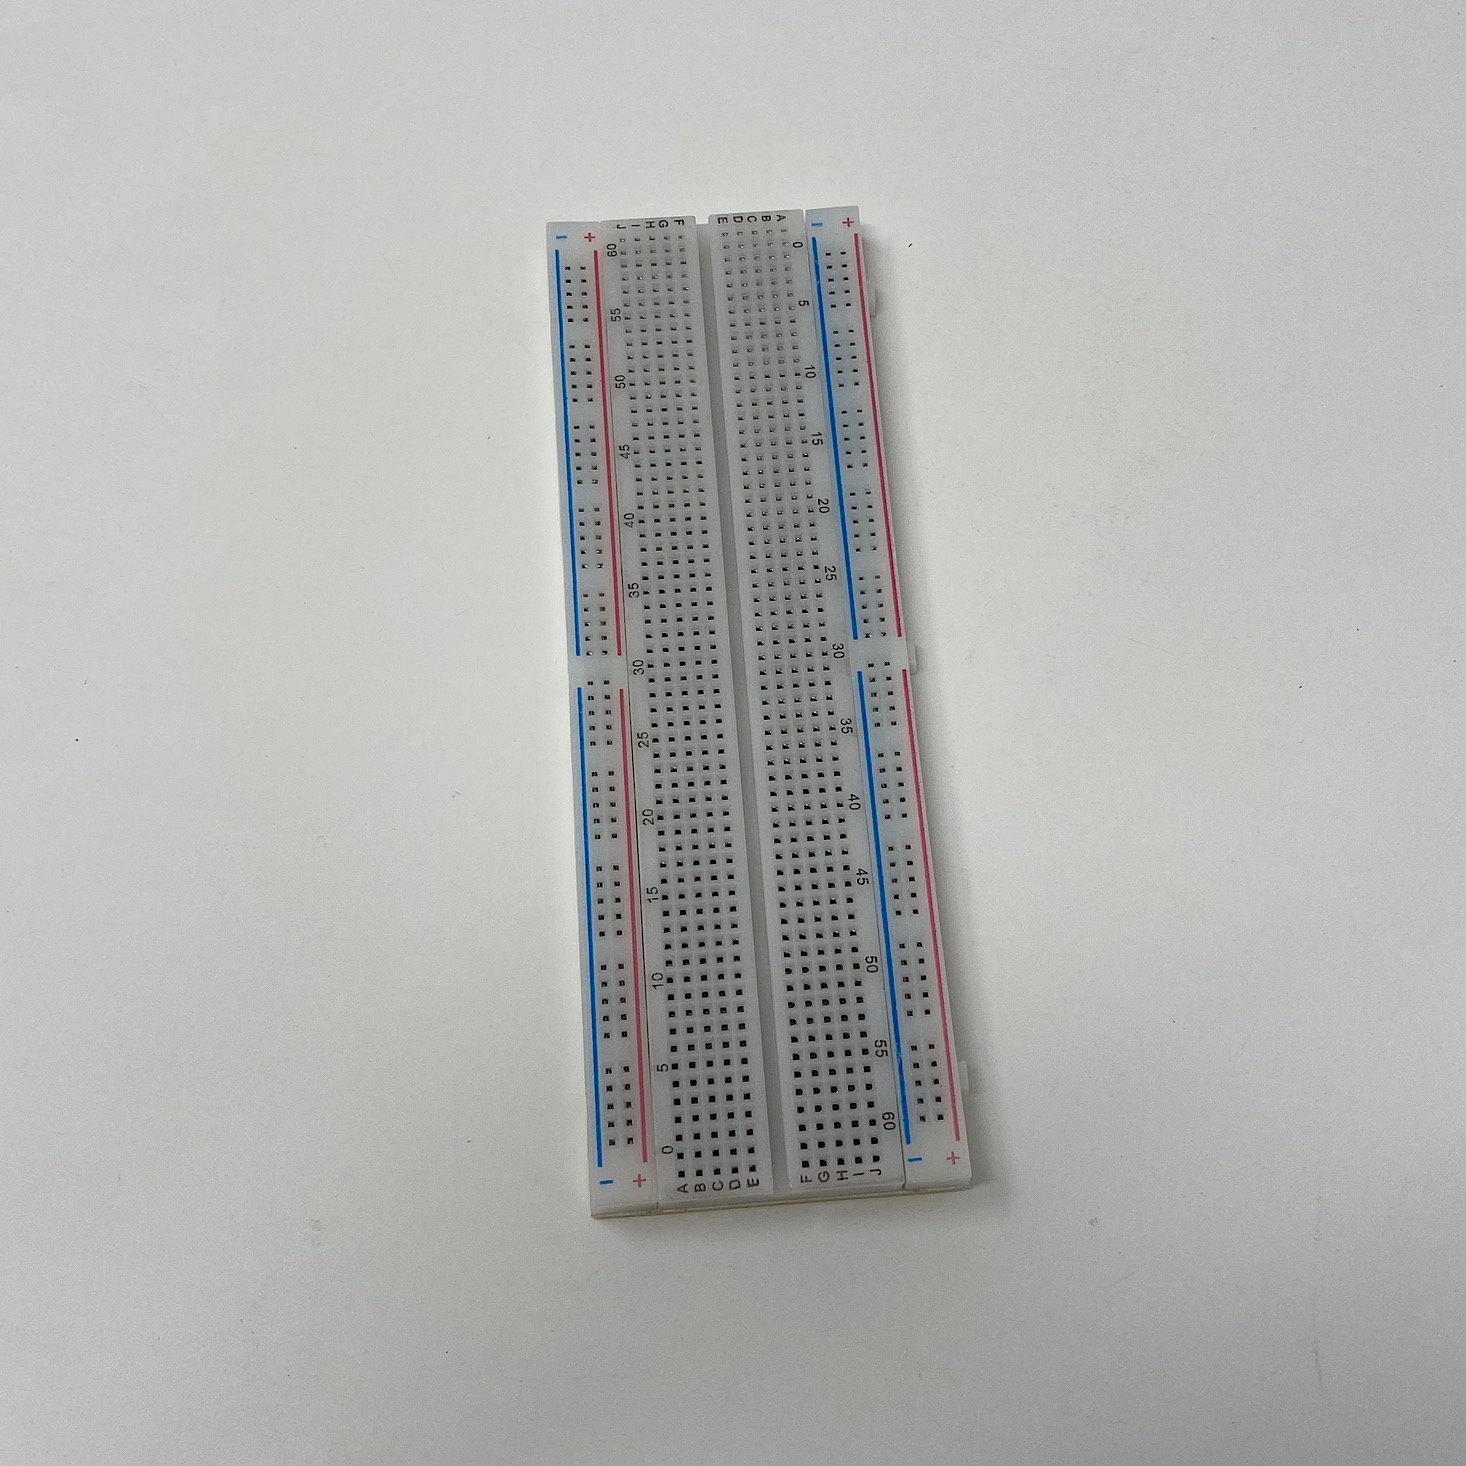


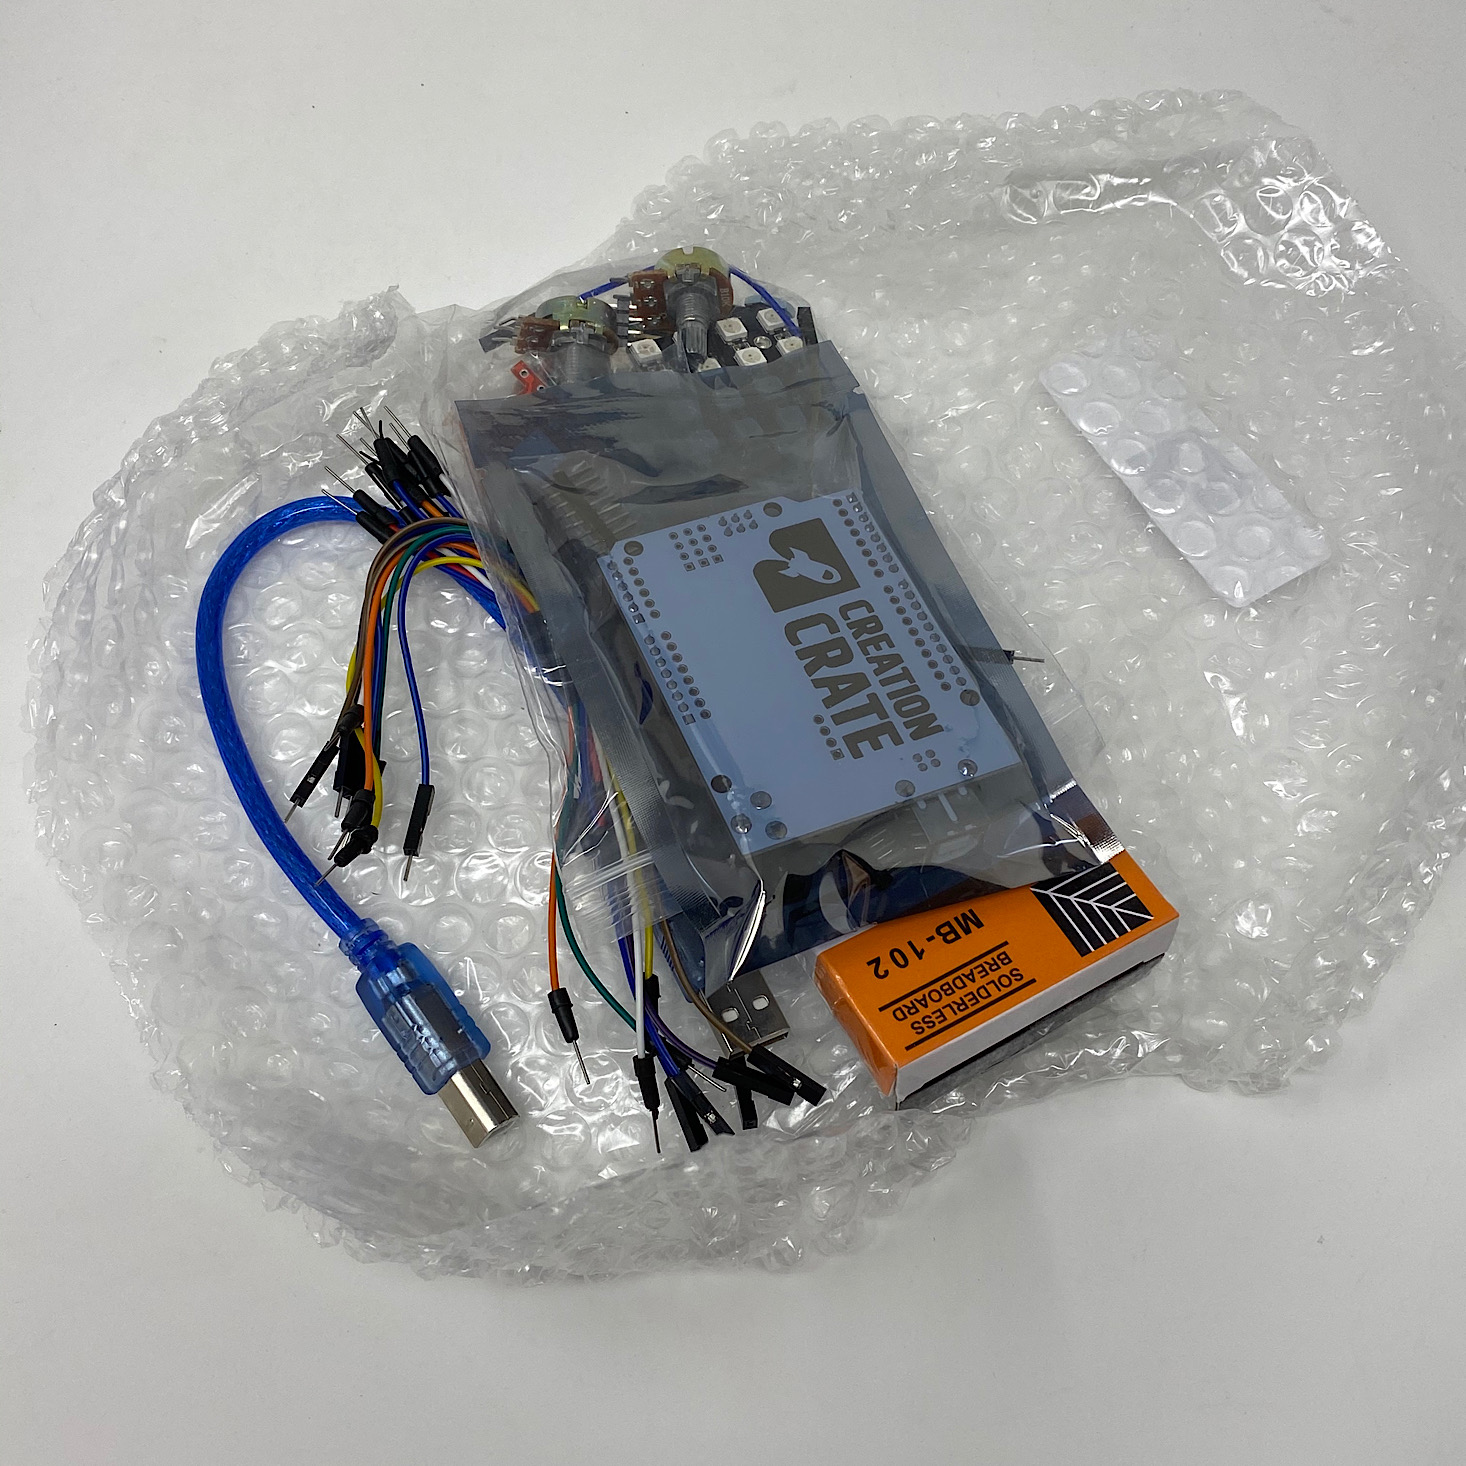
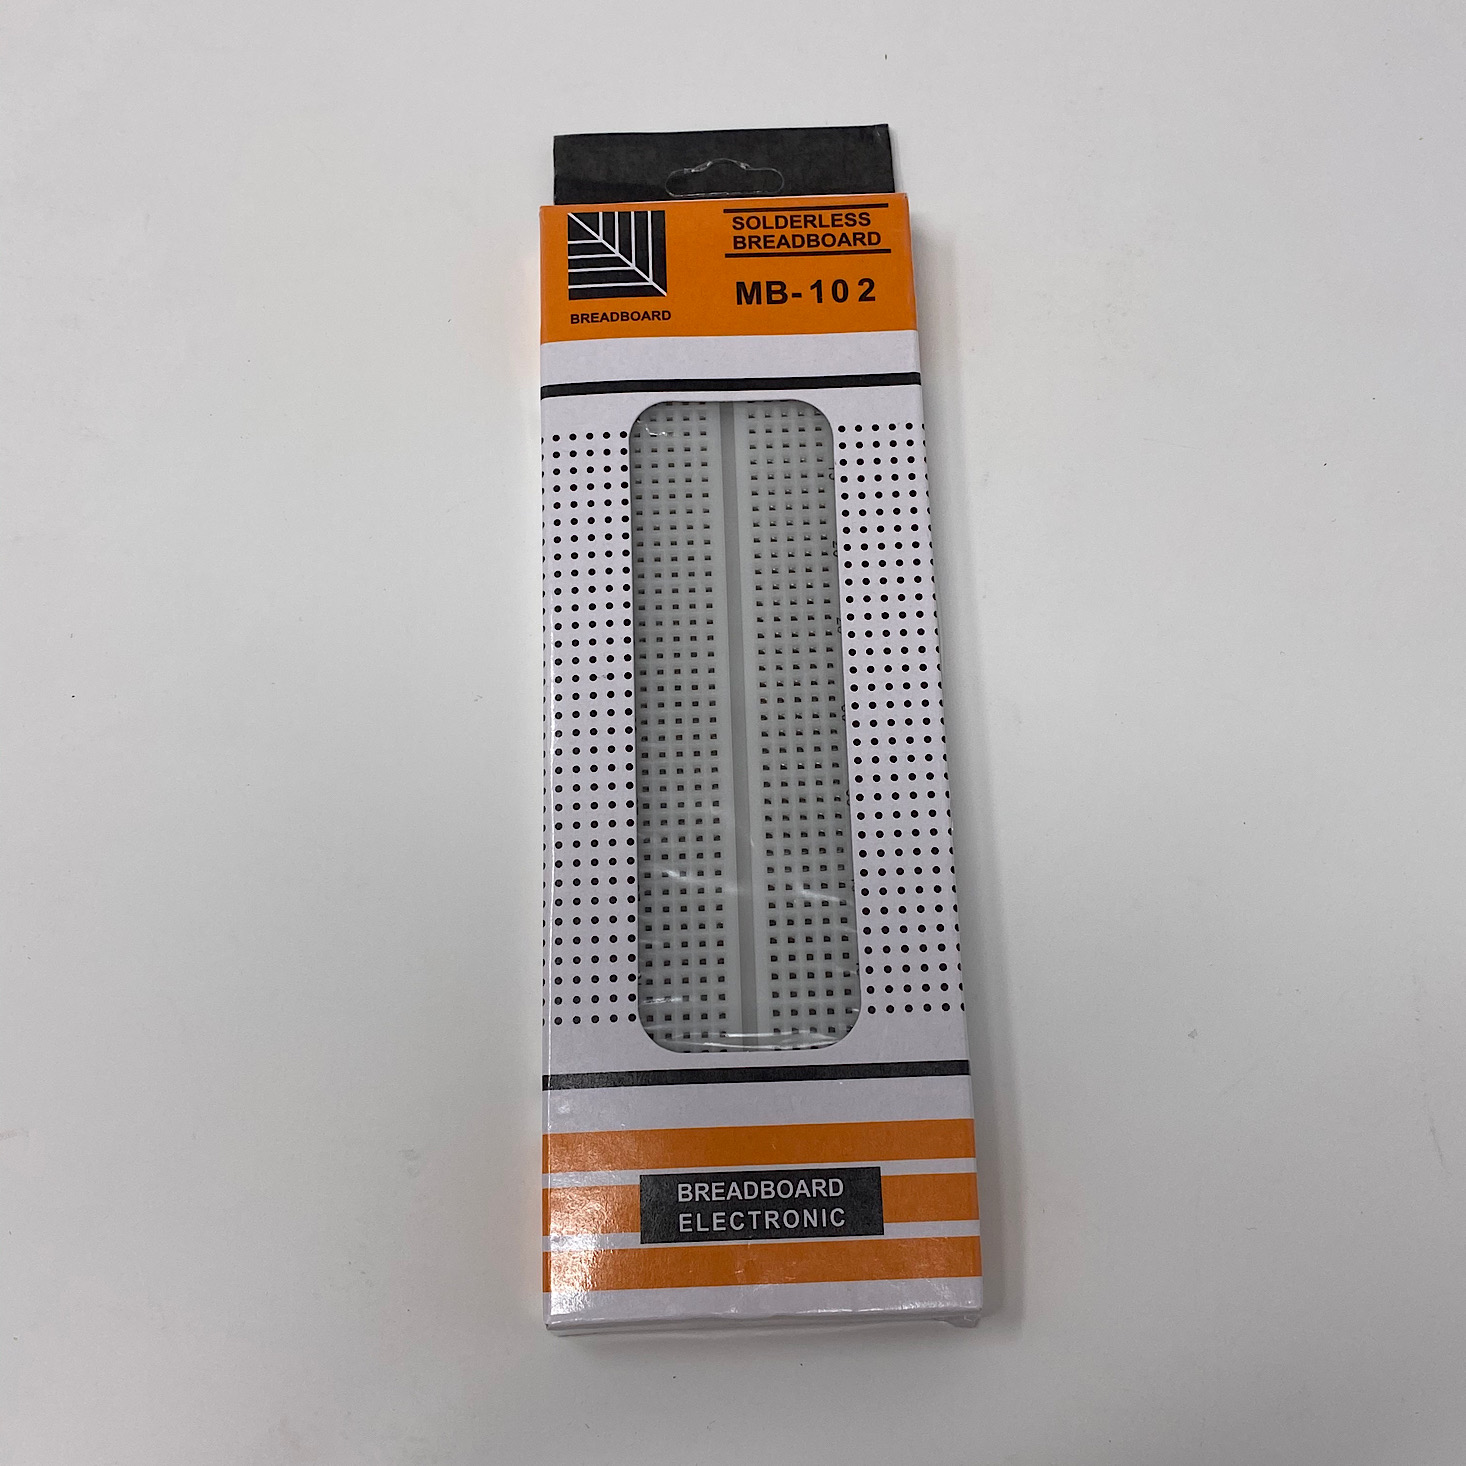
Breadboard and UNO R3
The two main components I needed were a breadboard and this UNO R3 they provided.


1 of 2
USB Cable
They also provided this cable with a USB port at one end to hook our project up to our computer for programming.

1 of 2
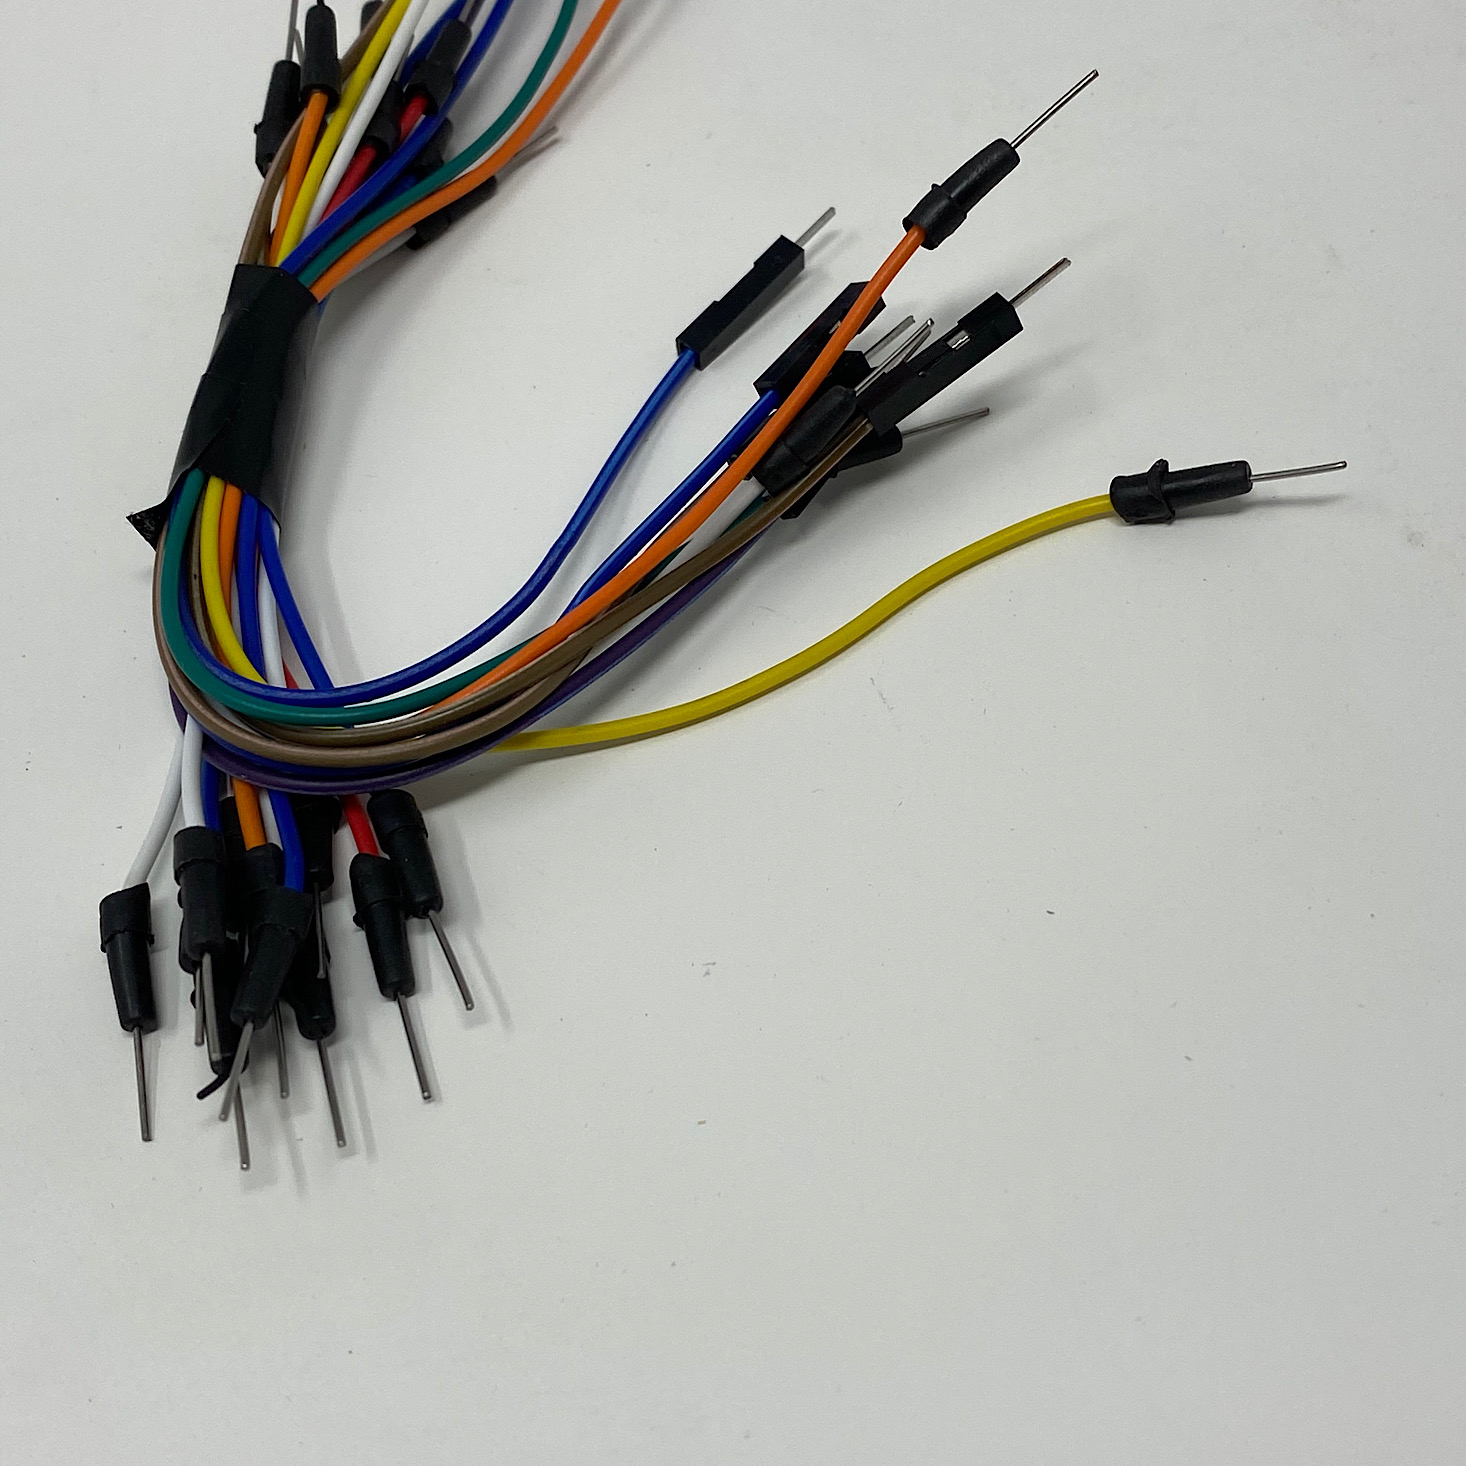
Jumper Wires
We also received several jumper wires to connect our components to our UNO R3.

1 of 2
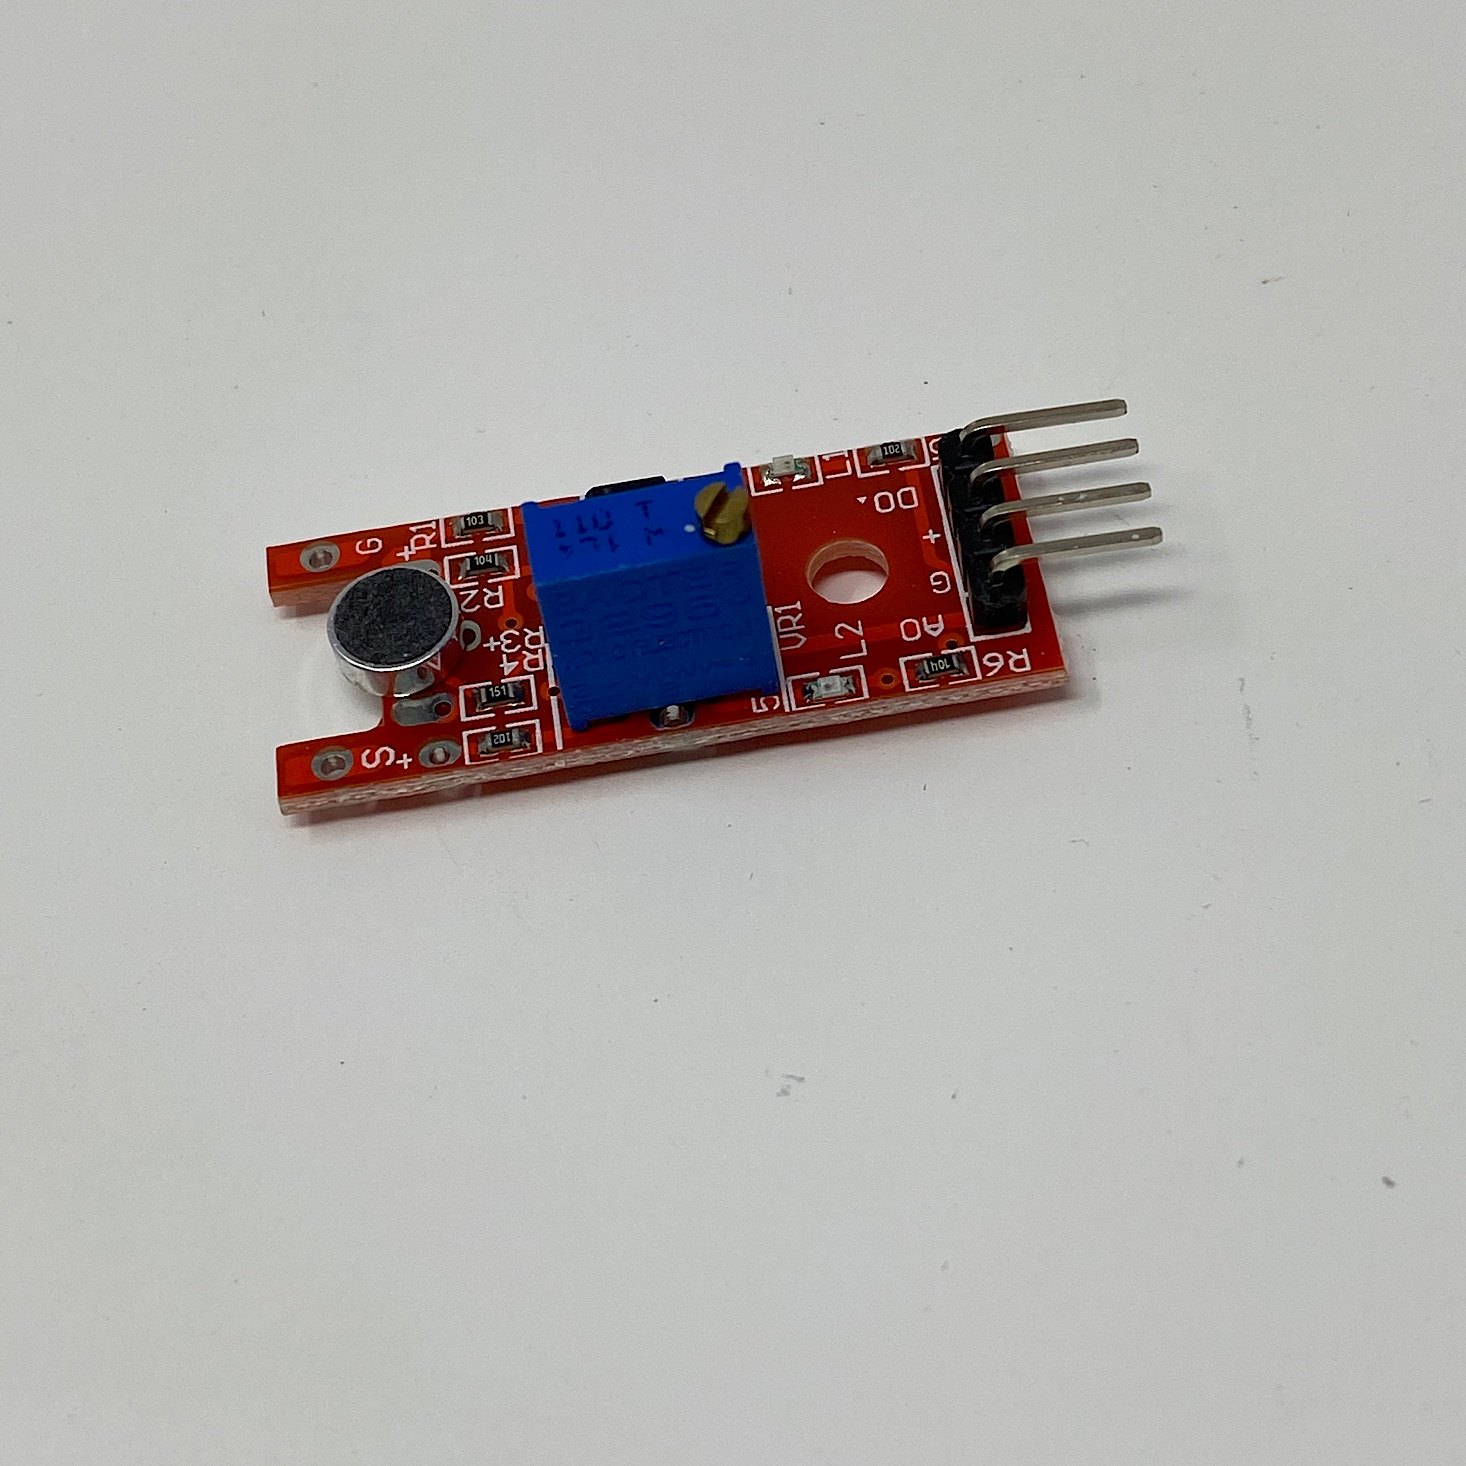
Male to Female Jumper Wires and Microphone Module
This month they also included some male to female jumpers and this microphone module.
1 of 2
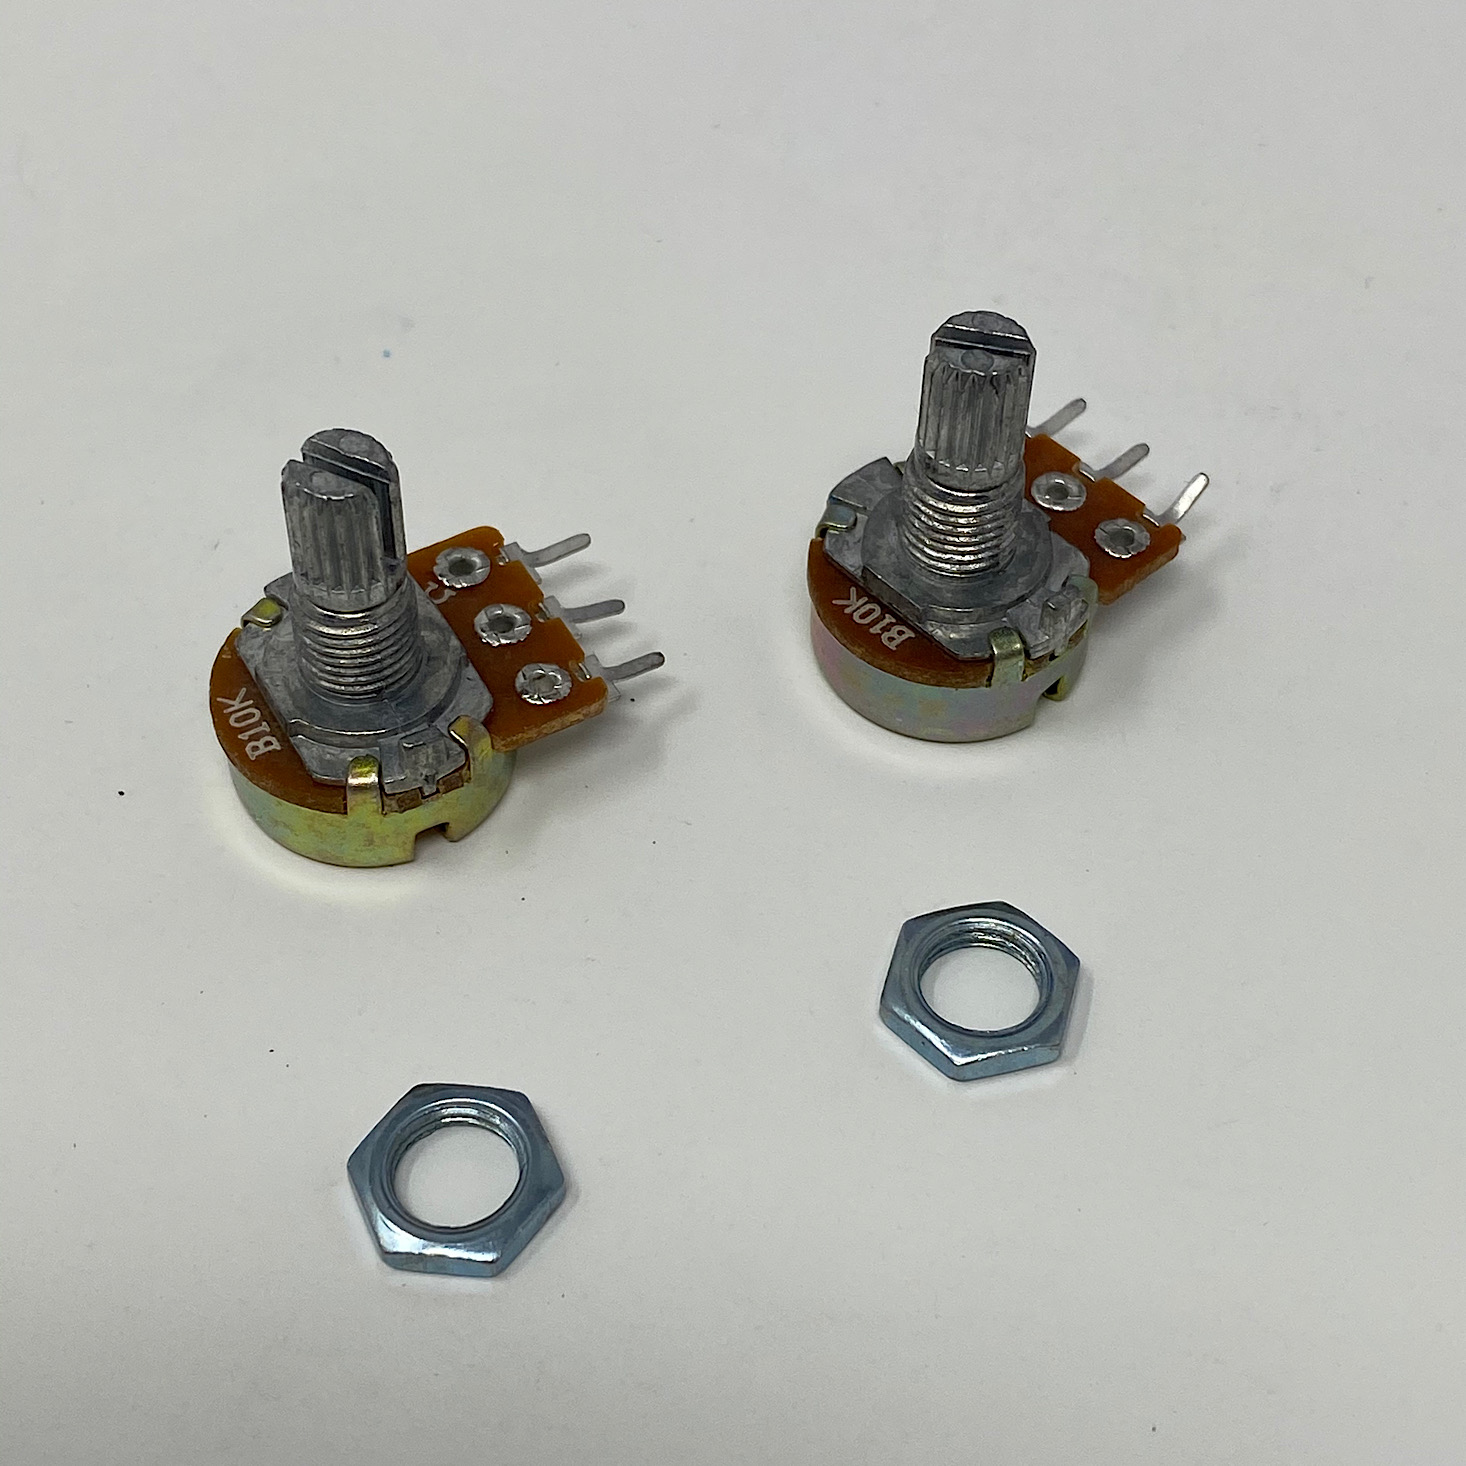
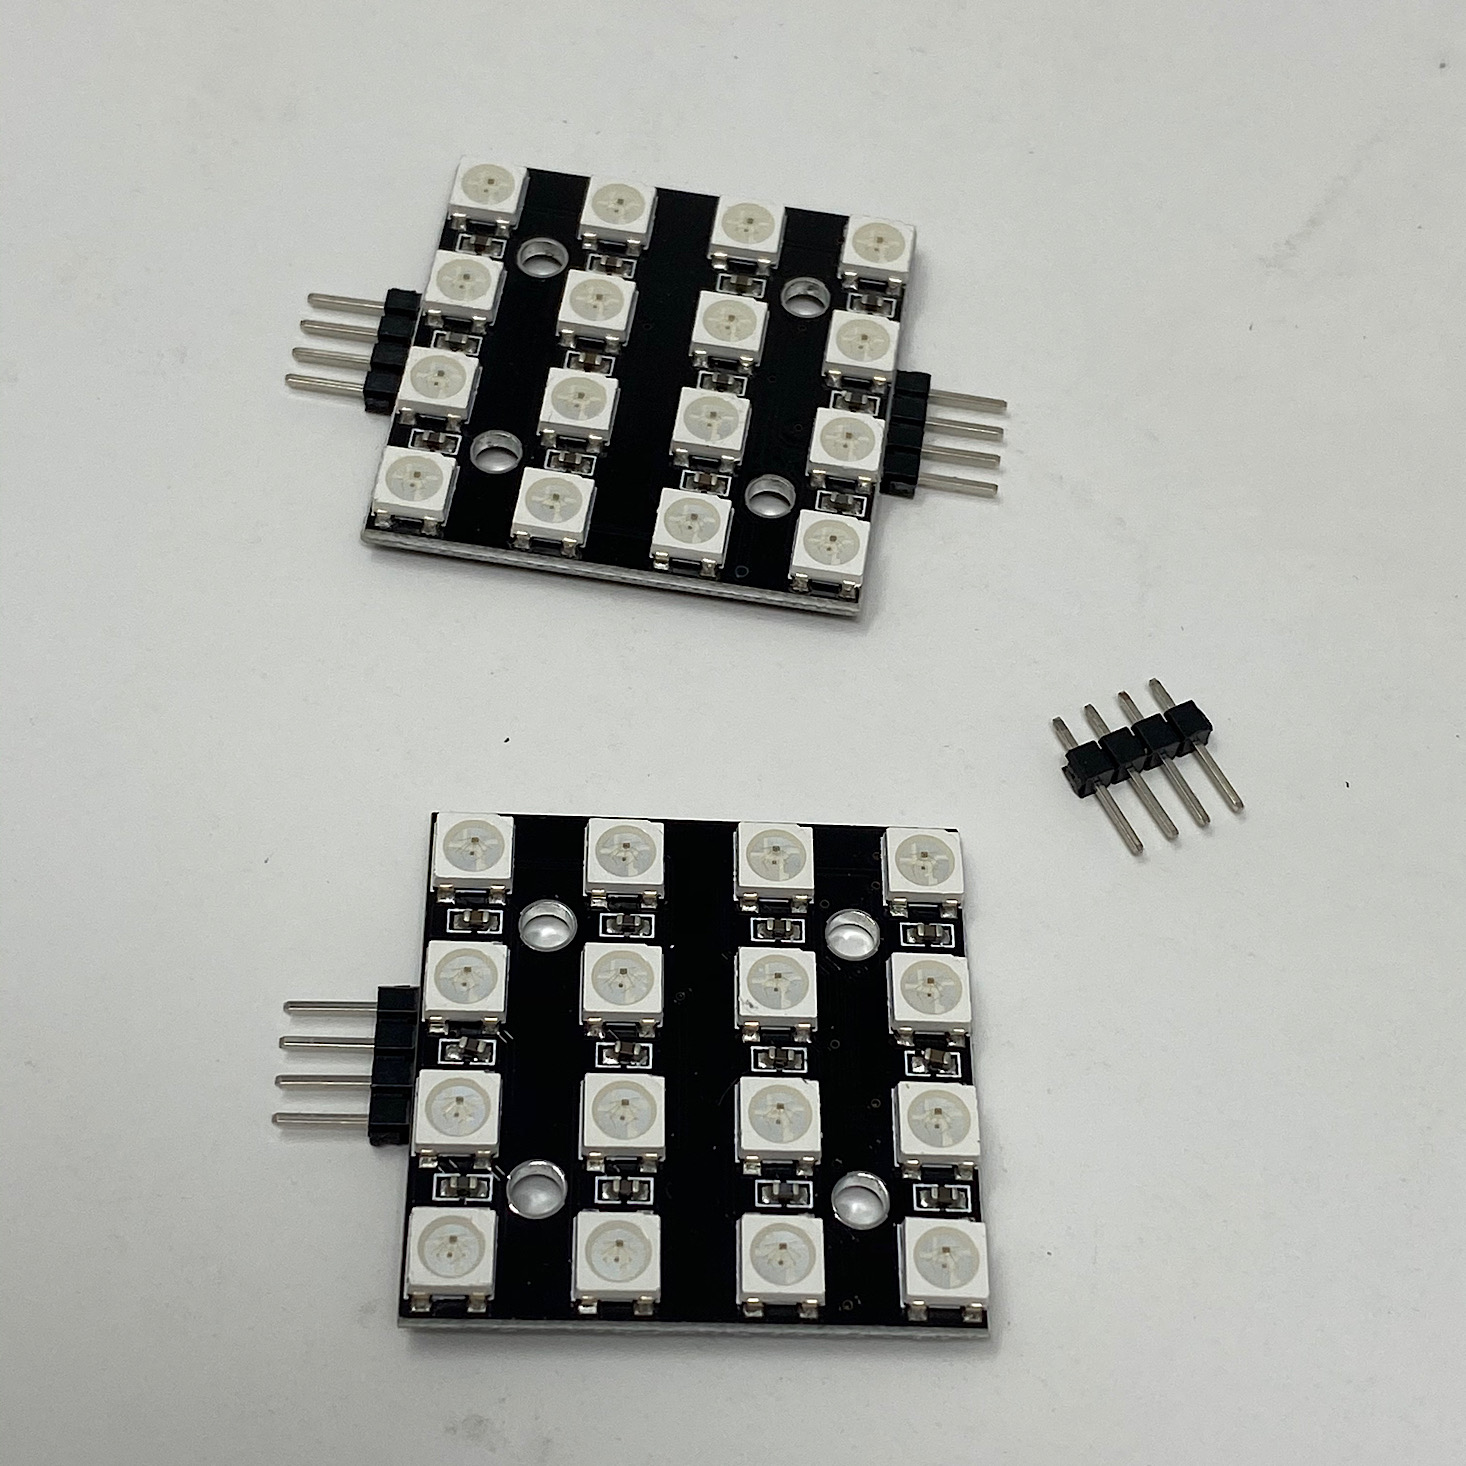
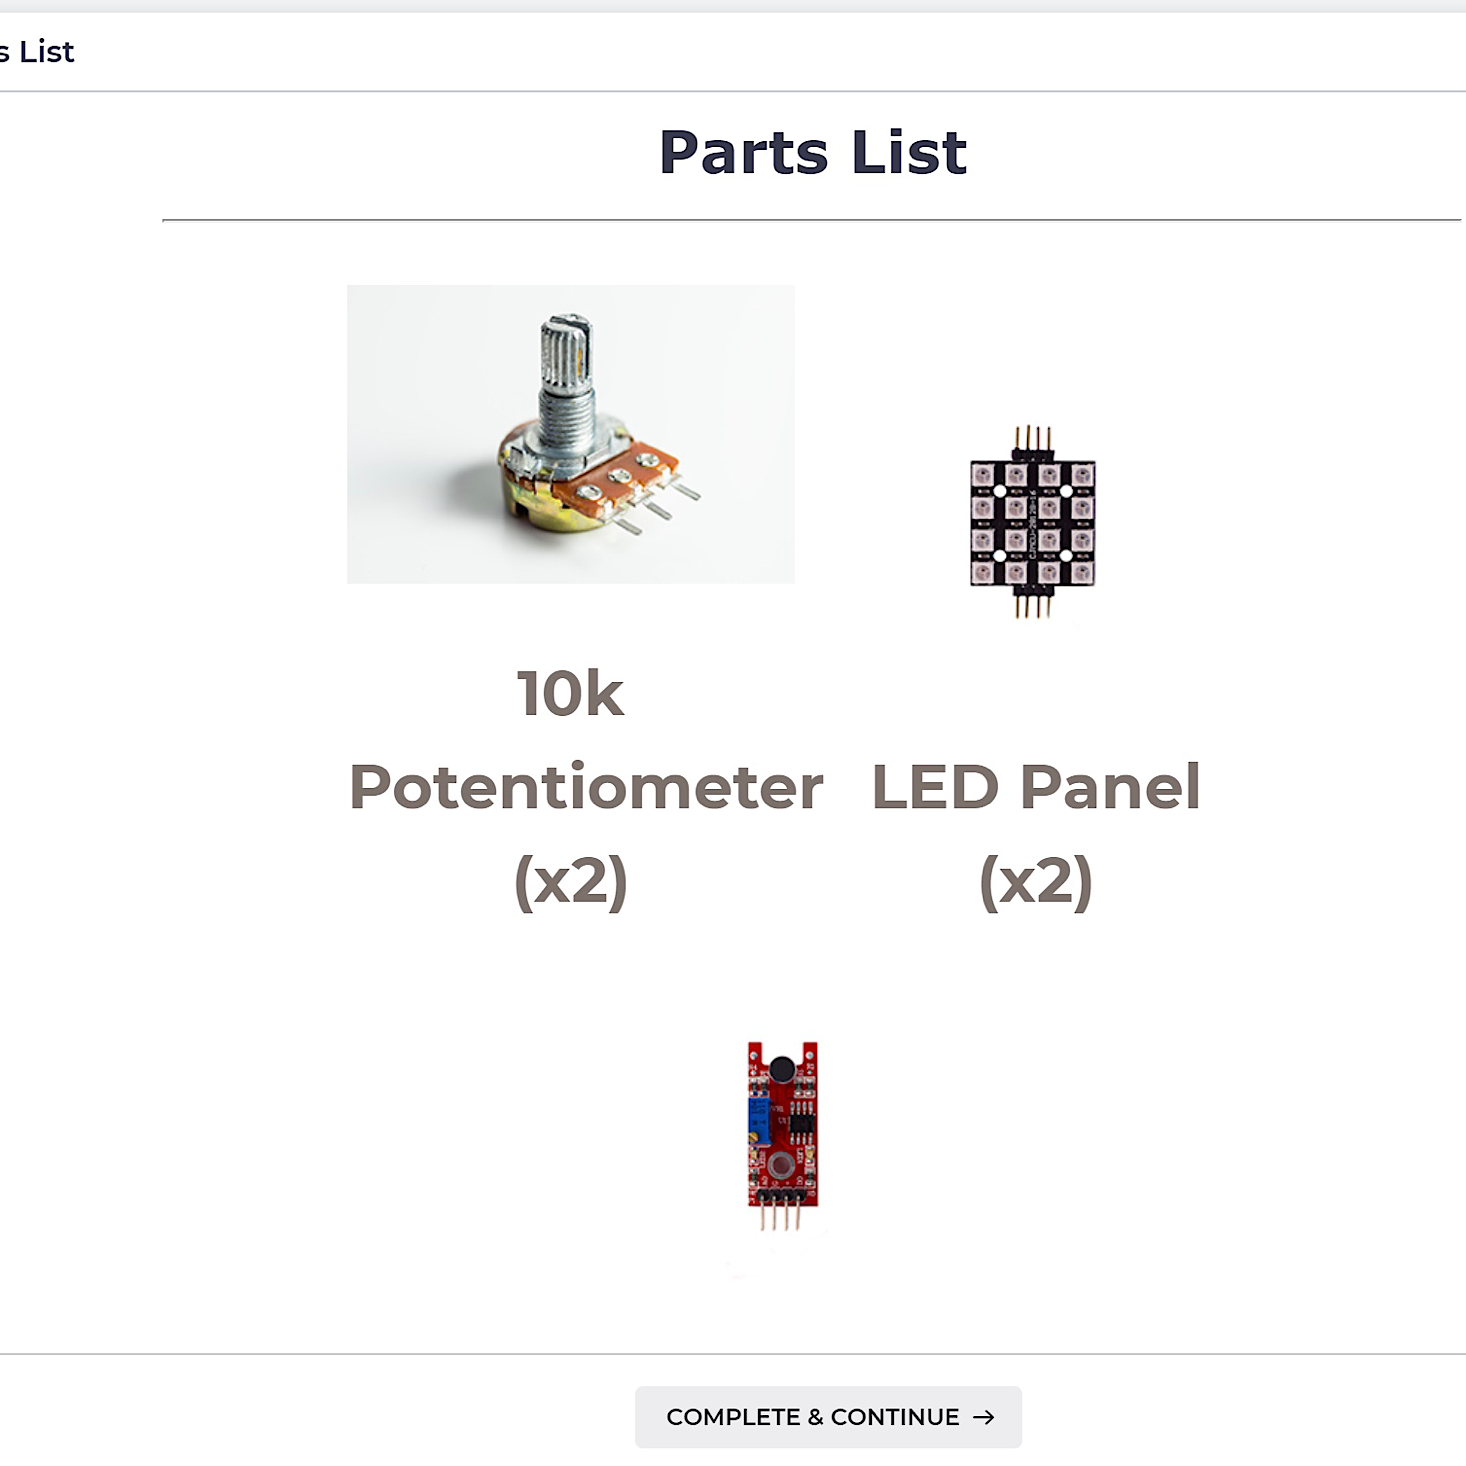
LED Panels and 10k Potentiometers
I also received two LED panels and two potentiometers. One of my panels arrived broken, but I was able to stick it back together somewhat. More on that later!
Logging into the Course


1 of 7


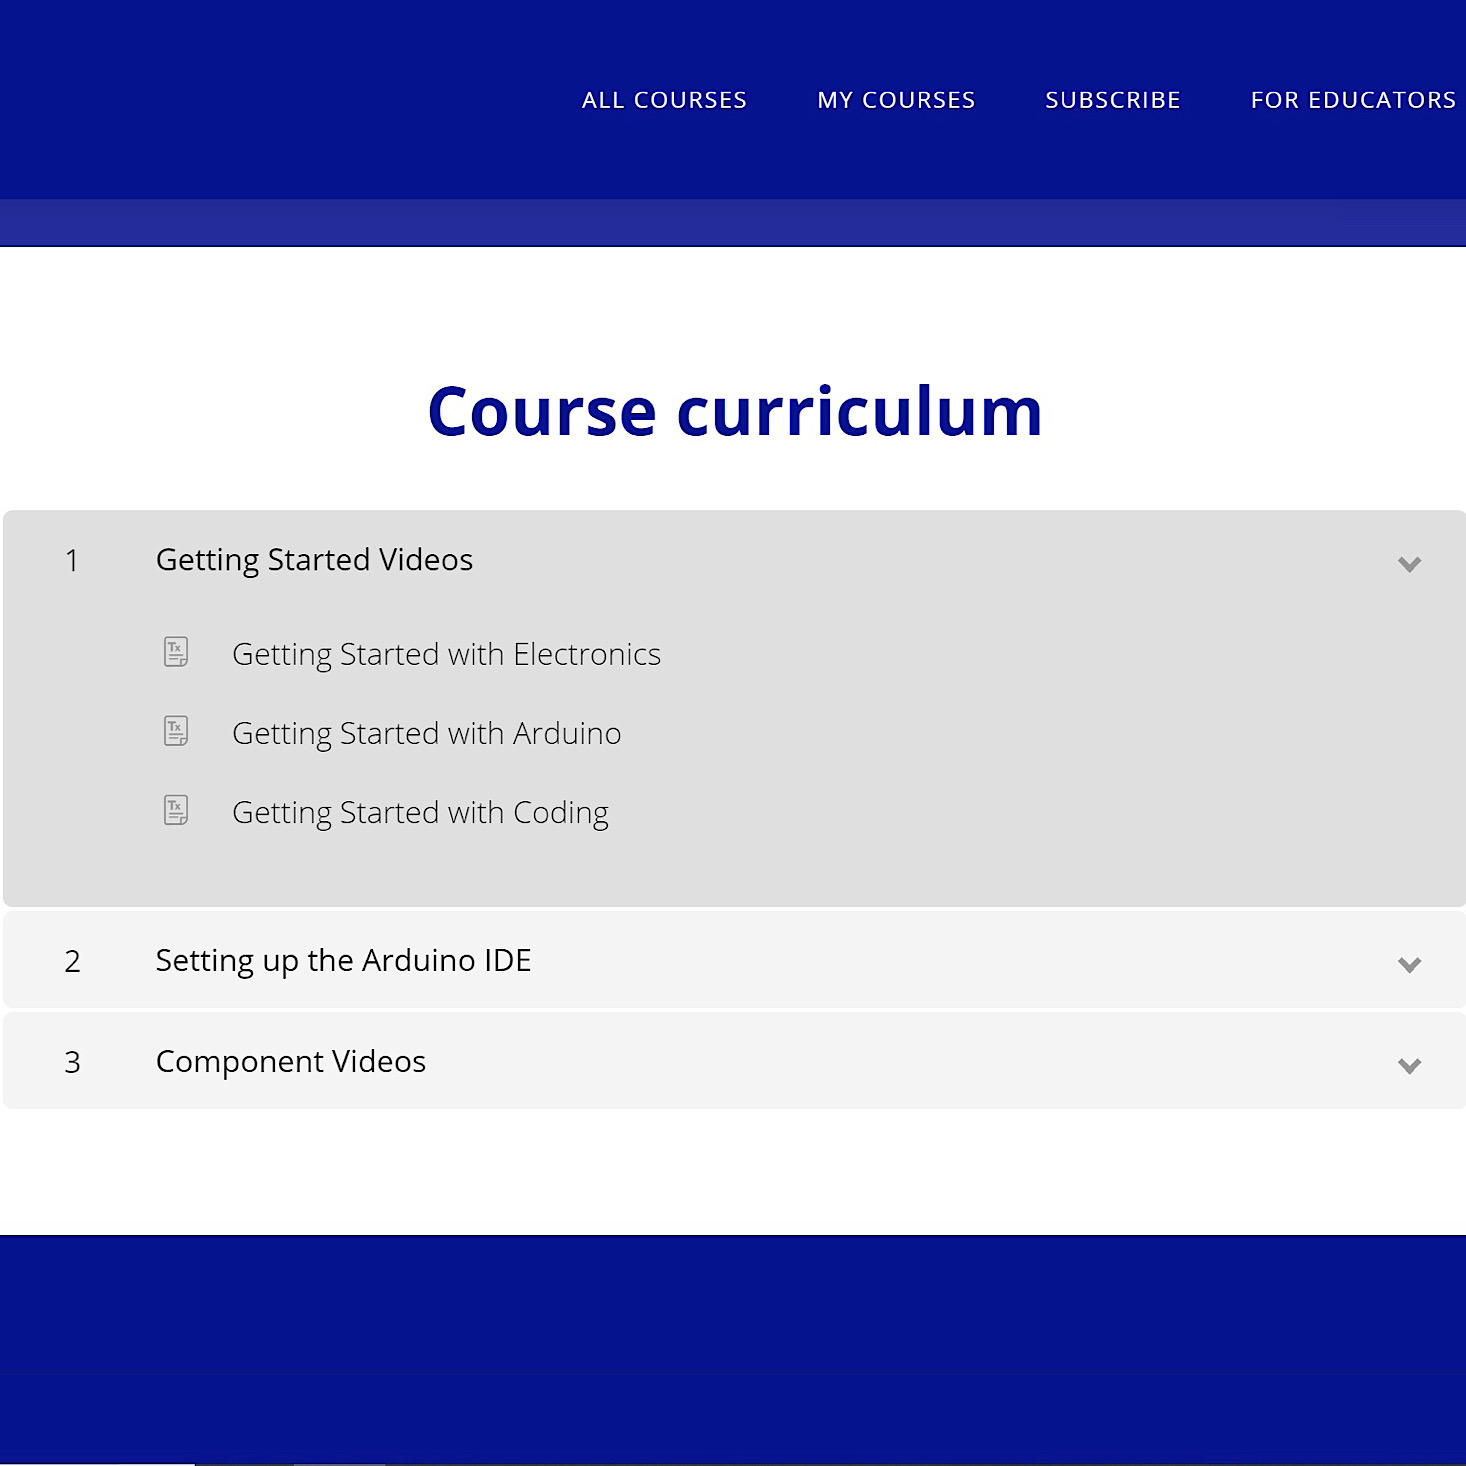
Logging into your course can be a little tricky the first time, so I've included some screenshots of the steps. After navigating to the classroom, you'll select "All Courses" and scroll down to find the "Original Courses" button. Then you select the course you want and hit the "Buy" button. From here you'll be prompted to create a new account or log in if you already have an account. There will be a section to enter your access code which can be found on the Parts List in your box and it will bring your total to $0.00 and allow you access to the course.
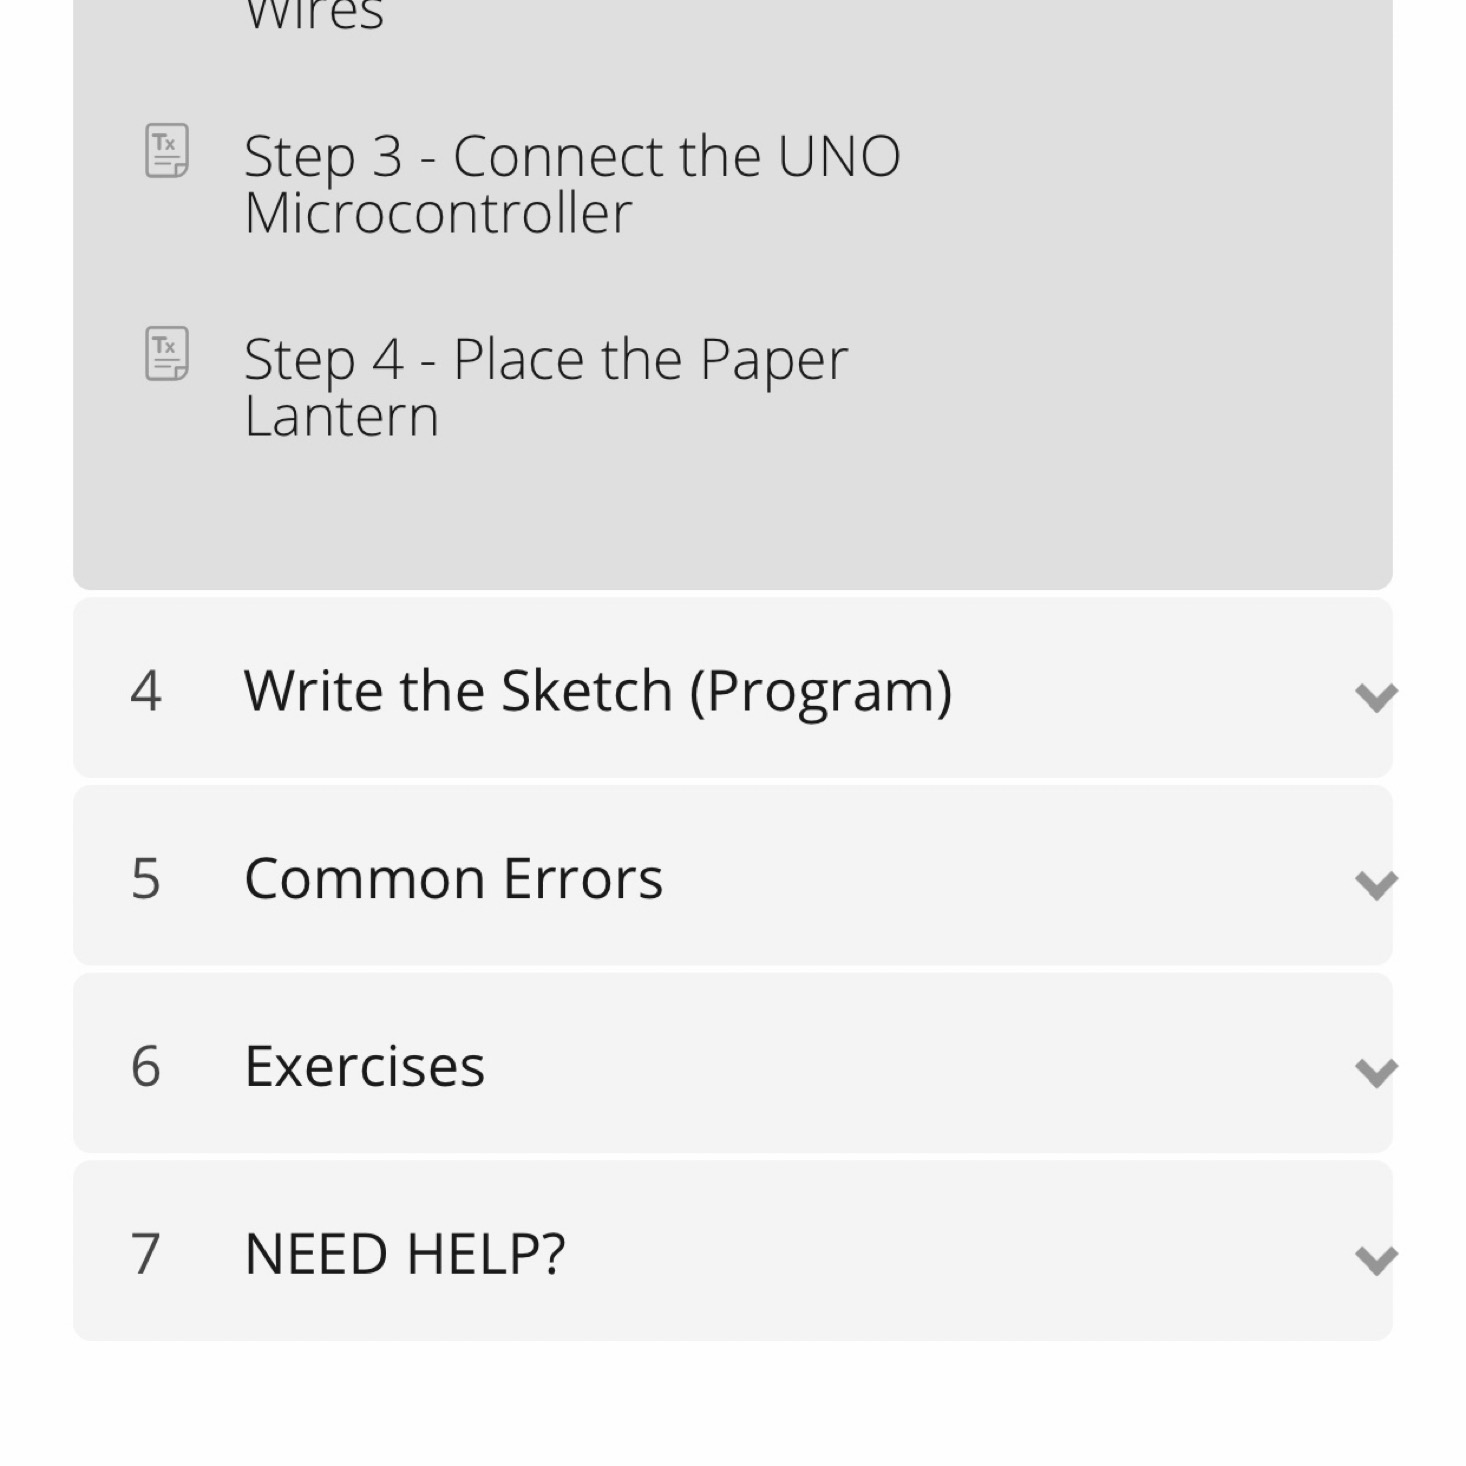
Course Layout
1 of 5


Once you begin your project, you'll notice a little sidebar that provides your progress throughout the course. While the components may be different each time, the course will be divided into many subsections that follow a logical order making it easy to follow along with since it is so well organized. There are even some troubleshooting sections.


1 of 5


One thing I think is so great about Creation Crate is they provide access to a "Getting Started Course" for those who are beginners. I was thoroughly impressed with this course. They went into all of the details about currents, amps, power, and voltage. They provided visual demonstrations of how things work and explained each of the components that we would be working with such as breadboards, jumper wires, and LEDs. I thought they had a great way of explaining and making real-life comparisons to help us gain an understanding of the concepts. This felt like a true educational course and was on par with something you might take in college!

1 of 4

Now let's get to this month's project! First, they introduced our project and displayed a parts list. They also provided a PDF version of the instructions for us to download. There is a sidebar that also tracks your progress and breaks everything down into steps.
1 of 6


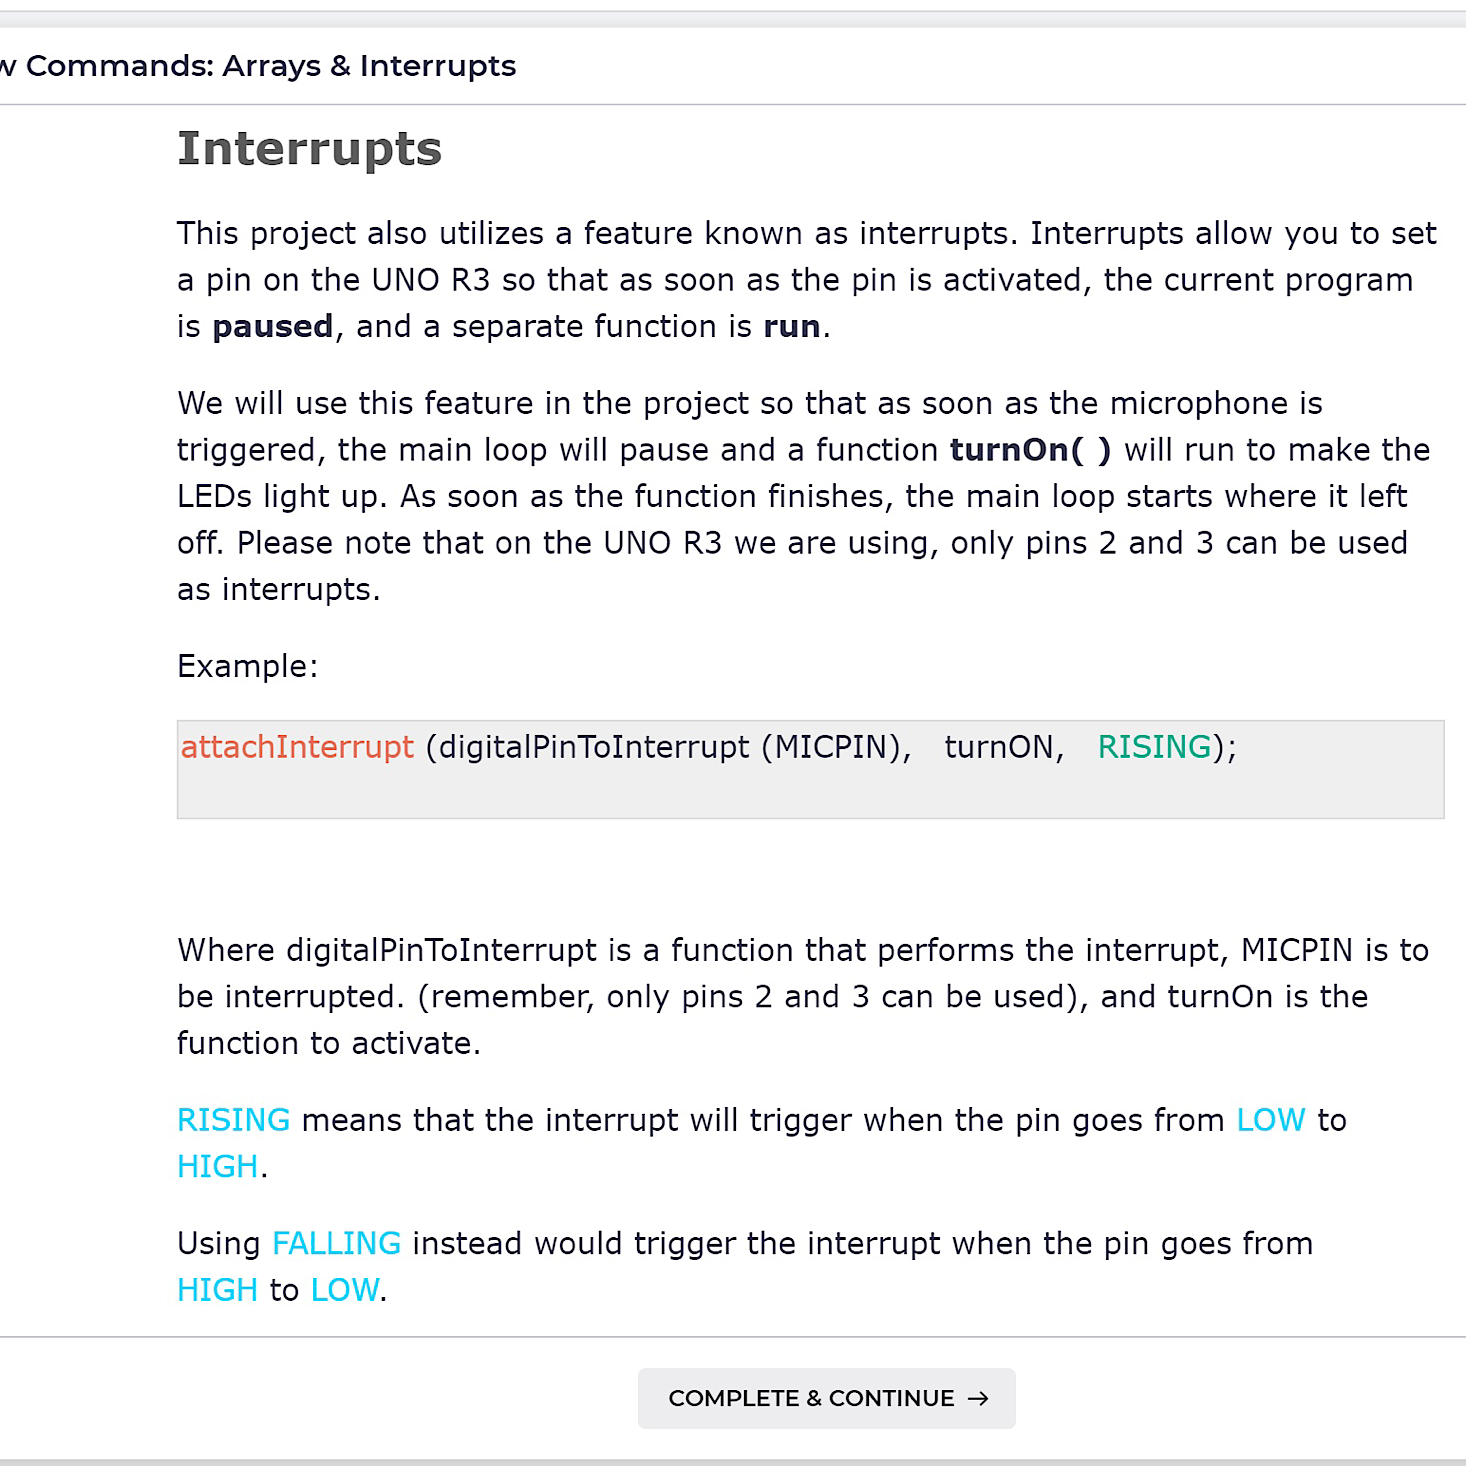
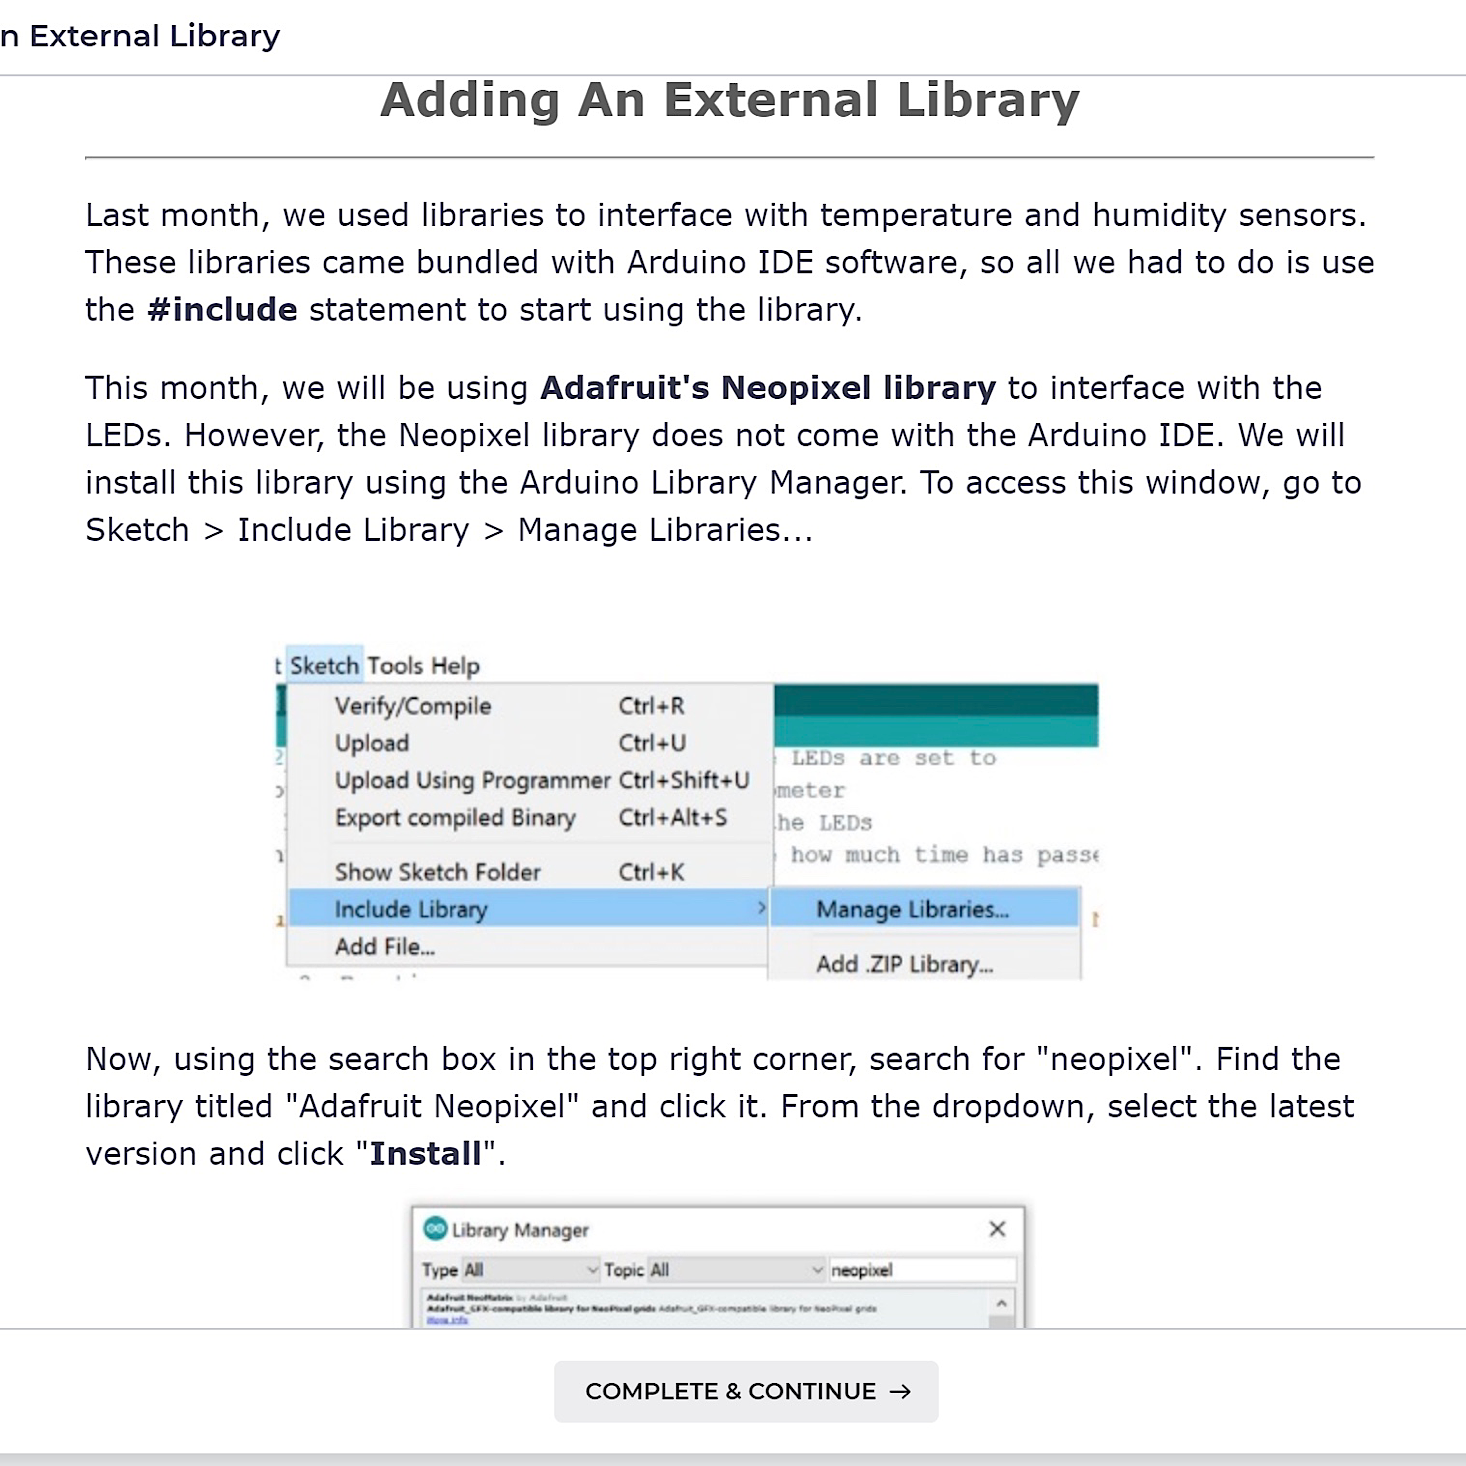
This month there was a lot of new information to cover. They explained arrays and interrupts and reminded us how to add an external library. They also described our "smart" LED panels and explained the way they work. I think they are very thorough in their explanations and they do their best to proactively answer questions through the information that they provide.
Part 1: Assembling the Hardware

1 of 5

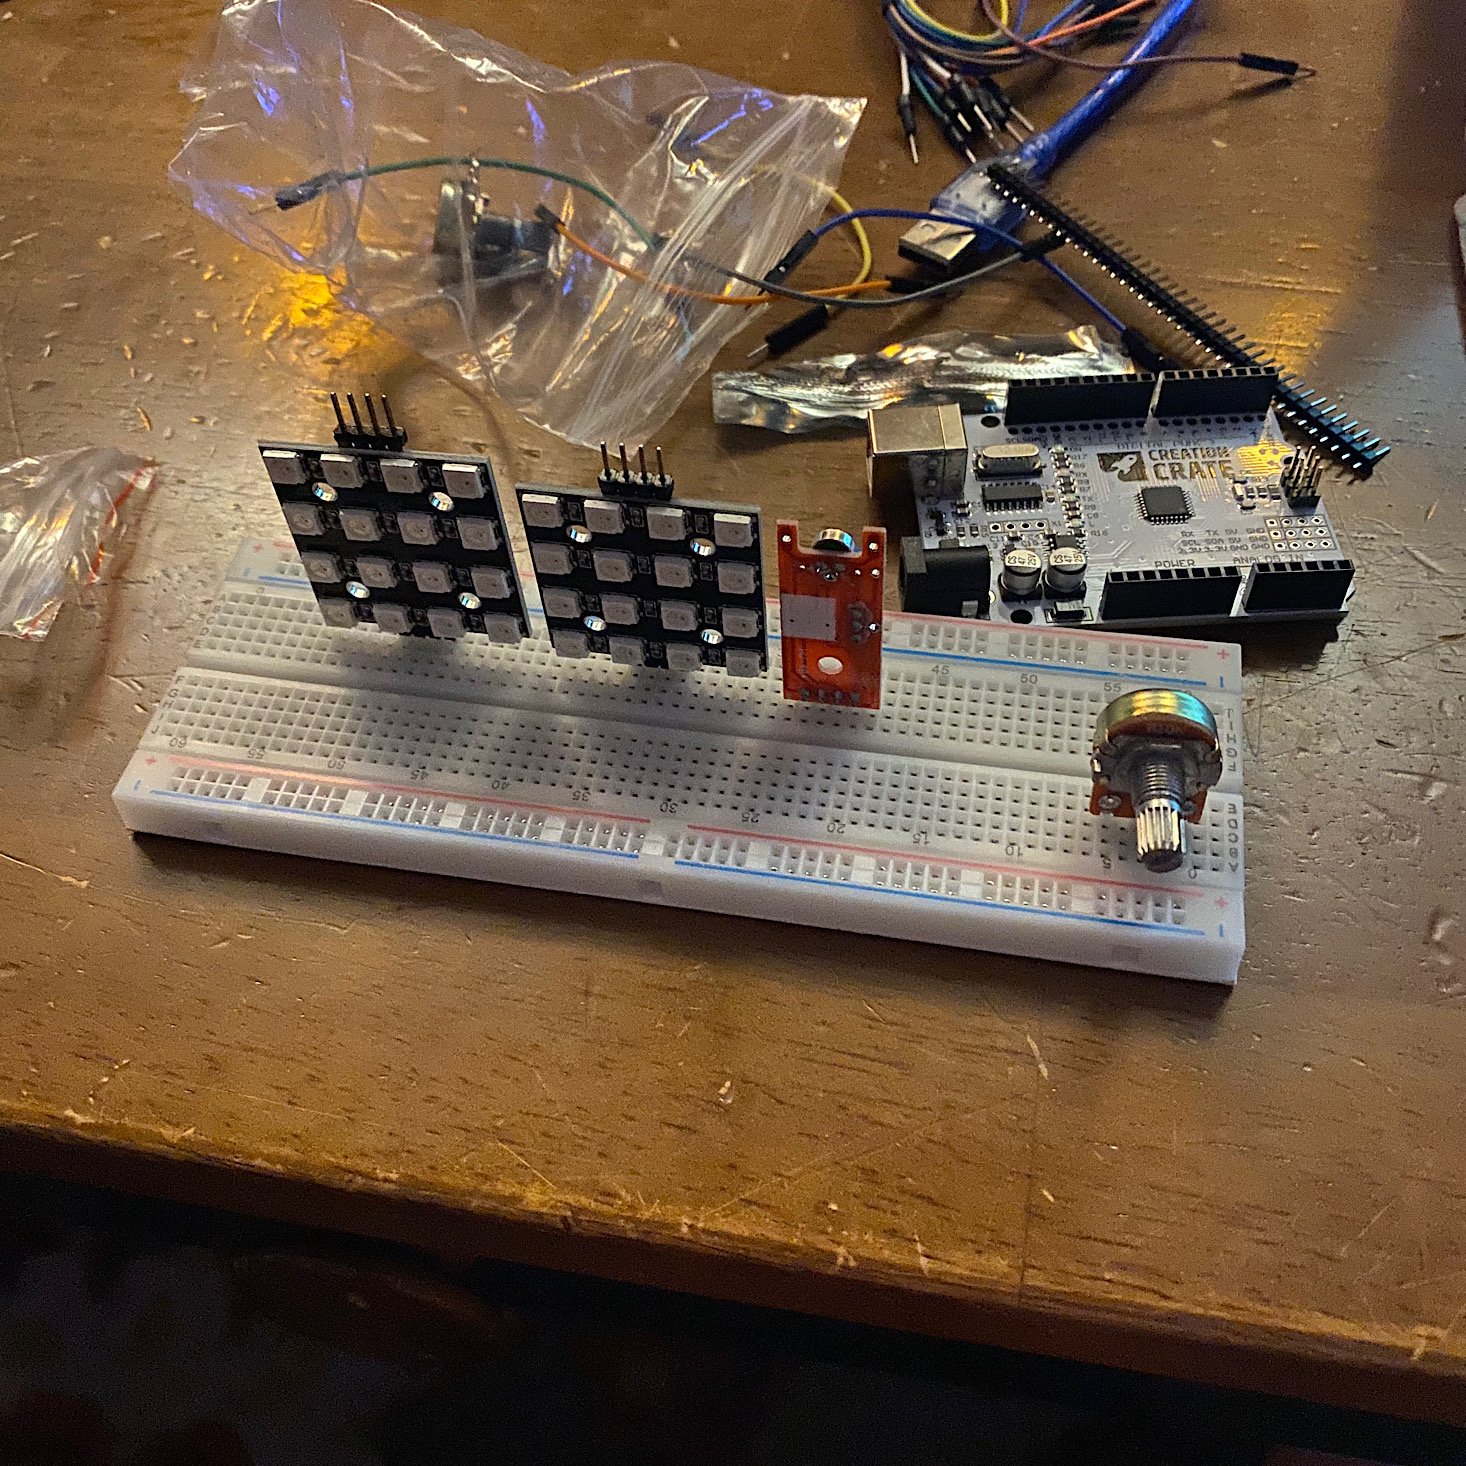

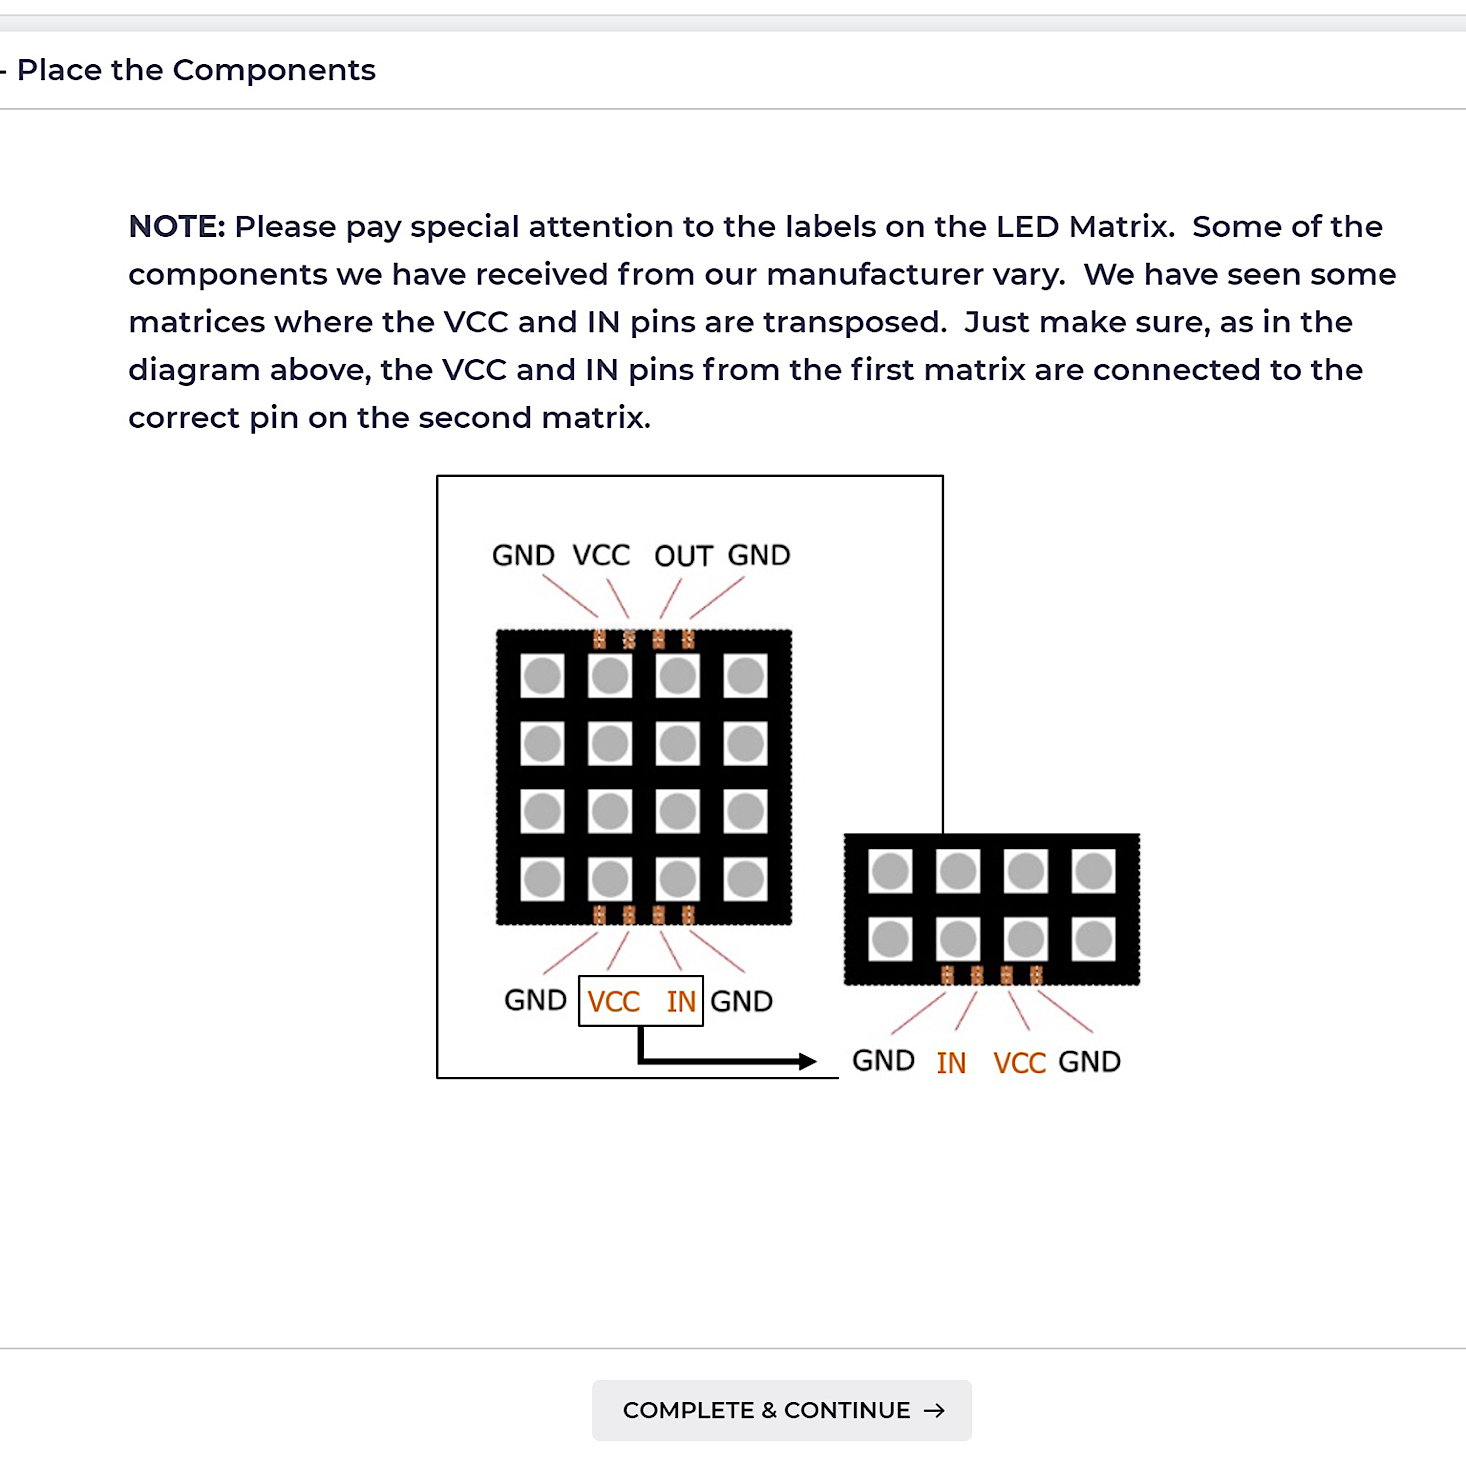
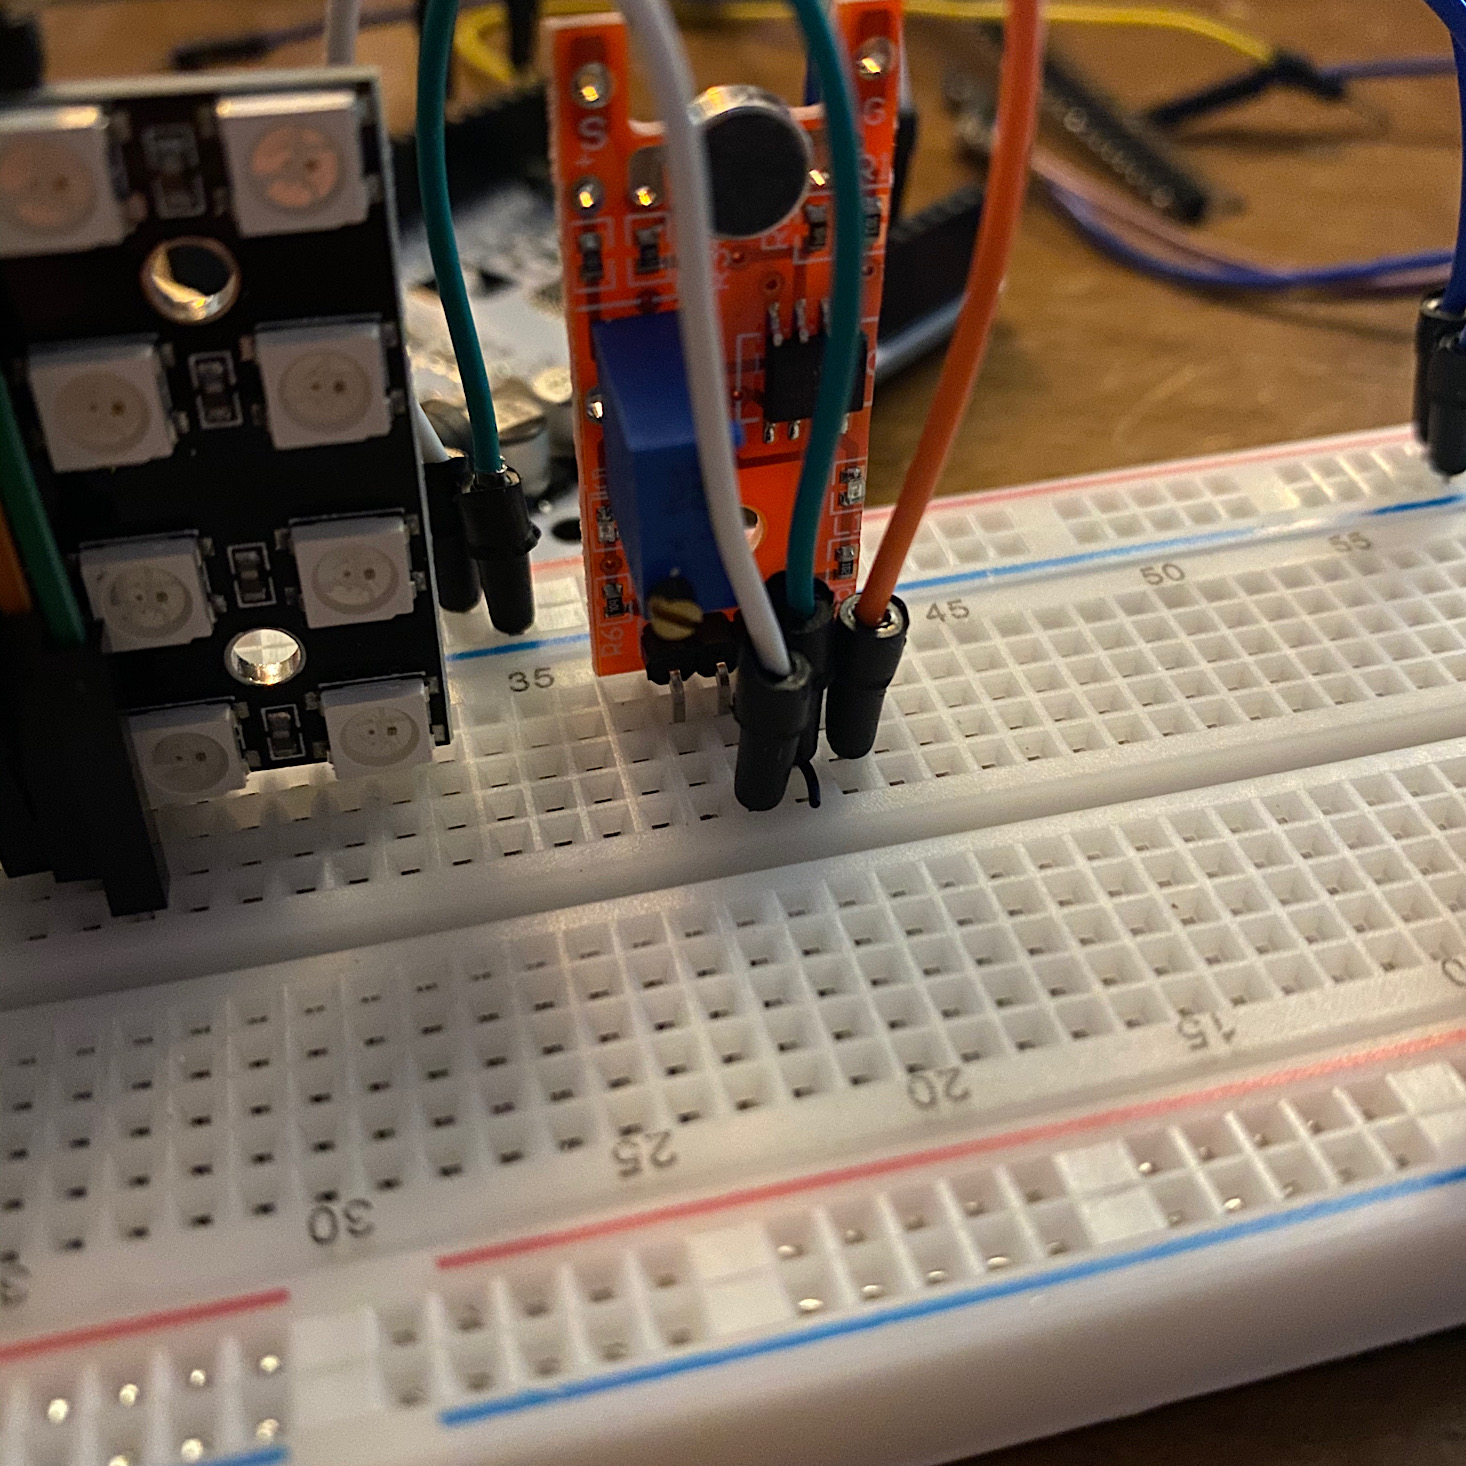
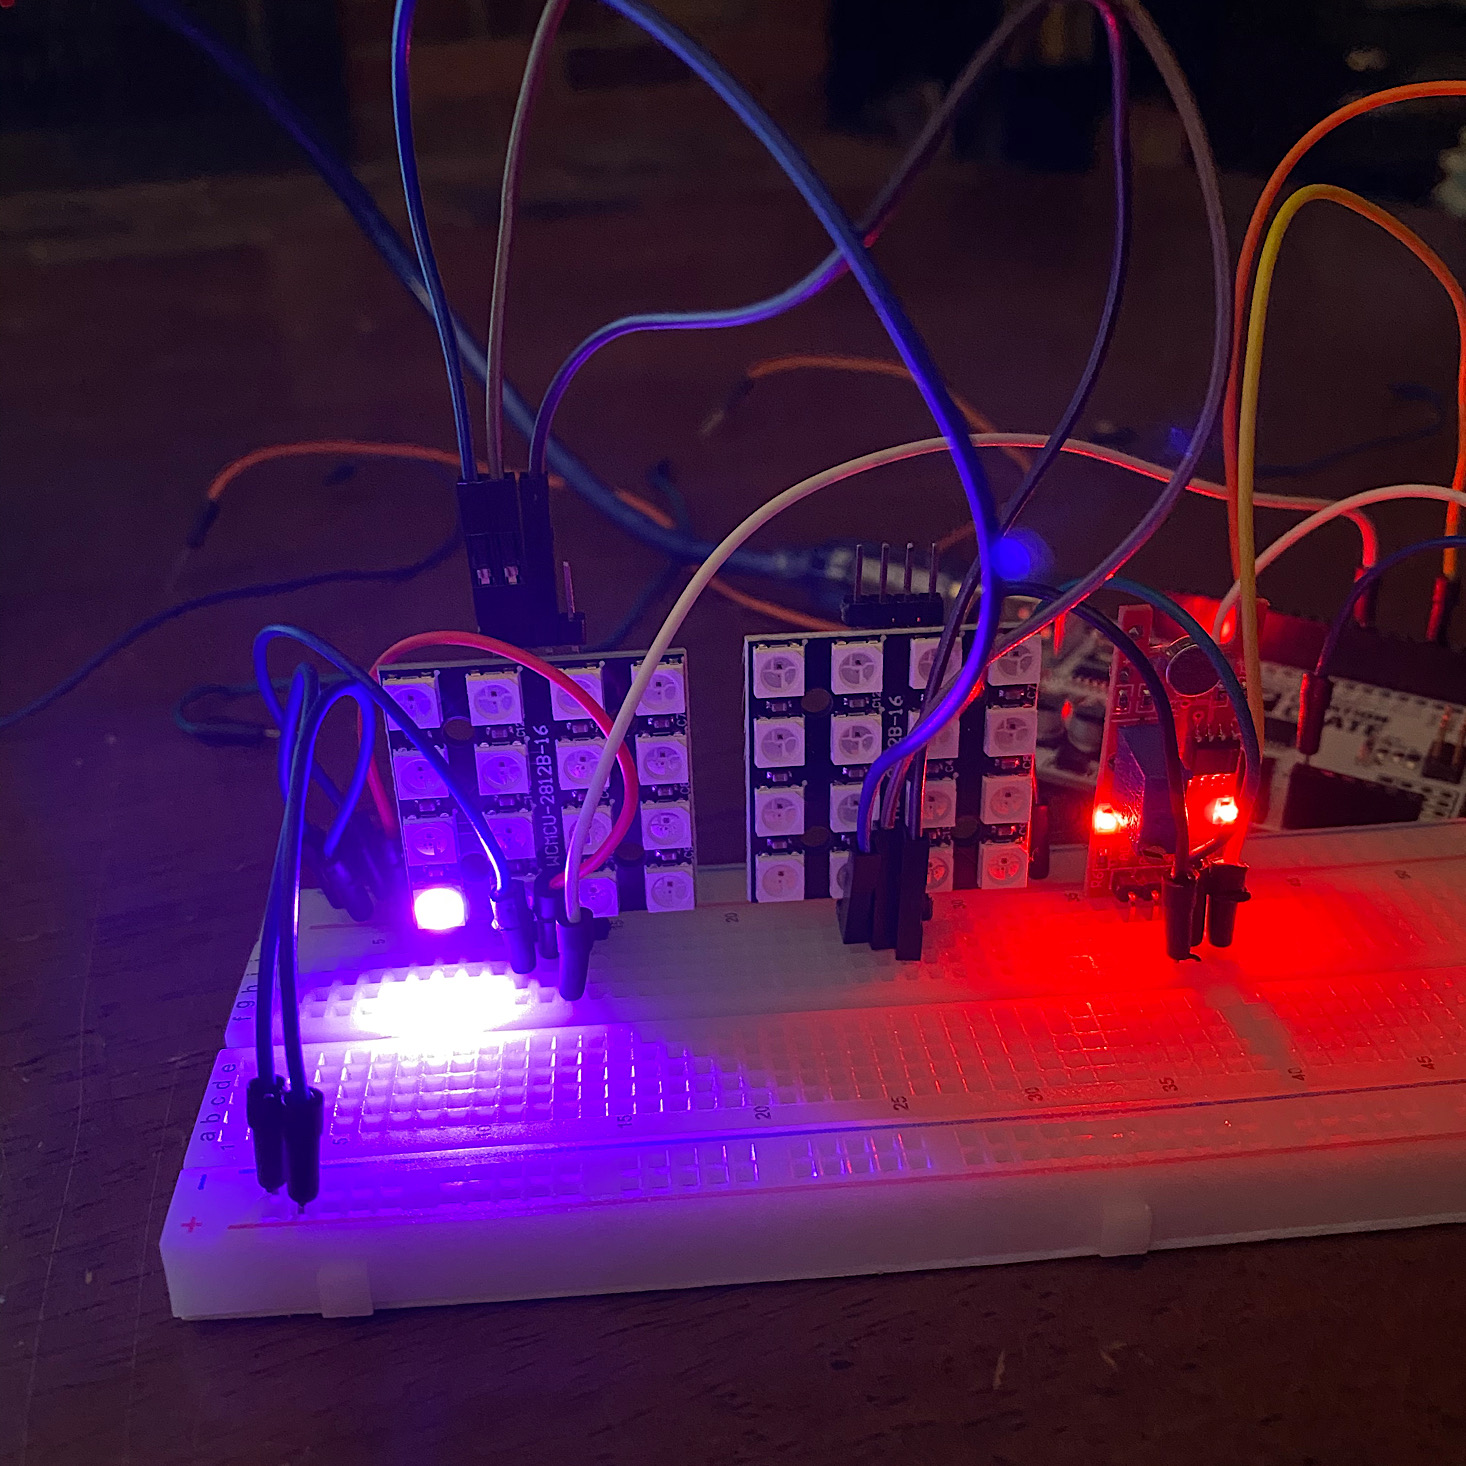
These are the instructions for placing the components on our breadboard and for wiring it up. This month I encountered a lot of difficulties. The first of which was my LED panel being broken, but fortunately I was able to attach the pins to the back and you can see I was able to get everything placed correctly and wired up.
Part 2: Write the Program


1 of 3
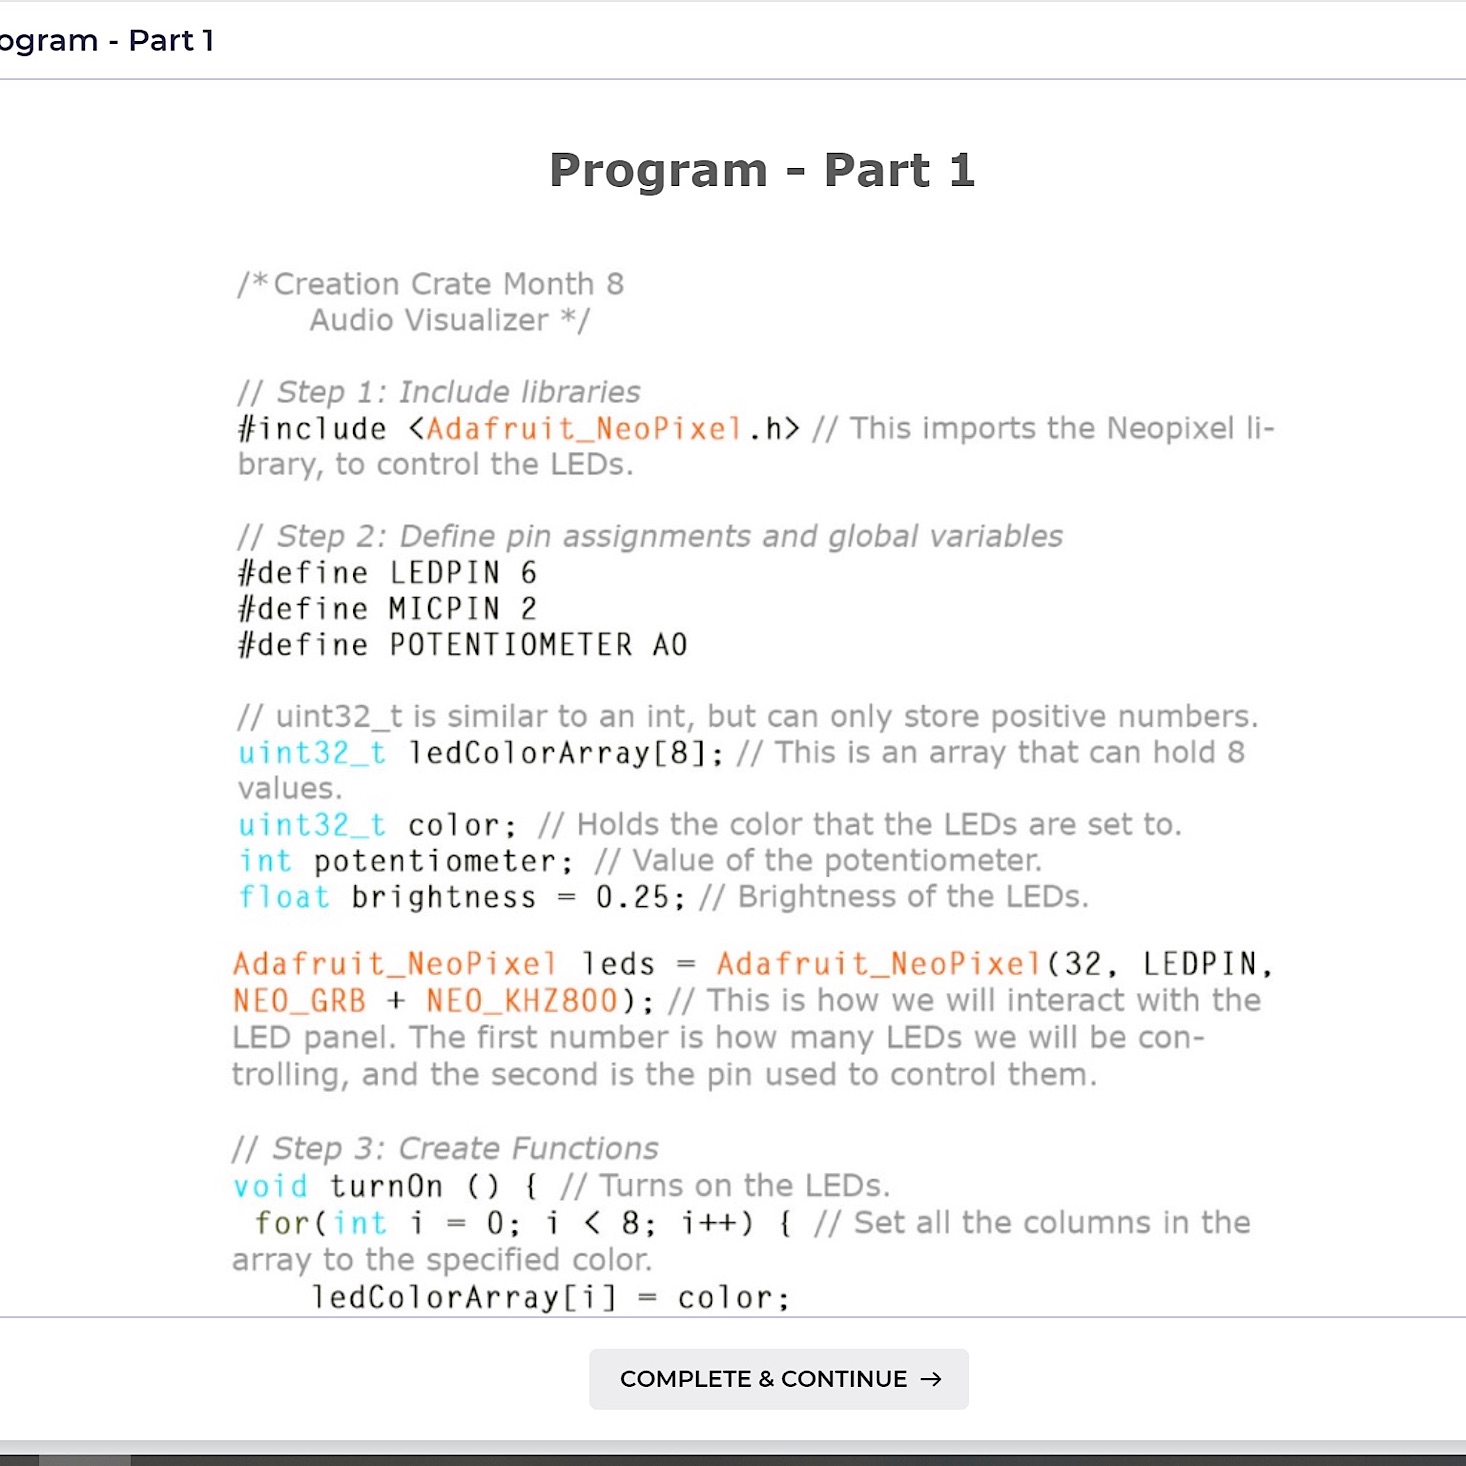
Now it was time to write the program using Arduino. With our first project, they provided directions for how to download Arduino's free software along with a coding video that explained the basics to us. While entering code is essentially just typing in what they give you word for word, it can be quite tedious and it's easy to make a mistake. Luckily, they include a section on common errors to help us troubleshoot. They break down the coding into sections and use notations to help us understand what each section is for.

1 of 3

I had no trouble with the code and I knew it was correct when there were no errors reported and it was done uploading. I even got the lights on my microphone module to light up, but still, my LED panels were blank. At this point, I began checking to make sure everything was wired correctly and in the process, I broke the pins off of the one LED panel permanently.
Since I was feeling pretty confident, I decided to break out my welcome gifts and I actually soldered the pins back onto the panel. Sorry, no photos- this was my first time using the soldering iron, and I was very focused. I managed to get them back on, but they quickly broke again because there just wasn't much metal to melt together. I did also use my digital multimeter to ensure that my panels were working, but since only one was still intact it was time to contact customer service and get a replacement sent out, which they quickly did!

1 of 2
My replacement came, I placed the components, re-wired everything, and this time, NOTHING lit up! I knew my code was correct because my microphone had worked previously and my UNO R3 was lighting up, so at this point I figured out that my breadboard was probably bad. Luckily I have a collection of them from previous projects so I added everything to the new breadboard (third time's a charm, right?) and success! My LED in the bottom corner was finally lit up! (See it in action right here.)
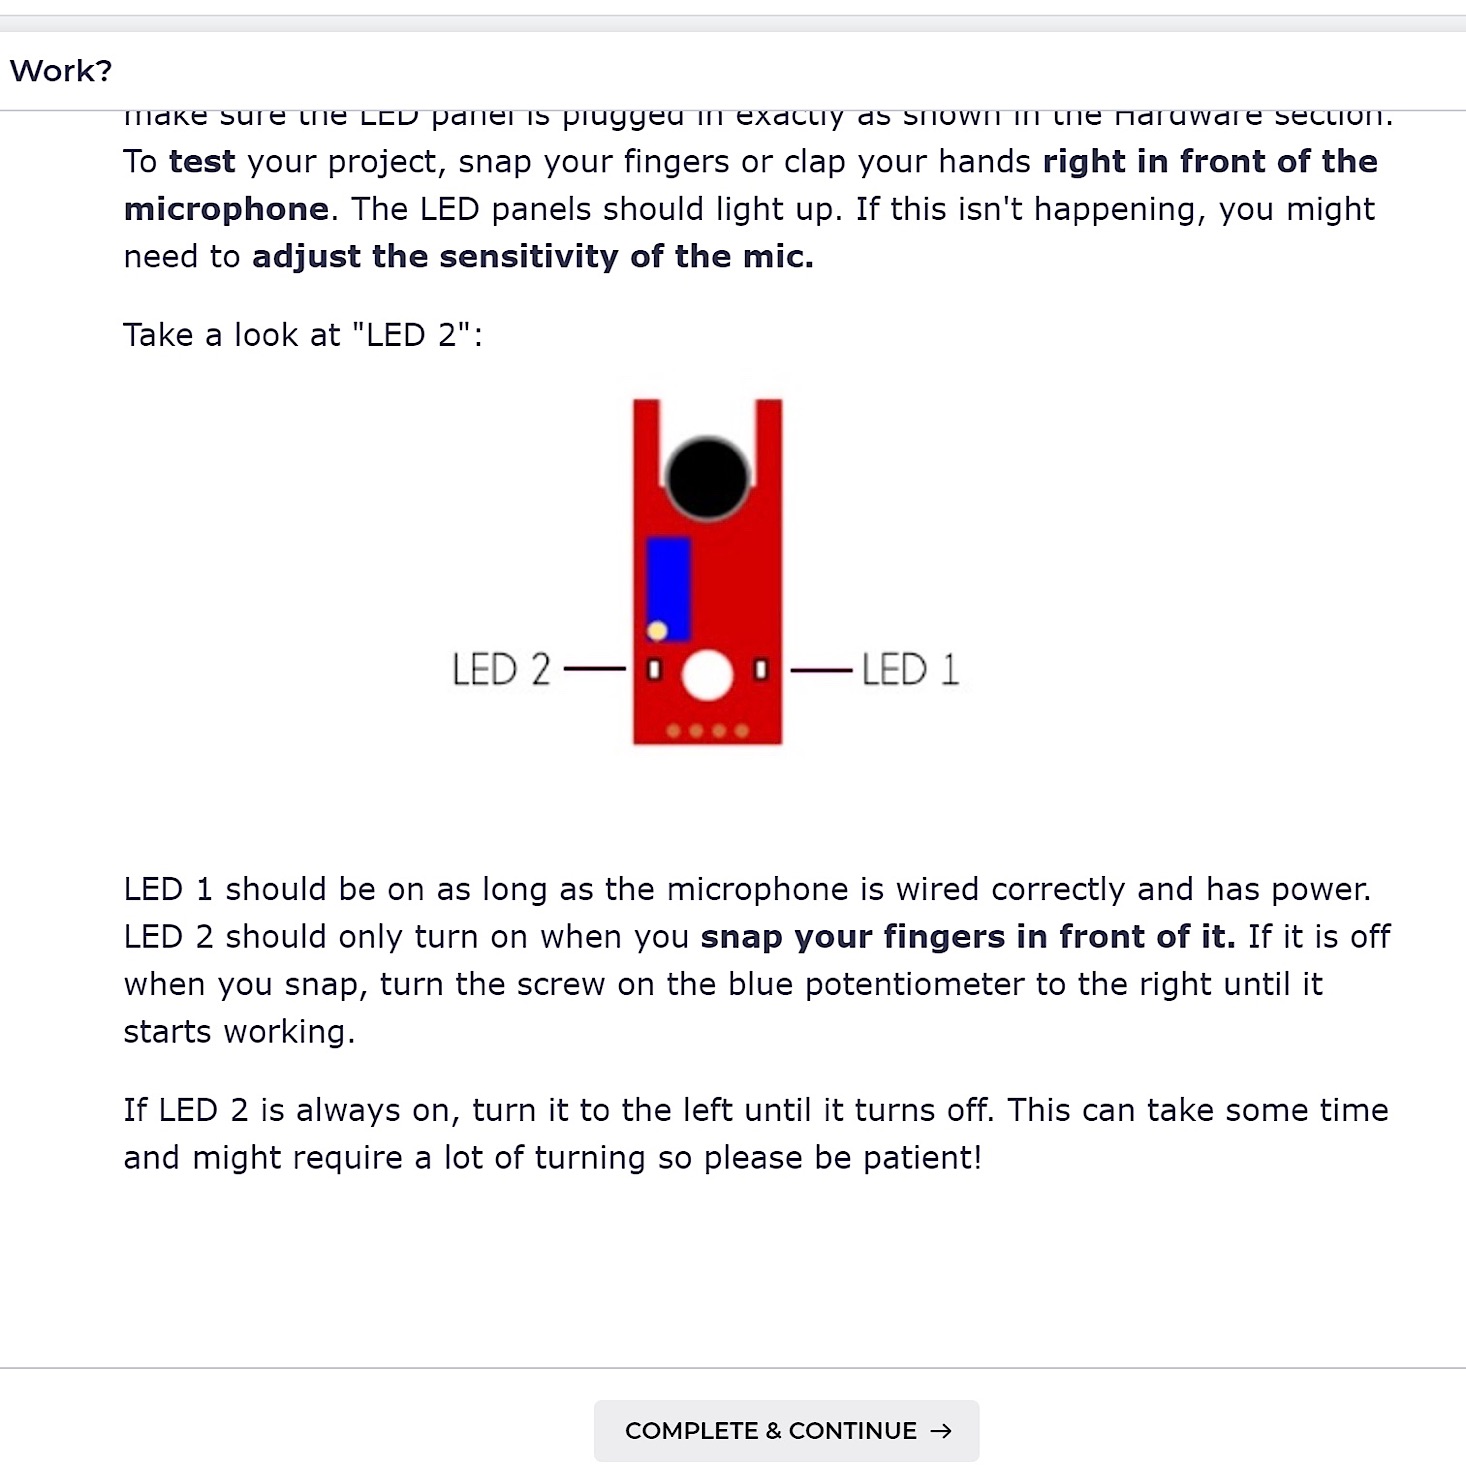
When the LED panels lit up they would all light up the same color when the microphone module picked up sound. I could also manually turn them on by turning the tiny screw at the bottom of the module which is what I did for this video. Then when I turned the potentiometer, it would change the colors. With it working, it was now time for the challenges.
1 of 2
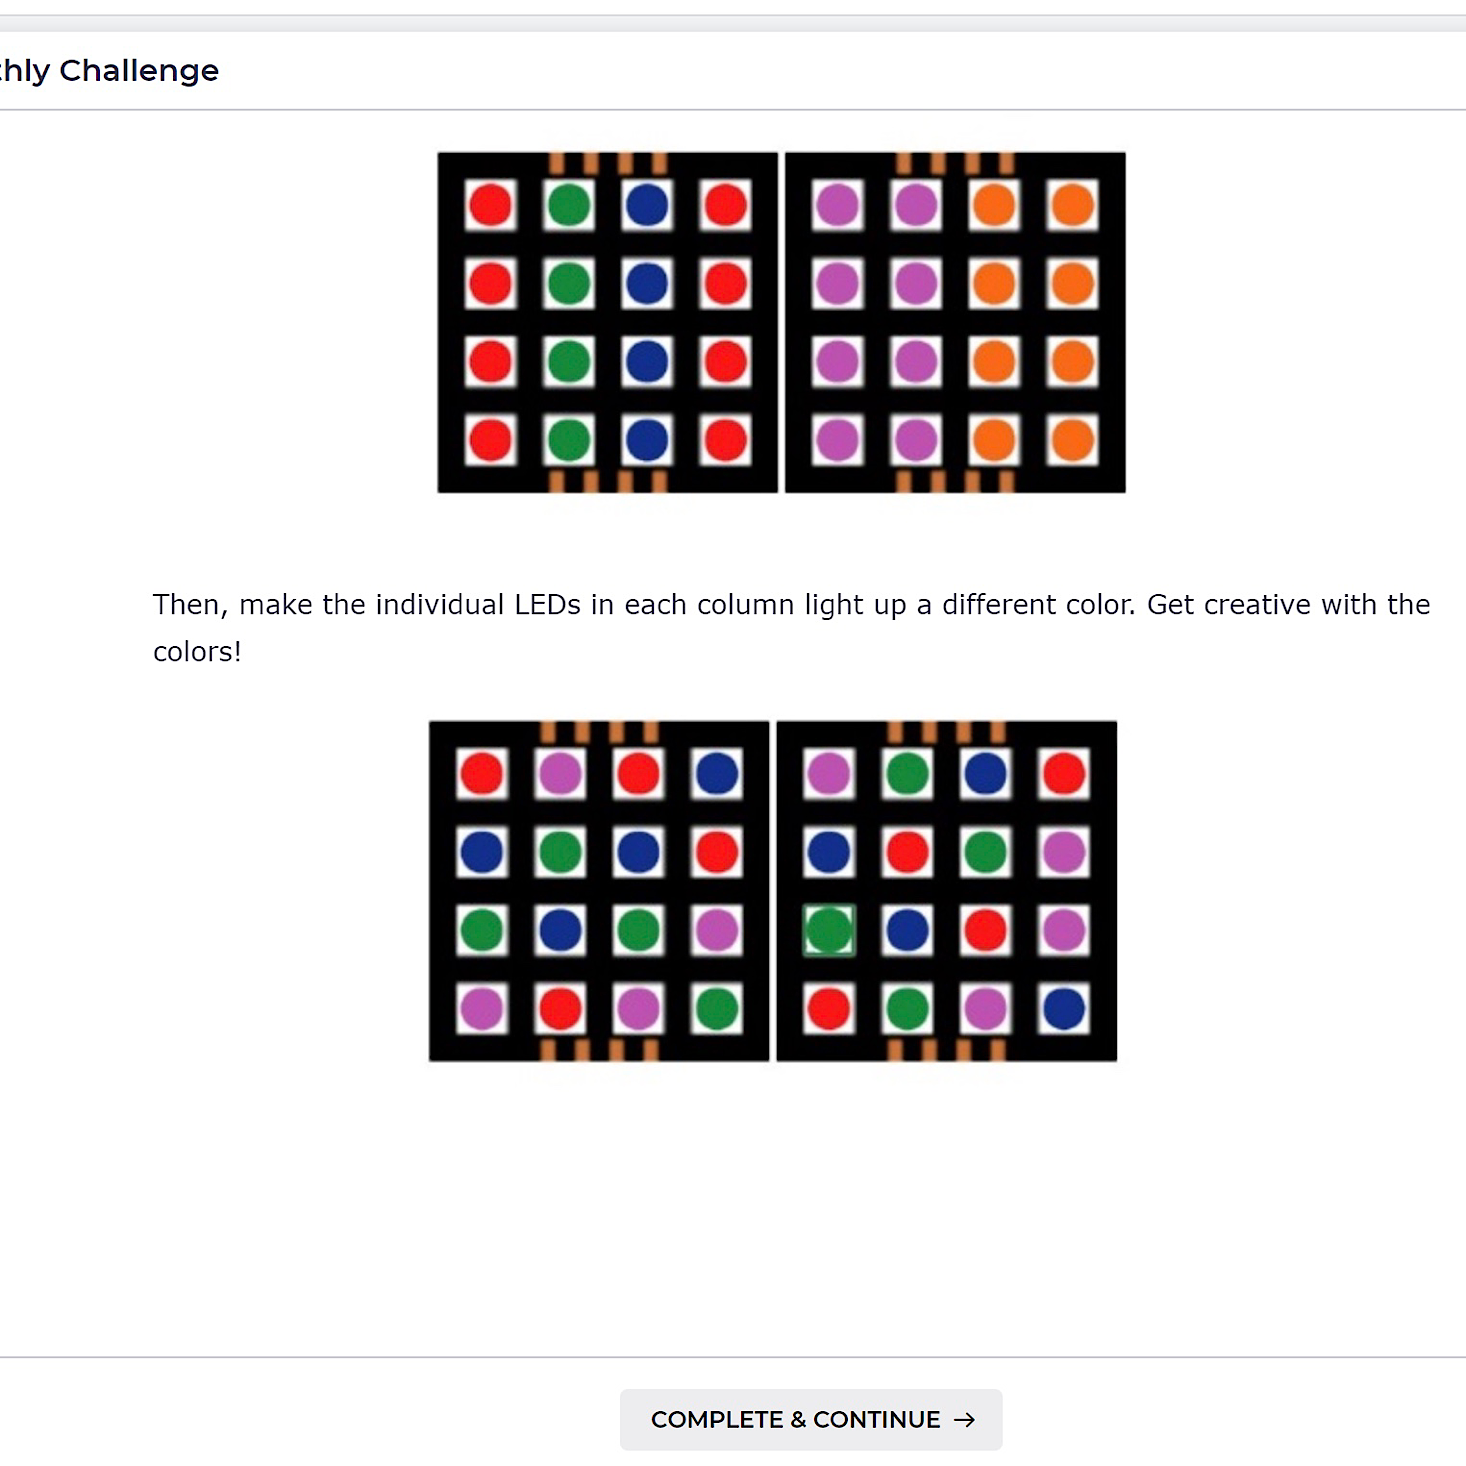
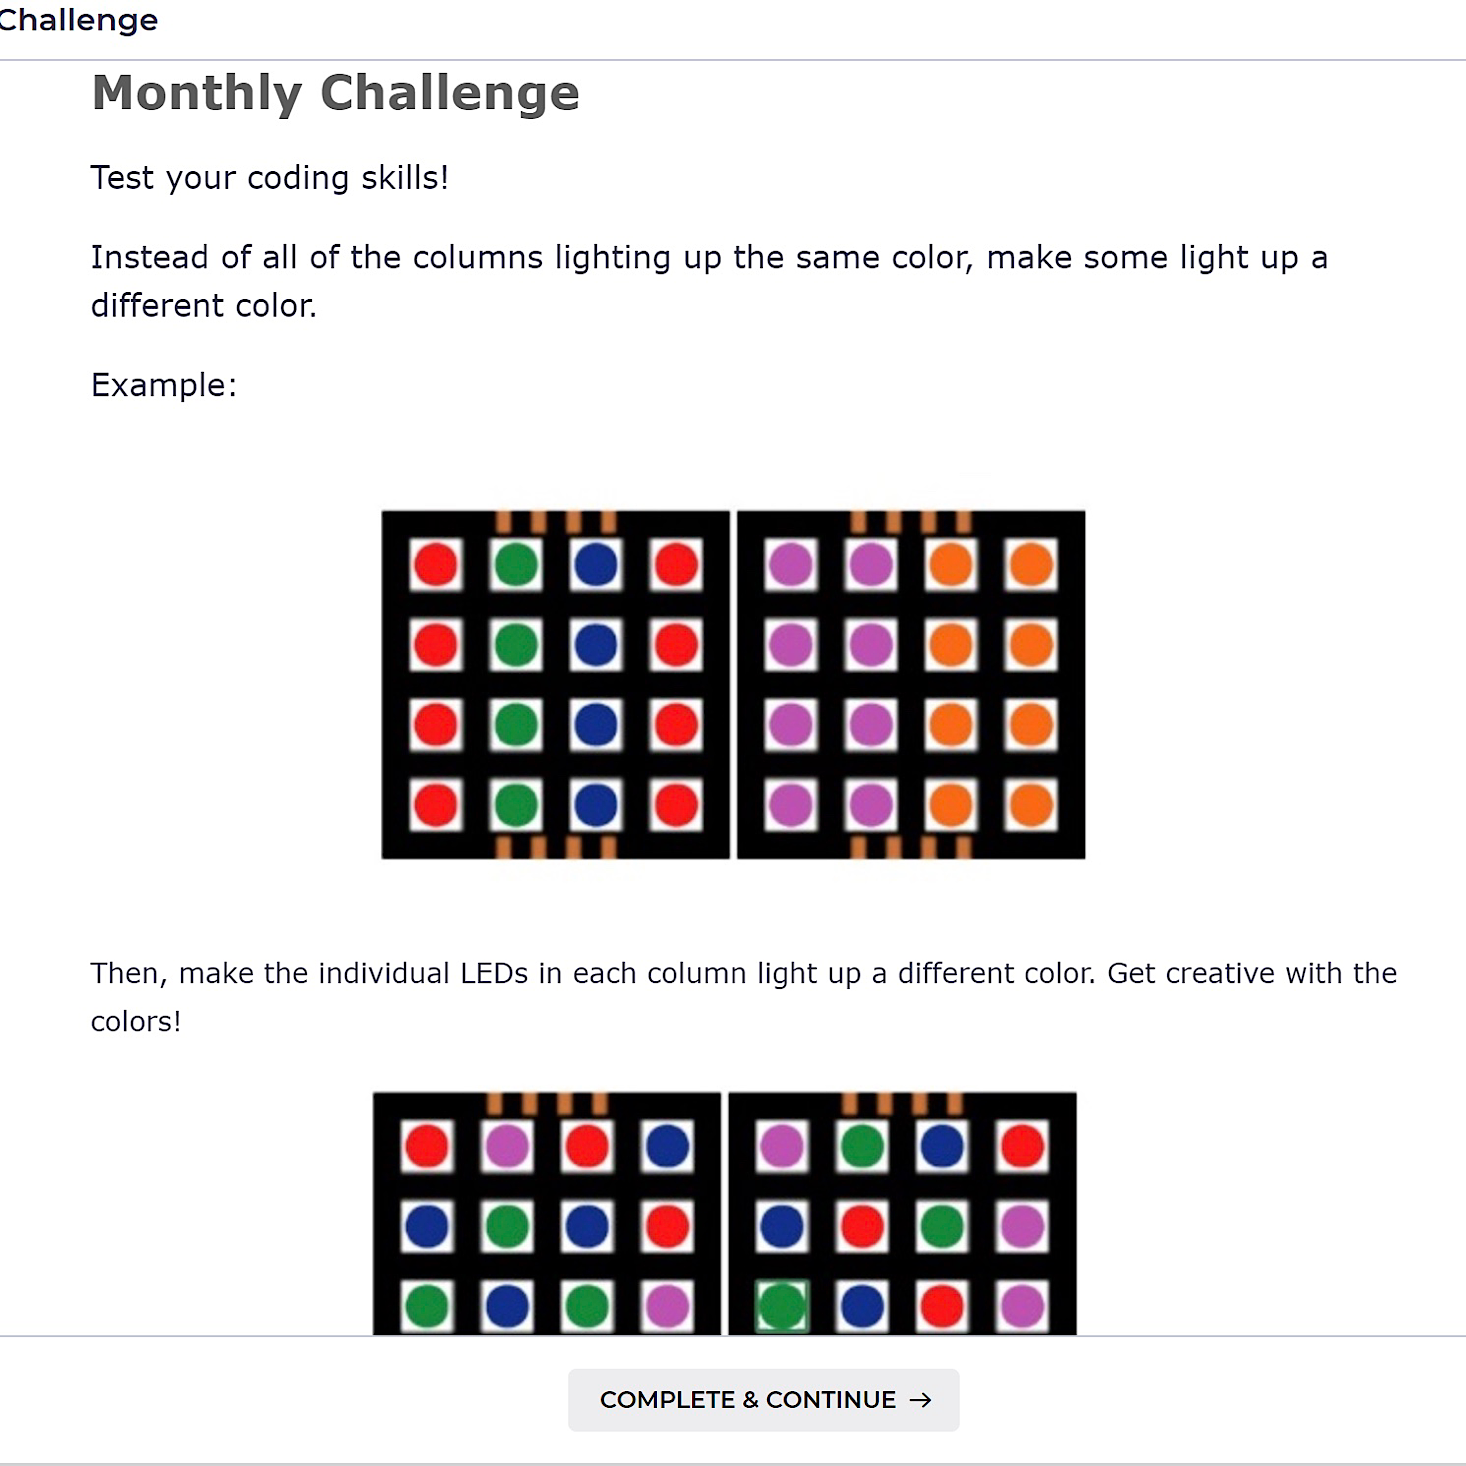
The first part was to get each row to light up as a separate color. I could not for the life of me figure out how to do this! I was able to change a few at a time, but I am still trying to make sense of arrays and the coding and how this LED panel works. I swear I am almost there, but I just haven't quite wrapped my head around it yet.


1 of 2
The monthly exercises seemed to be a bit more doable. I was able to change which LED lights up first pretty easily to the top right corner. I was also able to get the LEDs to light up from right to left instead of left to right. I did try to take a video of this, but these LED lights are so bright that it was difficult to see. Honestly, my eyes were a bit sore after working on this for so long! Ha. As for exercises 3 and 4, these are going to require me to go back through some of the previous courses for some help. This shouldn't be difficult since I still have access to all of the information and it really makes it feel like a true course that I'm taking where I'd have to consult my textbooks for the help. If I hadn't spent multiple hours trying to solve the other issues I'd encountered I would be trying these right now, but I think my brain could use a rest! I am grateful for the challenge though and the stimulation these exercises provide.

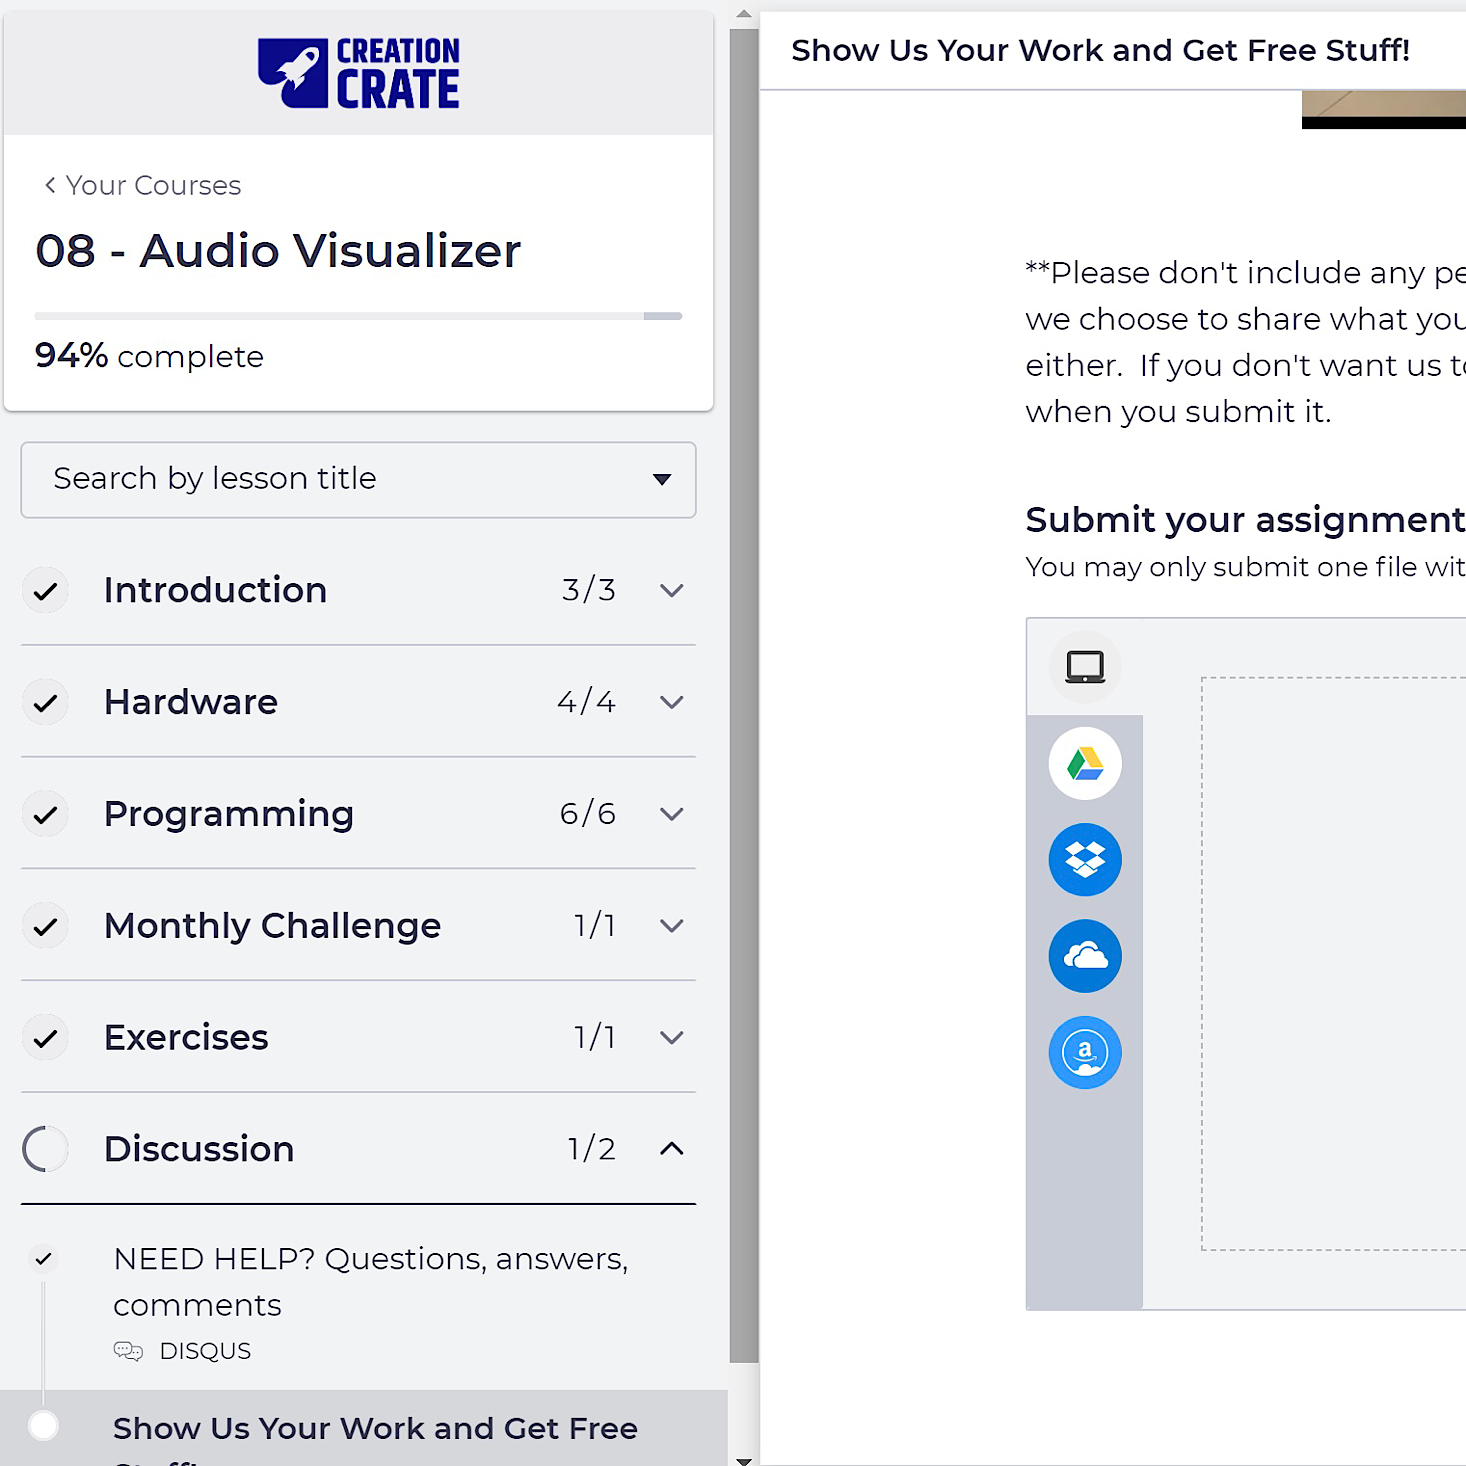
If we did have any major issues, they have a classroom discussion that we can use to ask questions. It looks like Creation Crate responds very quickly to any concerns, although I did post a question at the beginning of the month and have yet to hear back. I am willing to chalk it up to limited availability due to both COVID and it being summer for this time. I did not actually submit a question to customer service though and I'm sure if I did that would help to ensure a followup of some sort. I'll be testing this out again in the future to be sure! 😉

It was easy to see once we had completed everything in the course thanks to the side menu. The last section is where they encourage you to share your work in exchange for some cool rewards.
Verdict: This month was quite a stressful Creation Crate for me! The broken LED panel threw me for a loop and while I was feeling pretty proud that I was able to use my multimeter and soldering iron to solve my problem, I'm now wondering if maybe the breadboard was the issue the whole time? I do feel like I was savvy enough to figure that out as well thanks to my confidence in my wiring and coding skills which have improved vastly over the course of this subscription. I am still working on a few of the tasks from this month, but I am actually enjoying the challenge of them and I am impressed at the increasing difficulty of these projects. This is definitely a great way to stay sharp and it's very educational!
To Wrap Up:
Can you still get this box if you sign up today? Because the projects build upon one another, you'll receive the Project 1 box first! From Creation Crate:
Creation Crate projects are a combination of building hardware and programming software with a focus on helping you understand how it works. Each month, you'll be given a new project that's slightly harder than the last.
Check out our other Creation Crate reviews and our list of the best boxes for teens, as voted by MSA readers!
Keep Track of Your Subscriptions: Add this box to your subscription list or wishlist!
What do you think of Creation Crate?
Please do not enter your email address in the Name field or in the comment content. Your email address will not be published. Required fields are marked *. Remember to post with kindness and respect. Comments with offensive language, cruelness to others, etc will not be approved. See our full comment policy here.