

Eureka Crate (from parent company KiwiCo) is a subscription box for teens and adults ages 14-104. It arrives every month with all the materials and instructions needed to create a functional, lasting object with a focus on engineering. The goal of these projects is to use science and math to solve real-world problems while inspiring the recipients to become creative innovators.

KiwiCo offers boxes for a variety of different age groups:
- Panda Crate for 0-24-month-olds,
- Koala Crate for 2-4-year-olds,
- Kiwi Crate for 5-8-year-olds,
- Atlas Crate for 6-11-year-olds,
- Doodle Crate and Tinker Crate for 9-16+-year-olds,
- Eureka Crate and Maker Crate for ages 14 and up. There really is something for every age with this company.
This review is of the $29.95 a month Eureka Crate, for 14-year-olds and up.
This box was sent to us at no cost for review. (Check out the review process post to learn more about how we review boxes).
About Eureka Crate
The Subscription Box: Eureka Crate
The Cost: $29.95 per month + free shipping. Save with longer subscriptions.
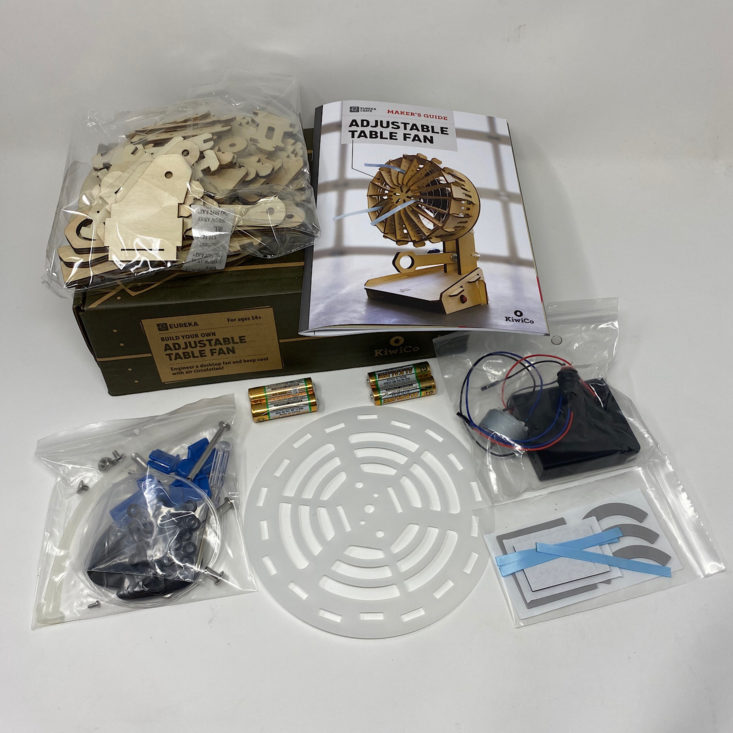
The Products: Detailed instructions and all of the high-quality materials needed to create a unique, lasting, and functional engineering project as well as a Maker's Guide that explains the science and technology behind it.
Ships to: The U.S. for free, Canada for $3.95 per month, and worldwide from $4.95-$6.95.
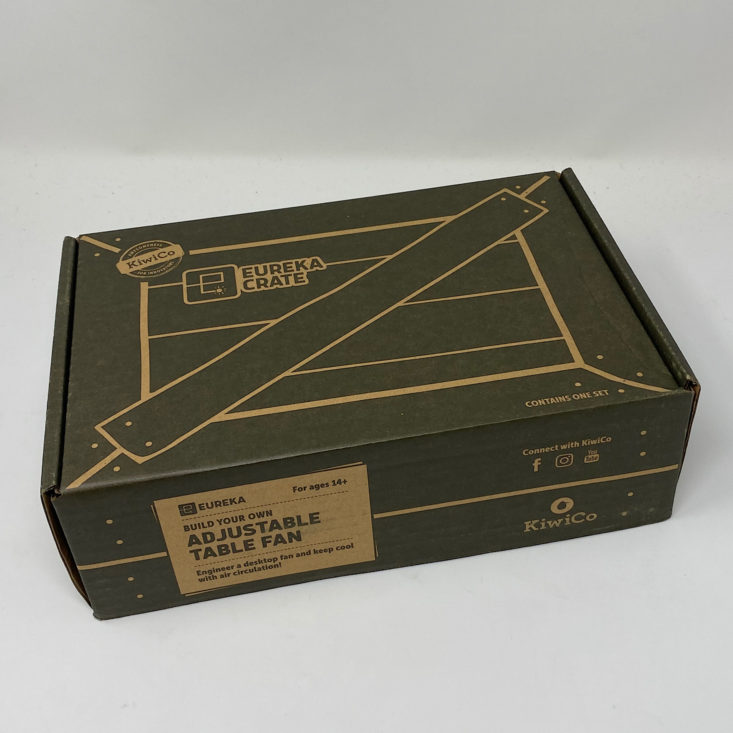
KiwiCo Eureka Crate "Adjustable Table Fan" Review - June 2020
1 of 9


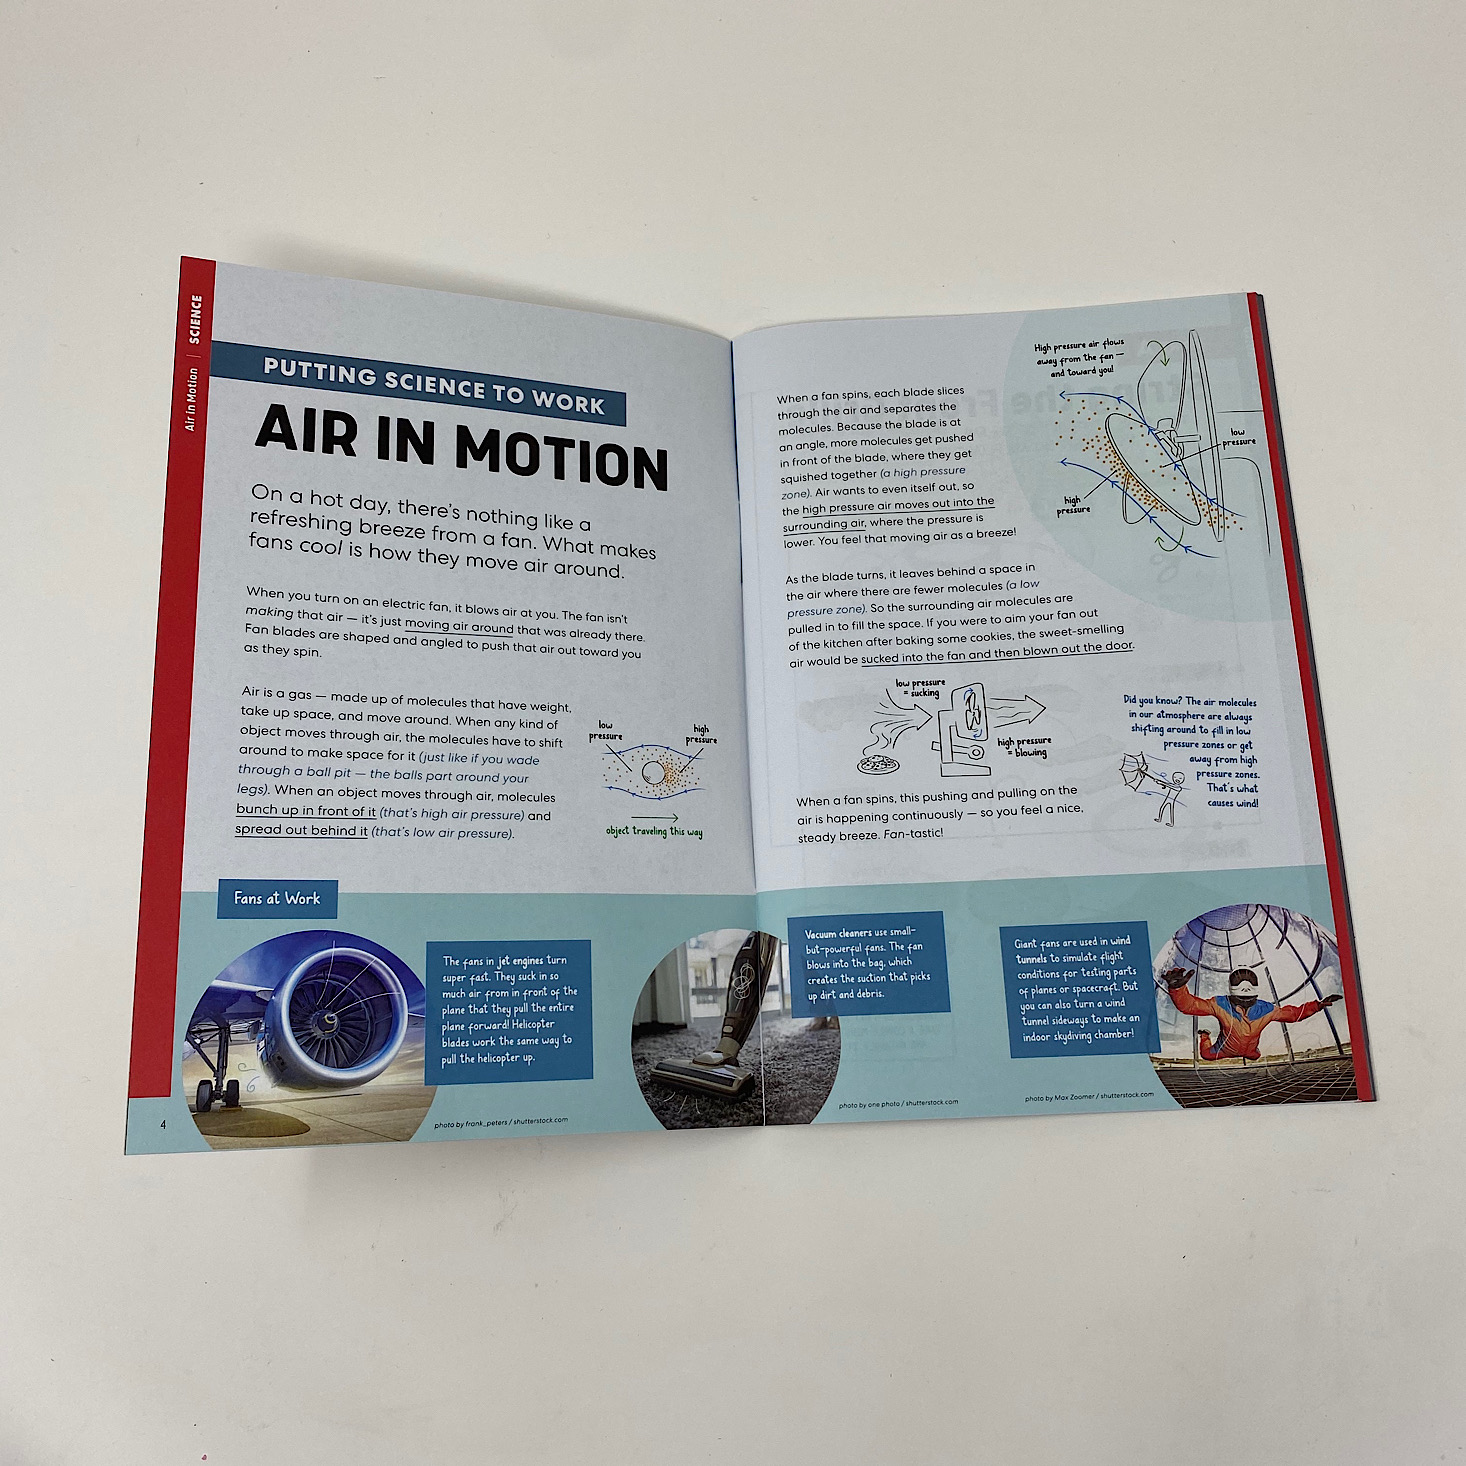

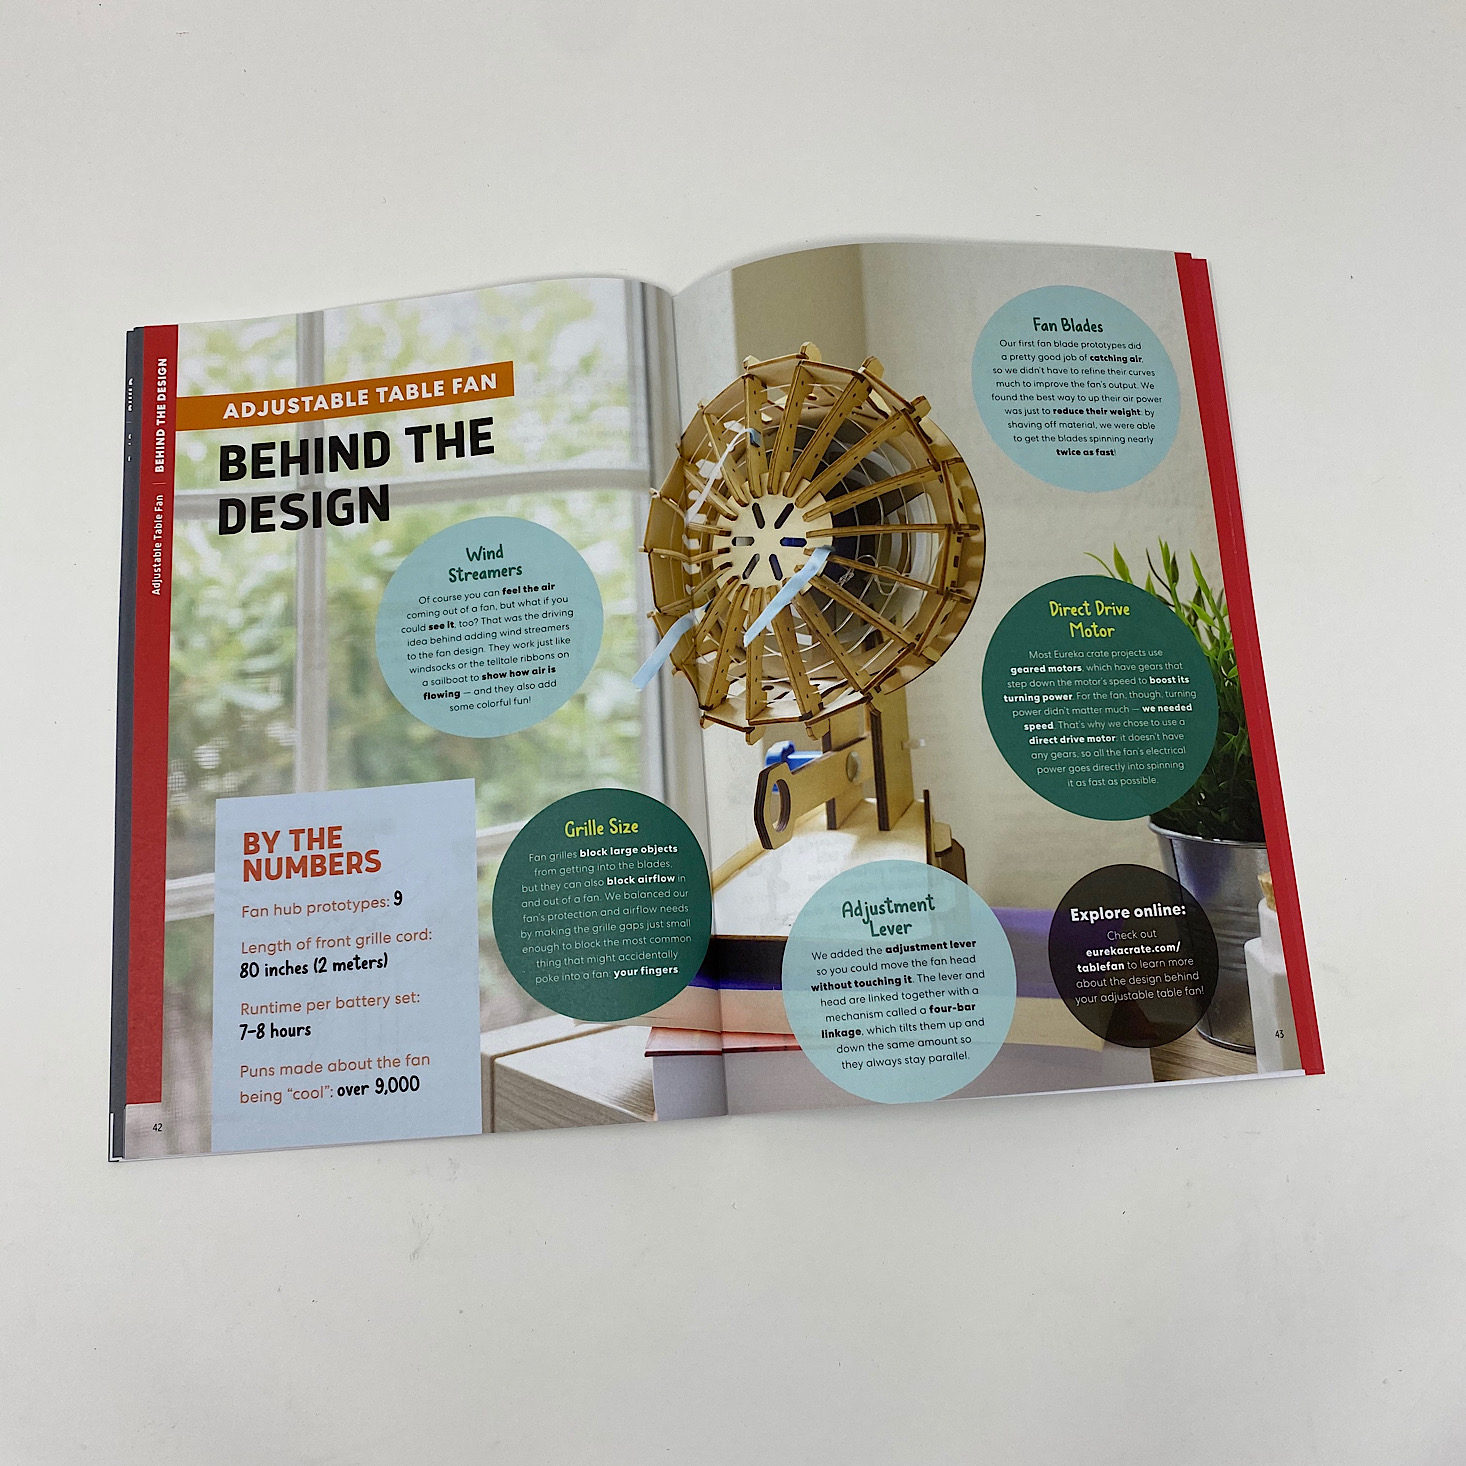
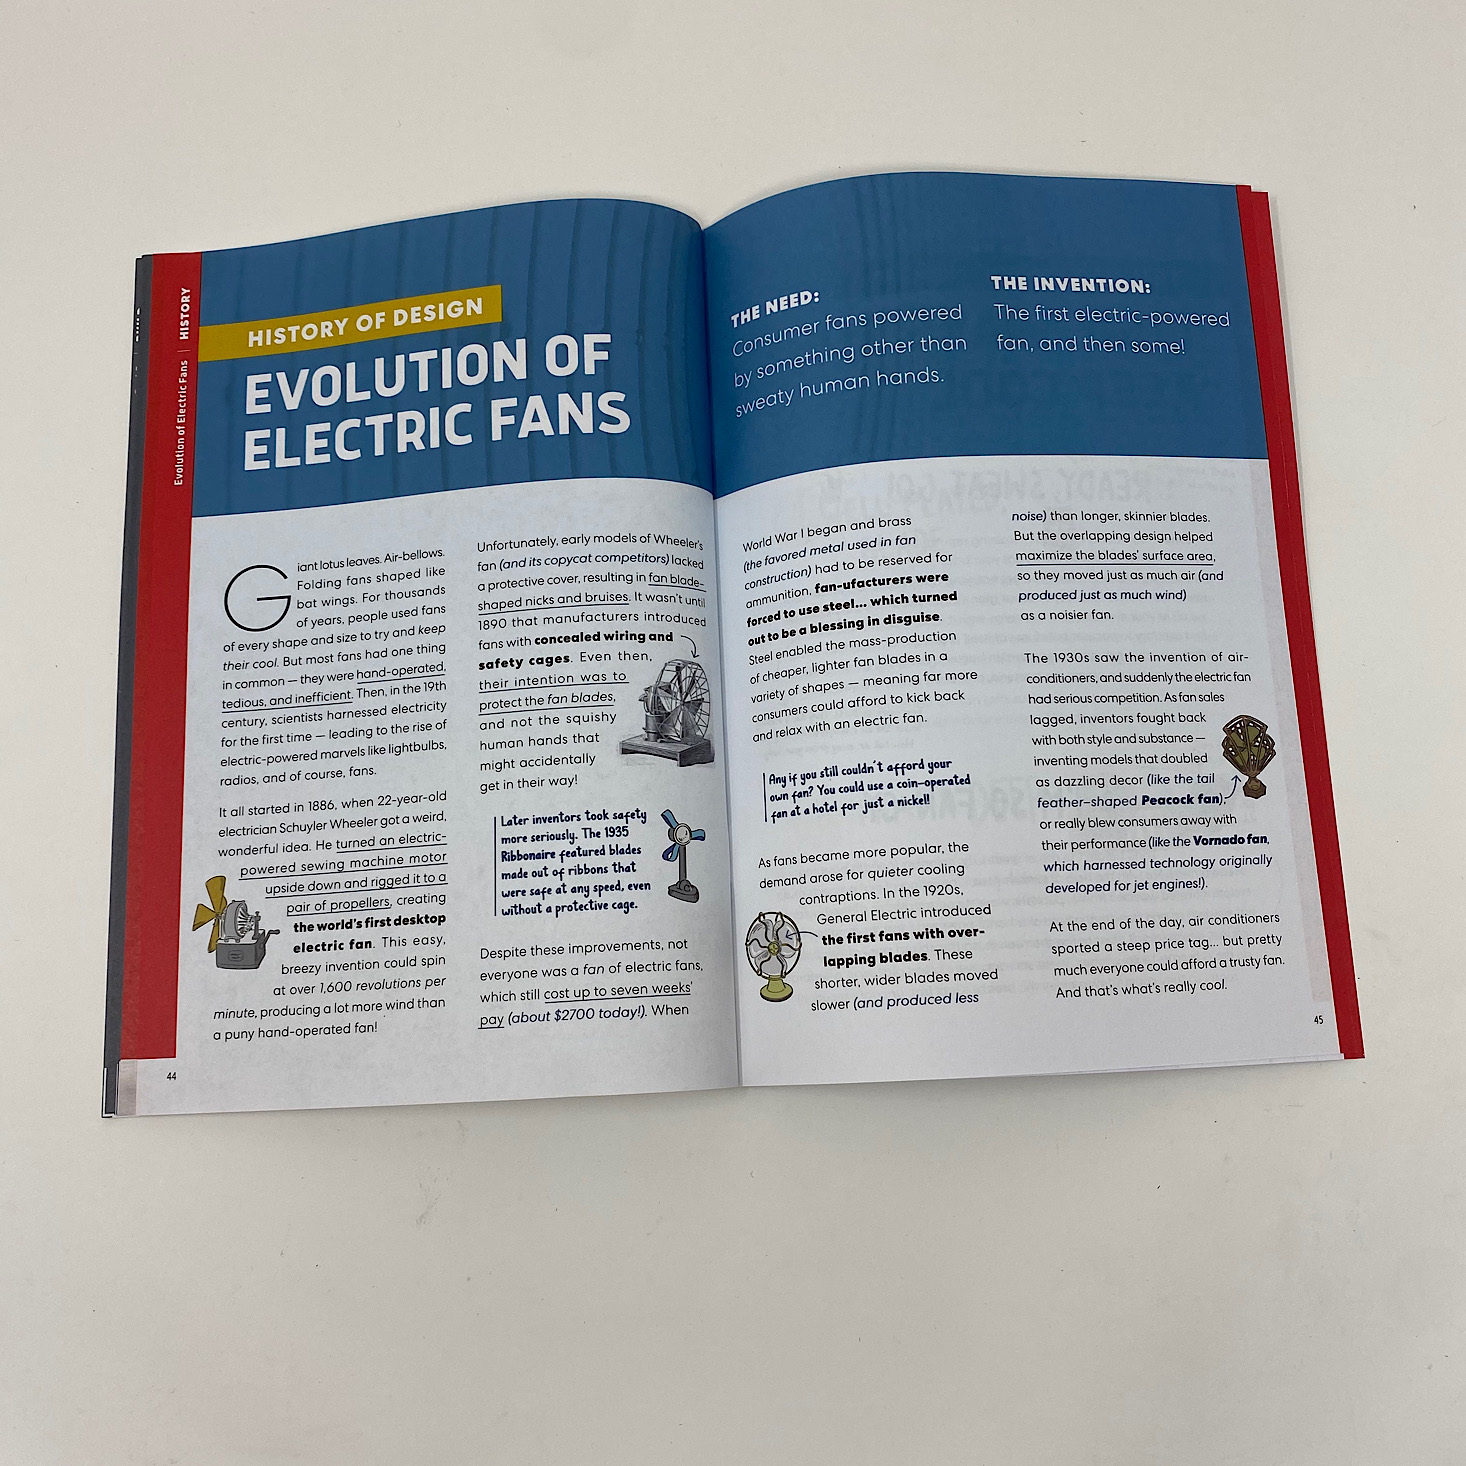
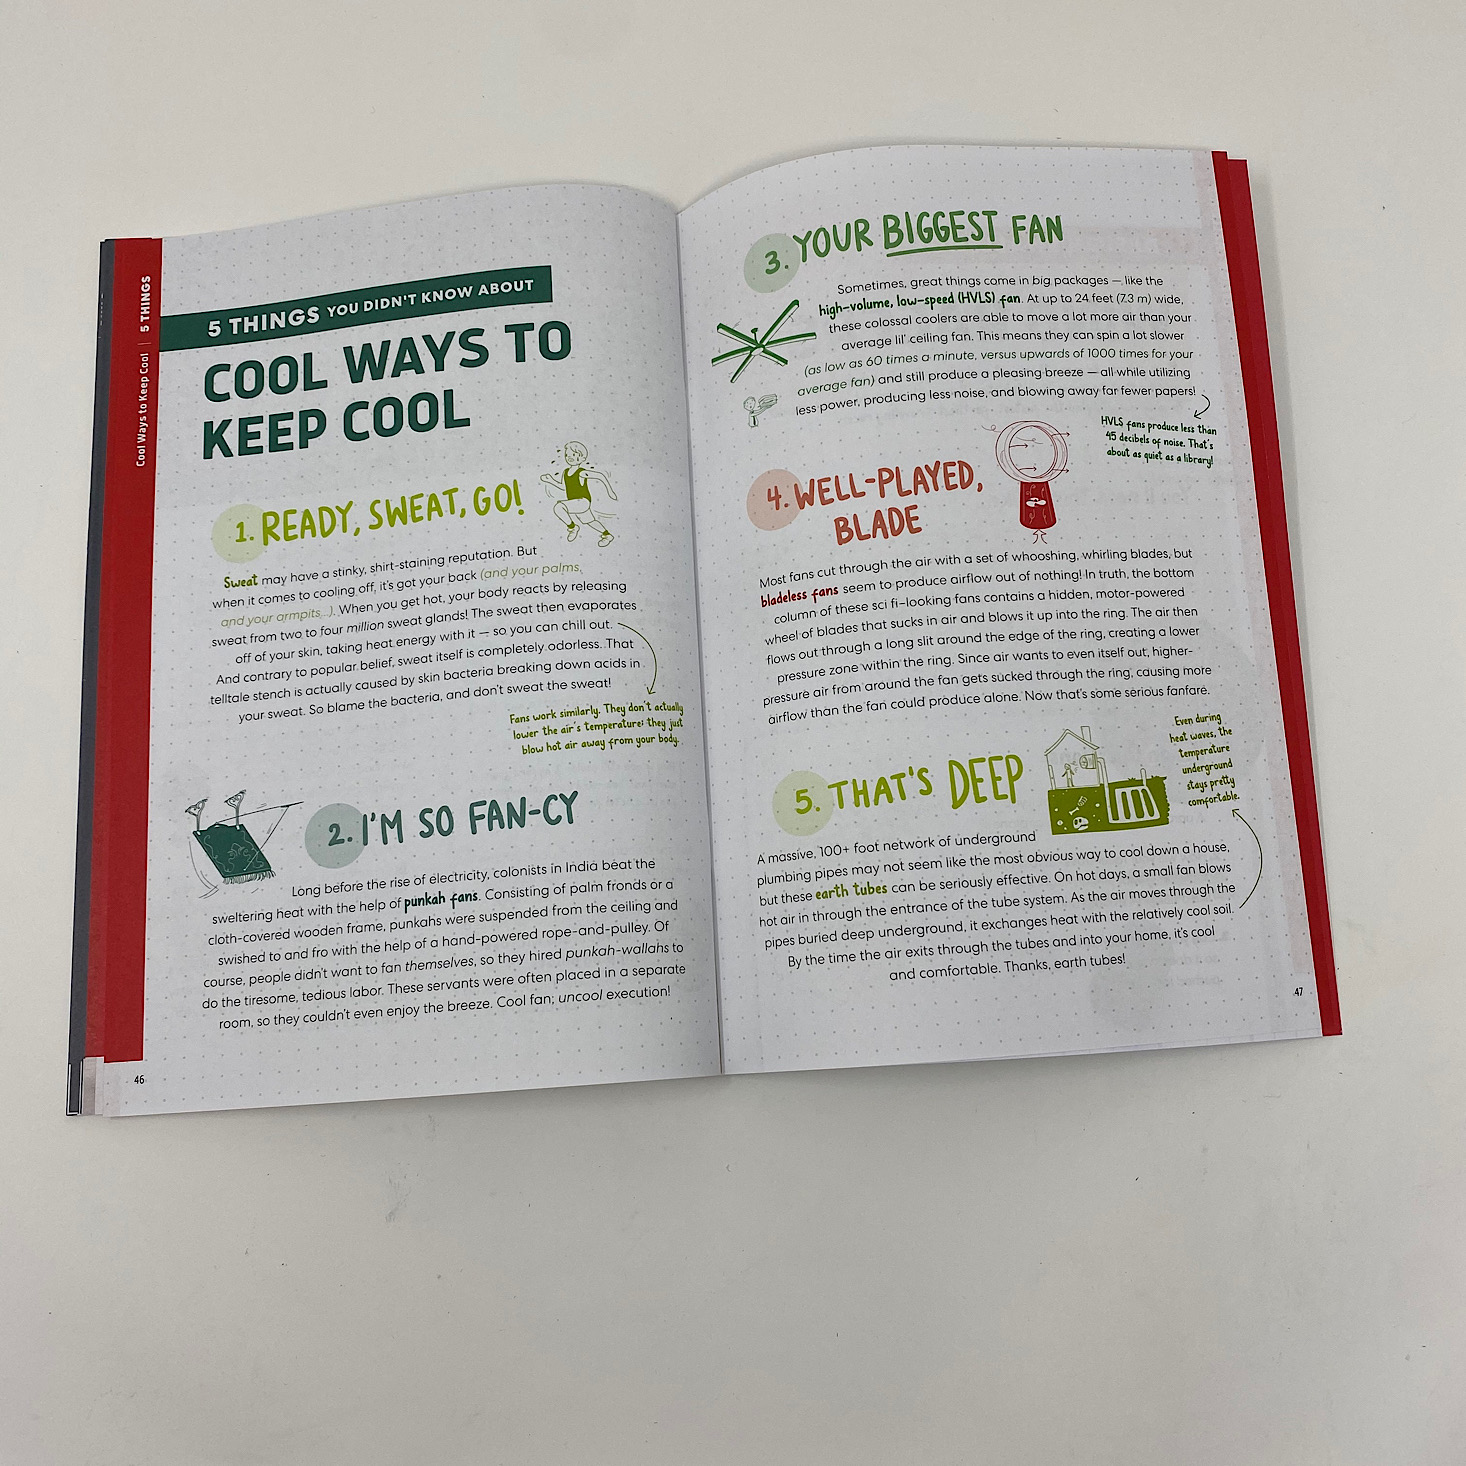
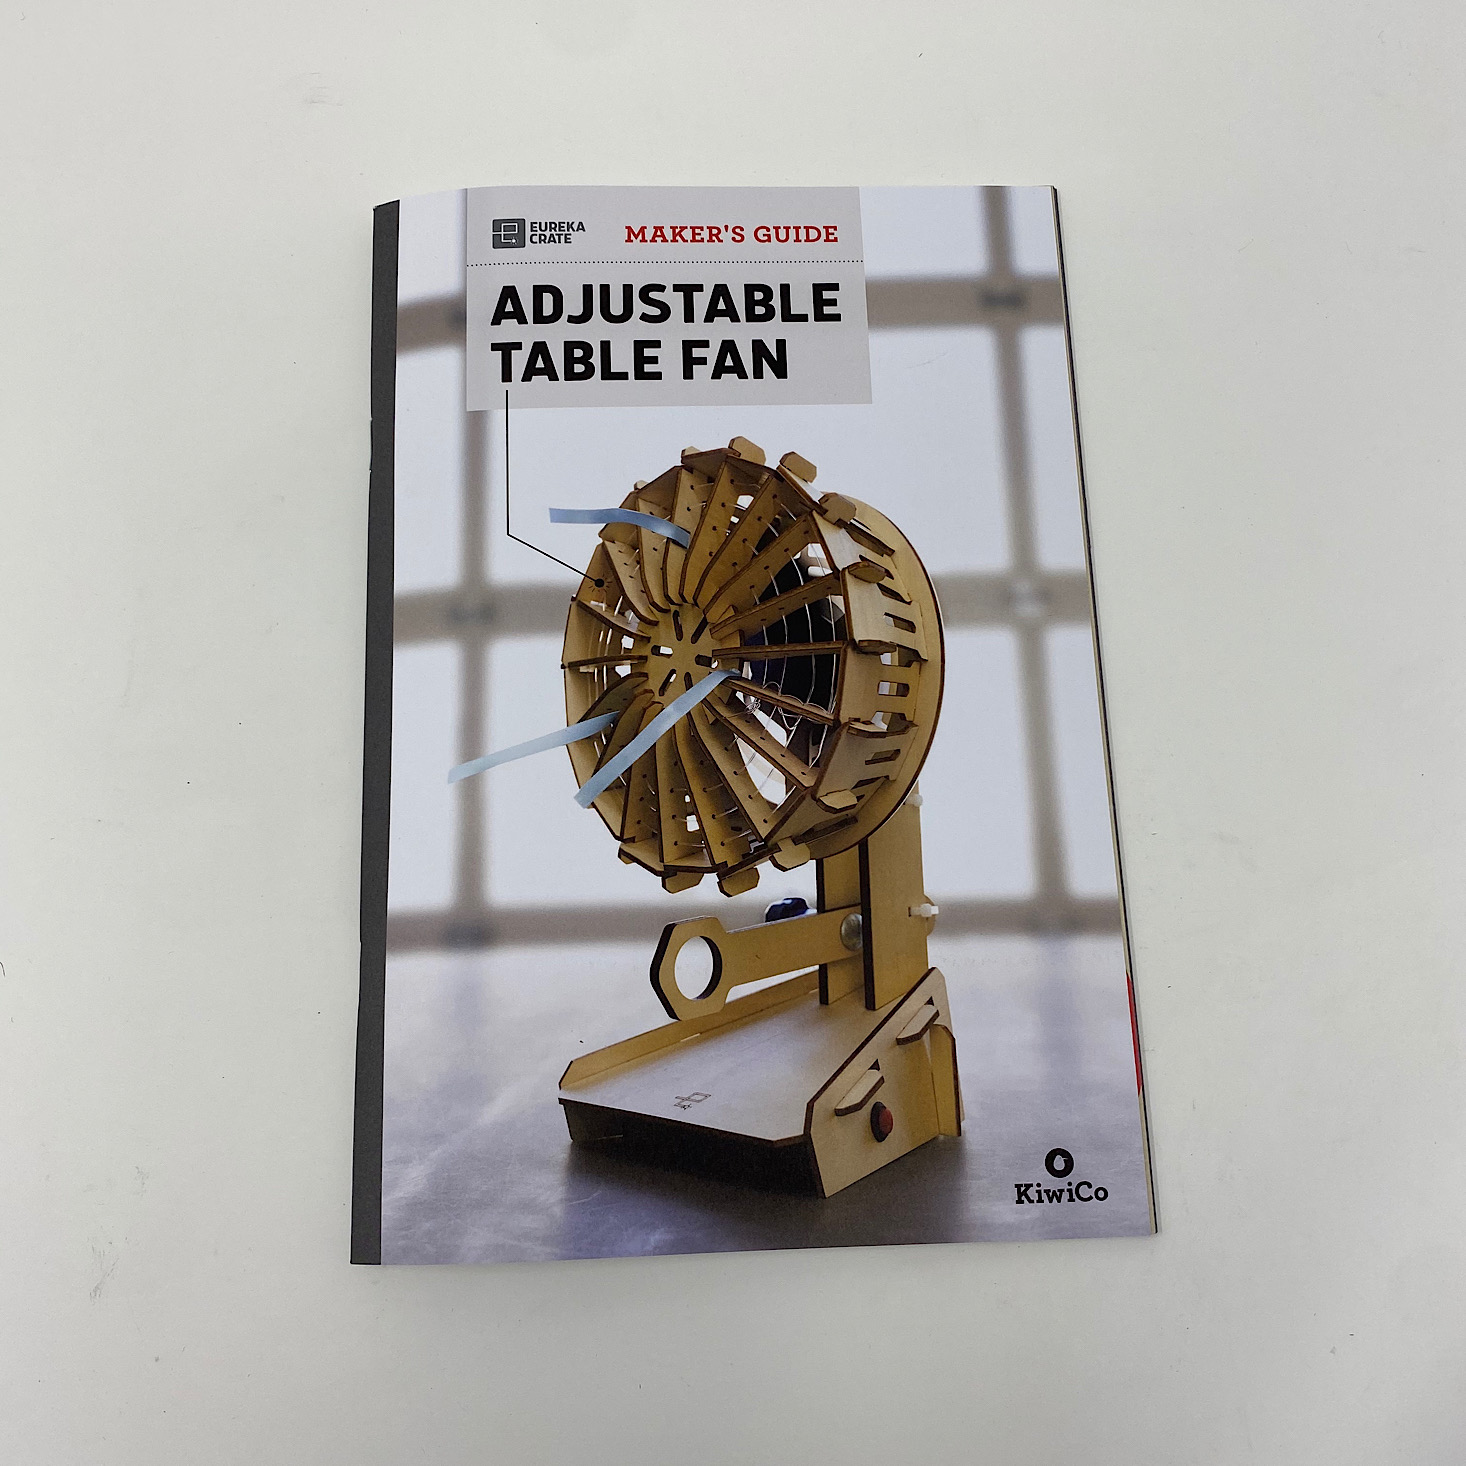
The project for this month was to make our own Adjustable Table Fan. We received this Maker's Guide which is full of helpful information related to our project along with the directions. This month they included some information about air in motion, the evolution of electric fans, and even some ways to keep cool. My favorite part is the "Behind the Design" page where they go into detail about their own process in creating this month's project. This month they made over 9,000 puns about the fan being "cool" and they went through 9 different hub prototypes. It looks like our fan can run for about 7-8 hours per battery set! Very "cool" indeed!
1 of 7


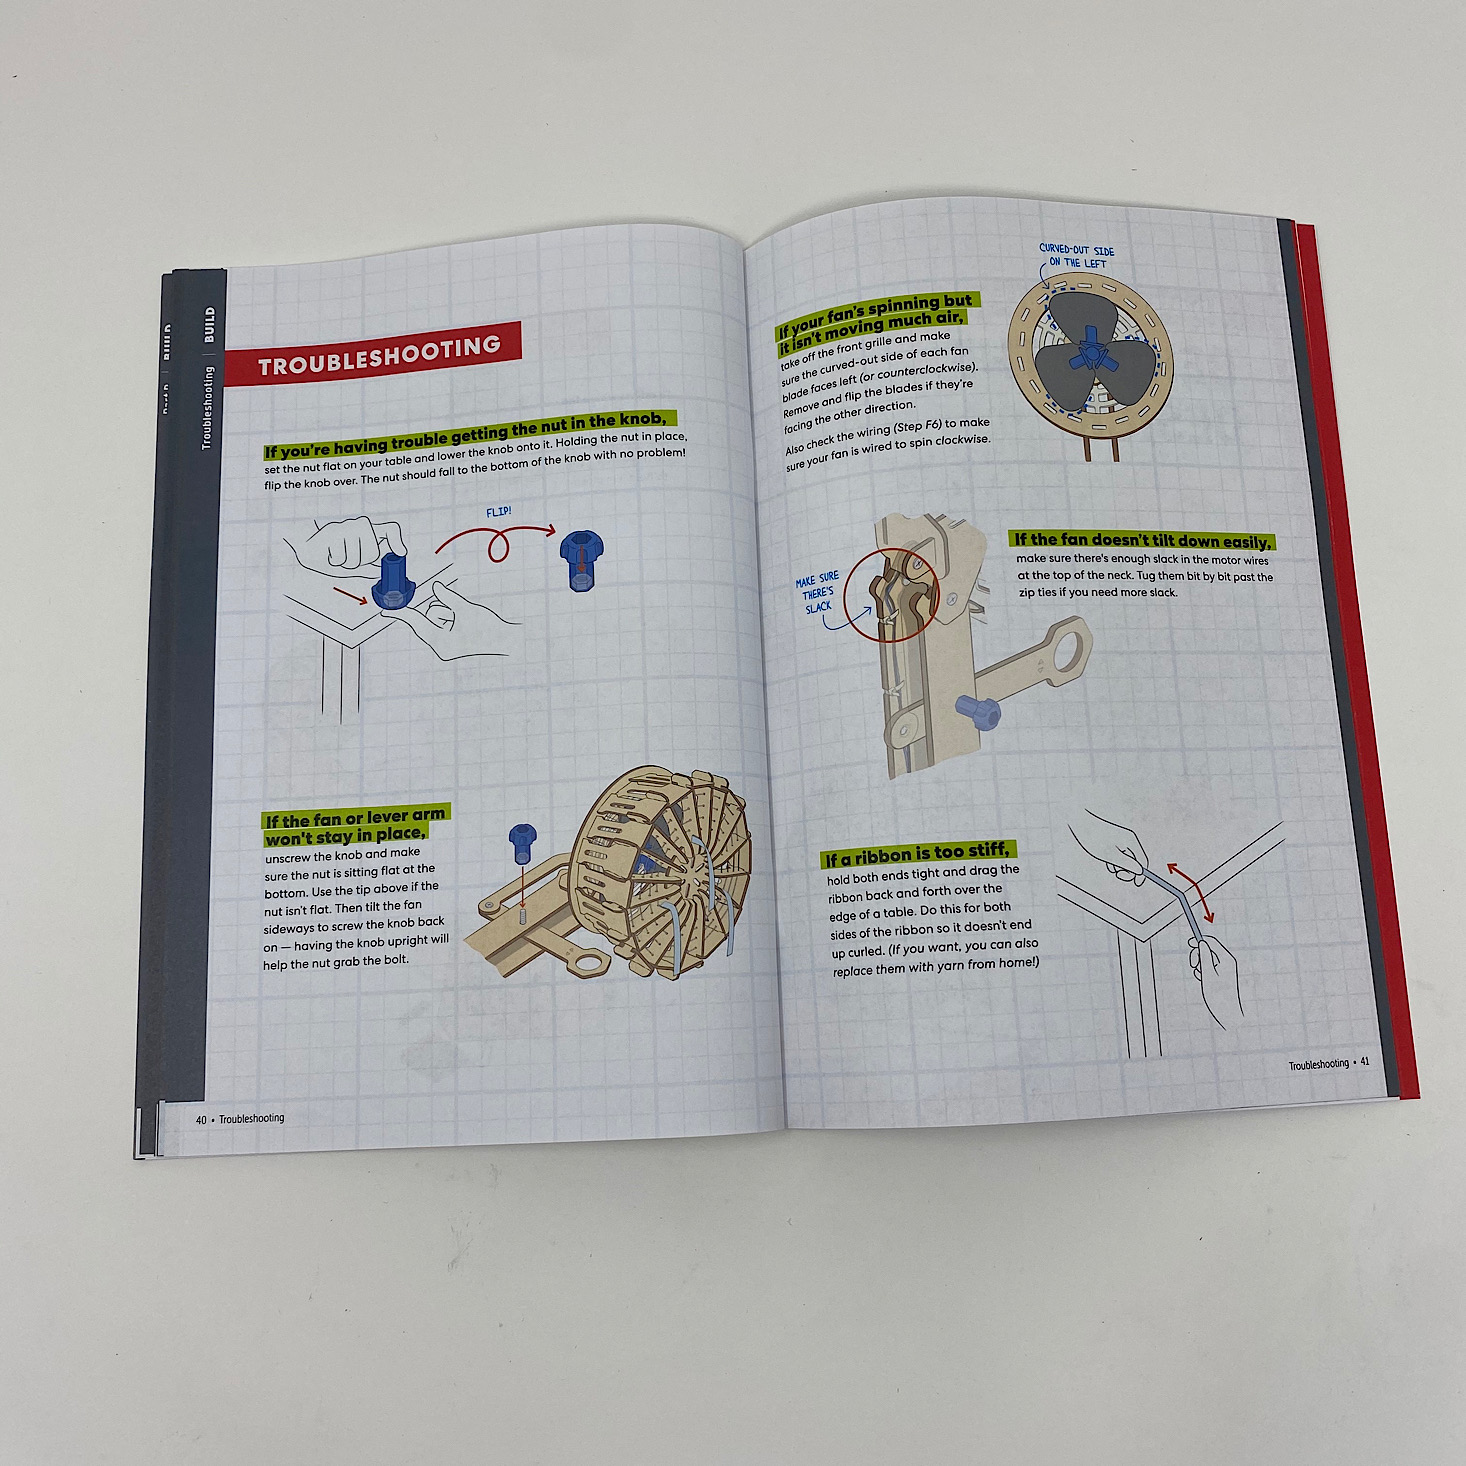
Our directions are separated into various sections which makes it so much easier since it breaks it down into smaller, more manageable tasks. The instructions are always clear and easy to follow with detailed, colorful pictures to reference. They even include information on troubleshooting, which can be very helpful!
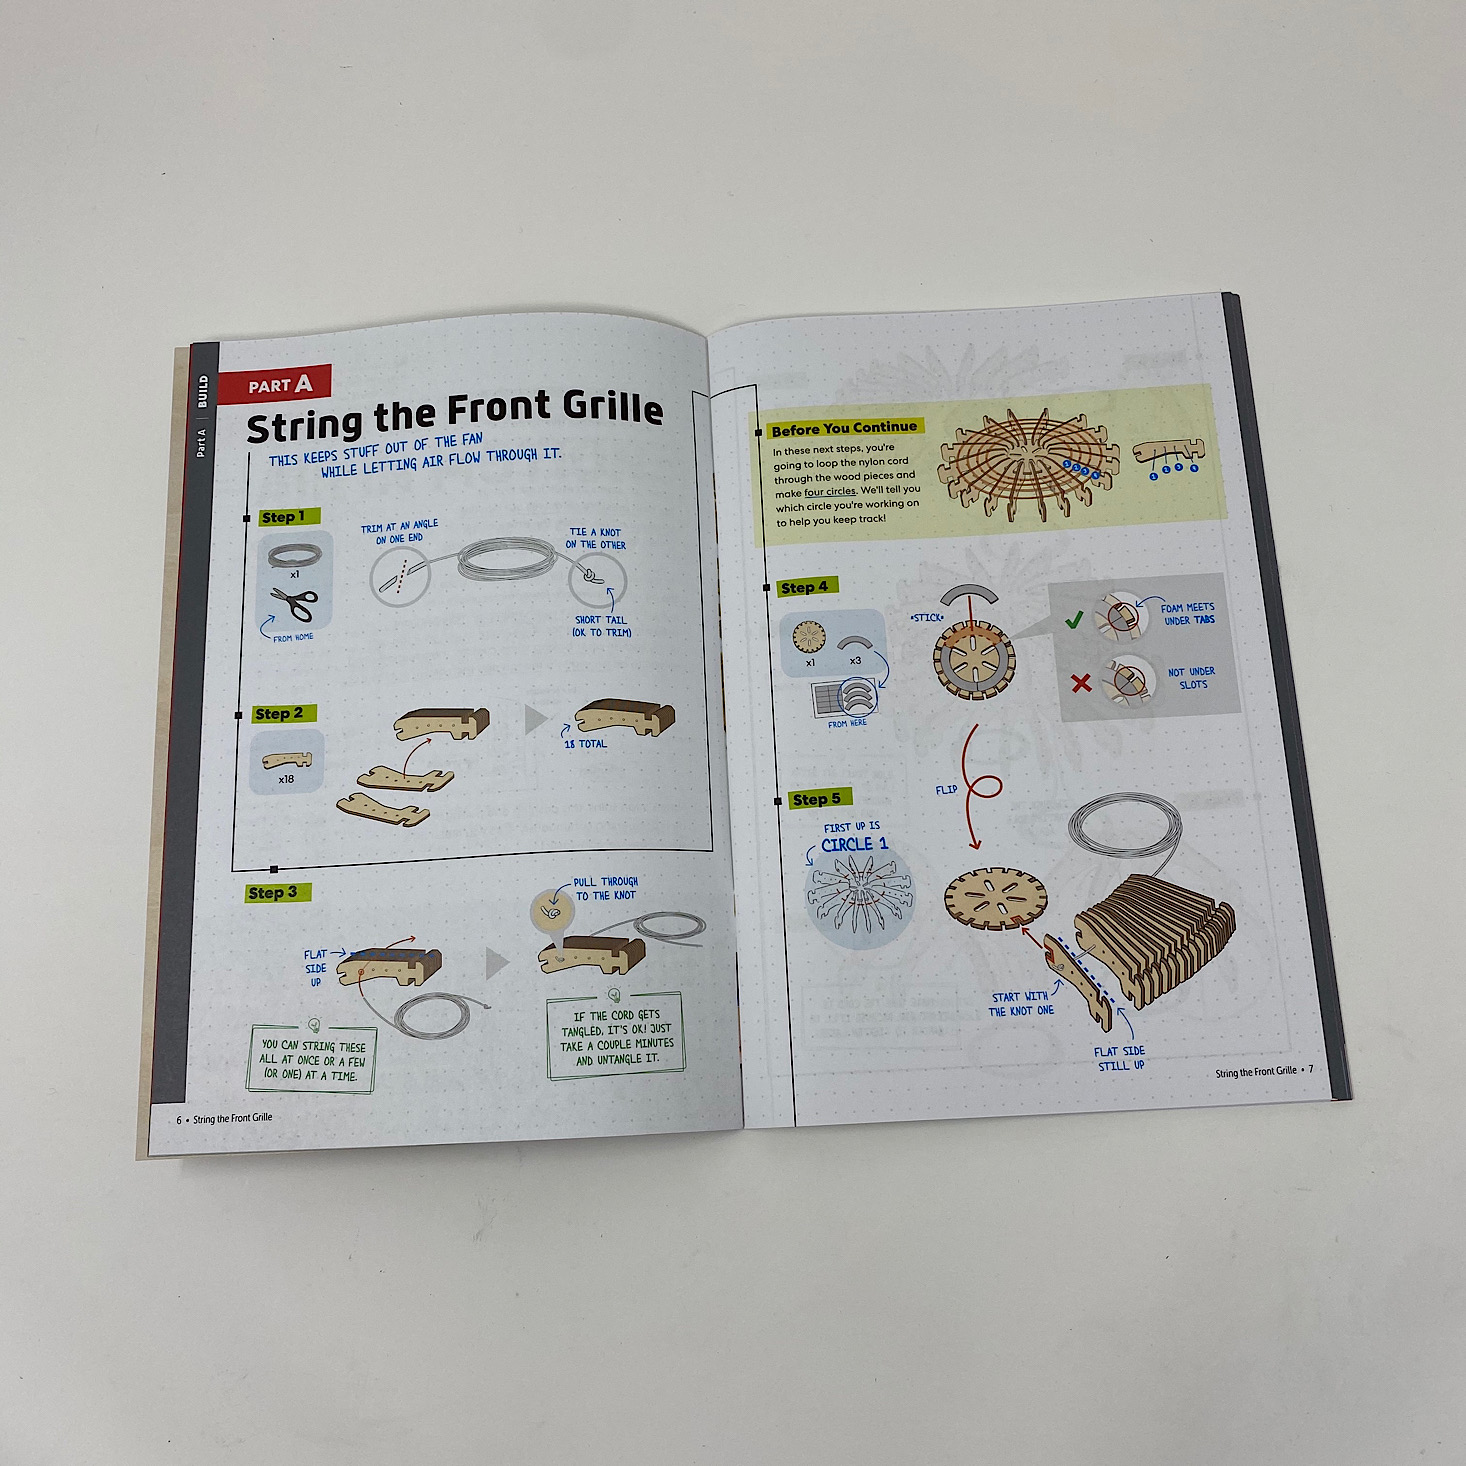
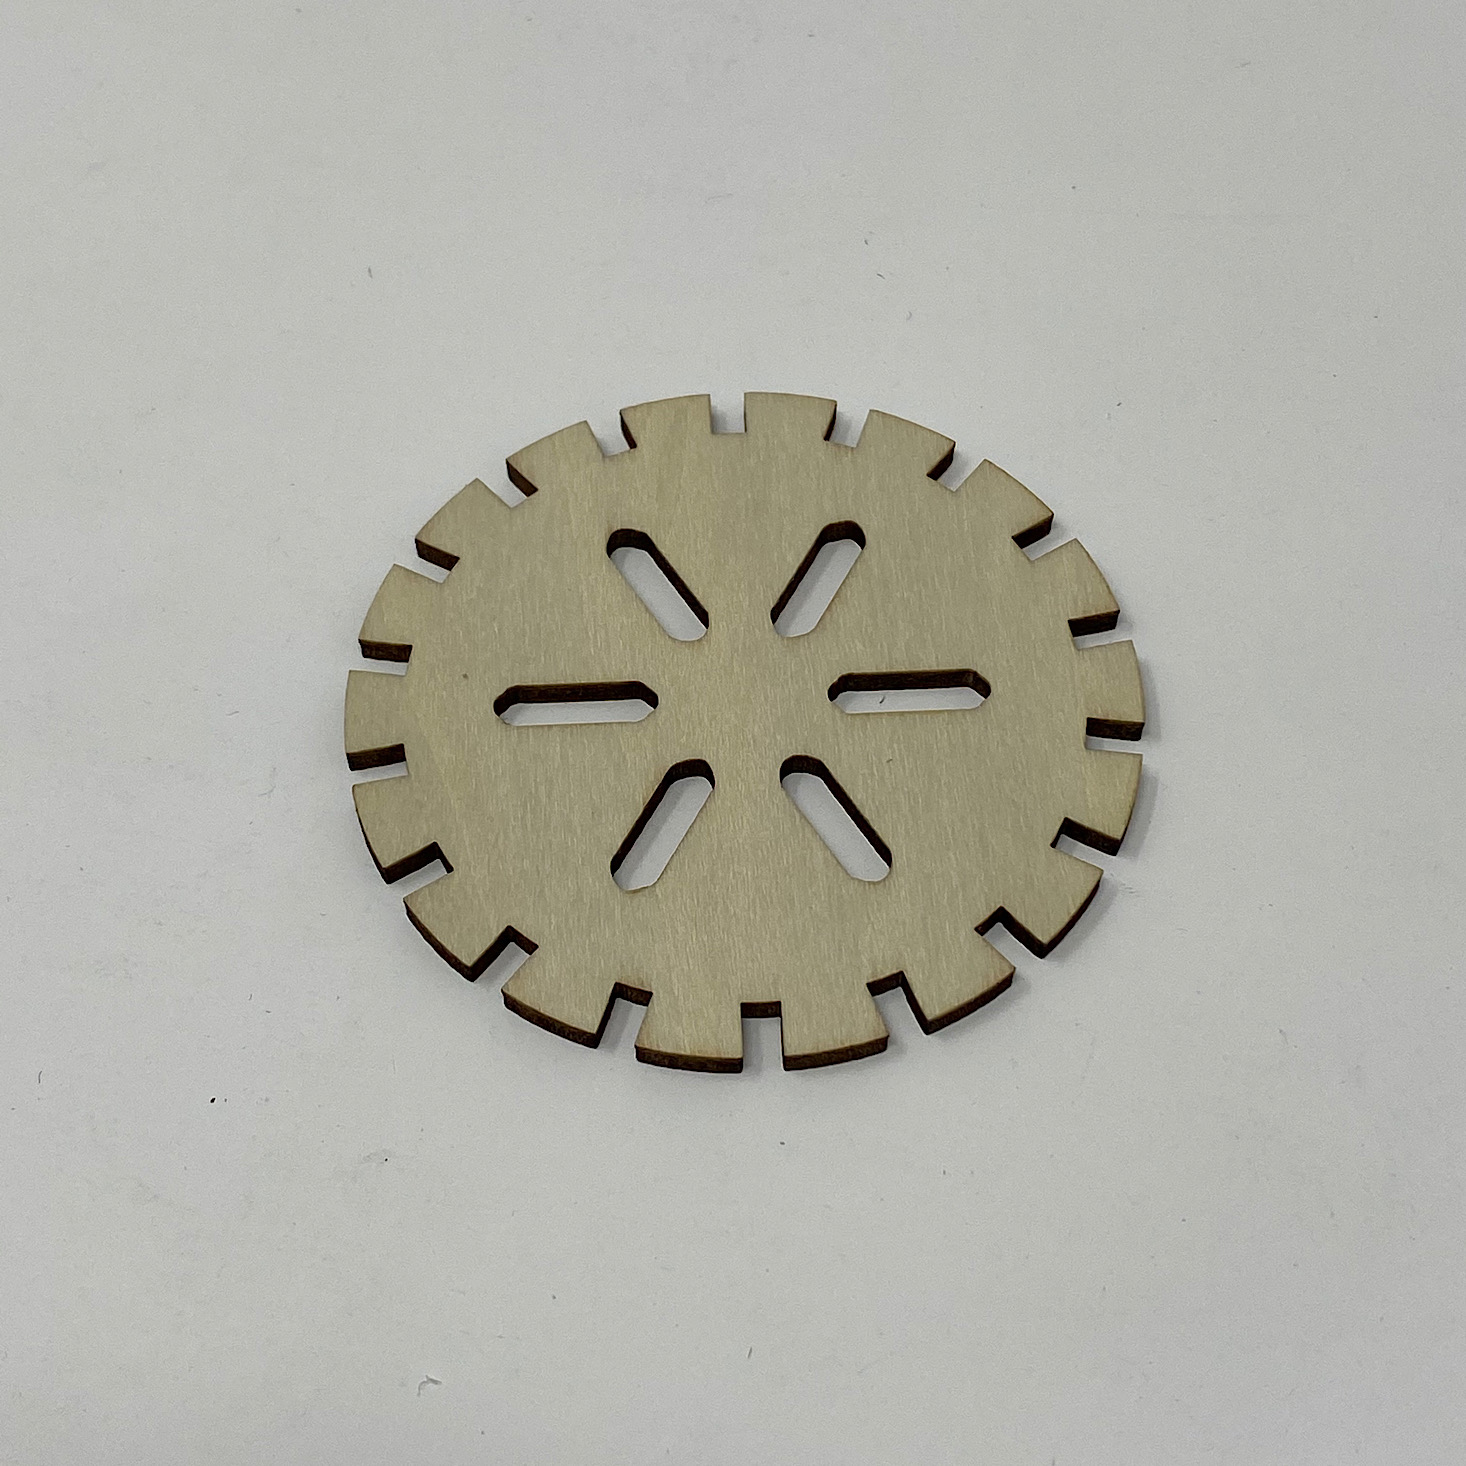
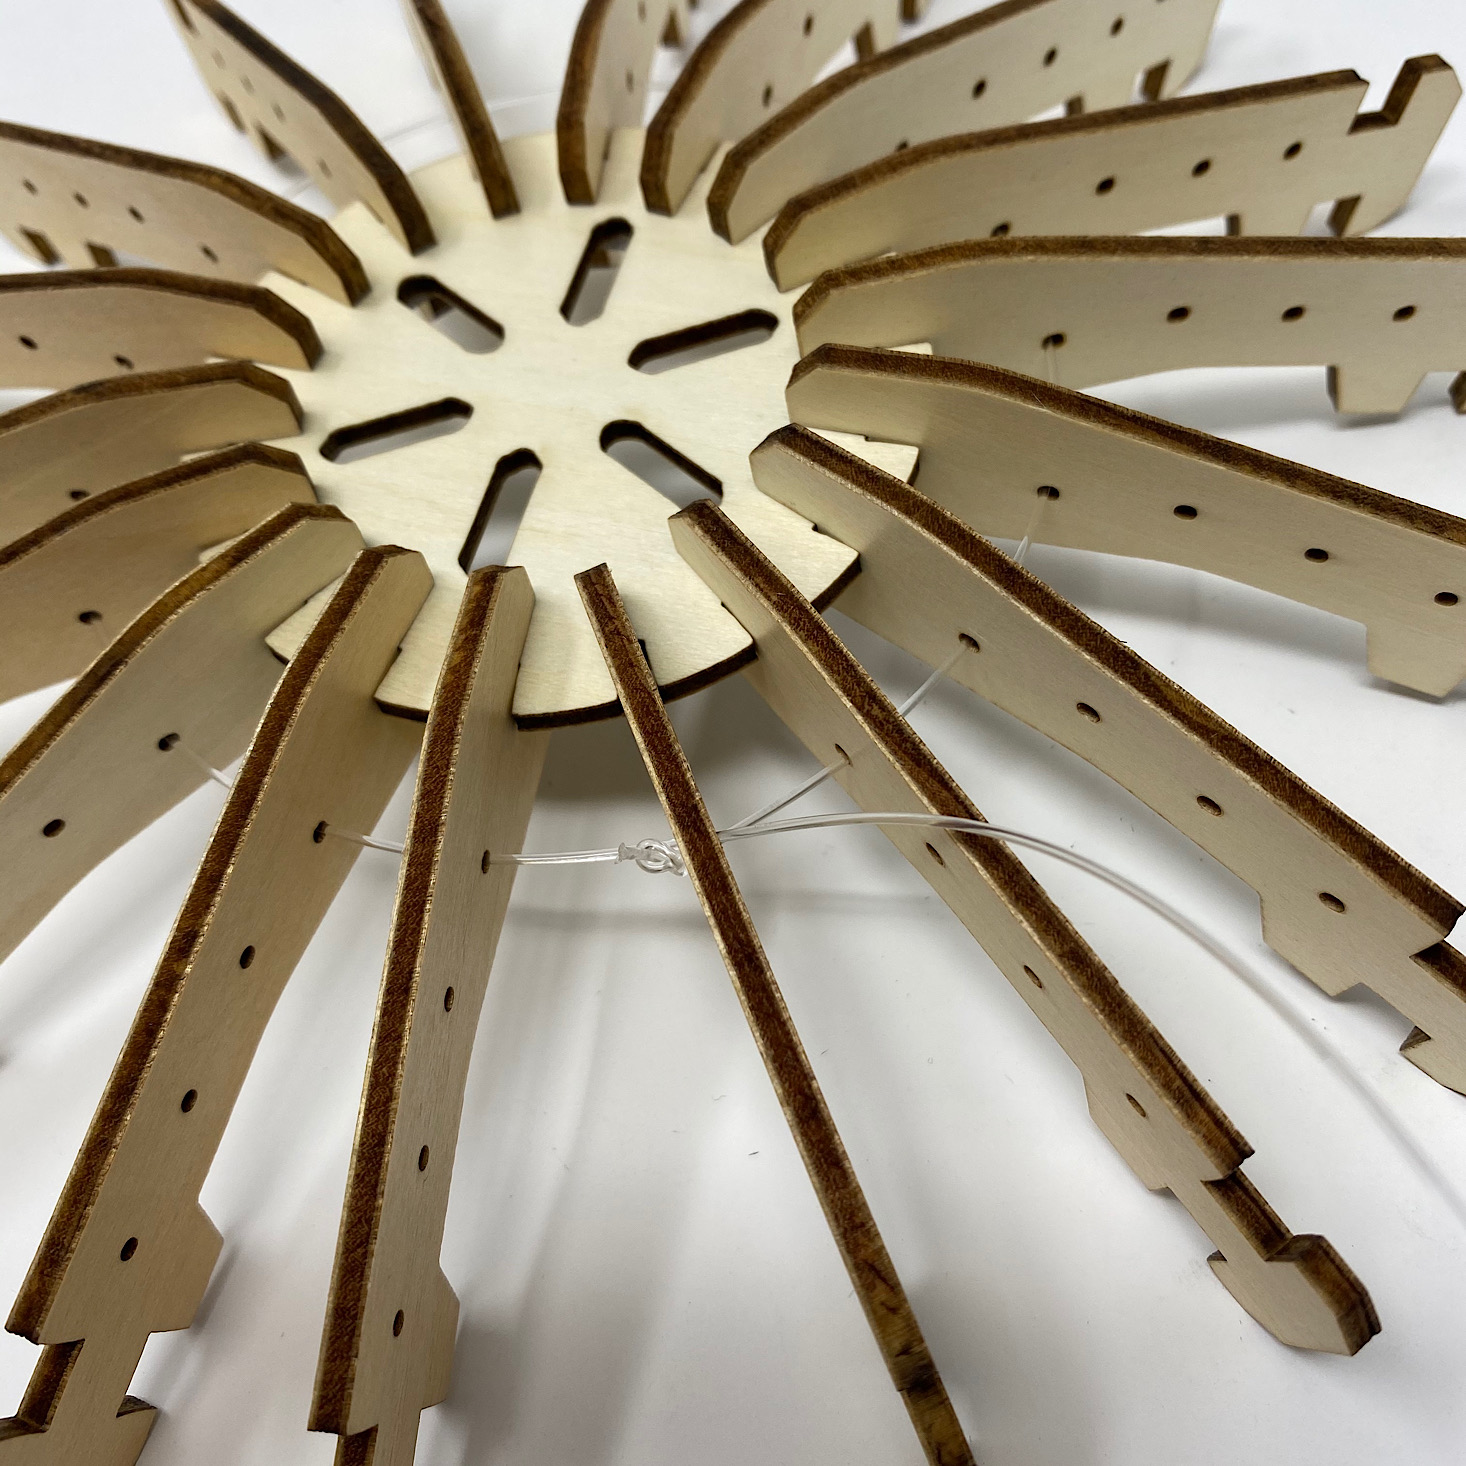
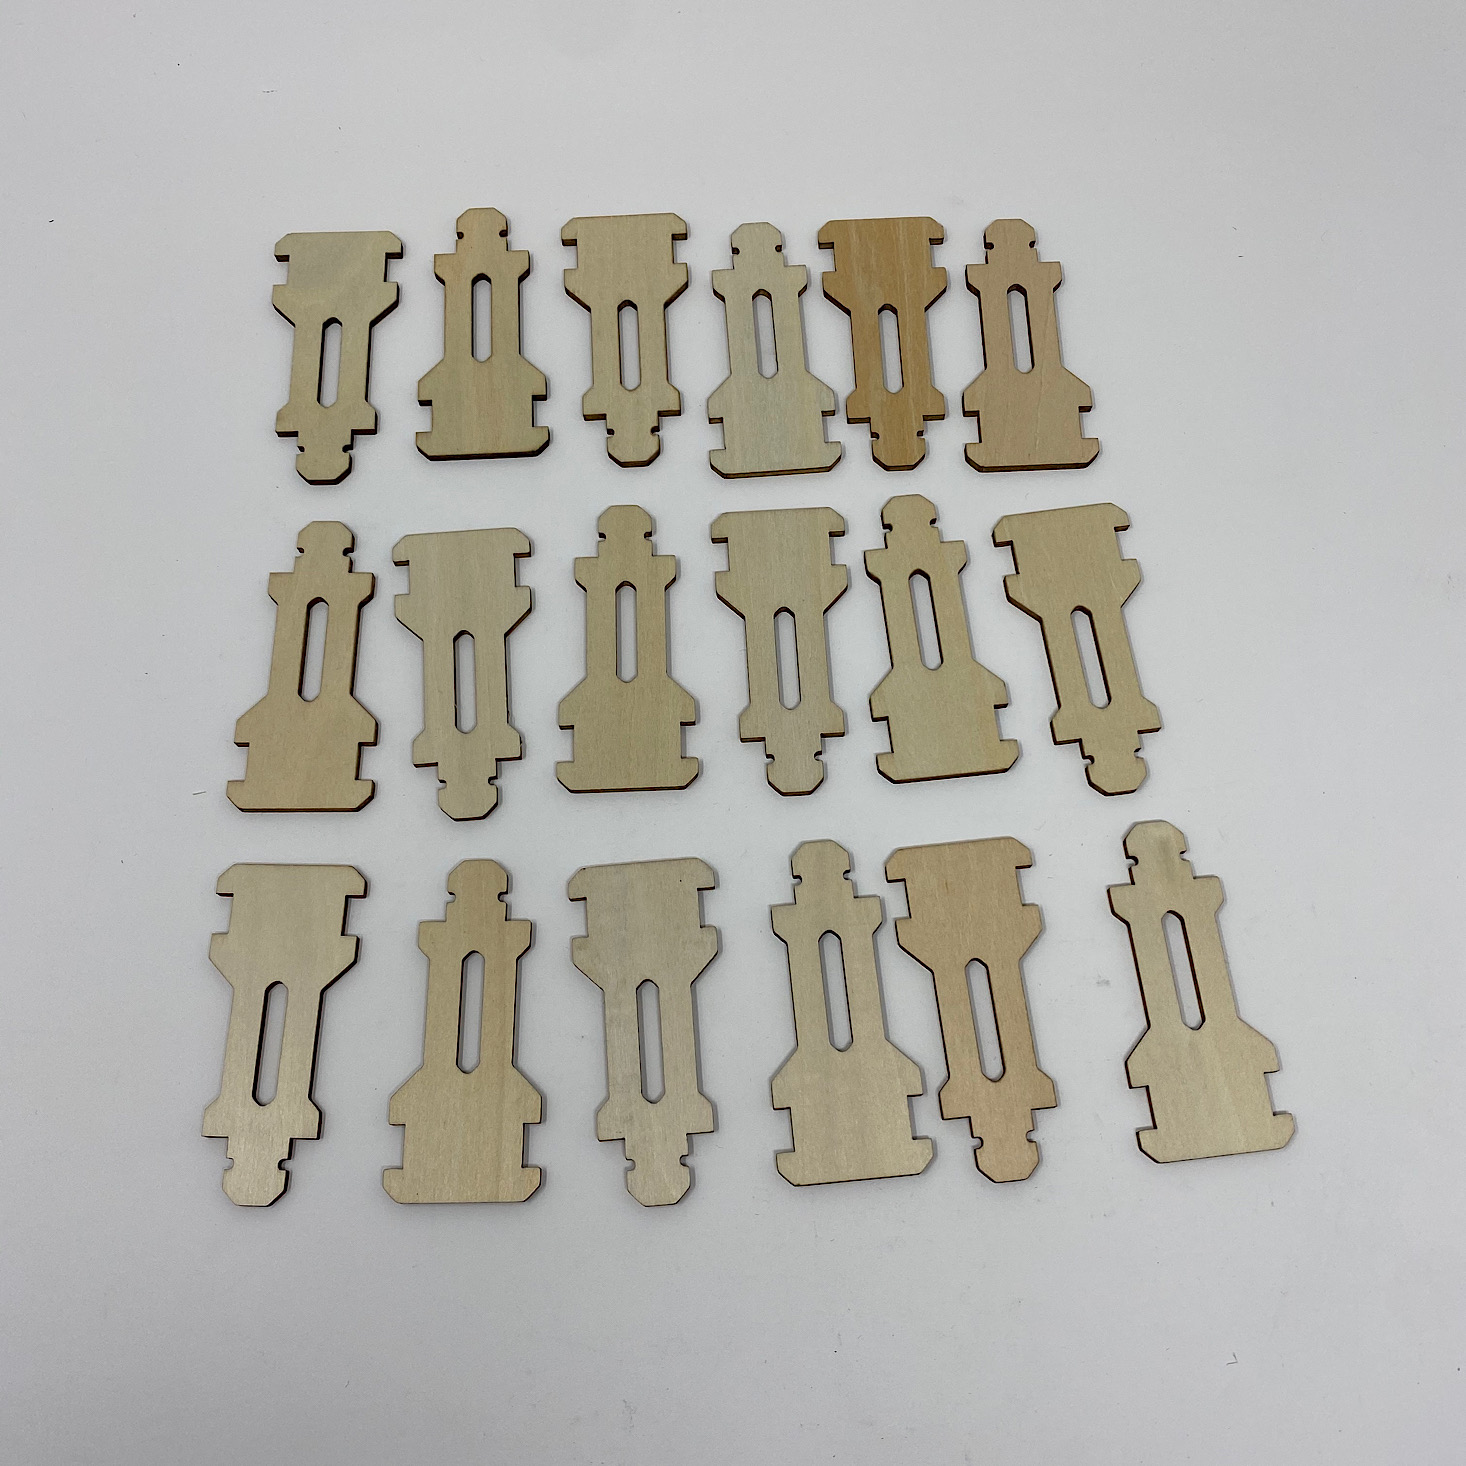
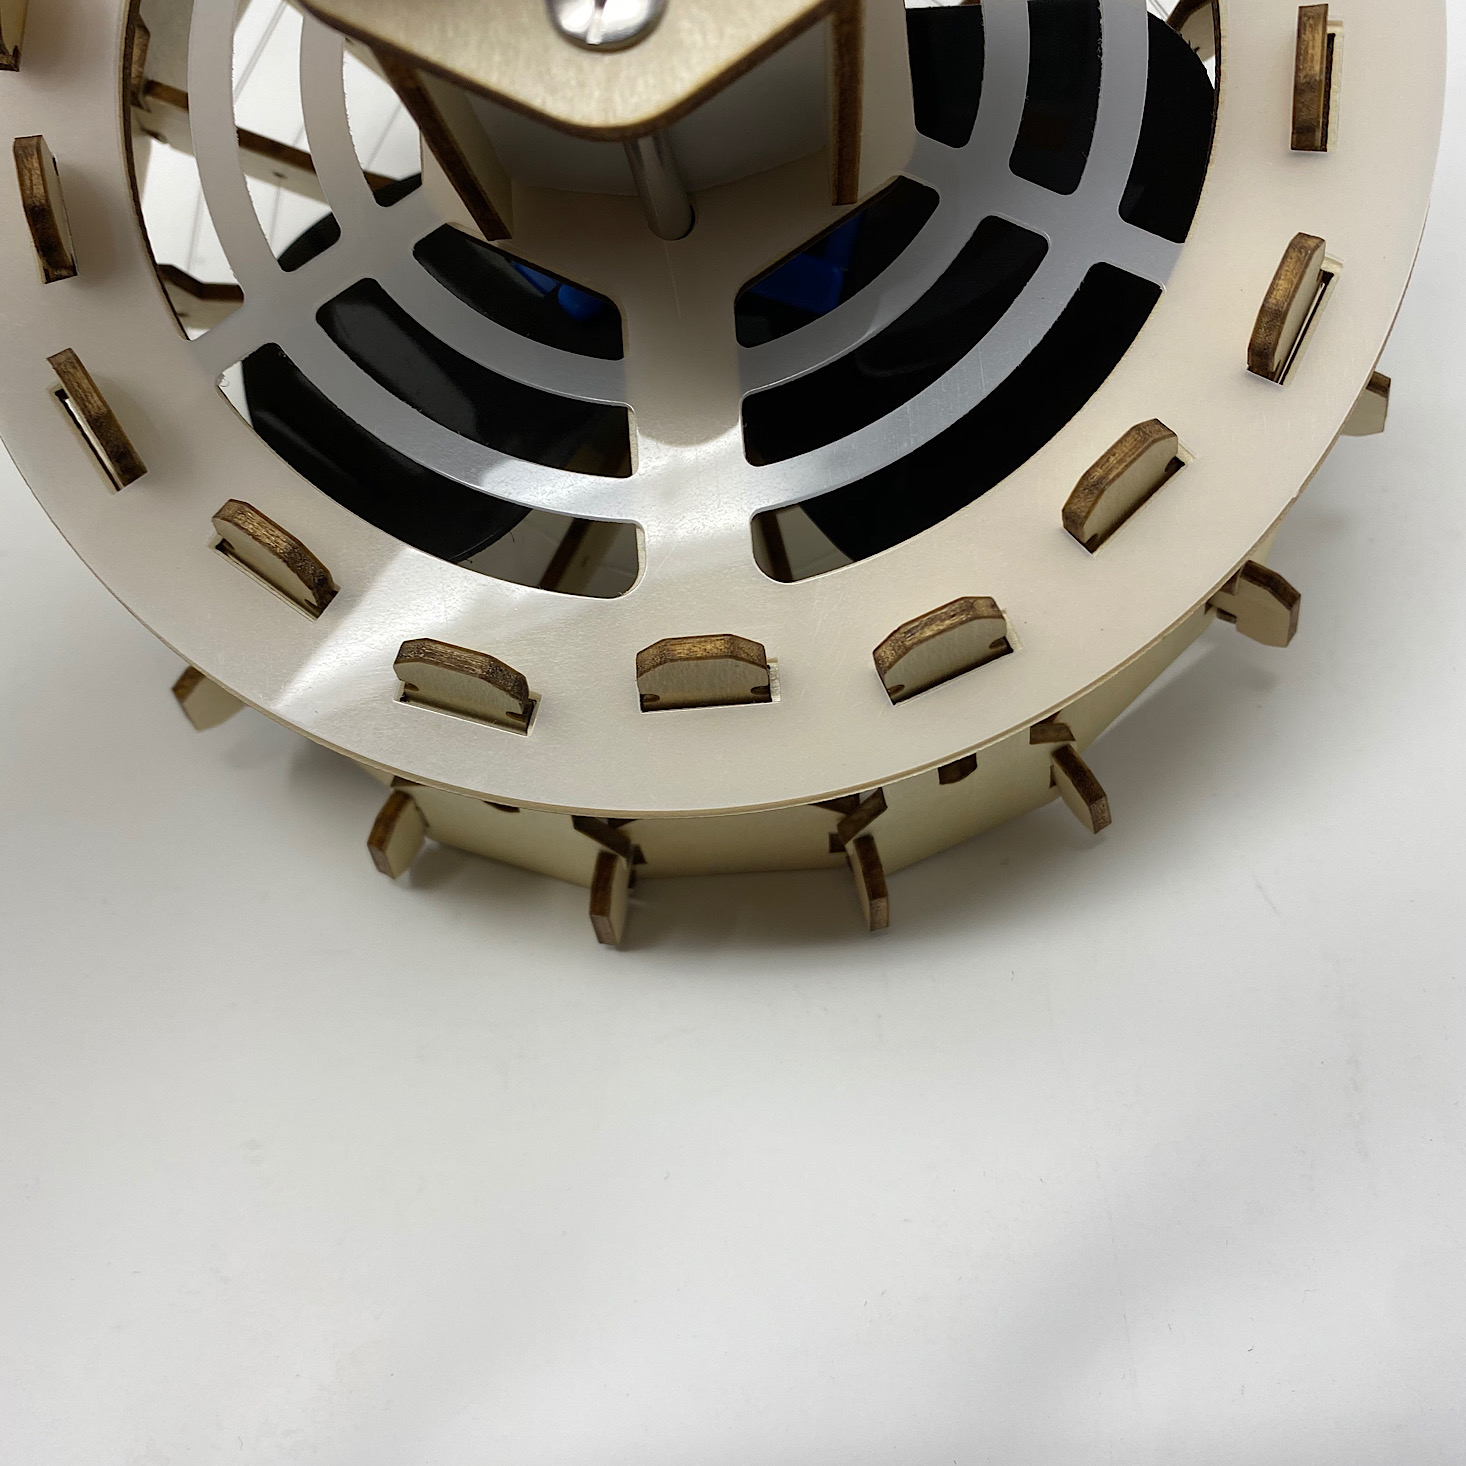
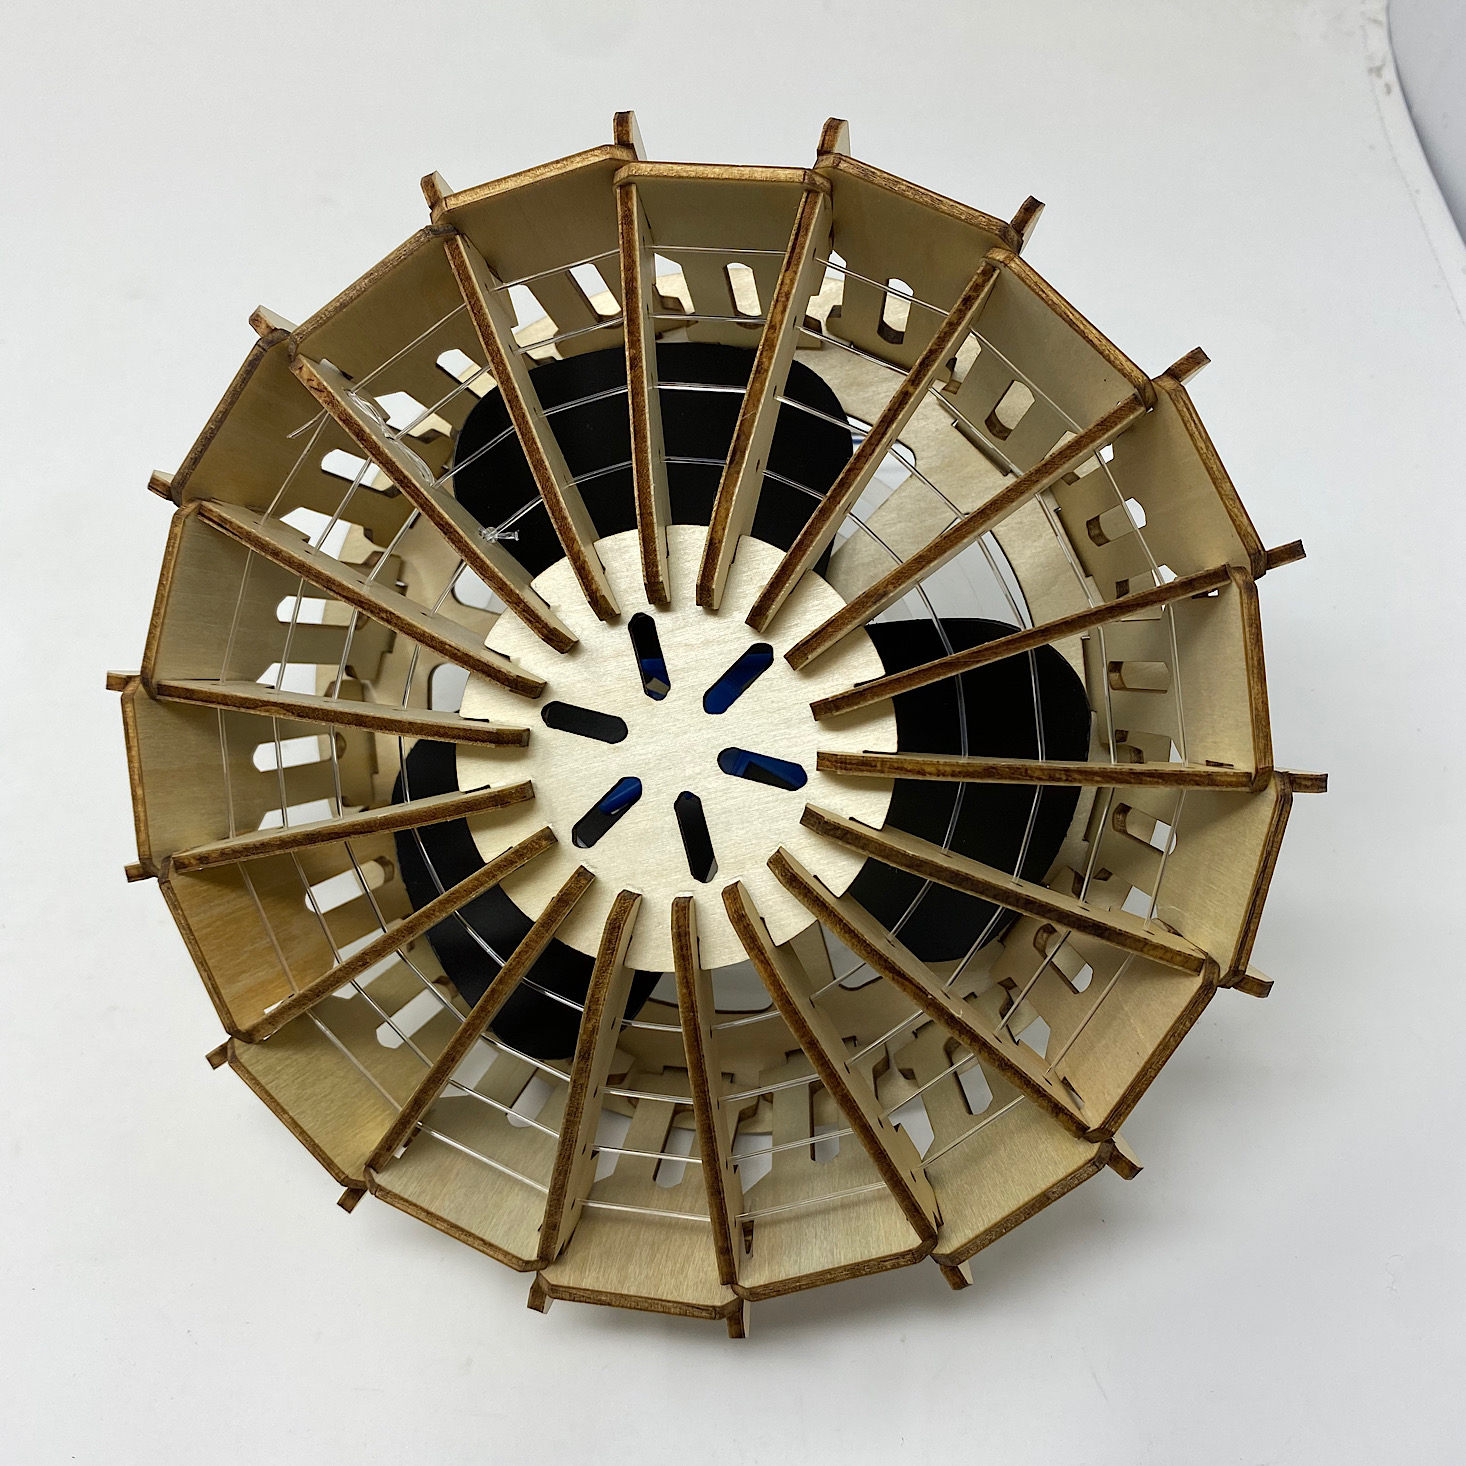
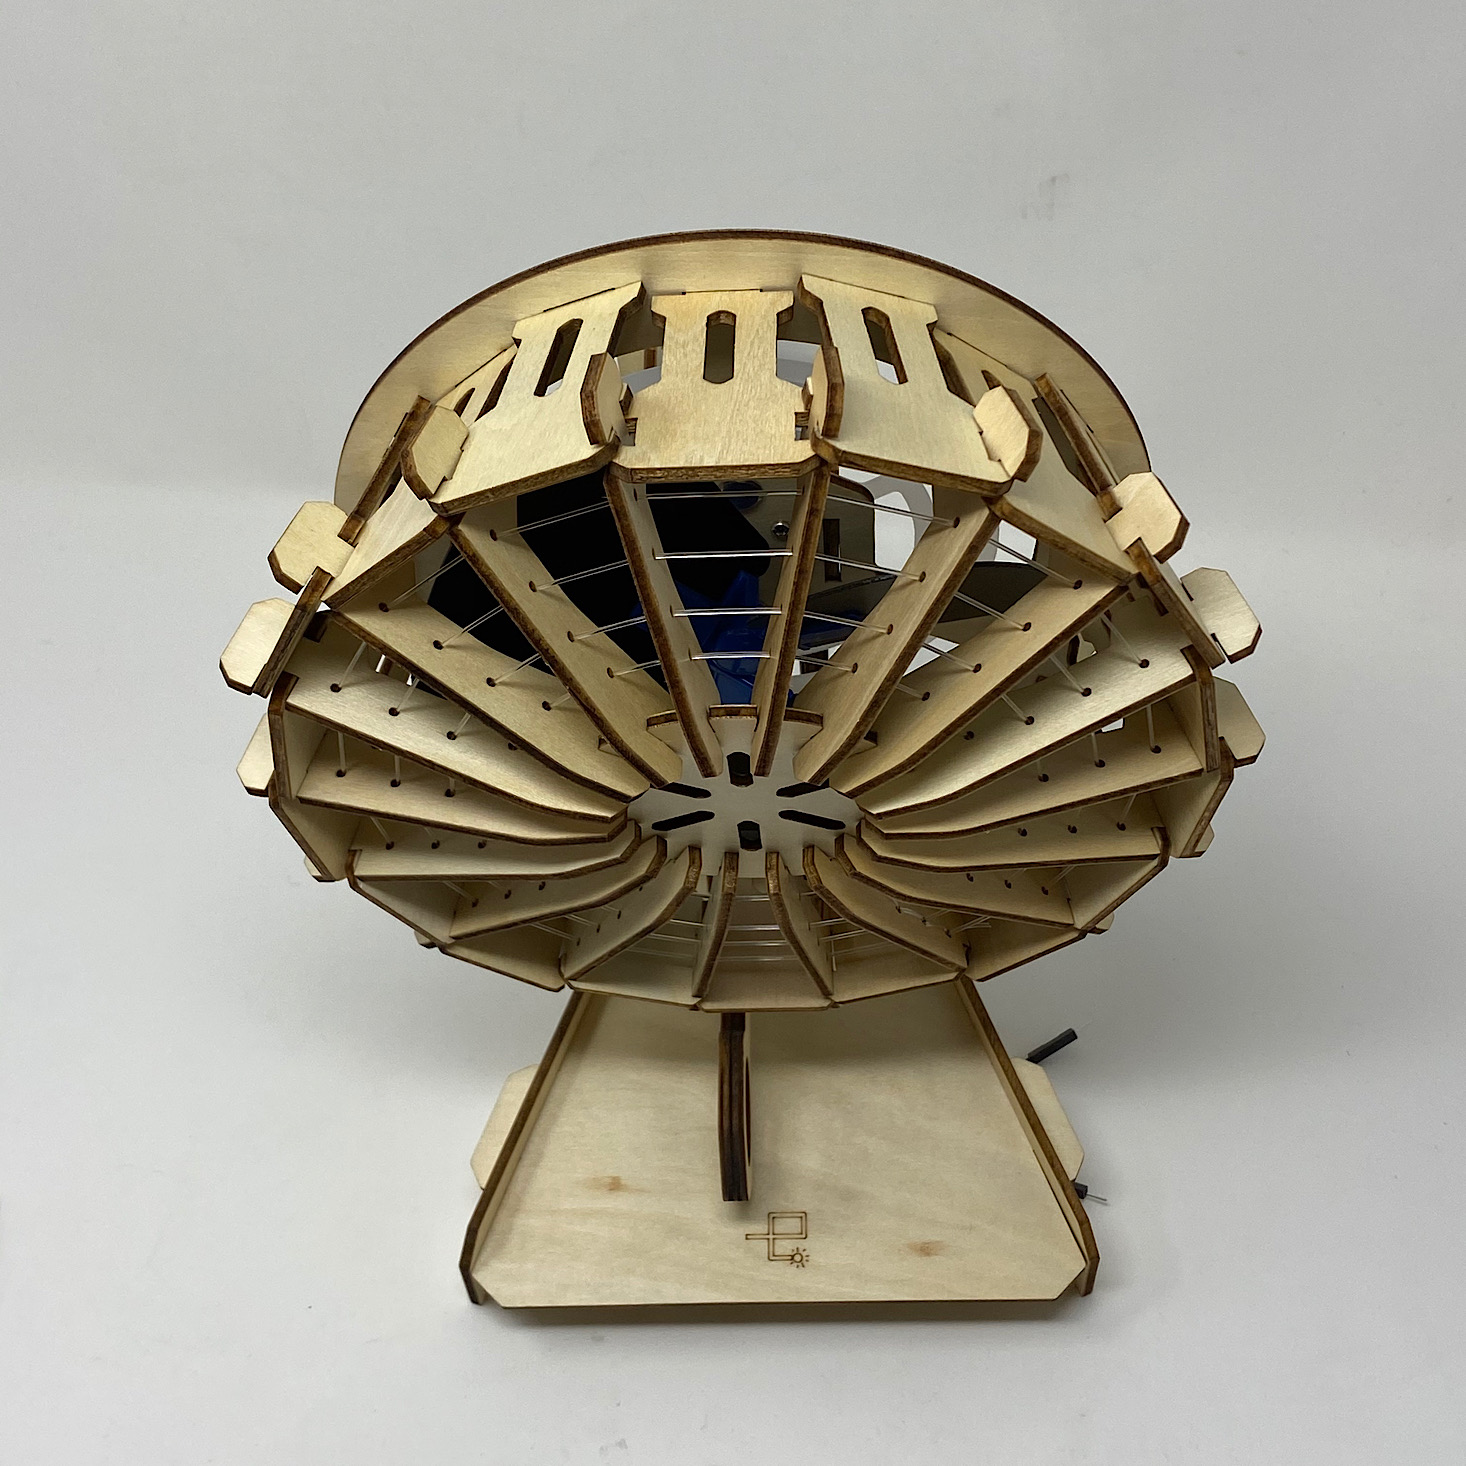
Part A: String the Front Grille

1 of 3
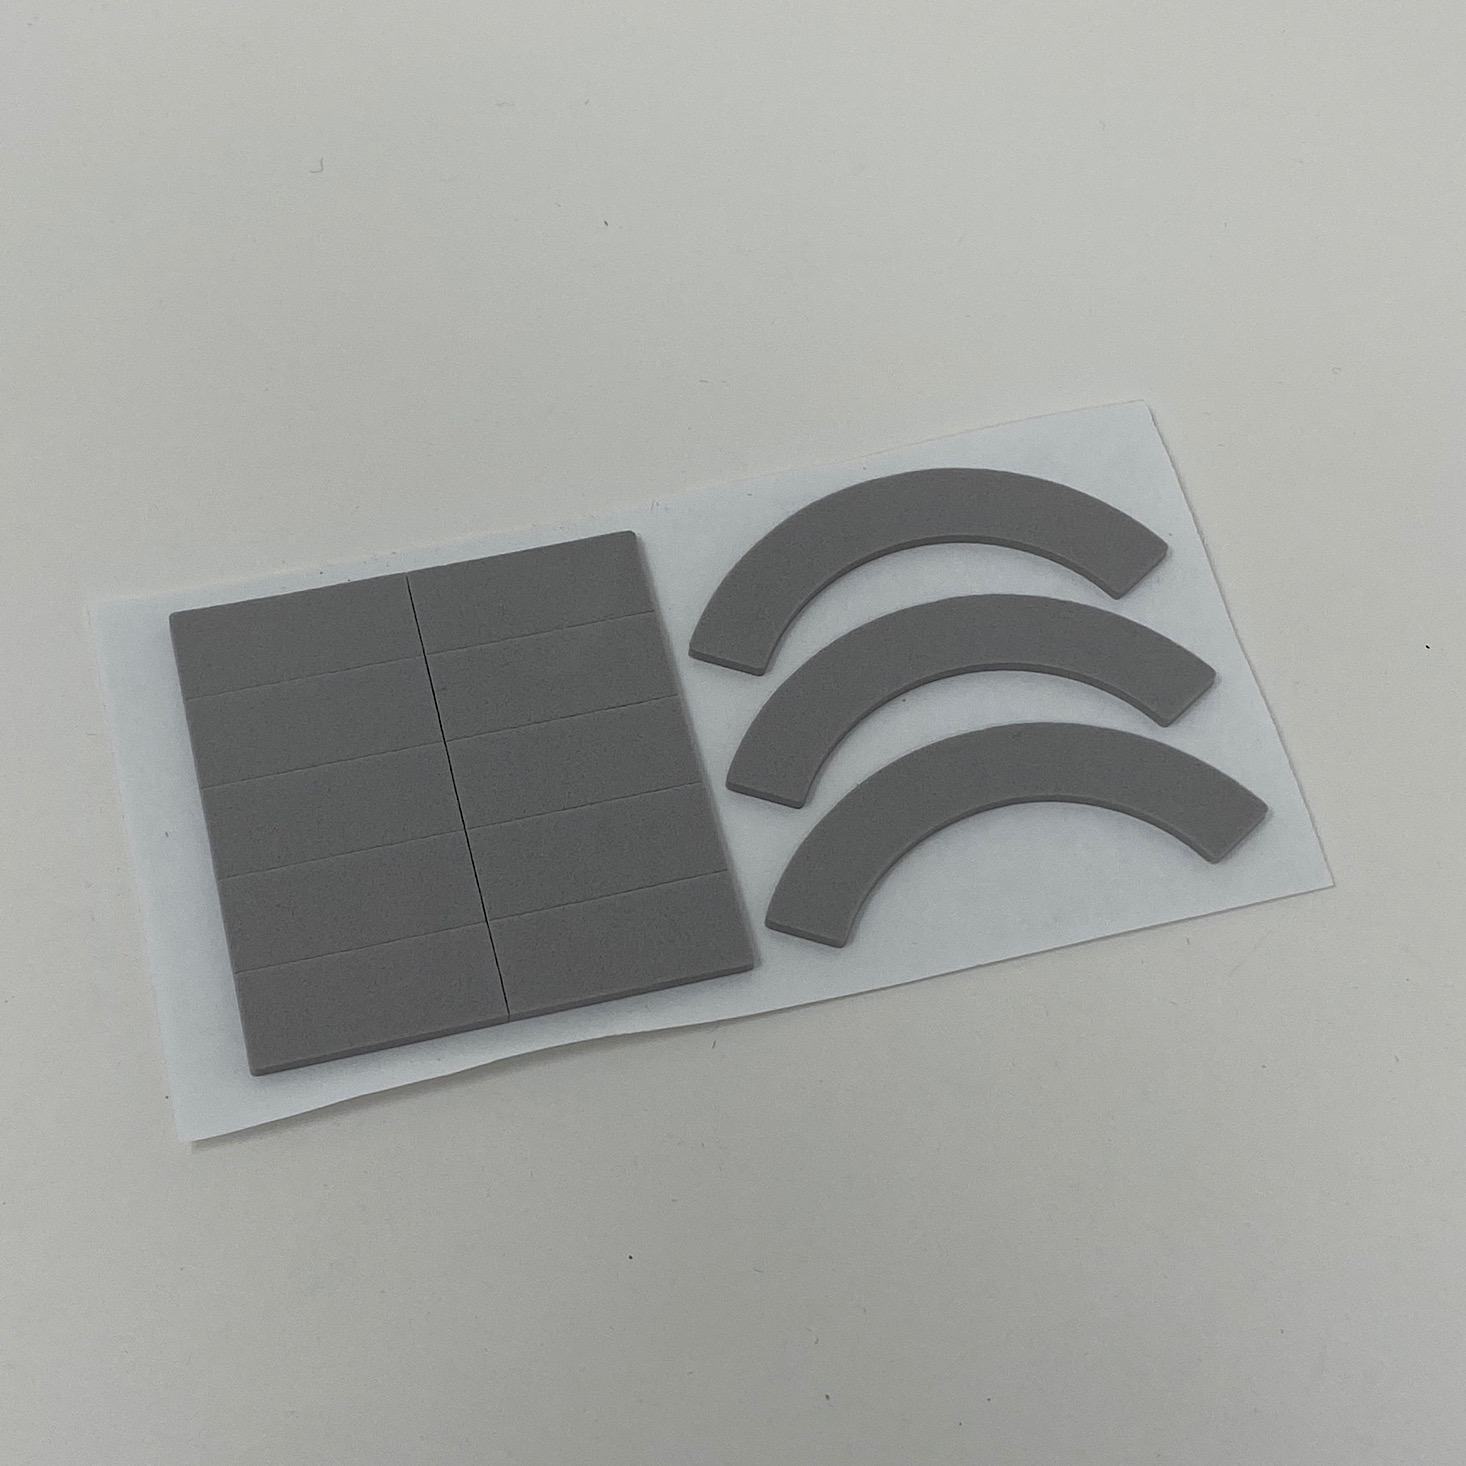
First I prepared the center of my fan by adding three of these foam arcs around the center.

1 of 3

I lined up these 18 pieces and then I cut an angle at one end of the wire they provided and tied a knot at the other end. Then I threaded it through the first hole of the wooden pieces and just slid it until it went through that same hole in all 18 of them.


1 of 2
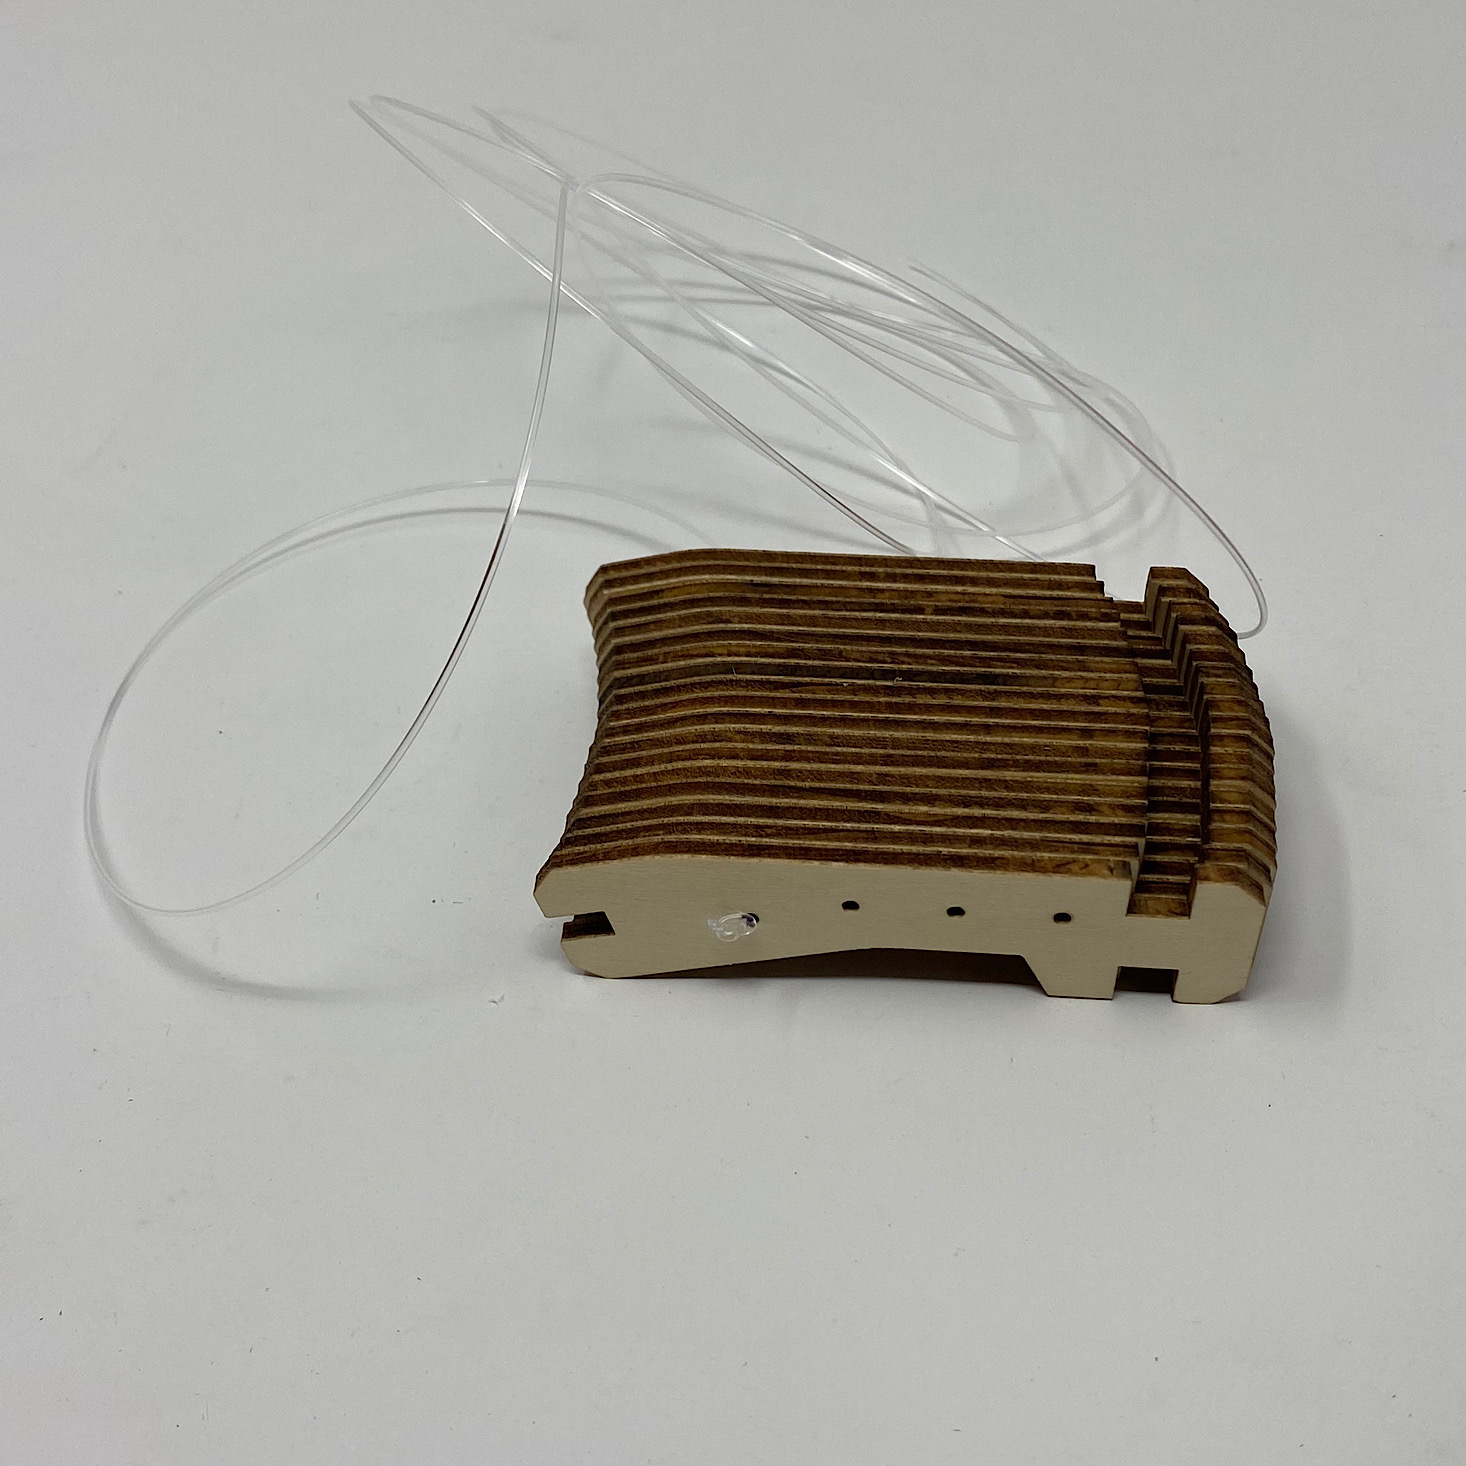
Now that all of the pieces had wire going through them it was time to stick them into the notches one after the other. This part was a bit tedious, but it was pretty simple!
1 of 3
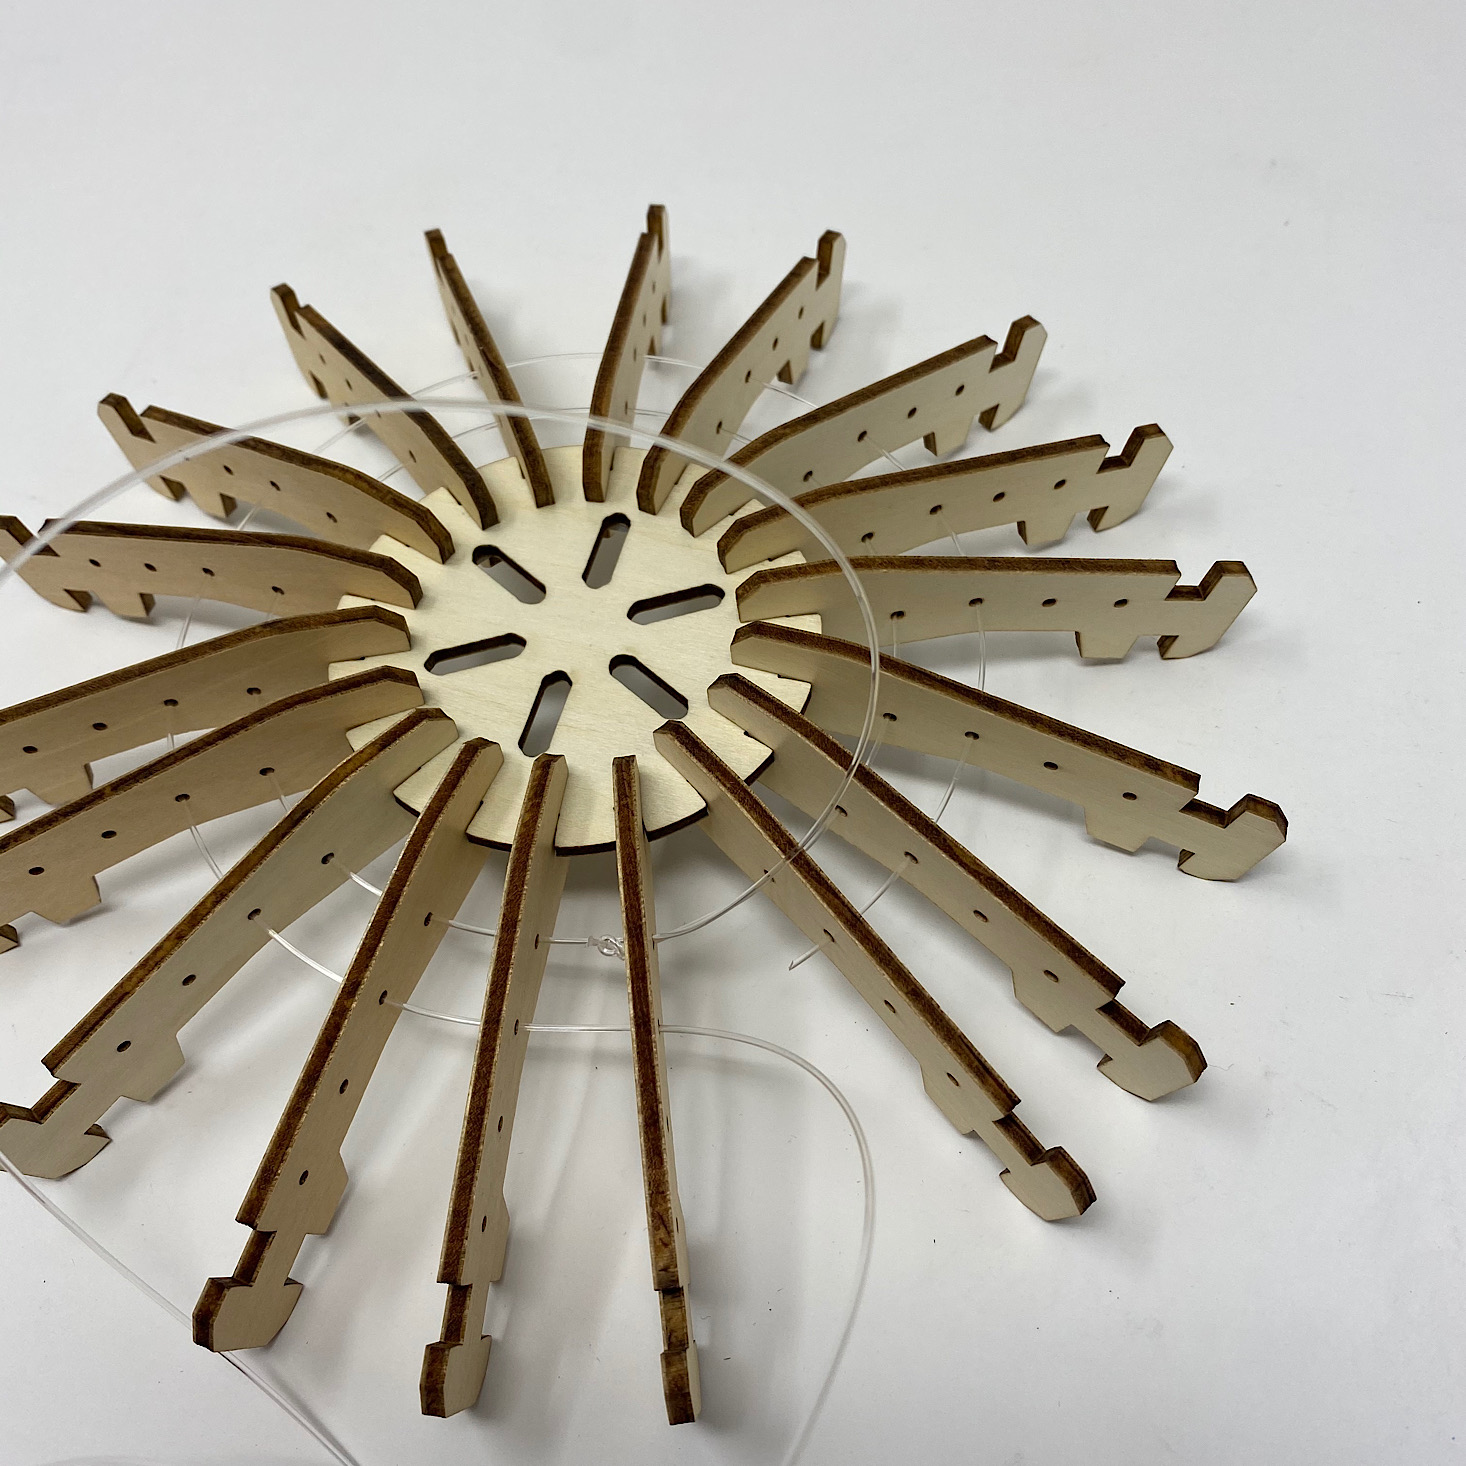
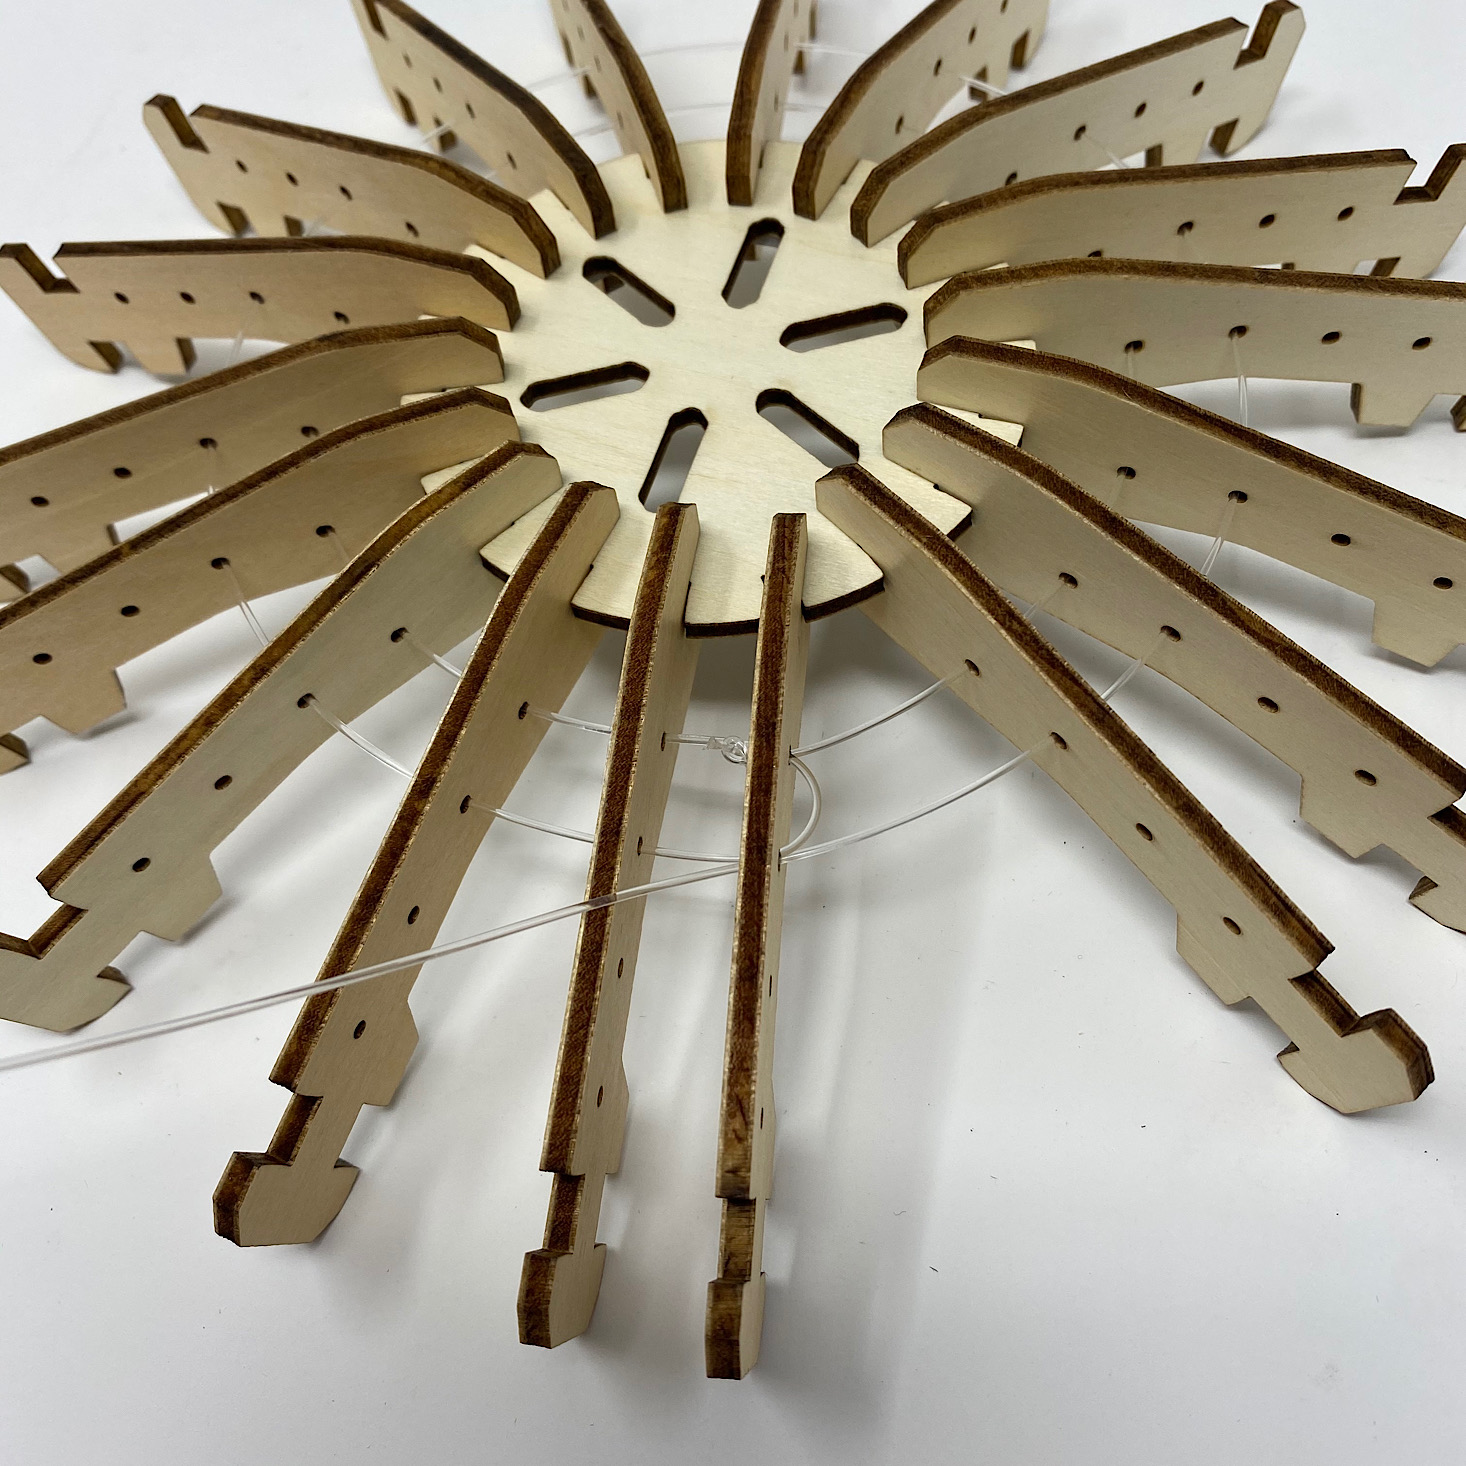
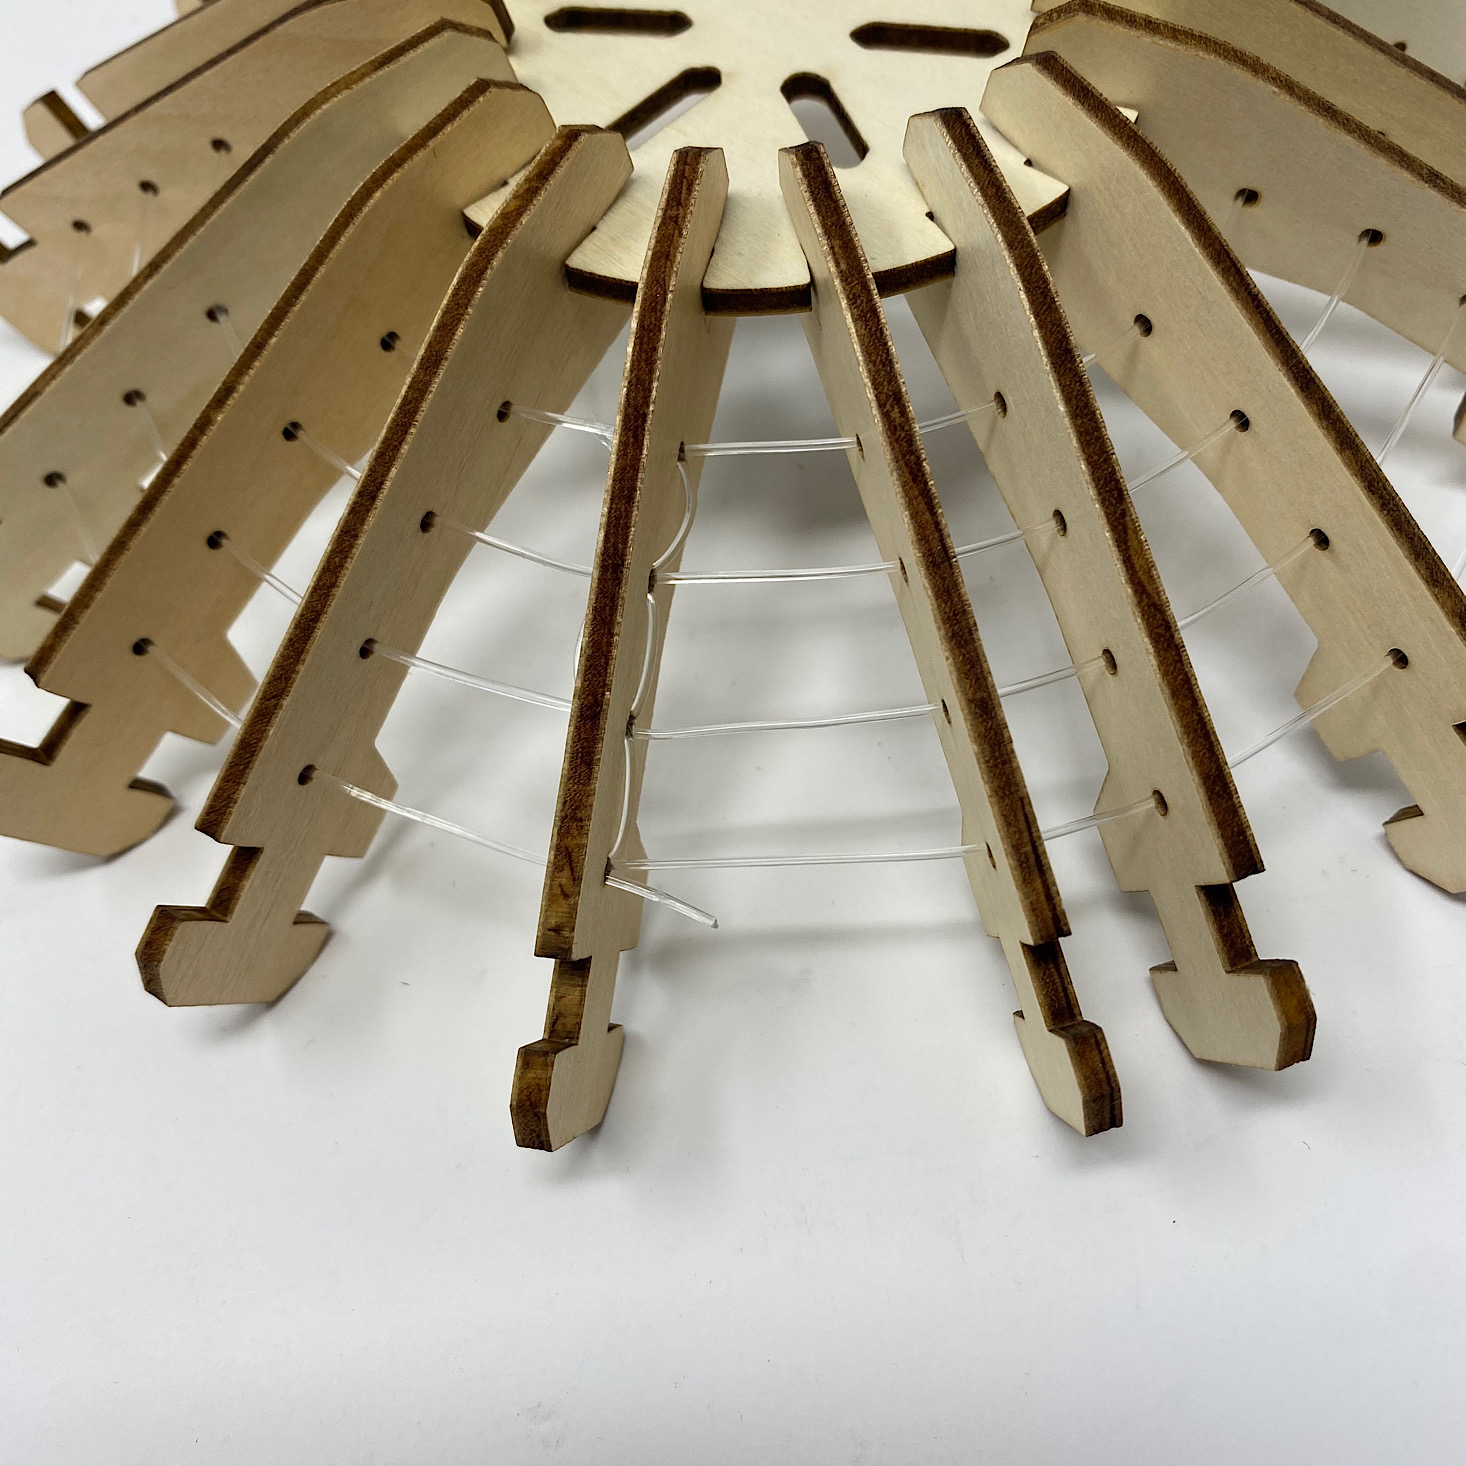
They really did make this so easy! I just threaded the wire through hole after hole going row by row and making sure to switch directions when I got back to the start. I kept on this way until I got to the last row.

1 of 3
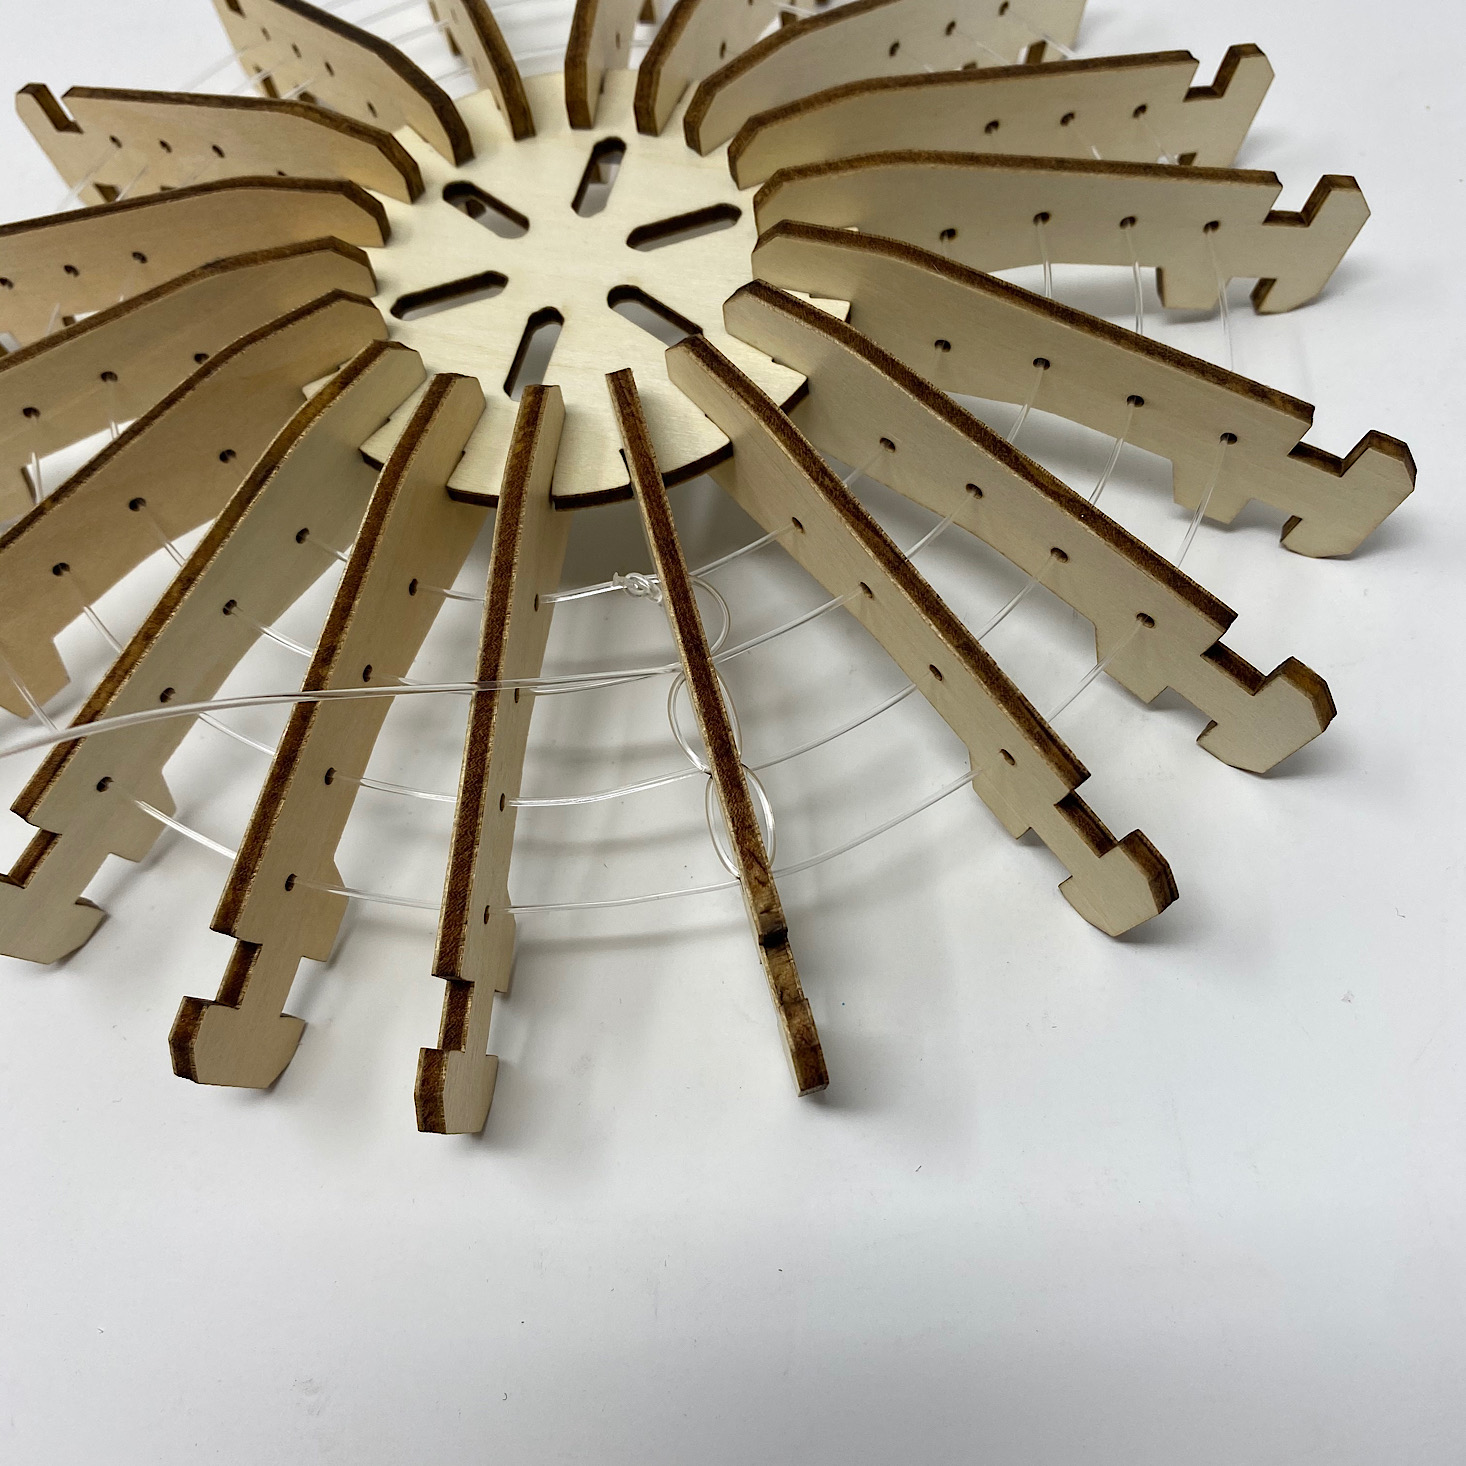
Finally, I got to the last row and came back to the starting hole. I did go back and tighten my strings some and then it was time to finish it off by going back through the third and second hole before coming back down and out of the fourth-row hole and trimming the wire.
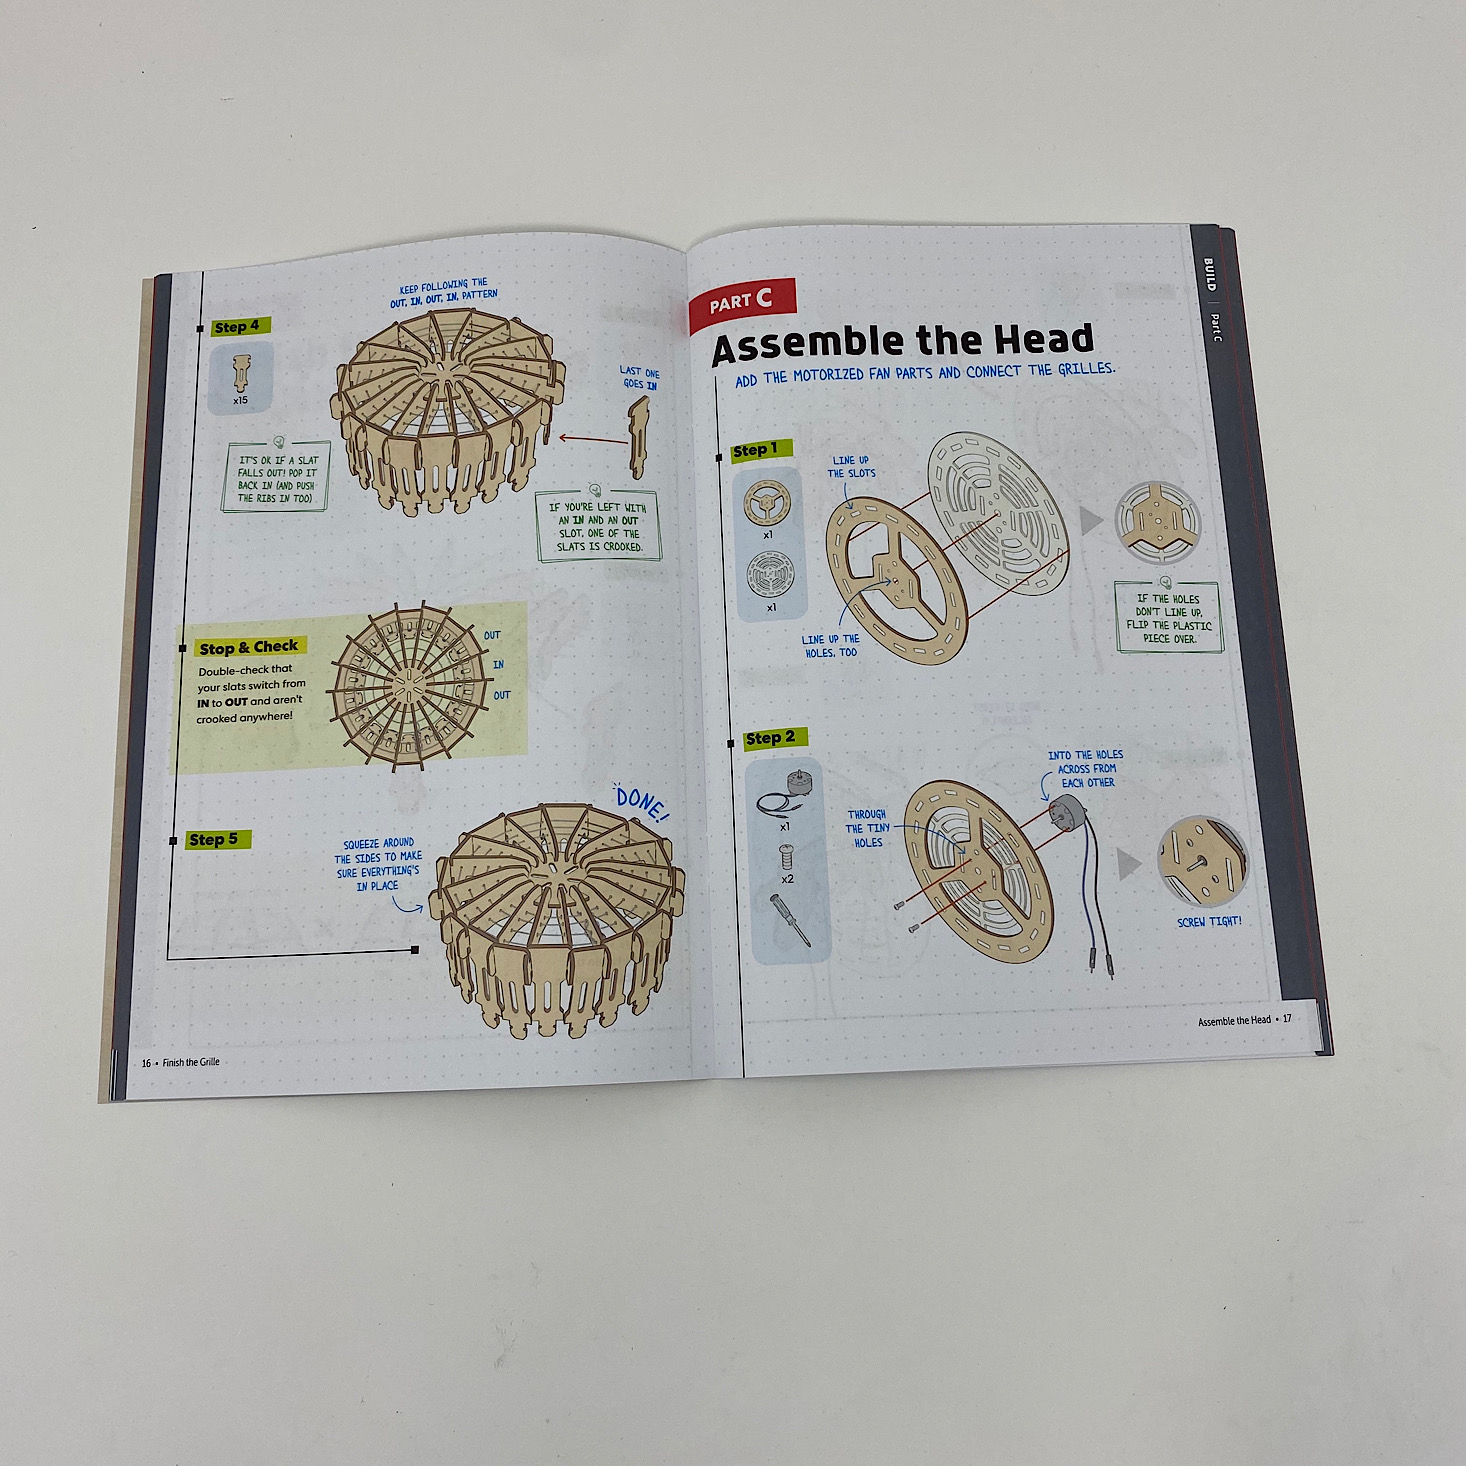
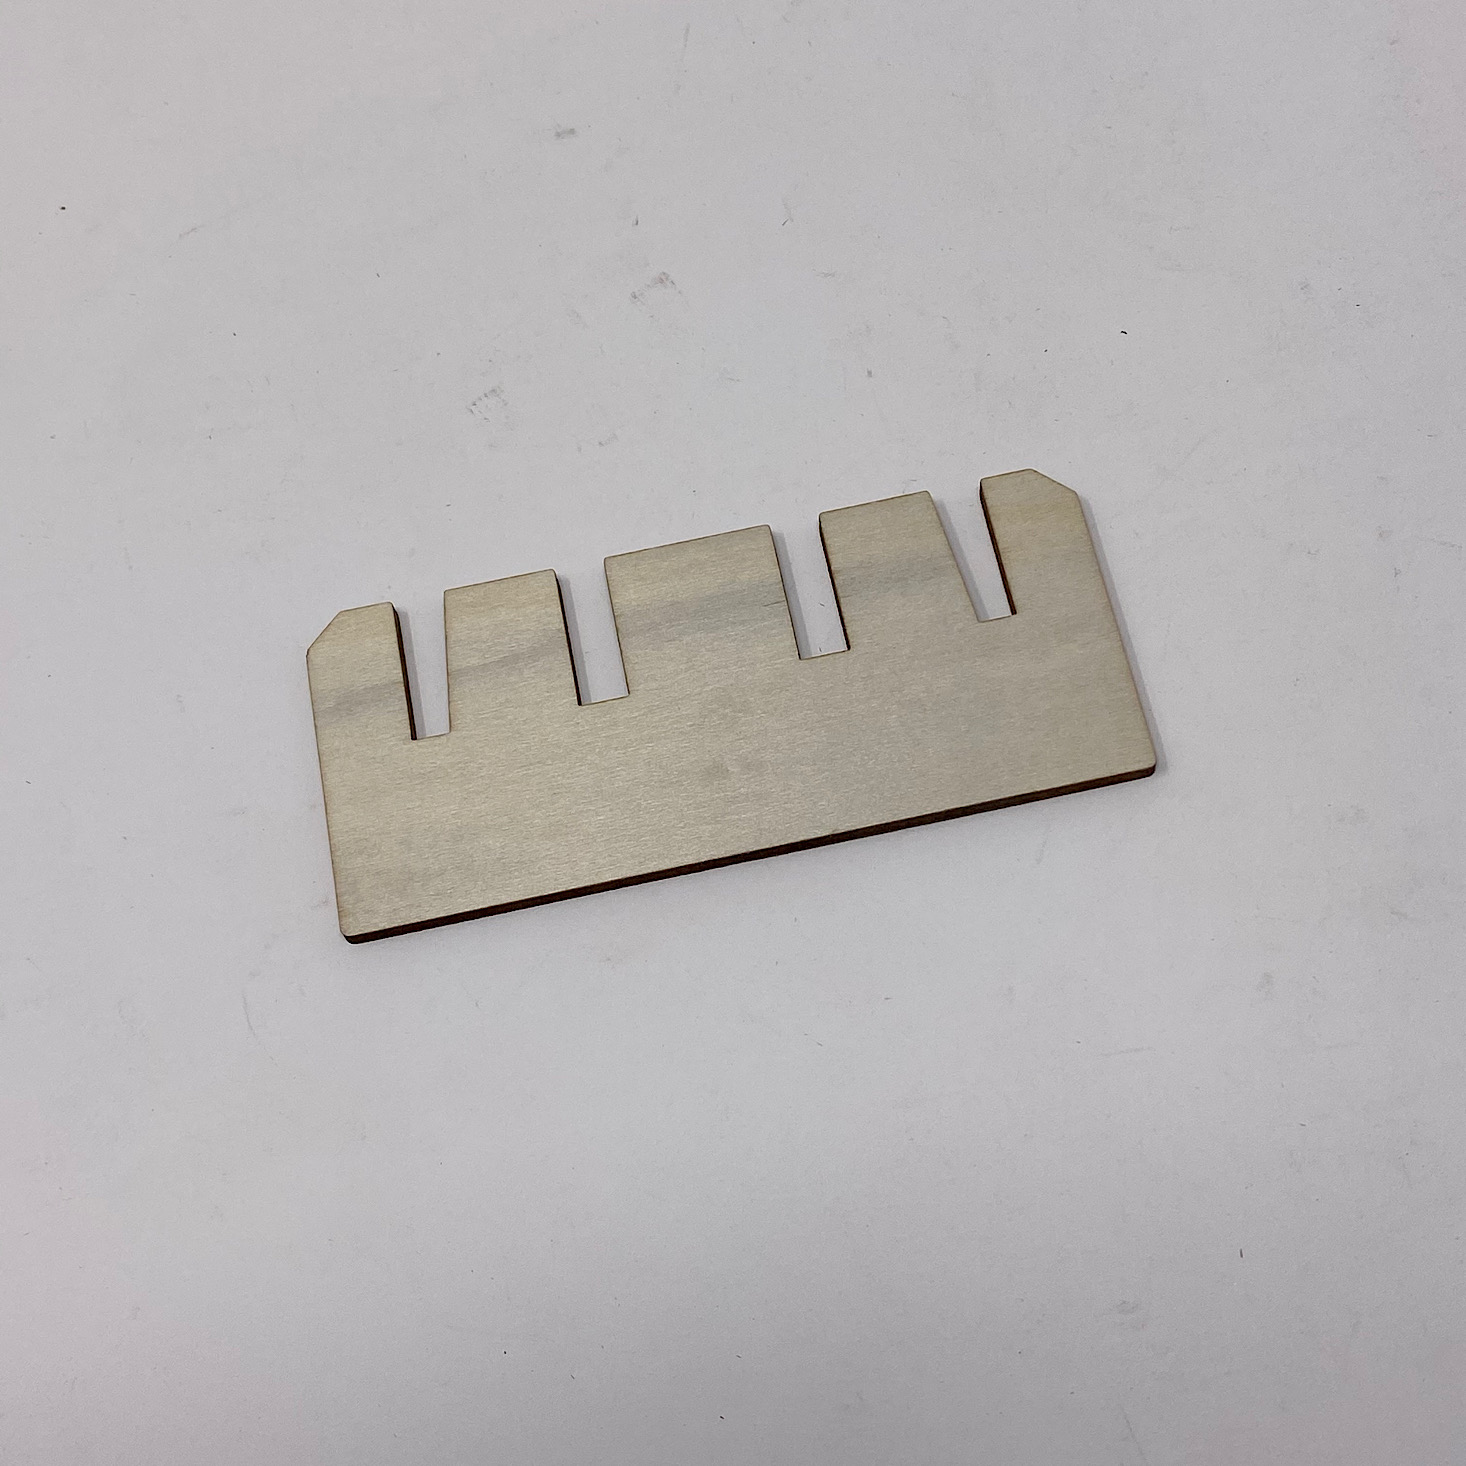
Part B: Finish the Grille

1 of 4
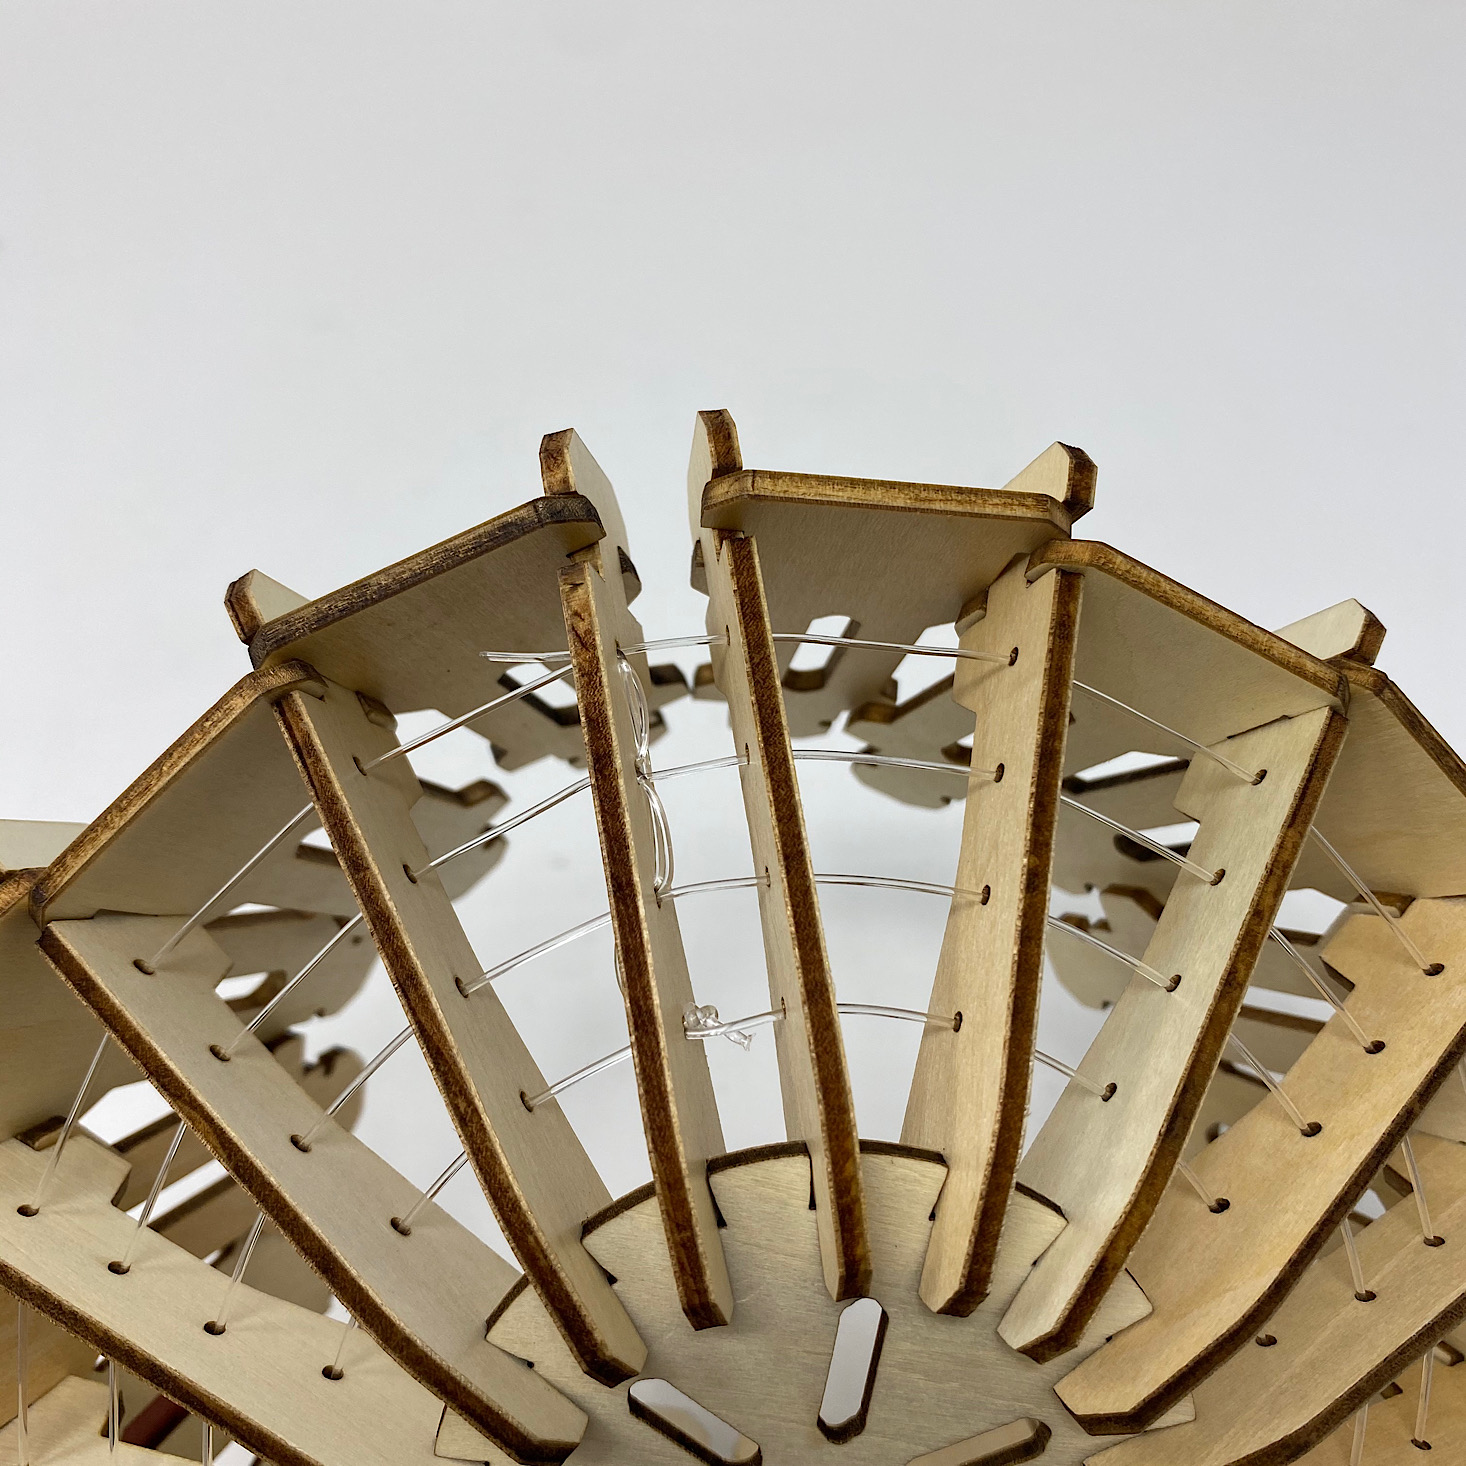
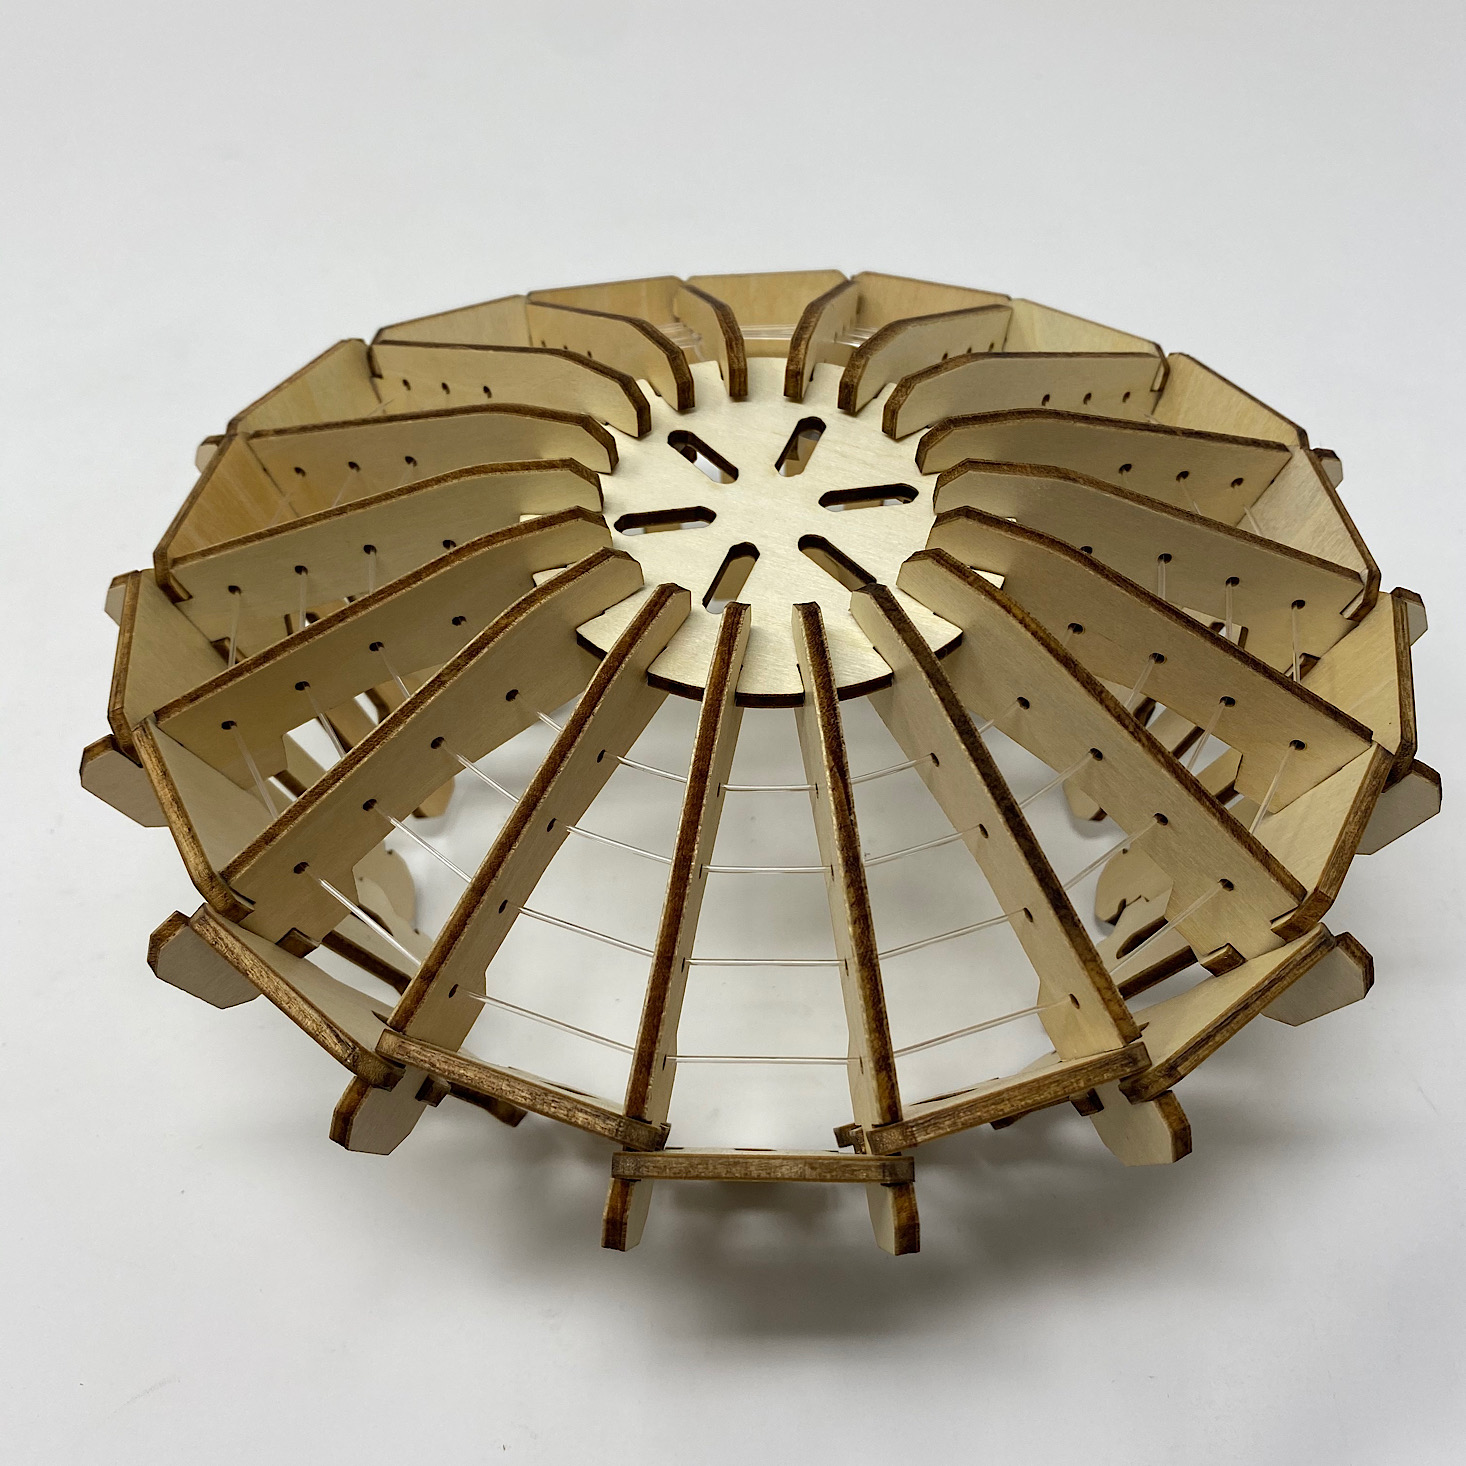
This is the moment when I realized that I may have tightened my wire just a bit too much. These little pieces were to fit in between each of the fan pieces I had assembled and you can see how very little room I had when I got finished. Fortunately, I was able to maneuver the last piece in there, but I had to go so slowly and I definitely thought it was going to break the entire time.
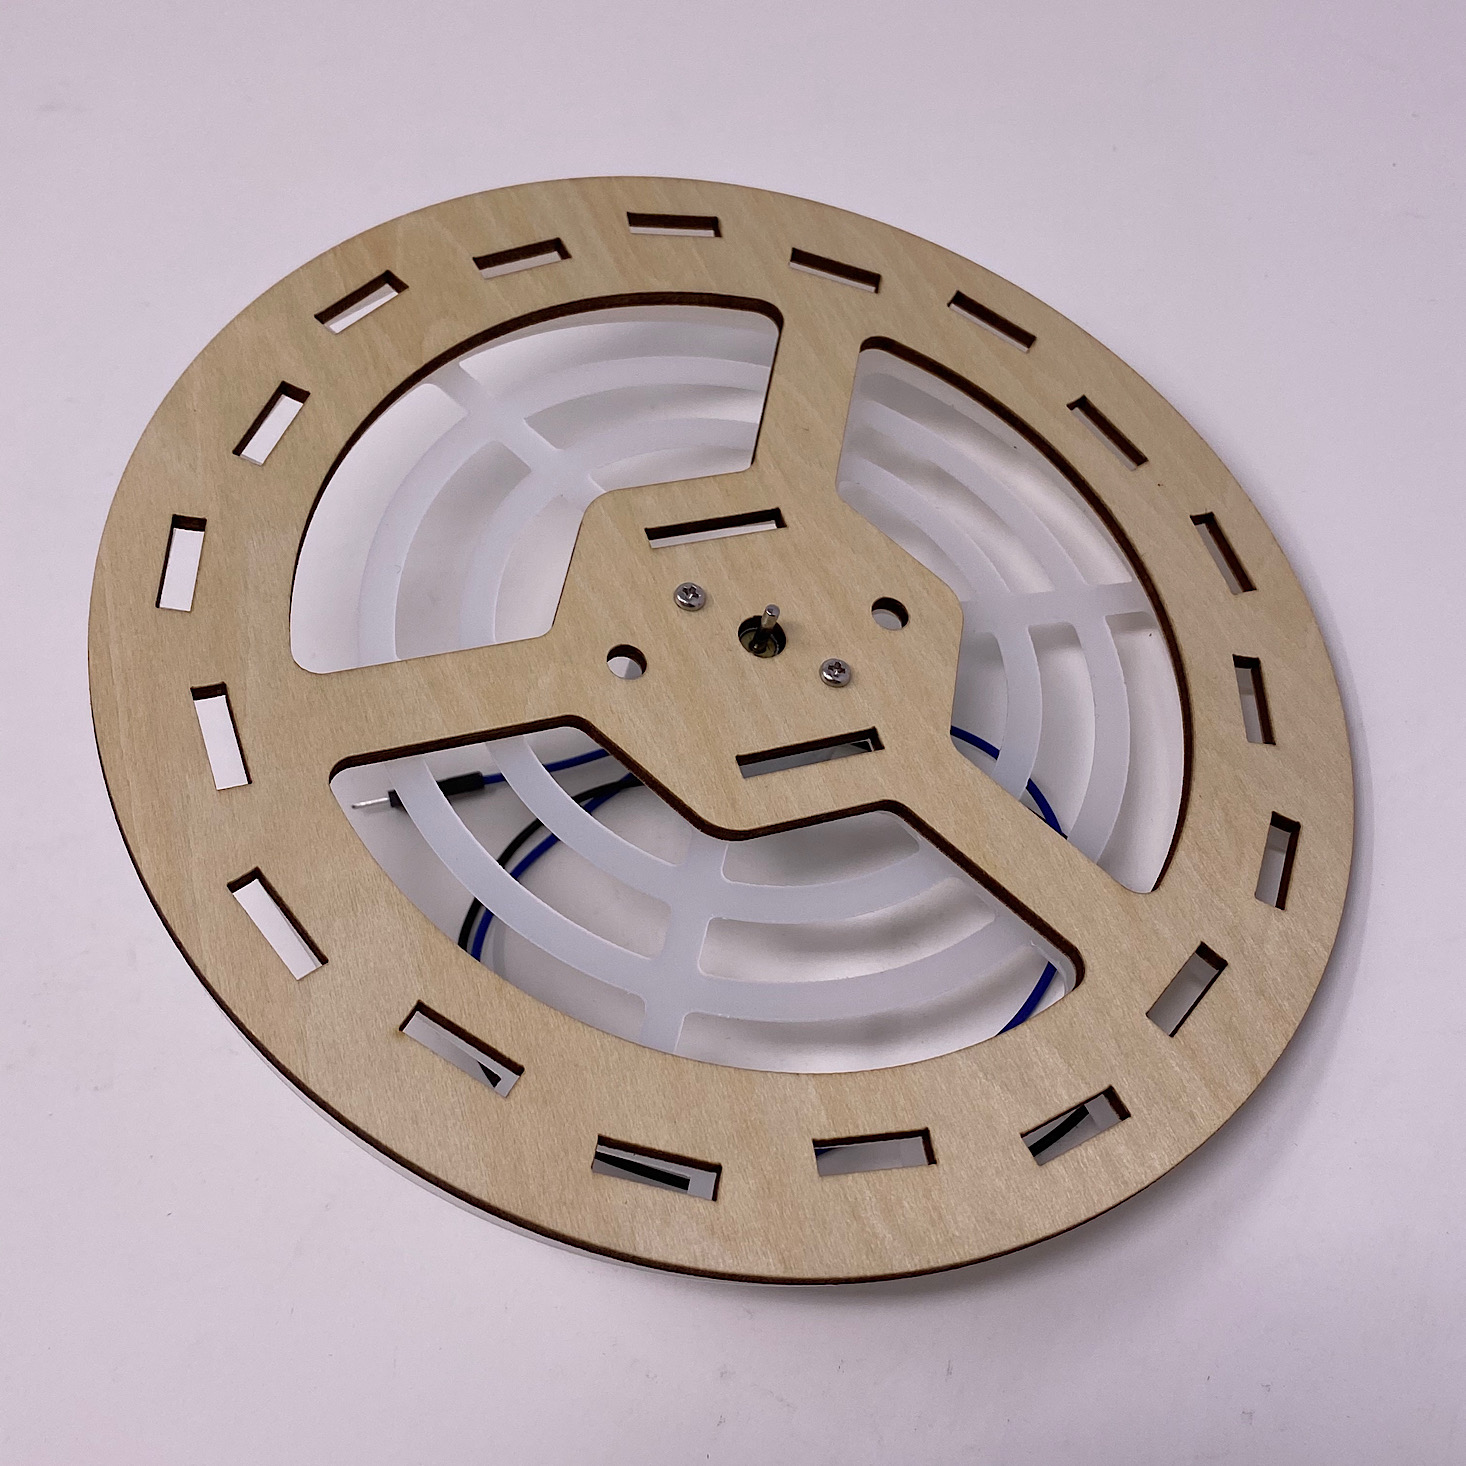
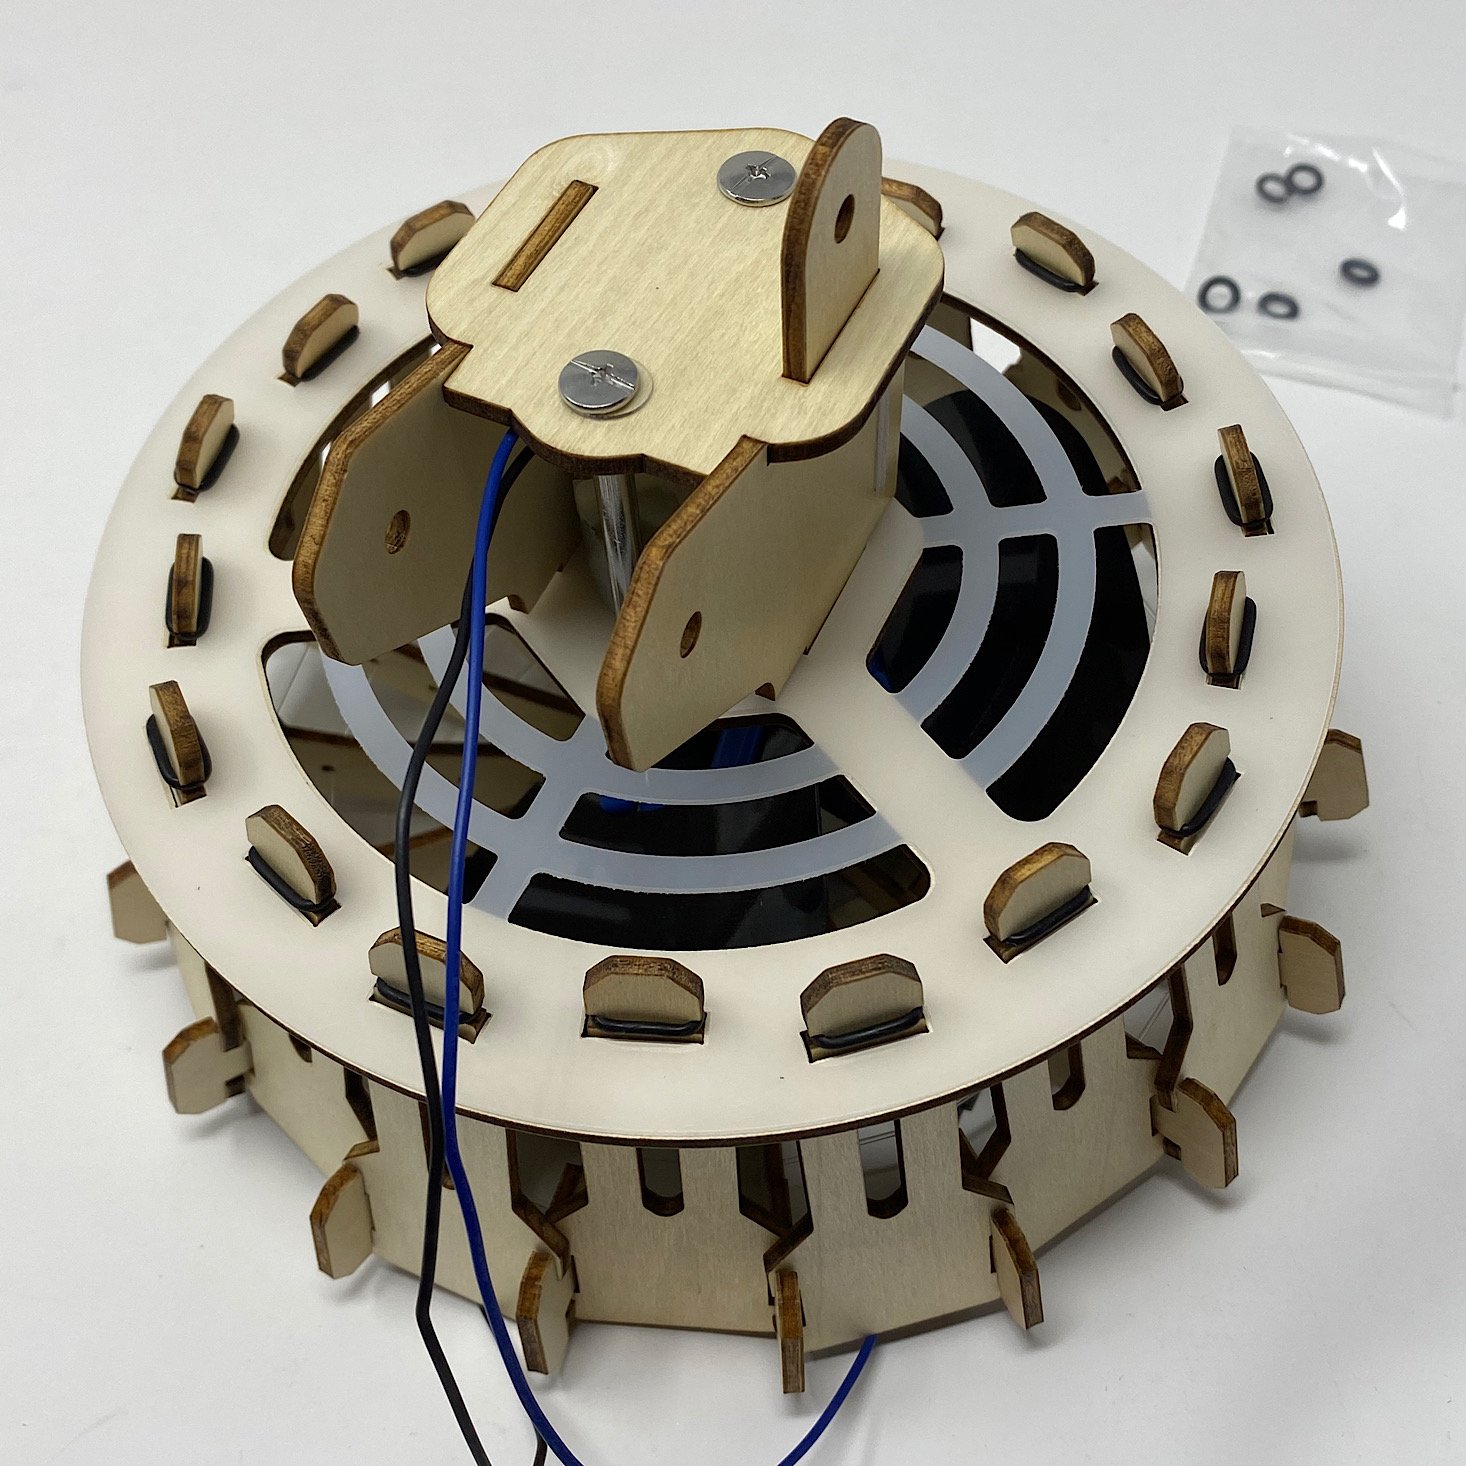
Part C: Assemble the Head

1 of 4


I lined up the holes in the wooden and plastic circles and then slipped the motor into place. I used the tiny screws and mini screwdriver they provided to screw it all together and secure it.


1 of 2
Then I assembled these pieces around the motor at the back.

1 of 4
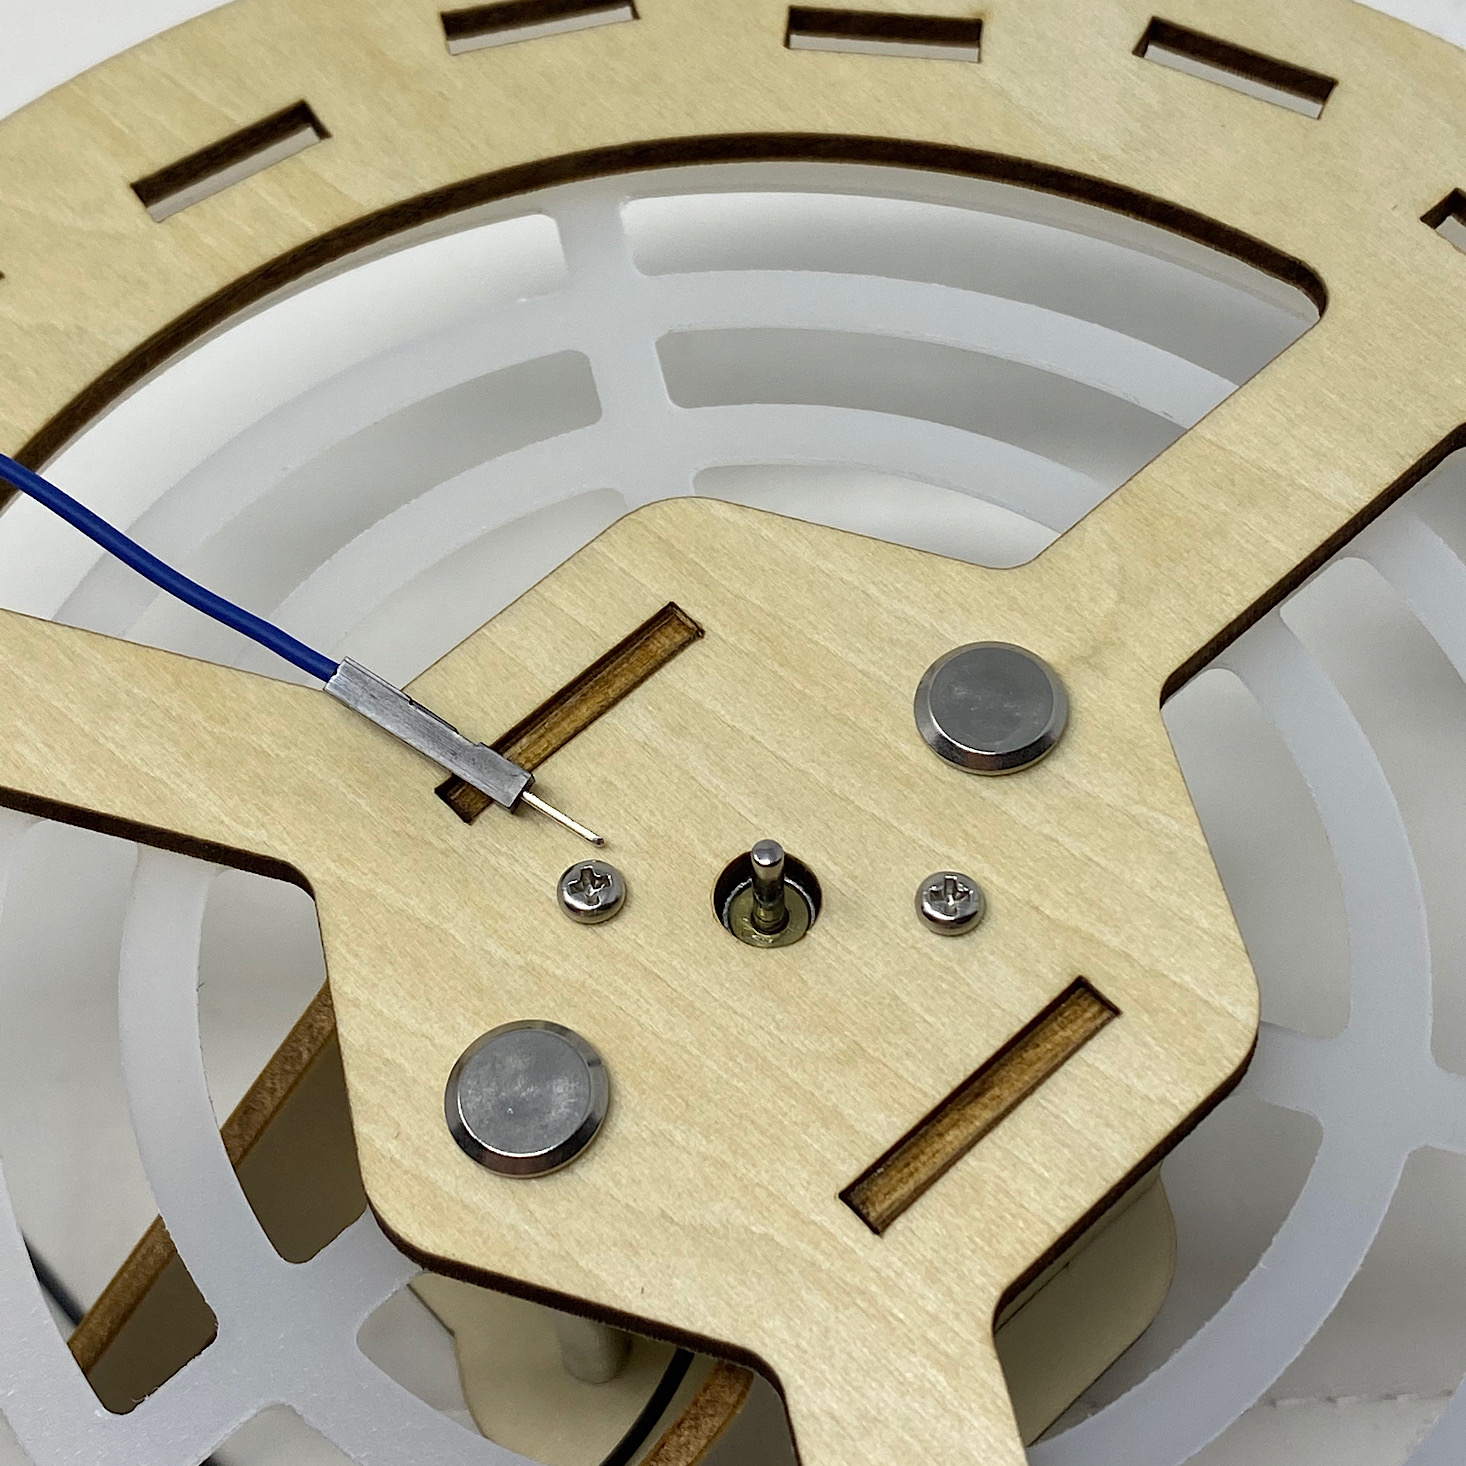
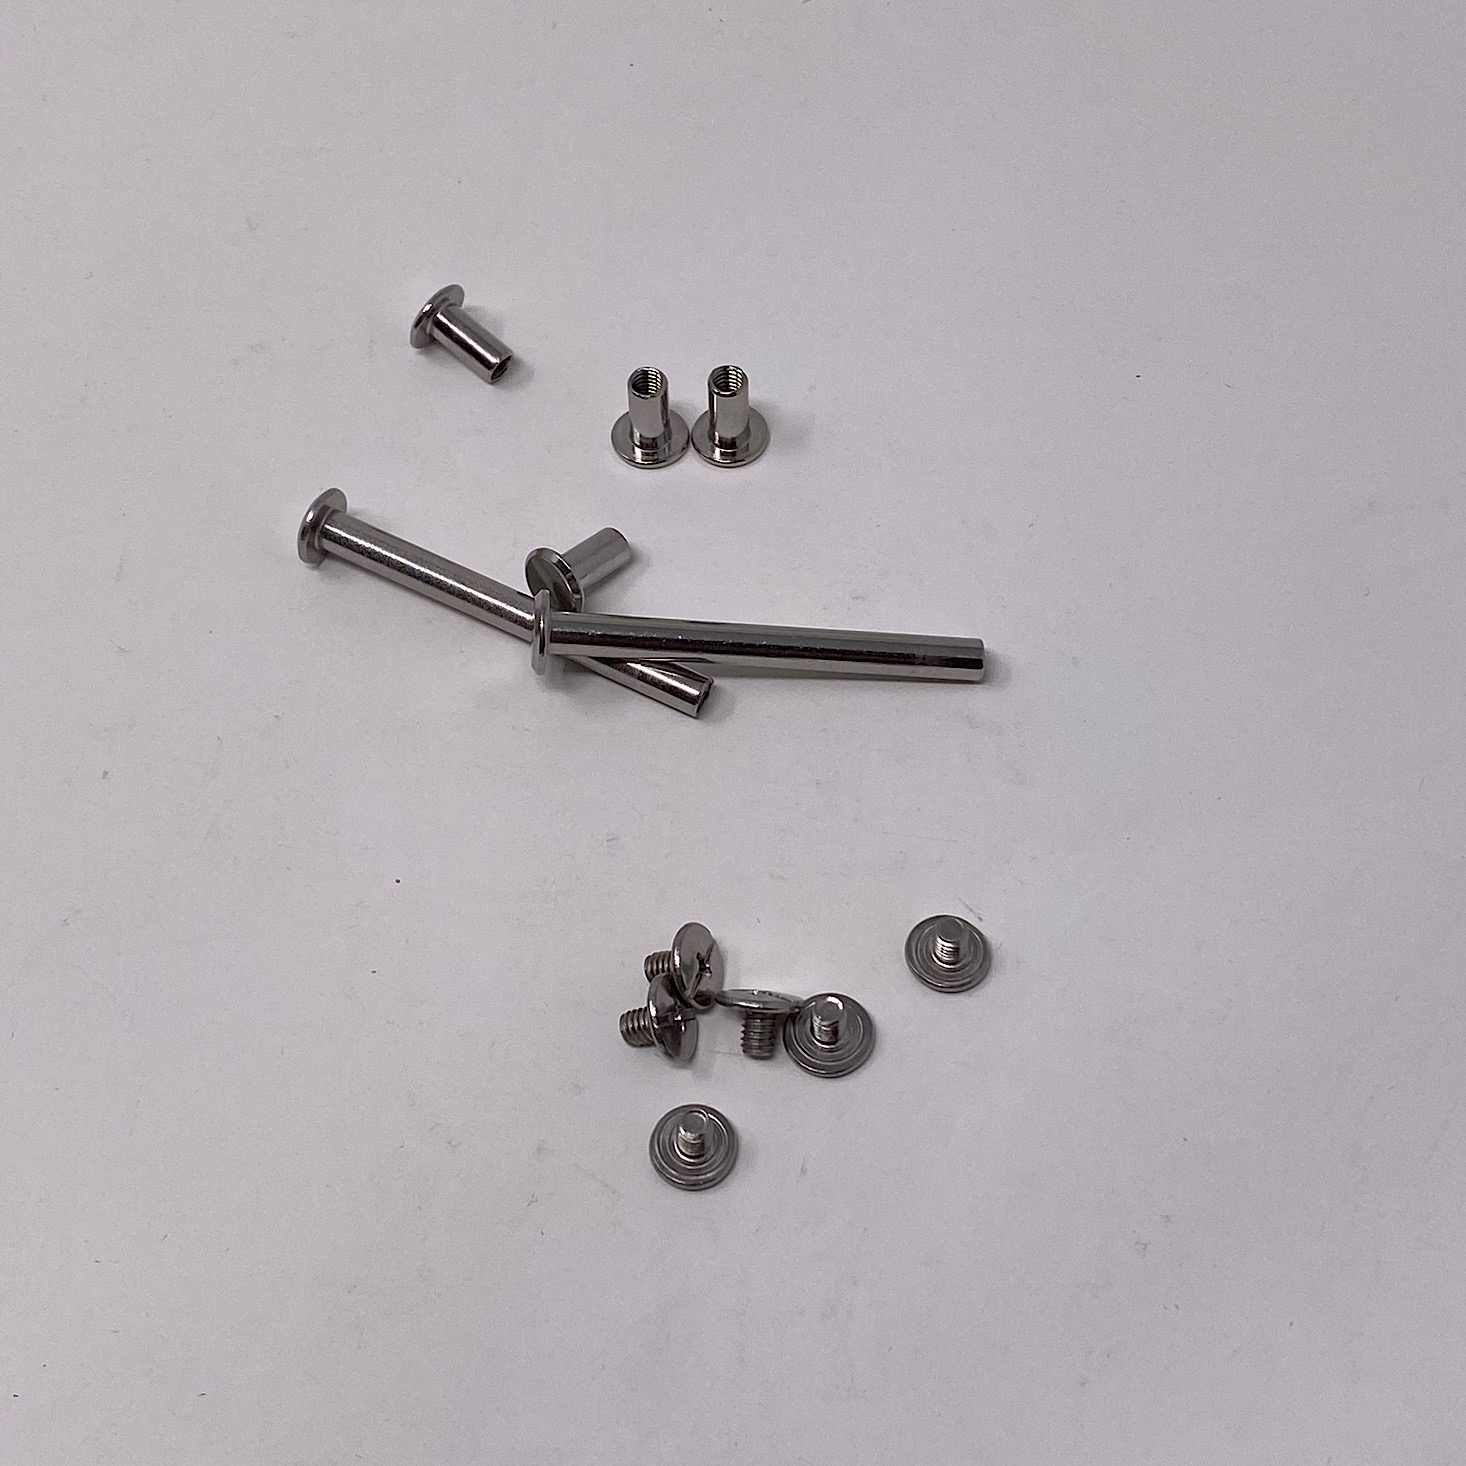
To secure the pieces, I used the longer bolts and screws. I did have to use a little plastic washer on one because it was a bit loose.

1 of 3
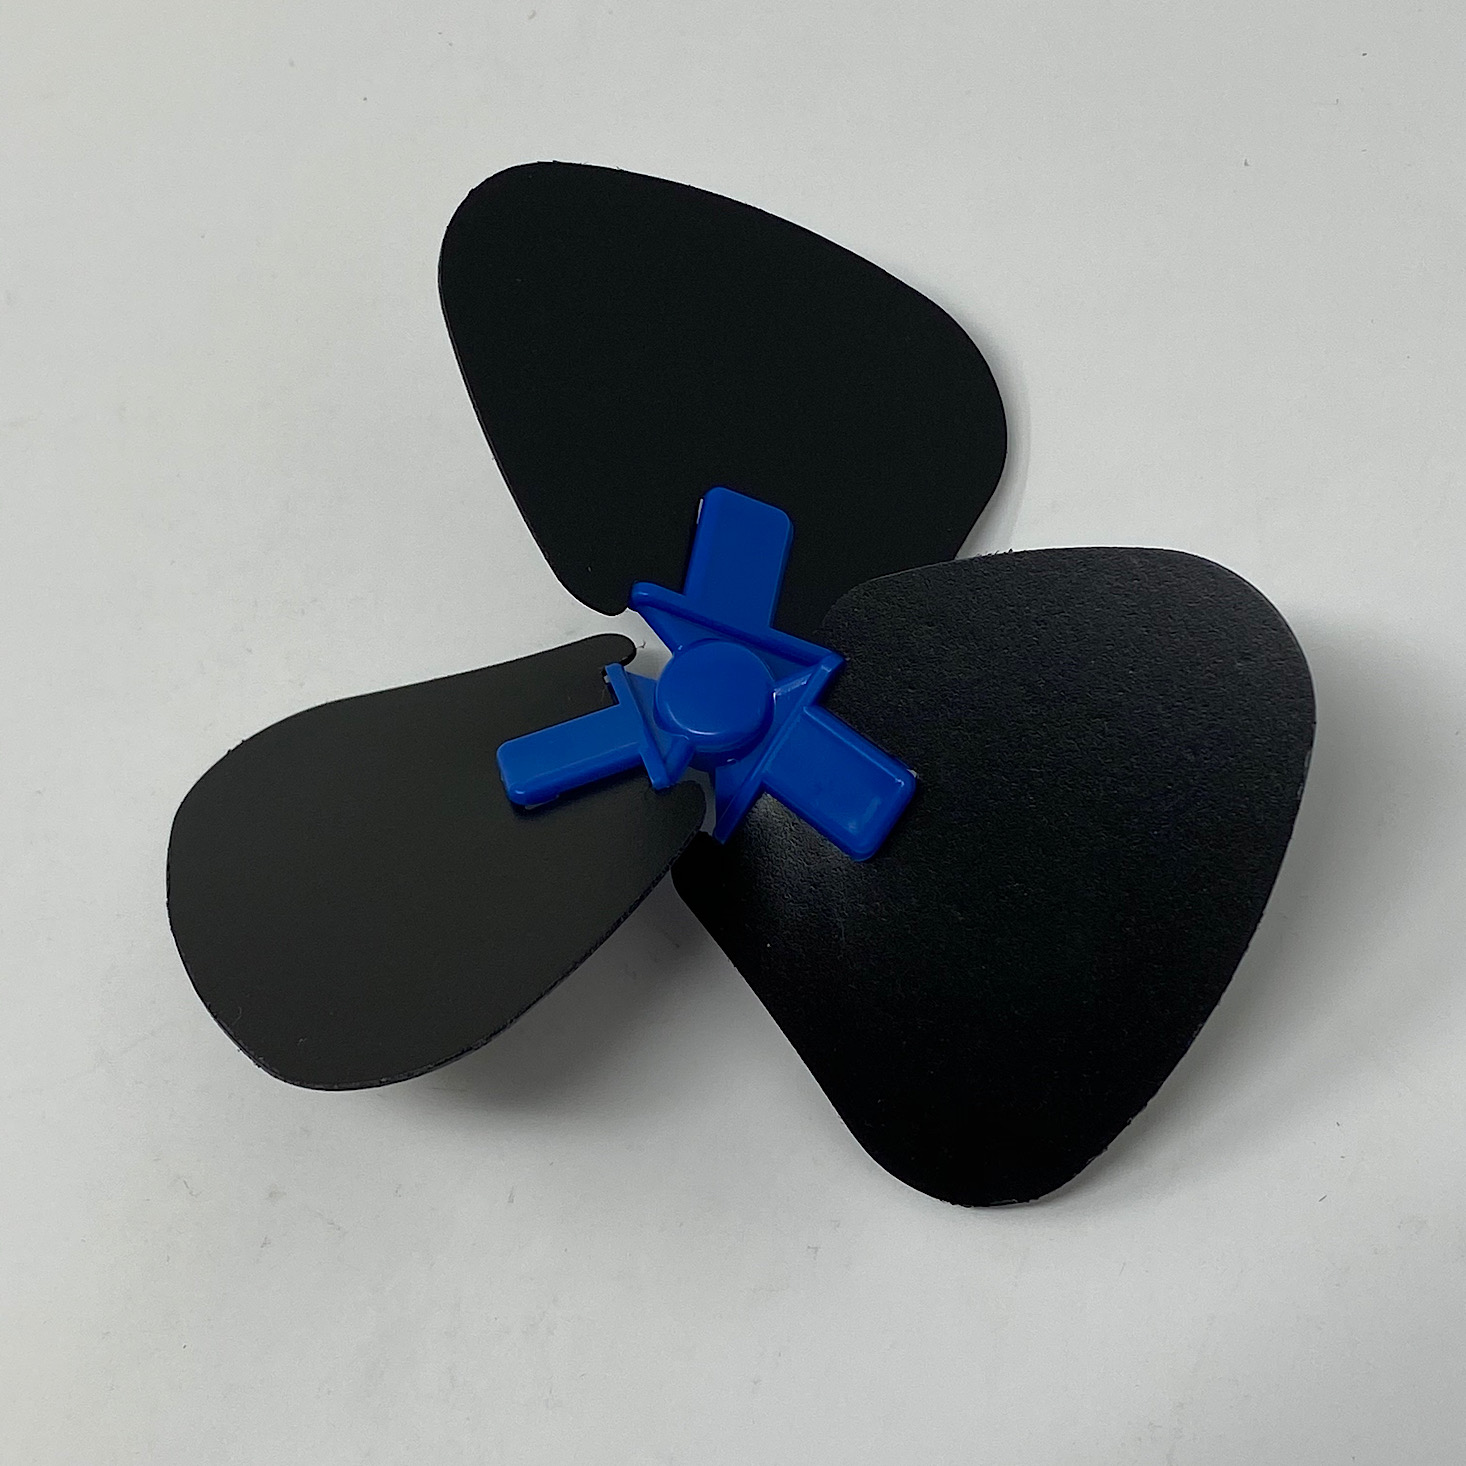
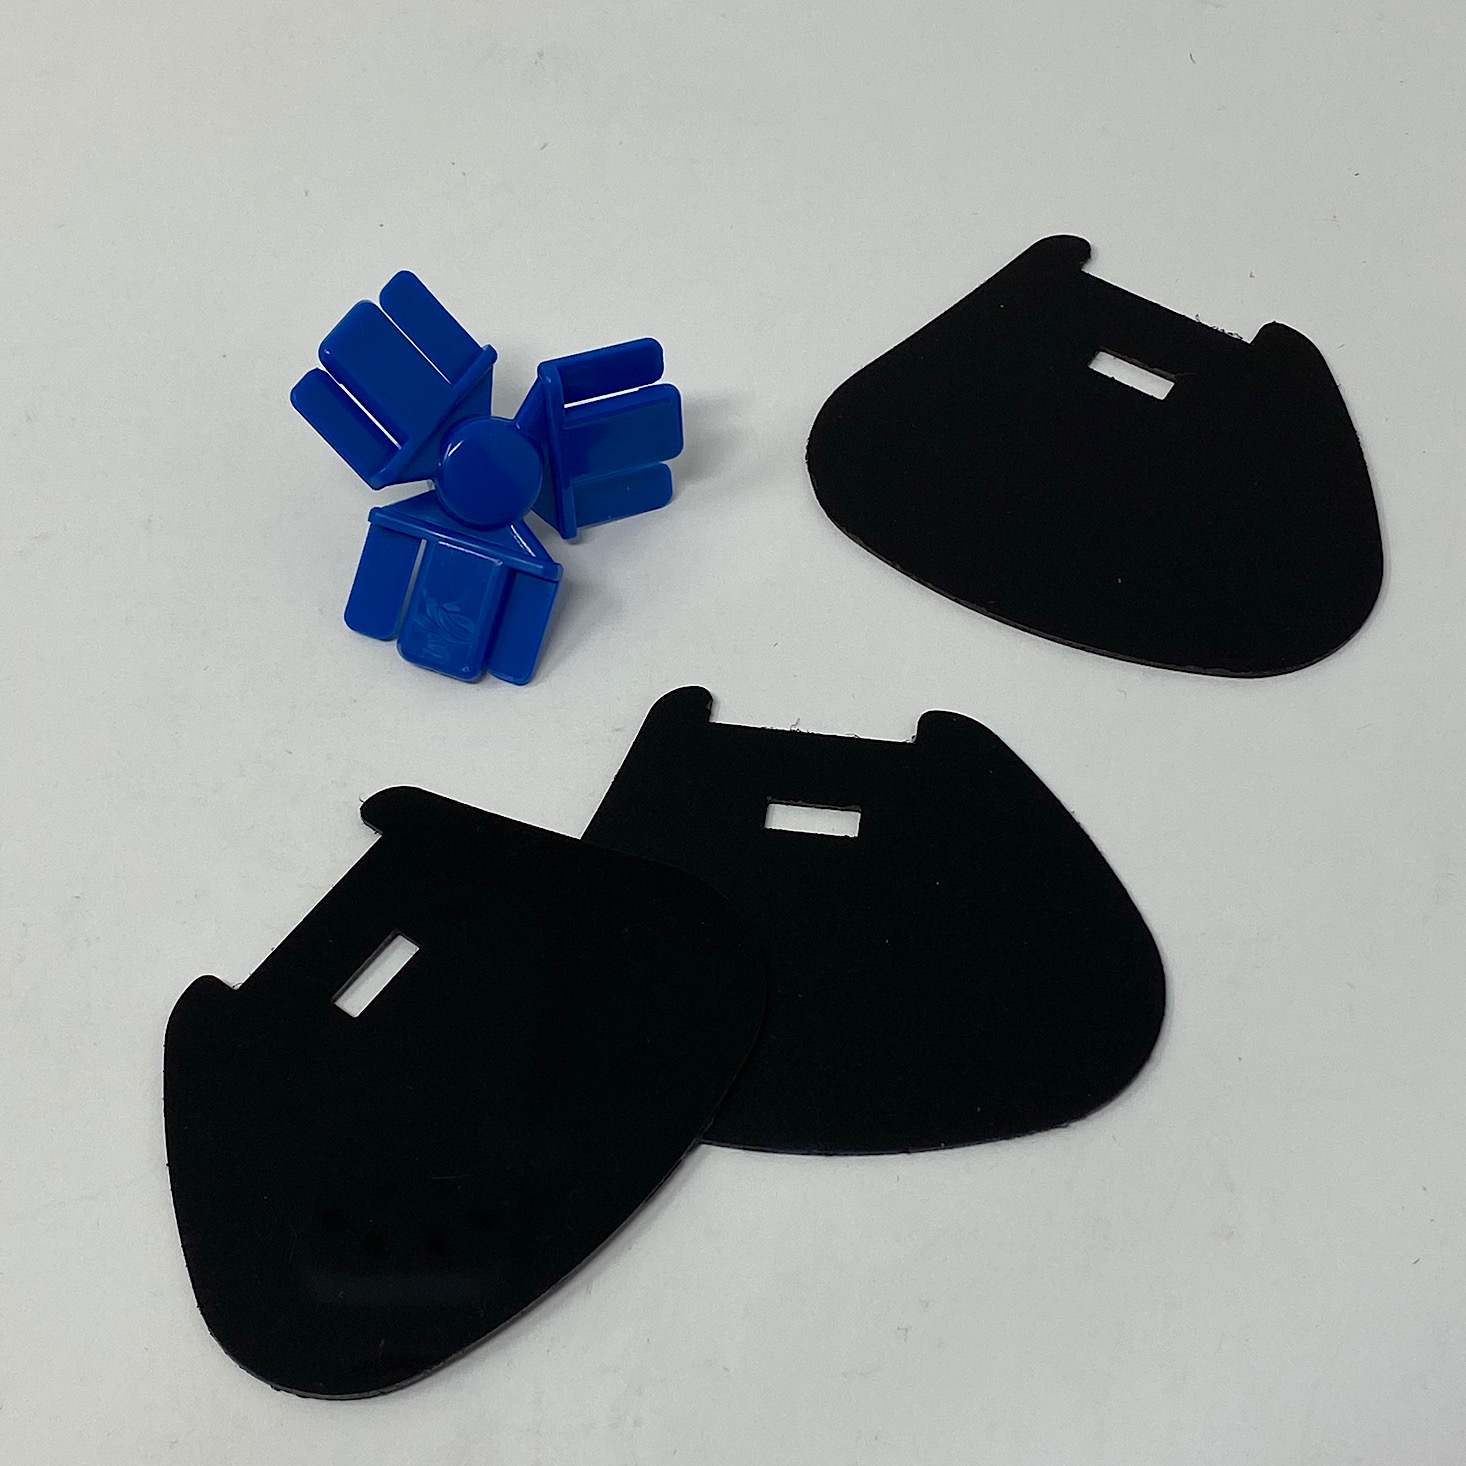
Assembling the fan blades was pretty easy. I just slipped them into the blue holder and made sure they were all facing the same direction.
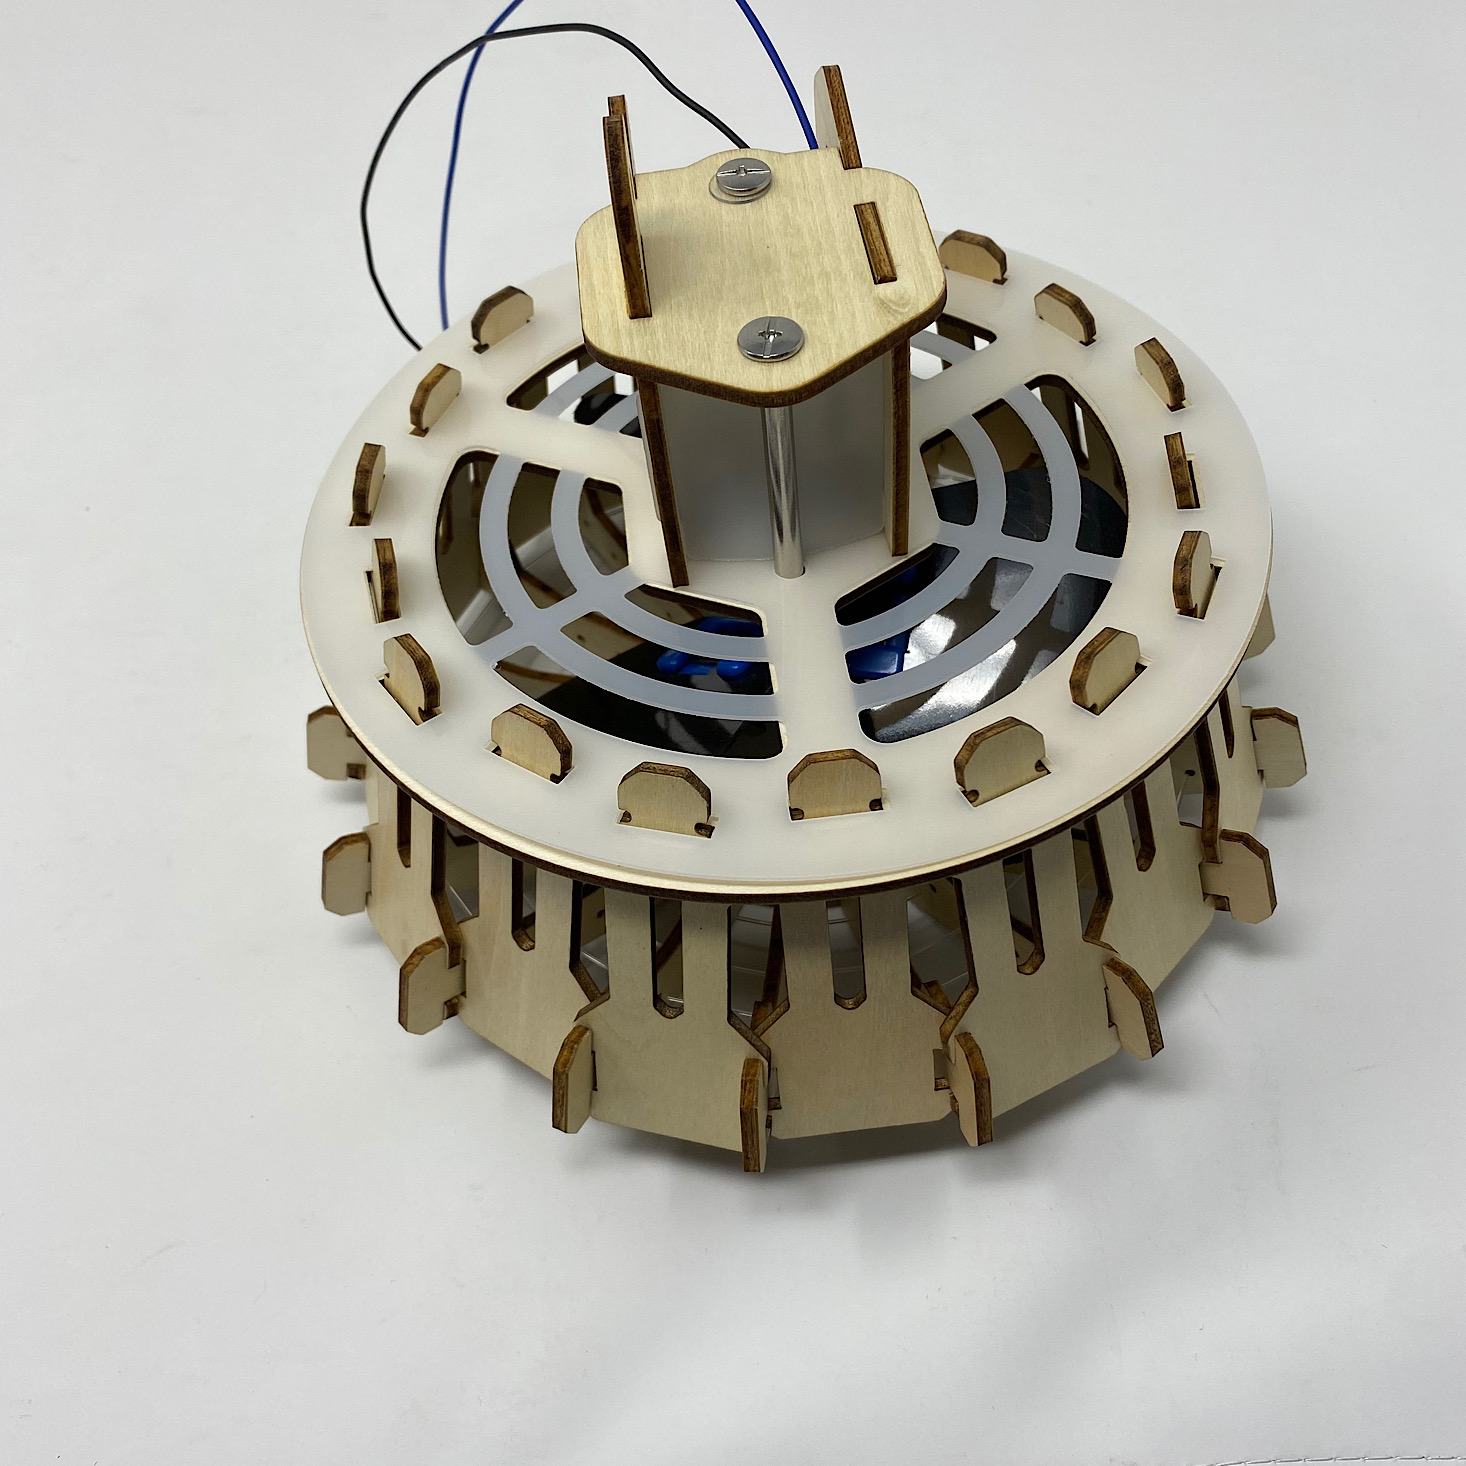
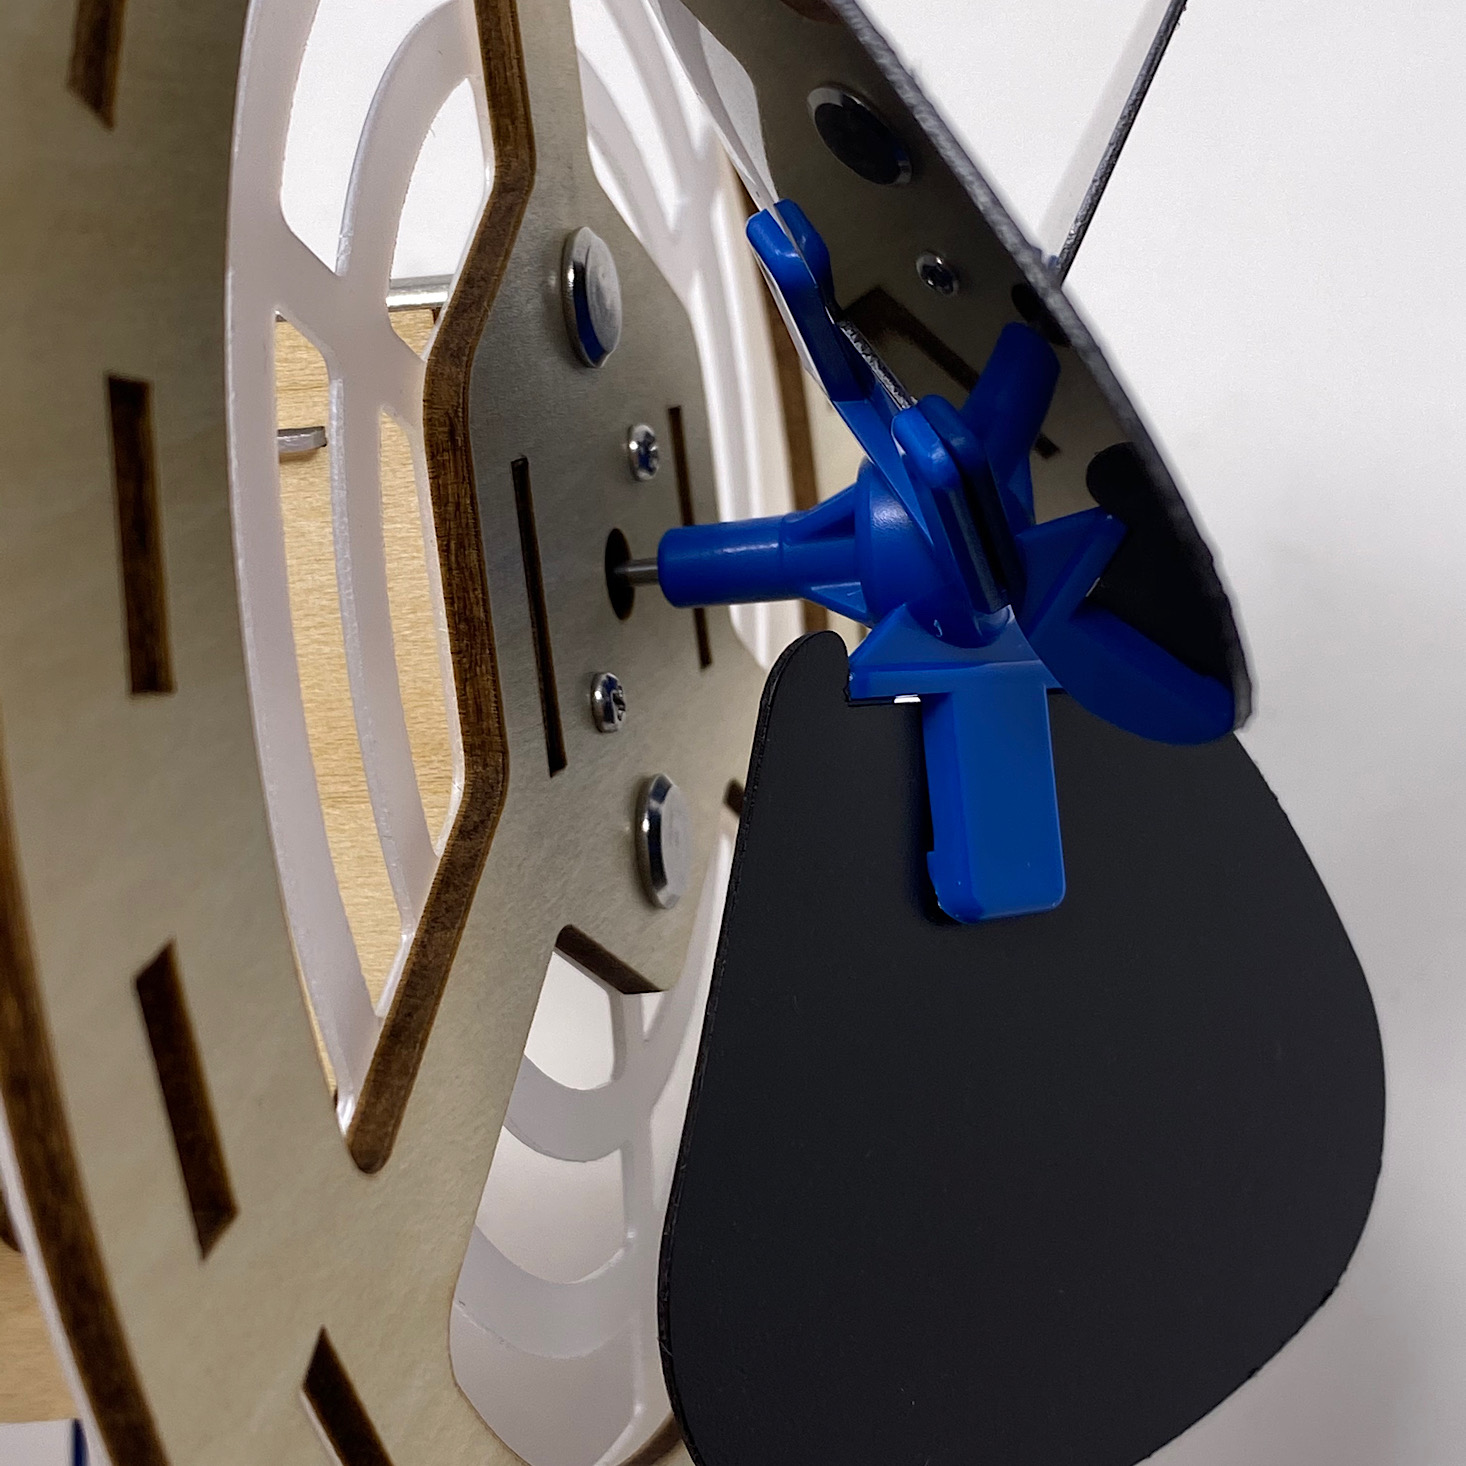
1 of 2
I stuck the finished fan blade piece onto the pole from the motor and then came the hardest part. I had to fit the outer part over the fan blades and into the holes around the back of the fan. Since my wire was sooooo tight, this was quite a feat. I had to be really careful and patient and sort of stretch the wire and then place each little peg one at a time to get it to fit.
1 of 2
It really took some adjusting, but finally, I was able to get the pieces into place! You can see that they alternate with one in and one out. It really could have been so easy! While it was a struggle, I'm happy that I was able to make it work!

1 of 2
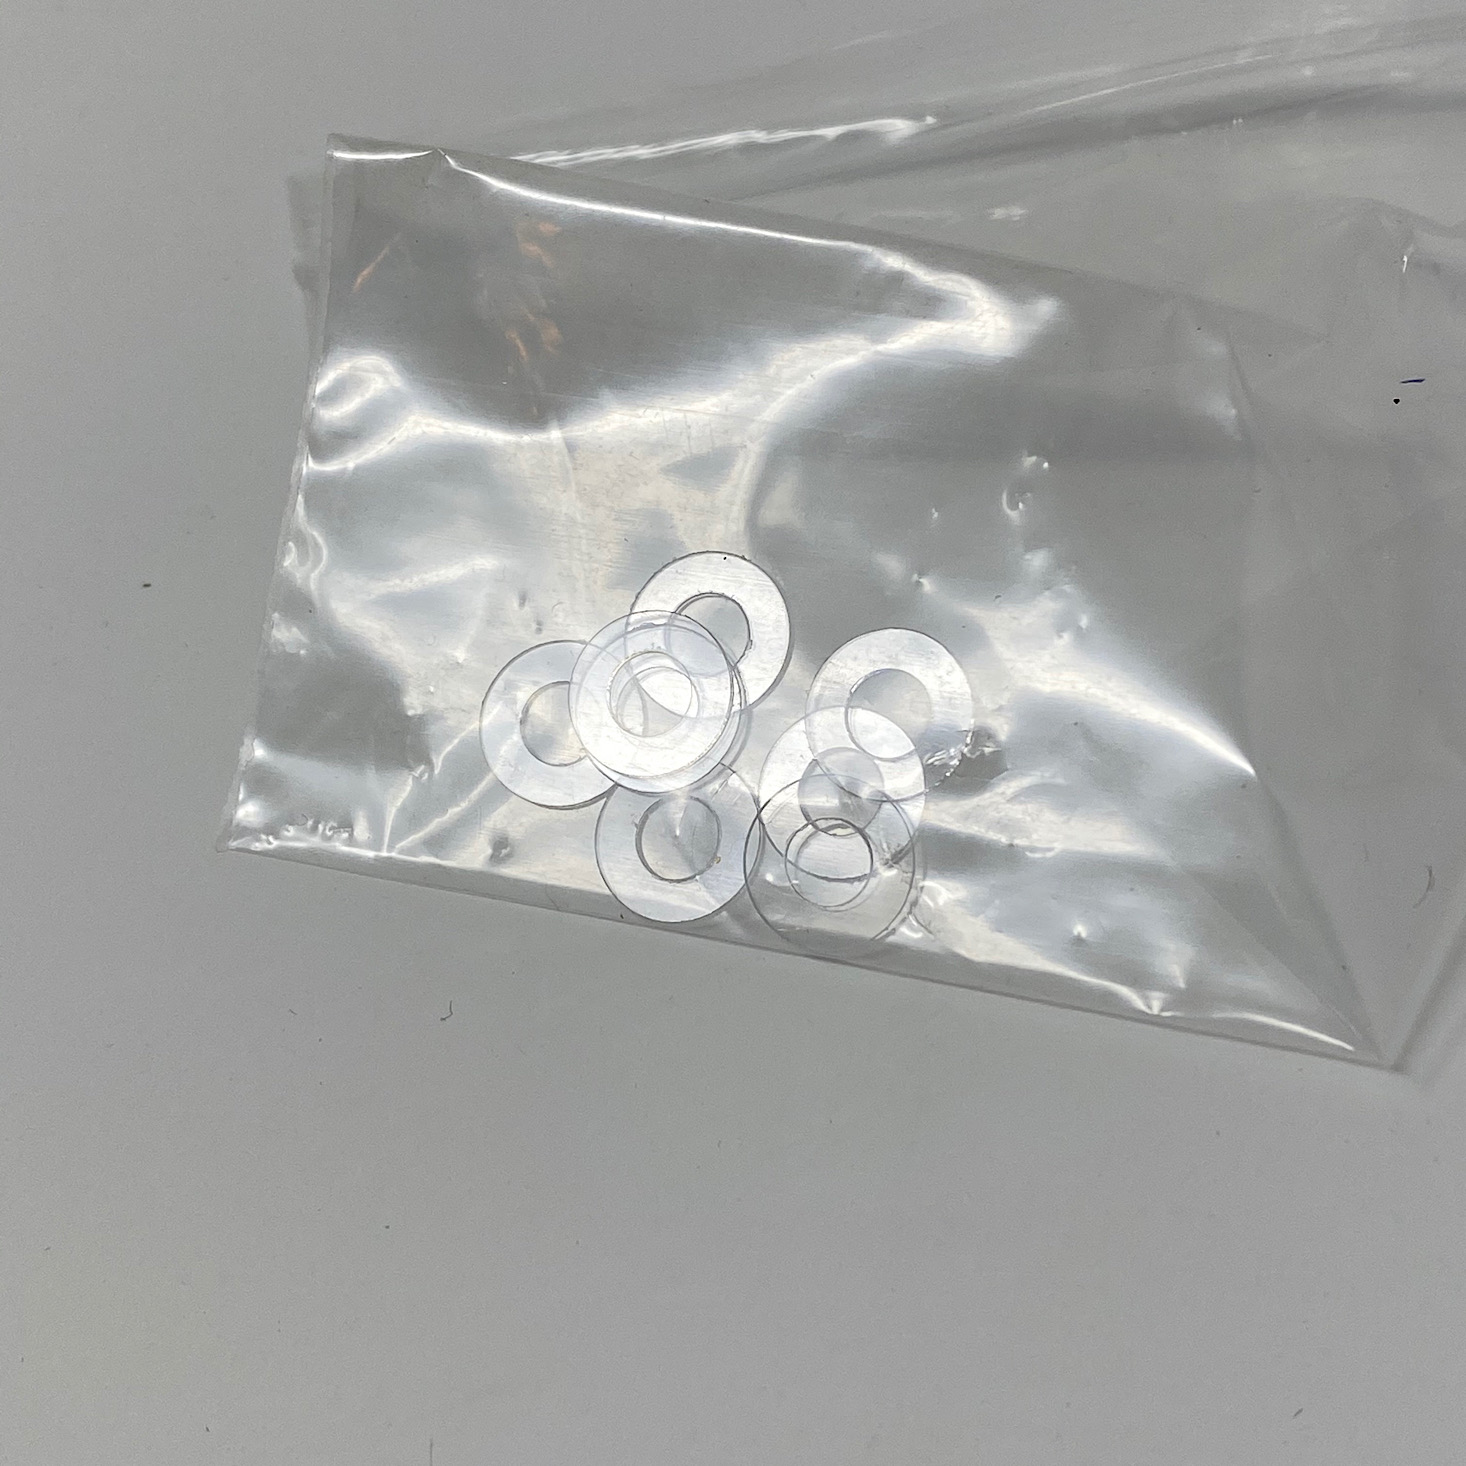
While my fan pieces felt pretty snug, I figured I better play it safe so I added the rubber rings to the ends like I was supposed to.
Part D: Add the Neck

1 of 5
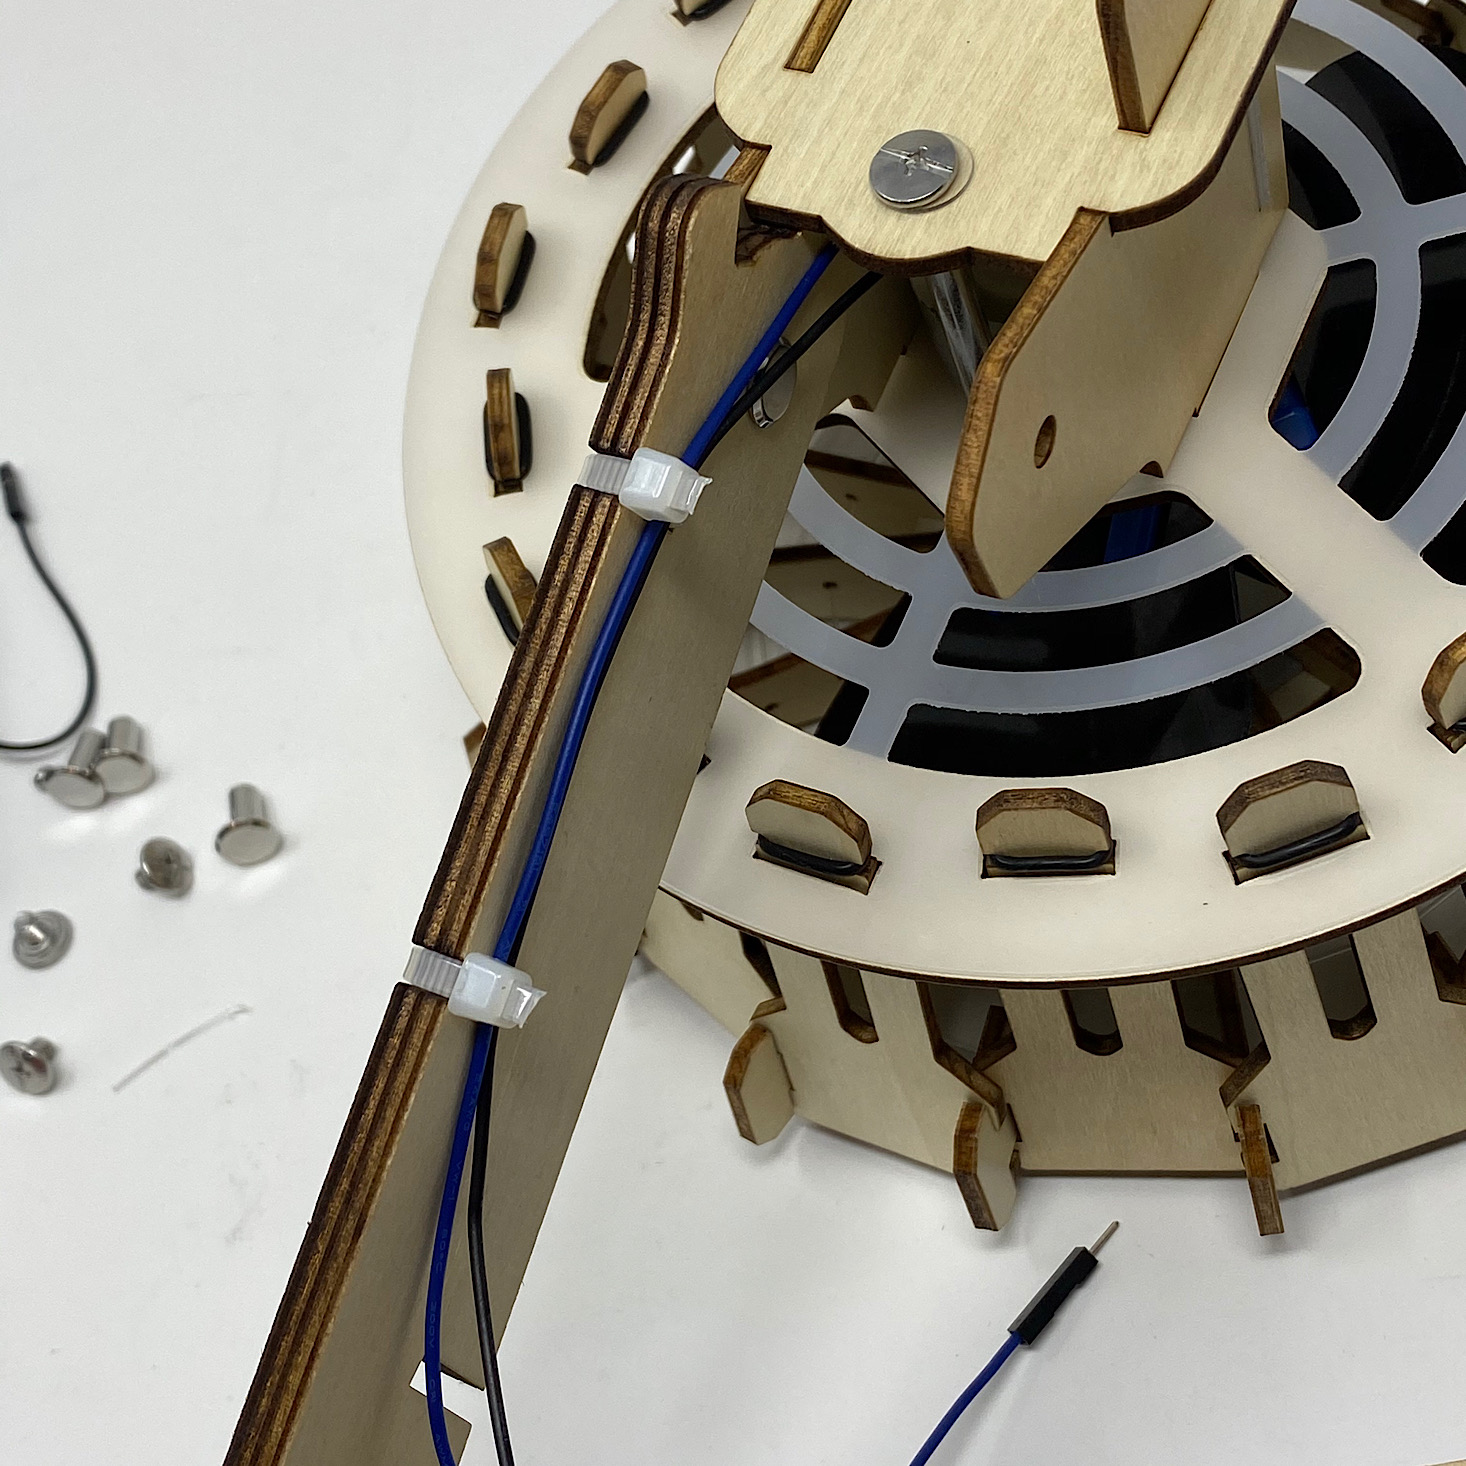
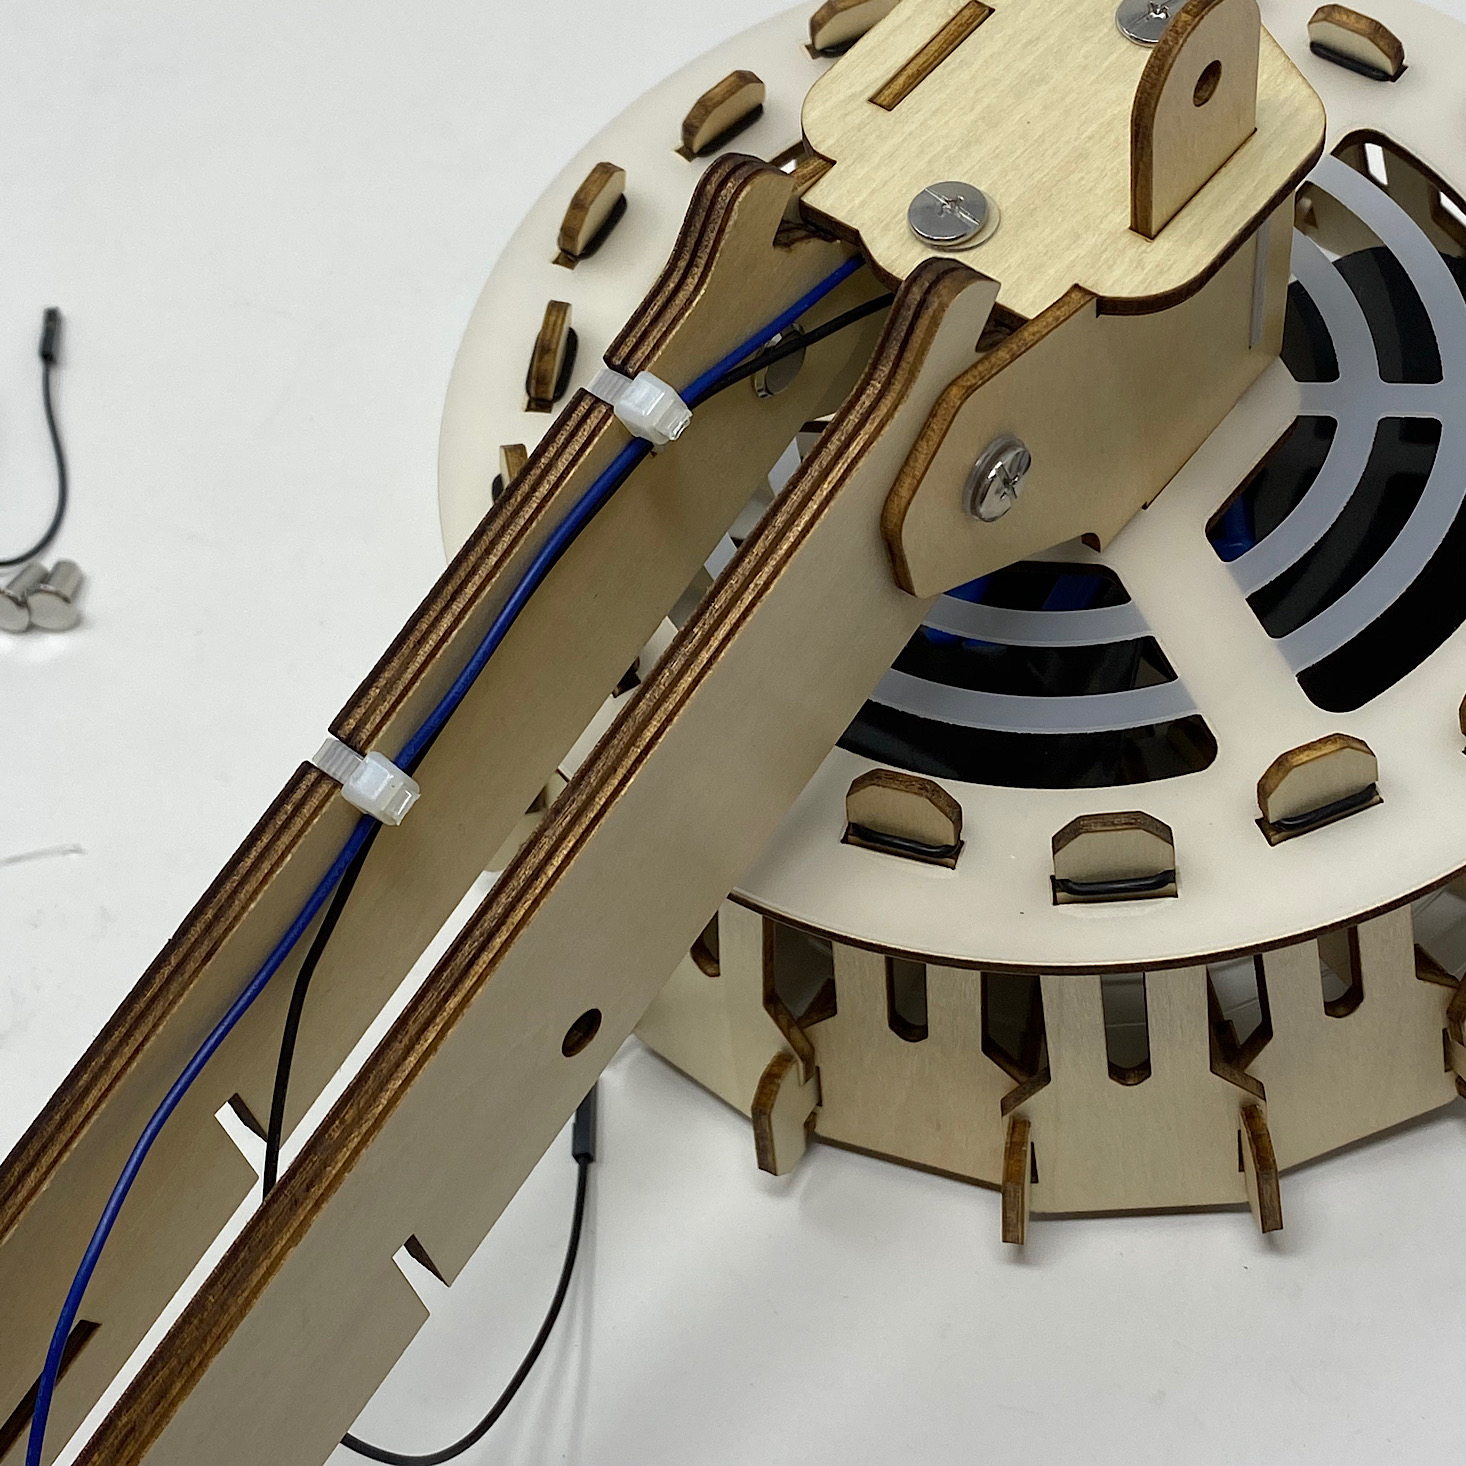

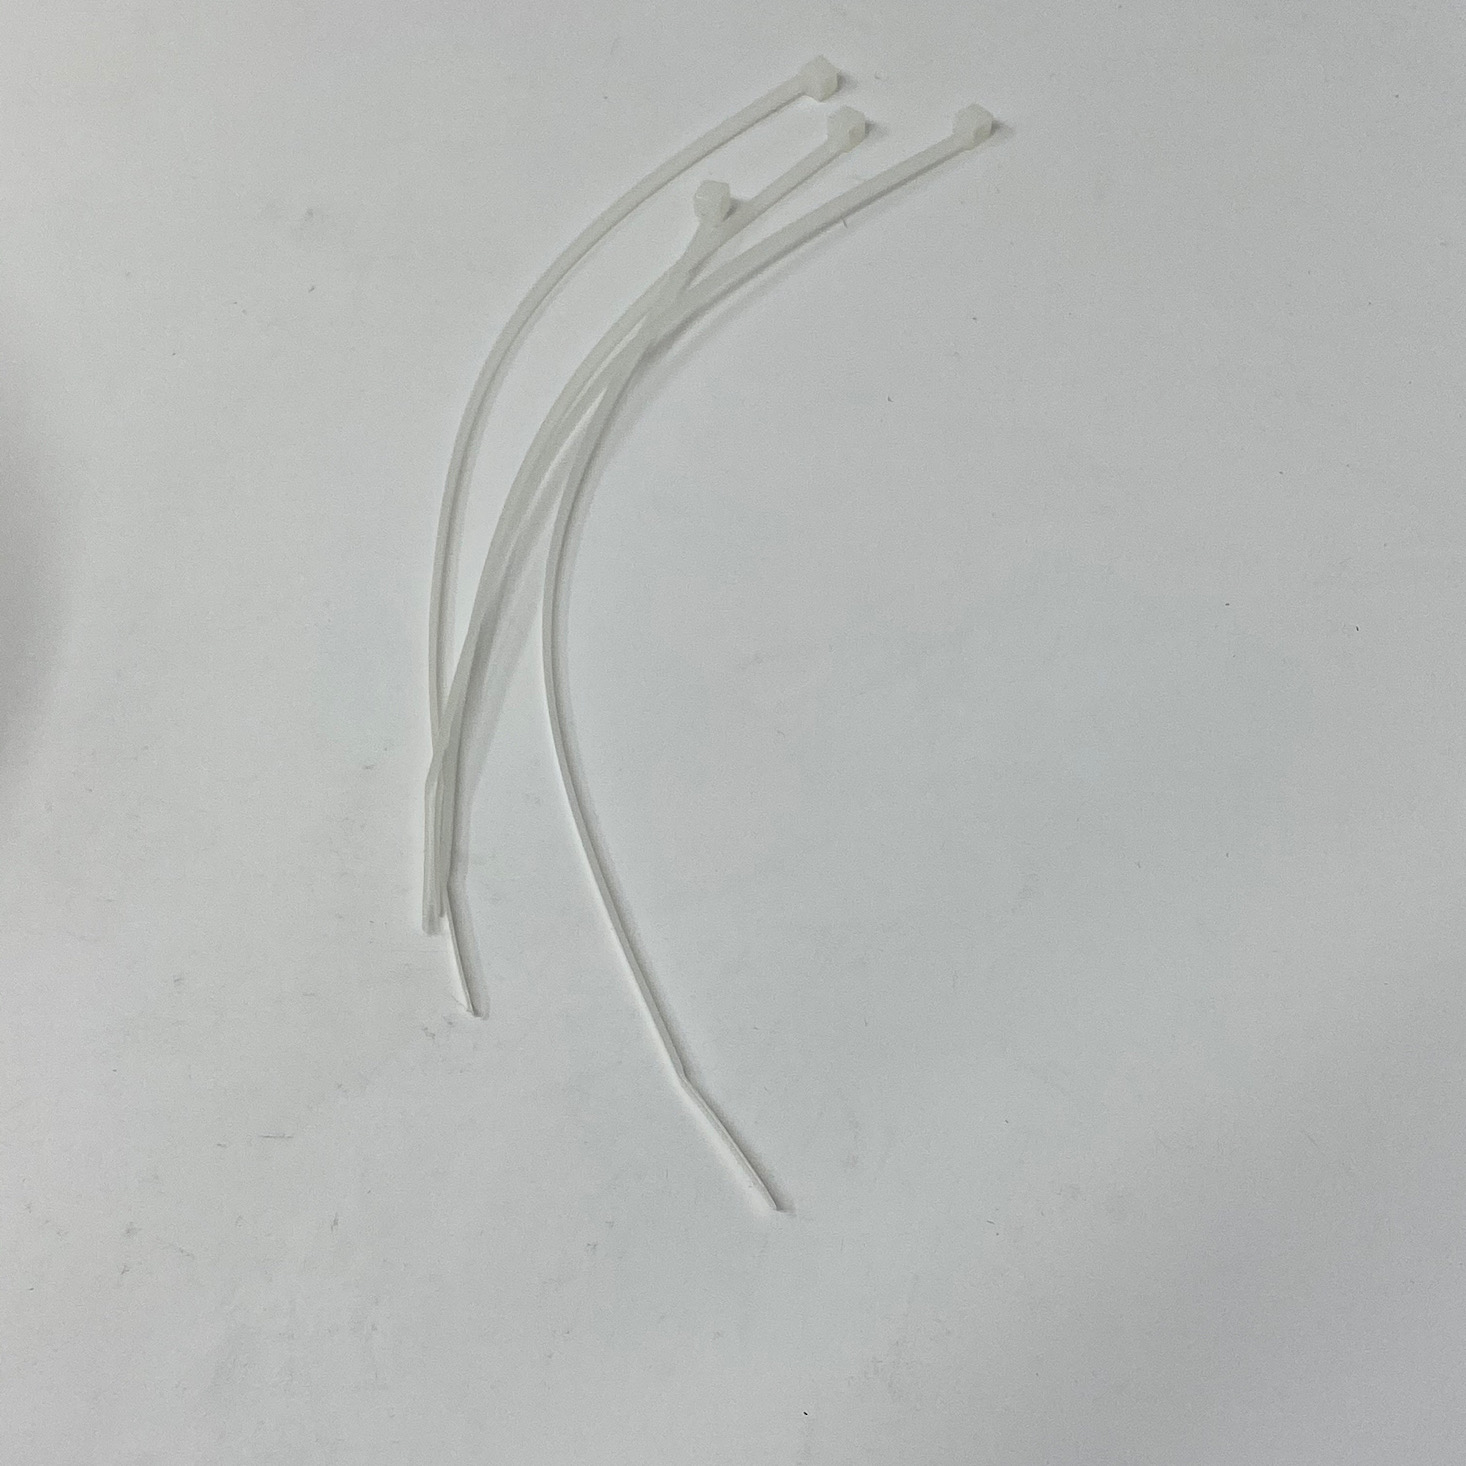
Now it was time to add the neck. I took one of the long wooden pieces and secured it to the back of the fan with a bolt and screw. Then I used the zip ties to secure the wires and help hold them in place and out of the way along the neck. This was easy since the holes were already made in the arm for the zip ties. I trimmed those and then I added the other neckpiece to the other side.


1 of 5

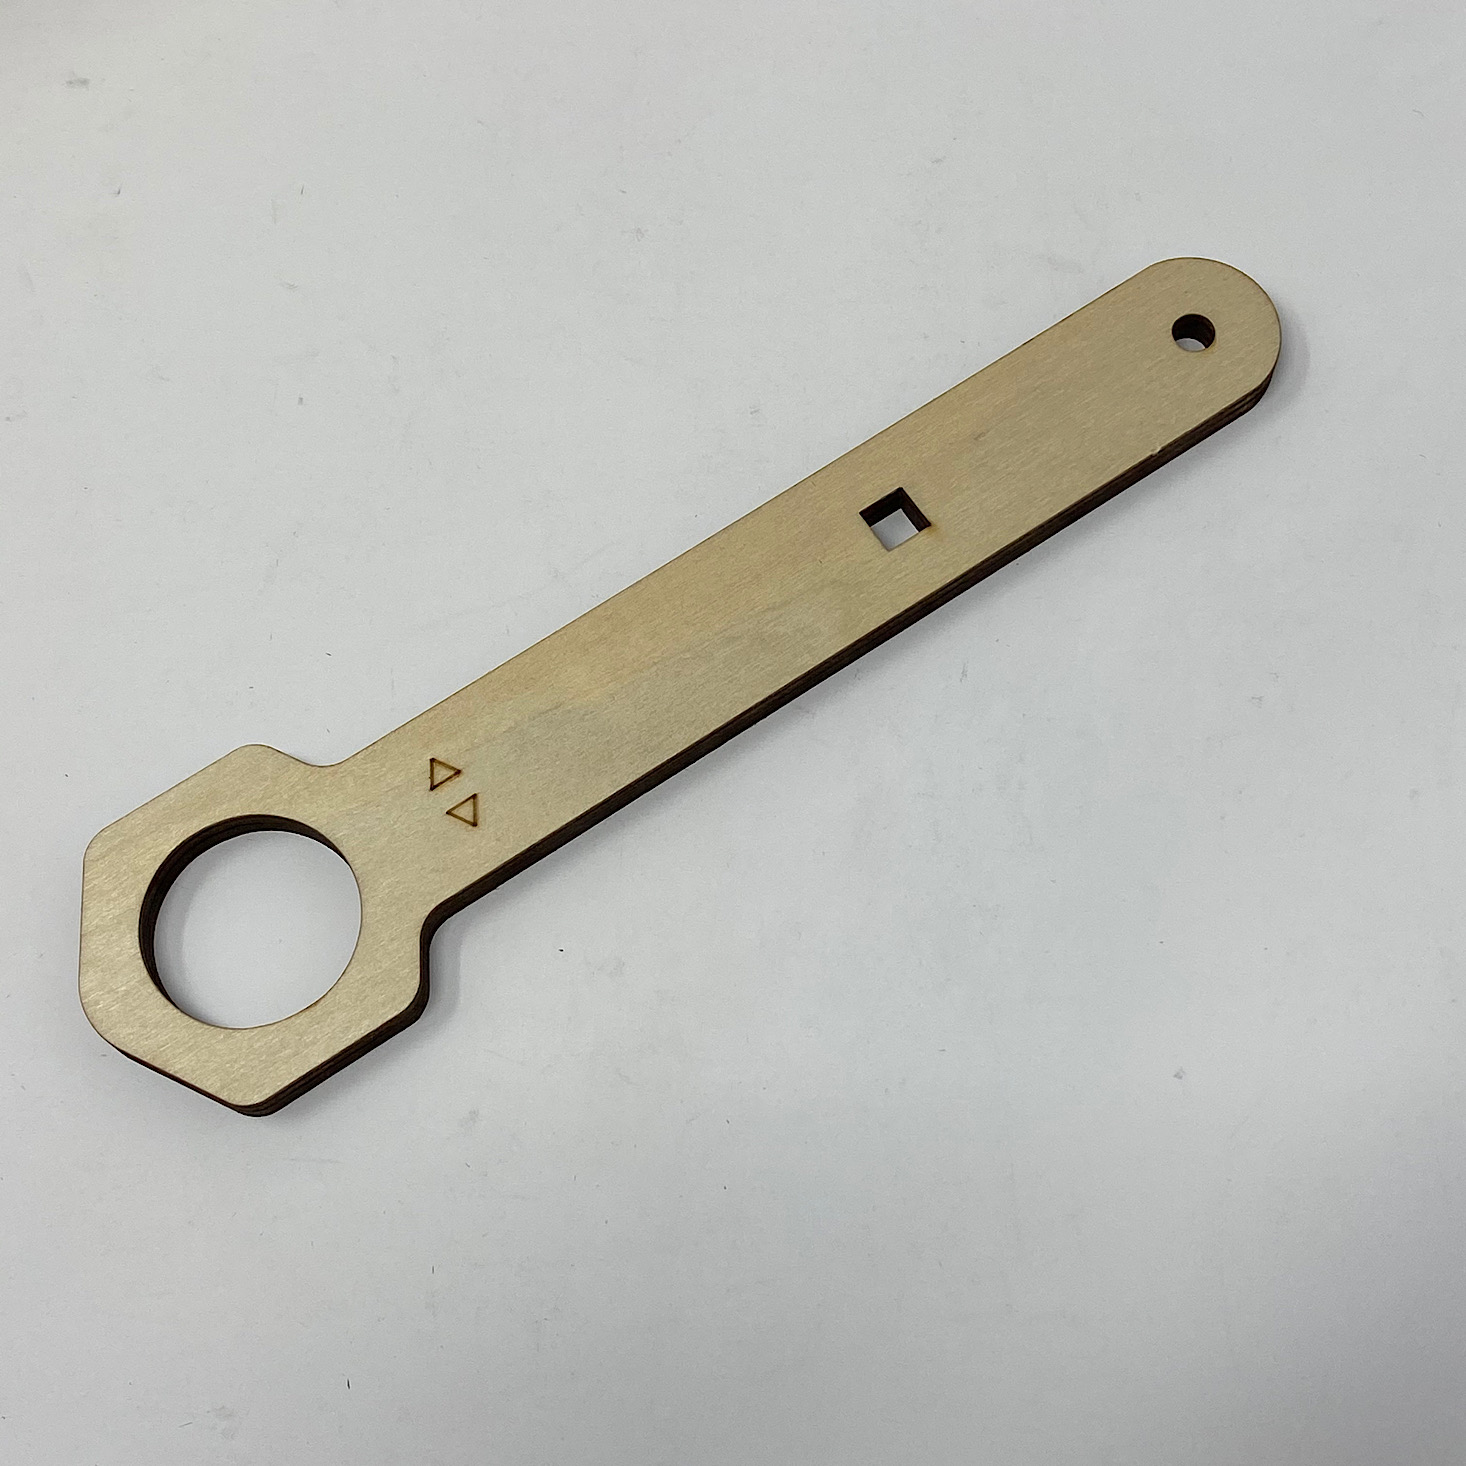
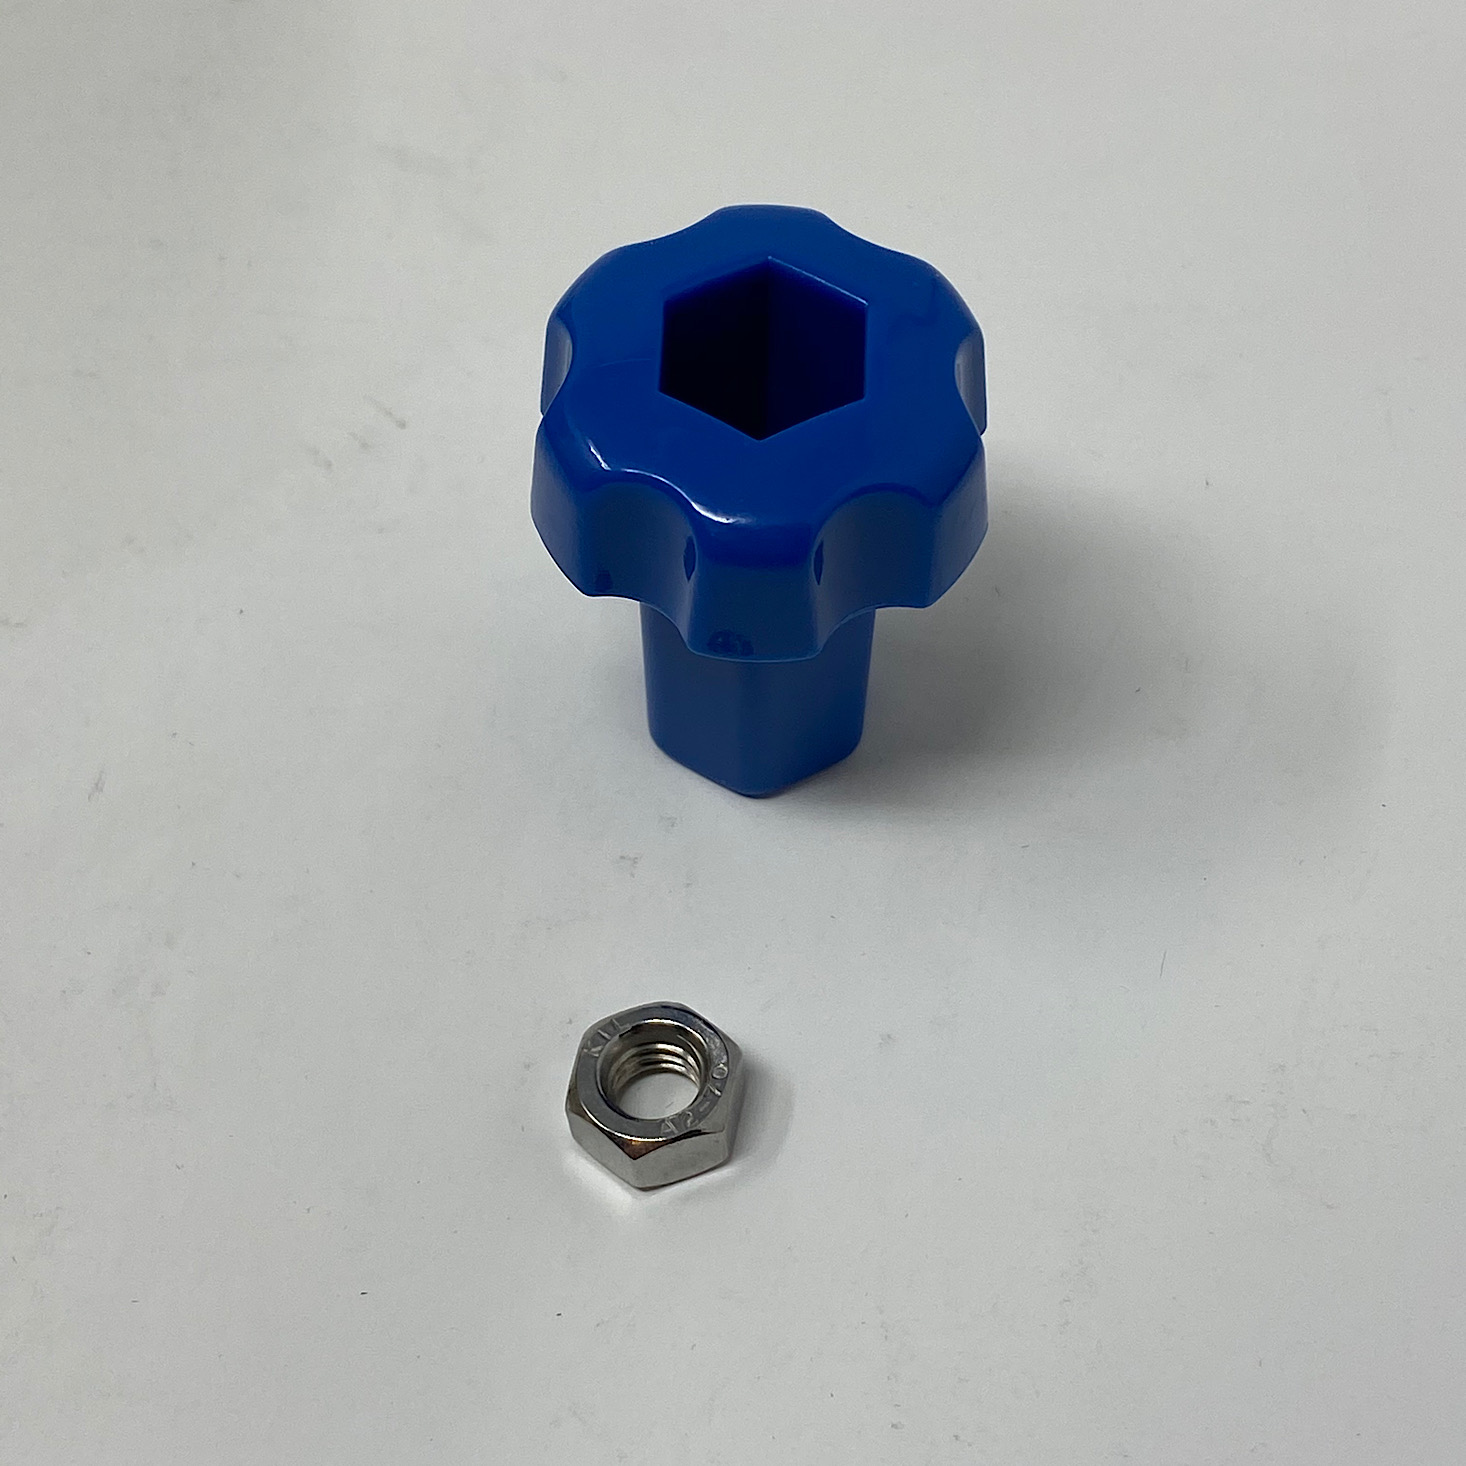
With the neck in place, it was time to add the adjustment lever. I slid the lever in between the two wooden pieces, matched up the holes, and then added the large screw from inside. Then I stuck the nut inside the big blue bolt and screwed those onto the end of the large screw.
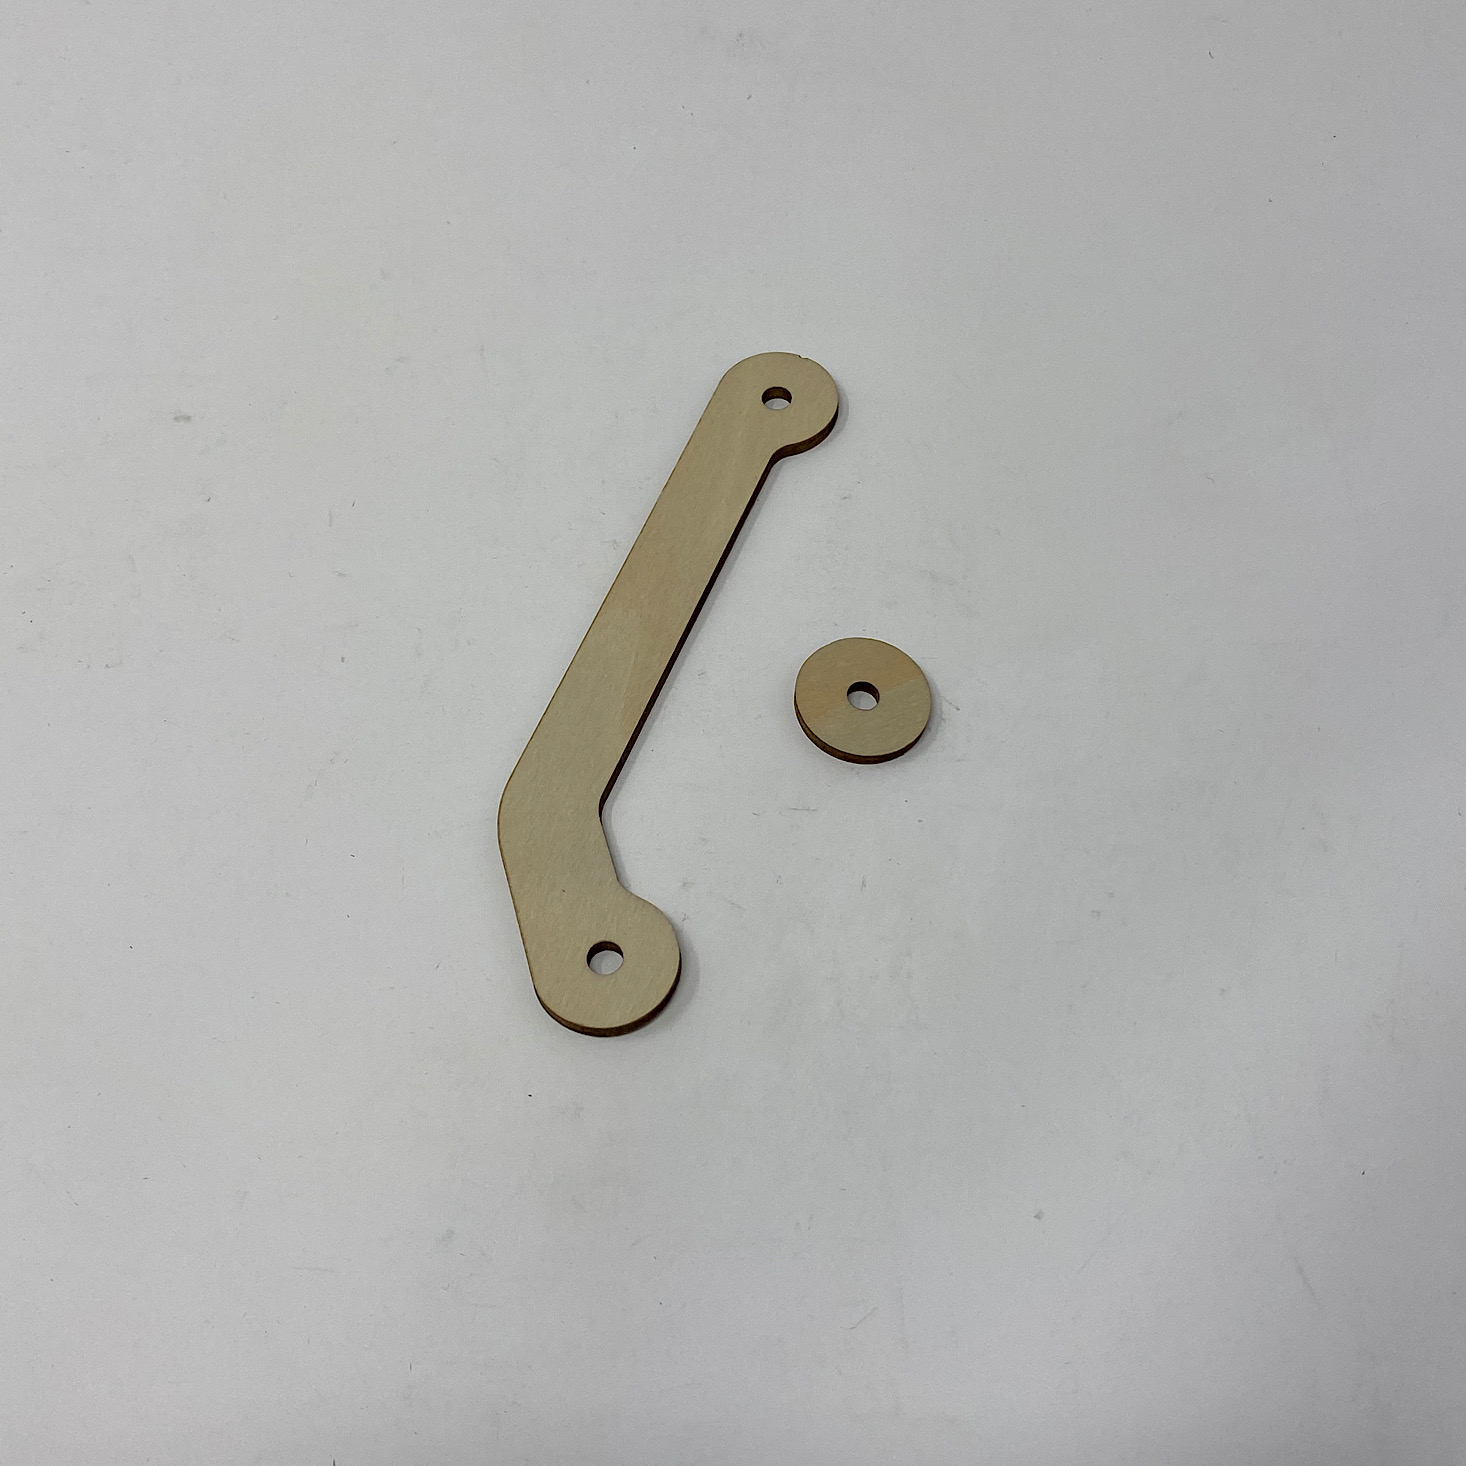
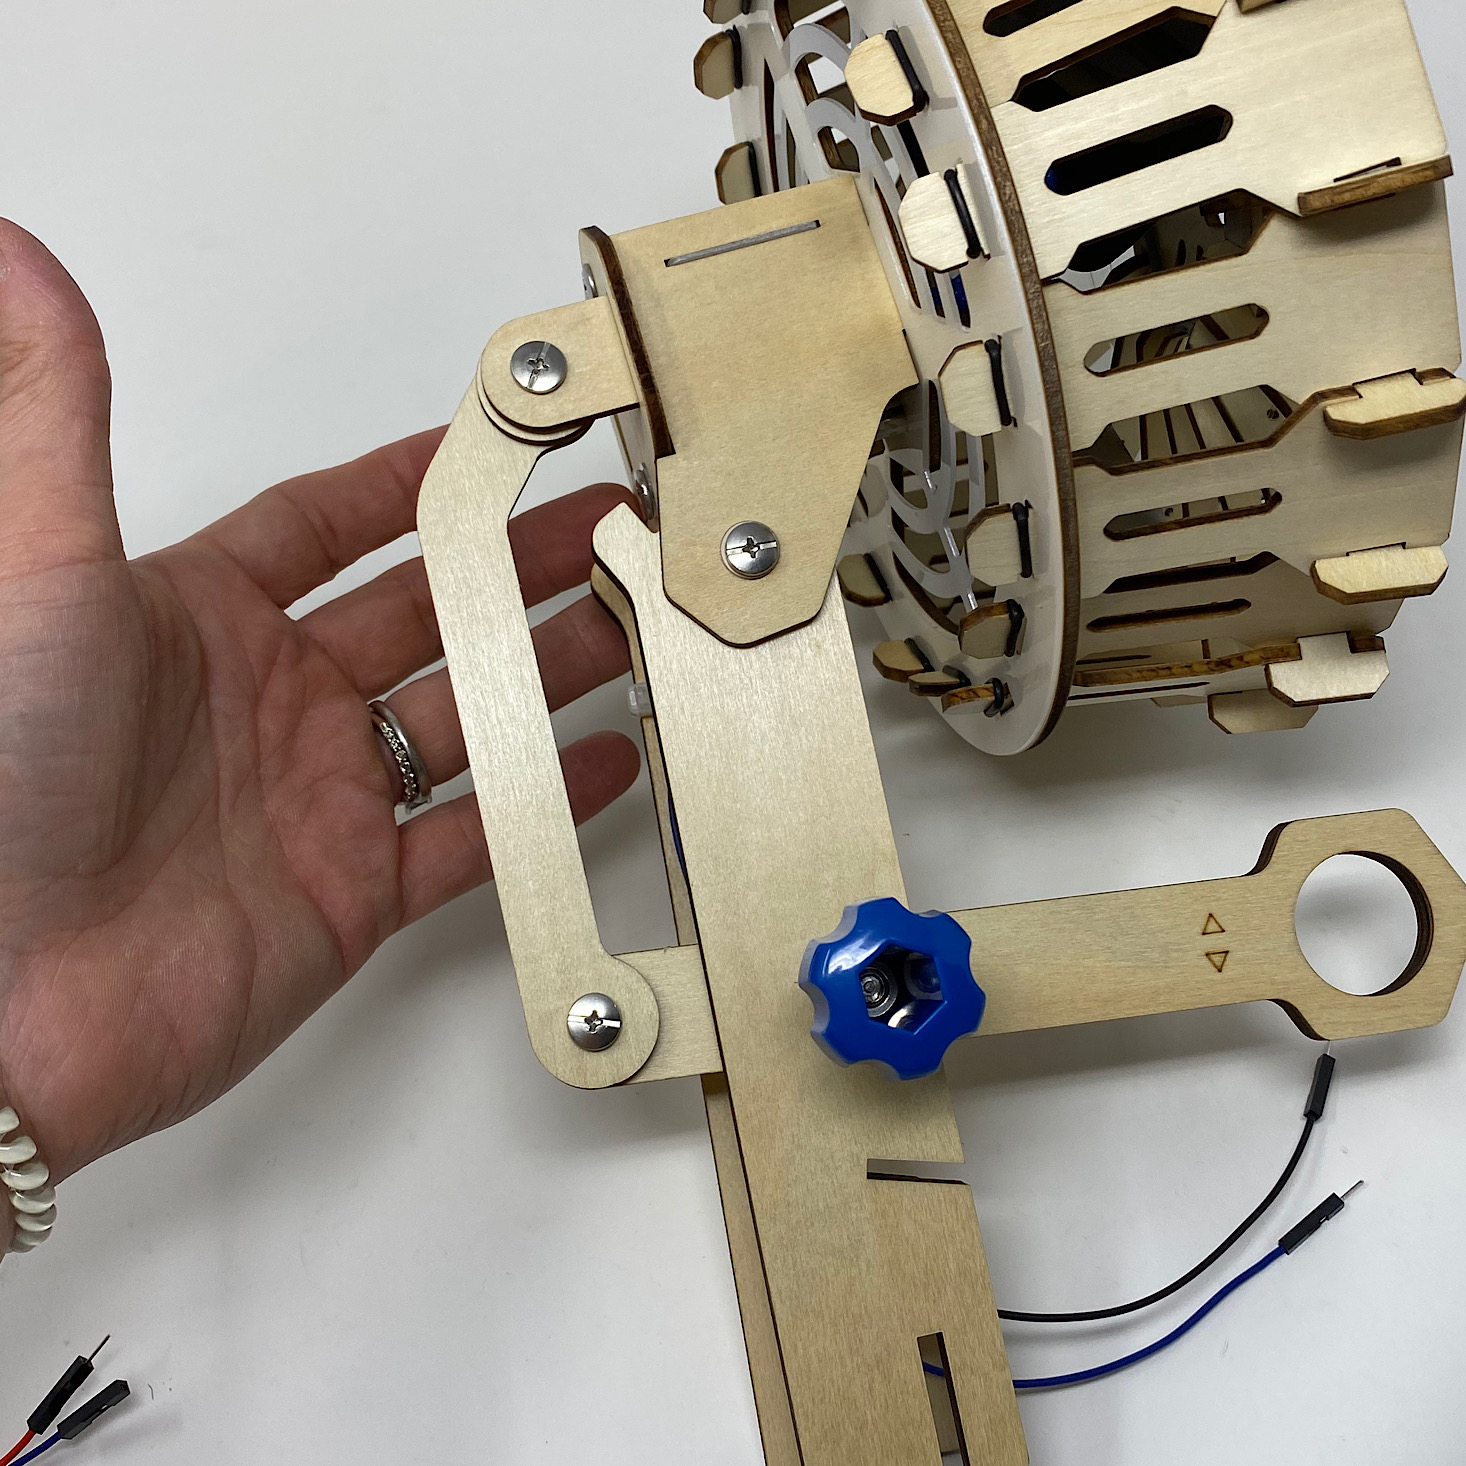
1 of 3

I added the wooden circle and this wooden connector piece to the top hole with a bolt and screw, then I attached it to the hole in our lever at the bottom. Then it was time to get started on the base.
Part E: Build the Base
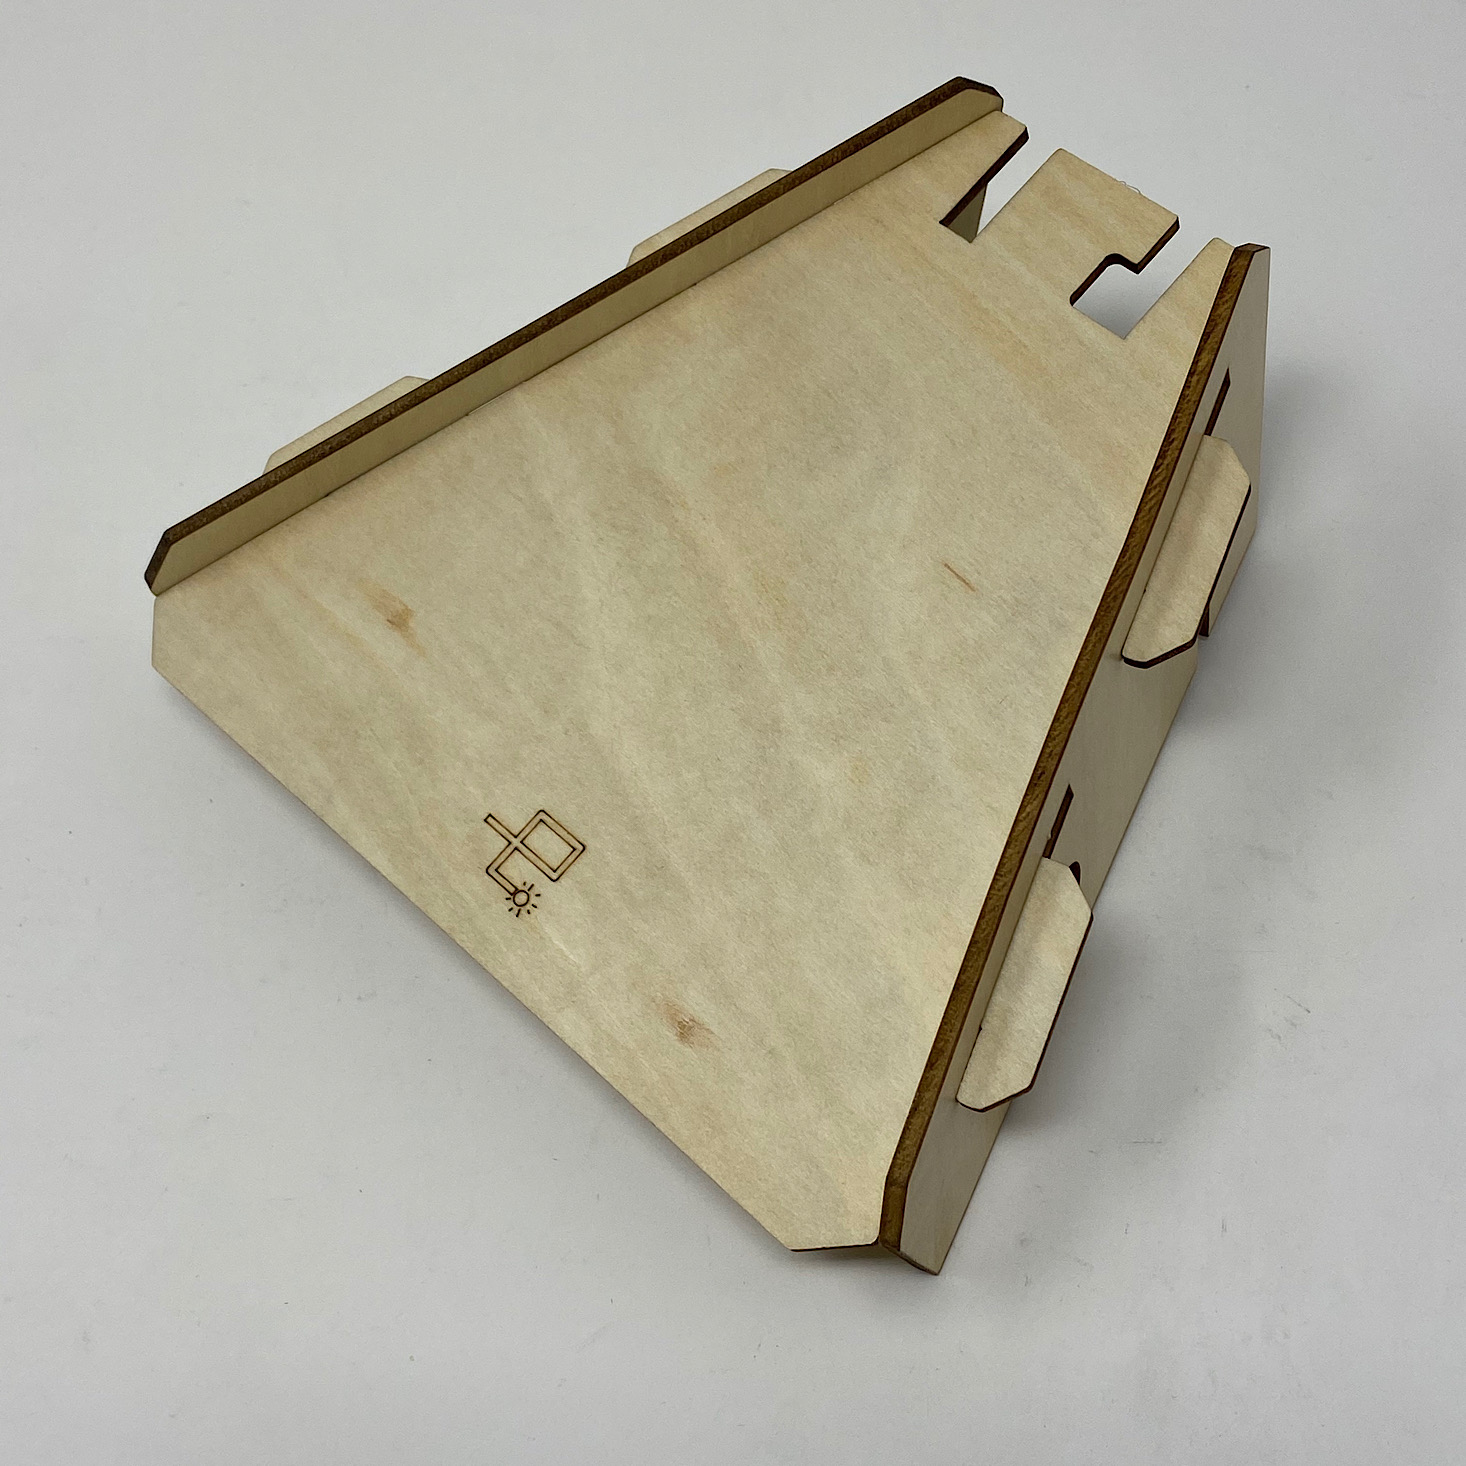

1 of 4


Making the base was super easy. I just added some foam pieces to the back of the larger wooden piece and then slid everything together as the instructions showed.


1 of 3
Then I slipped the fan head into the notches on the base and then added some foam rectangles to the smaller wooden piece before slipping it underneath the base to hold it all in place.

1 of 2
The fan was almost ready to go! To adjust the fan head we simply had to move the adjustment lever up or down. If it was too loose or too tight, I simply turned the blue knob and it held the fan in place!
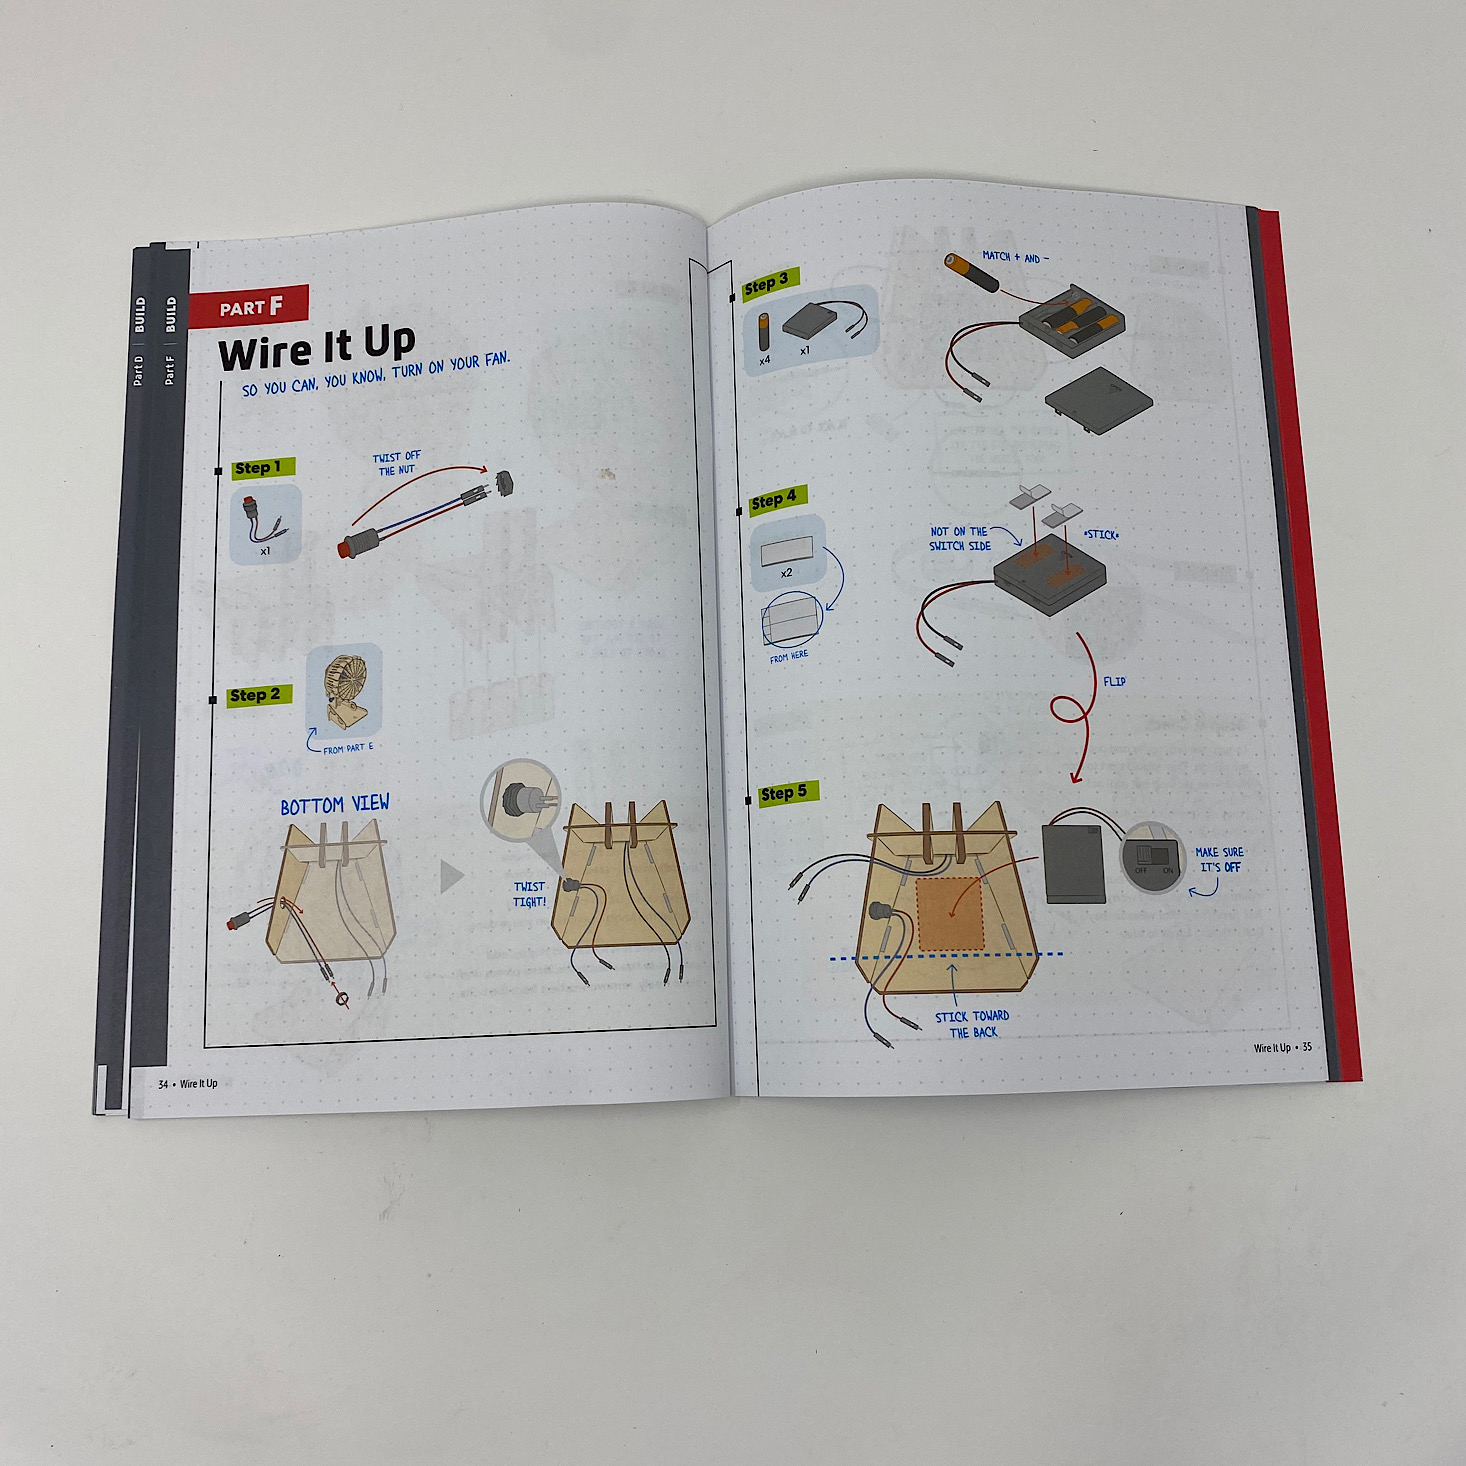
Part F: Wire it Up

1 of 2
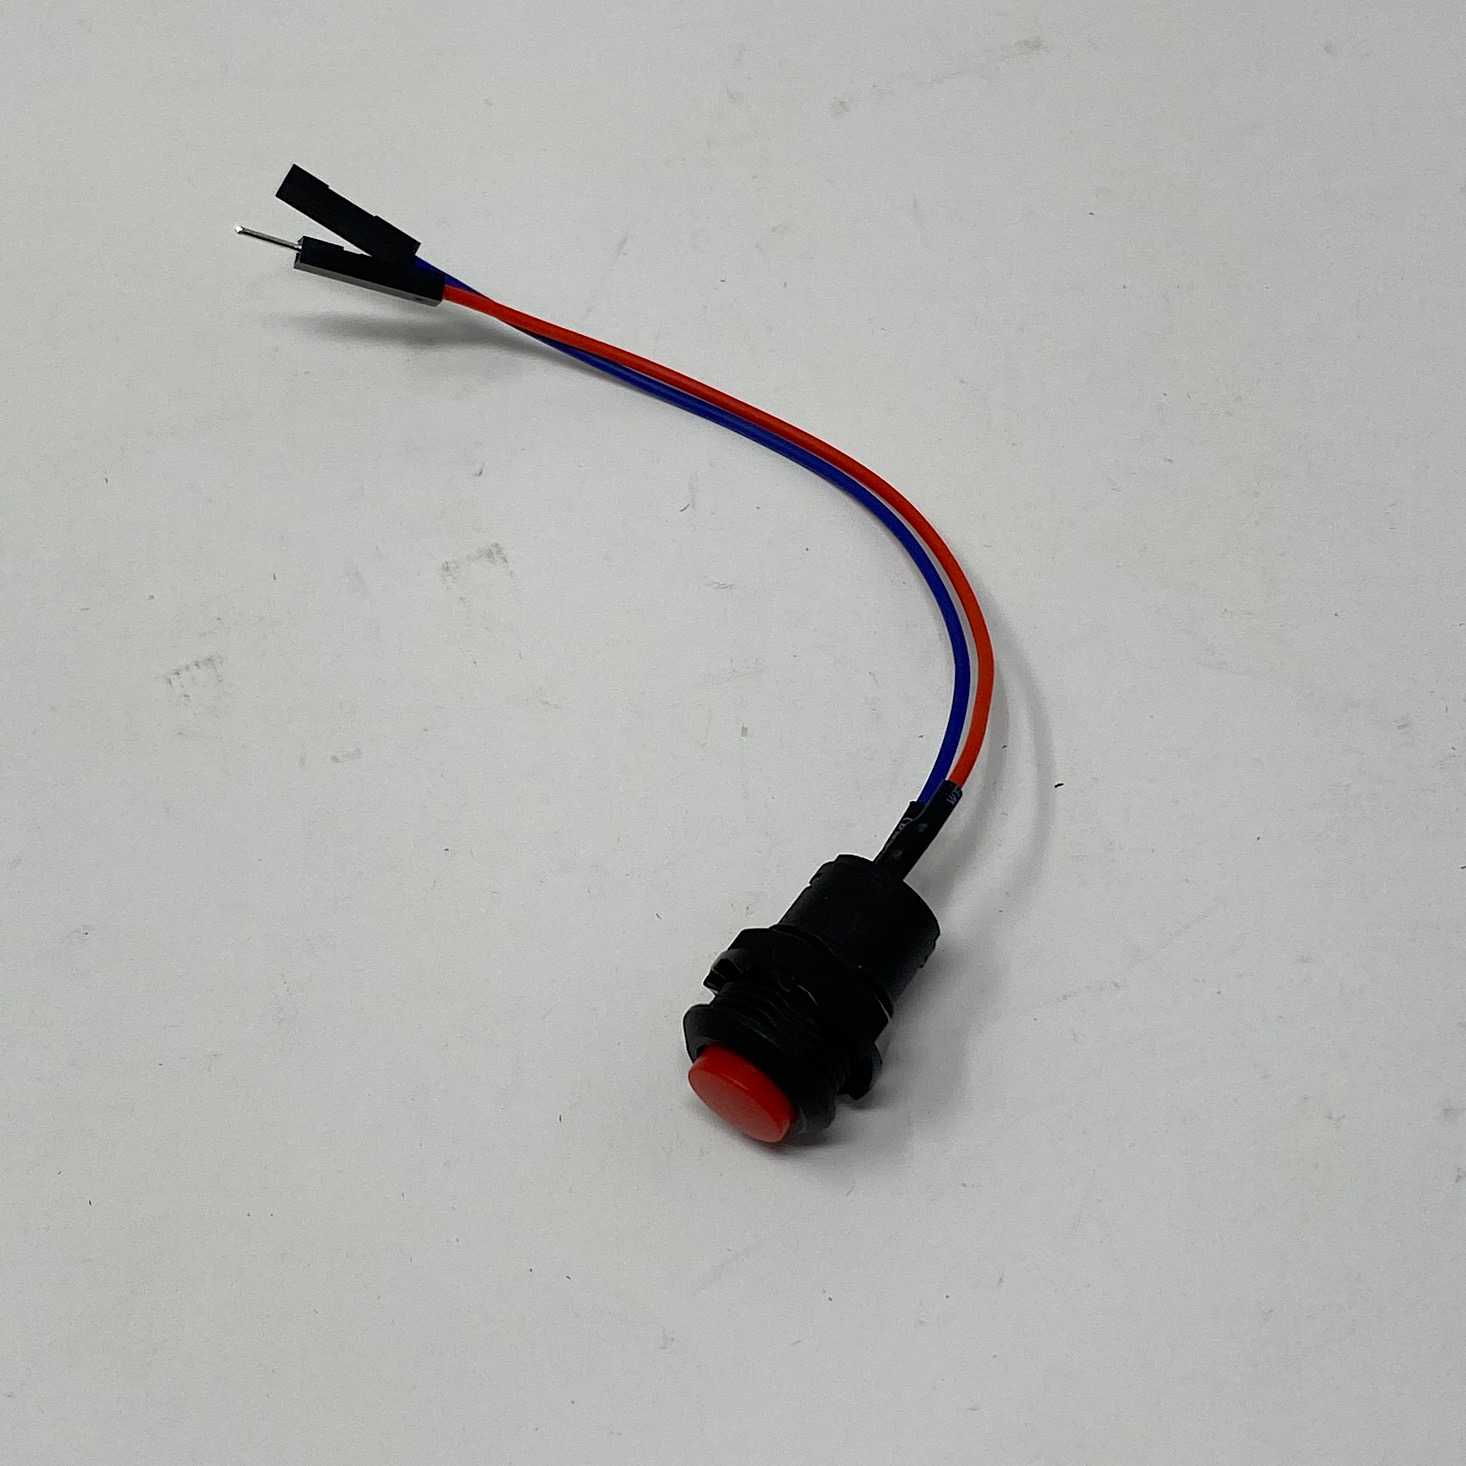
Next, it was time to power it up! They provided this button which would operate our fan. I took off the little bolt then placed the button into the hole on the side of the fan base and then wound the bolt back on to hold it in place.

1 of 2
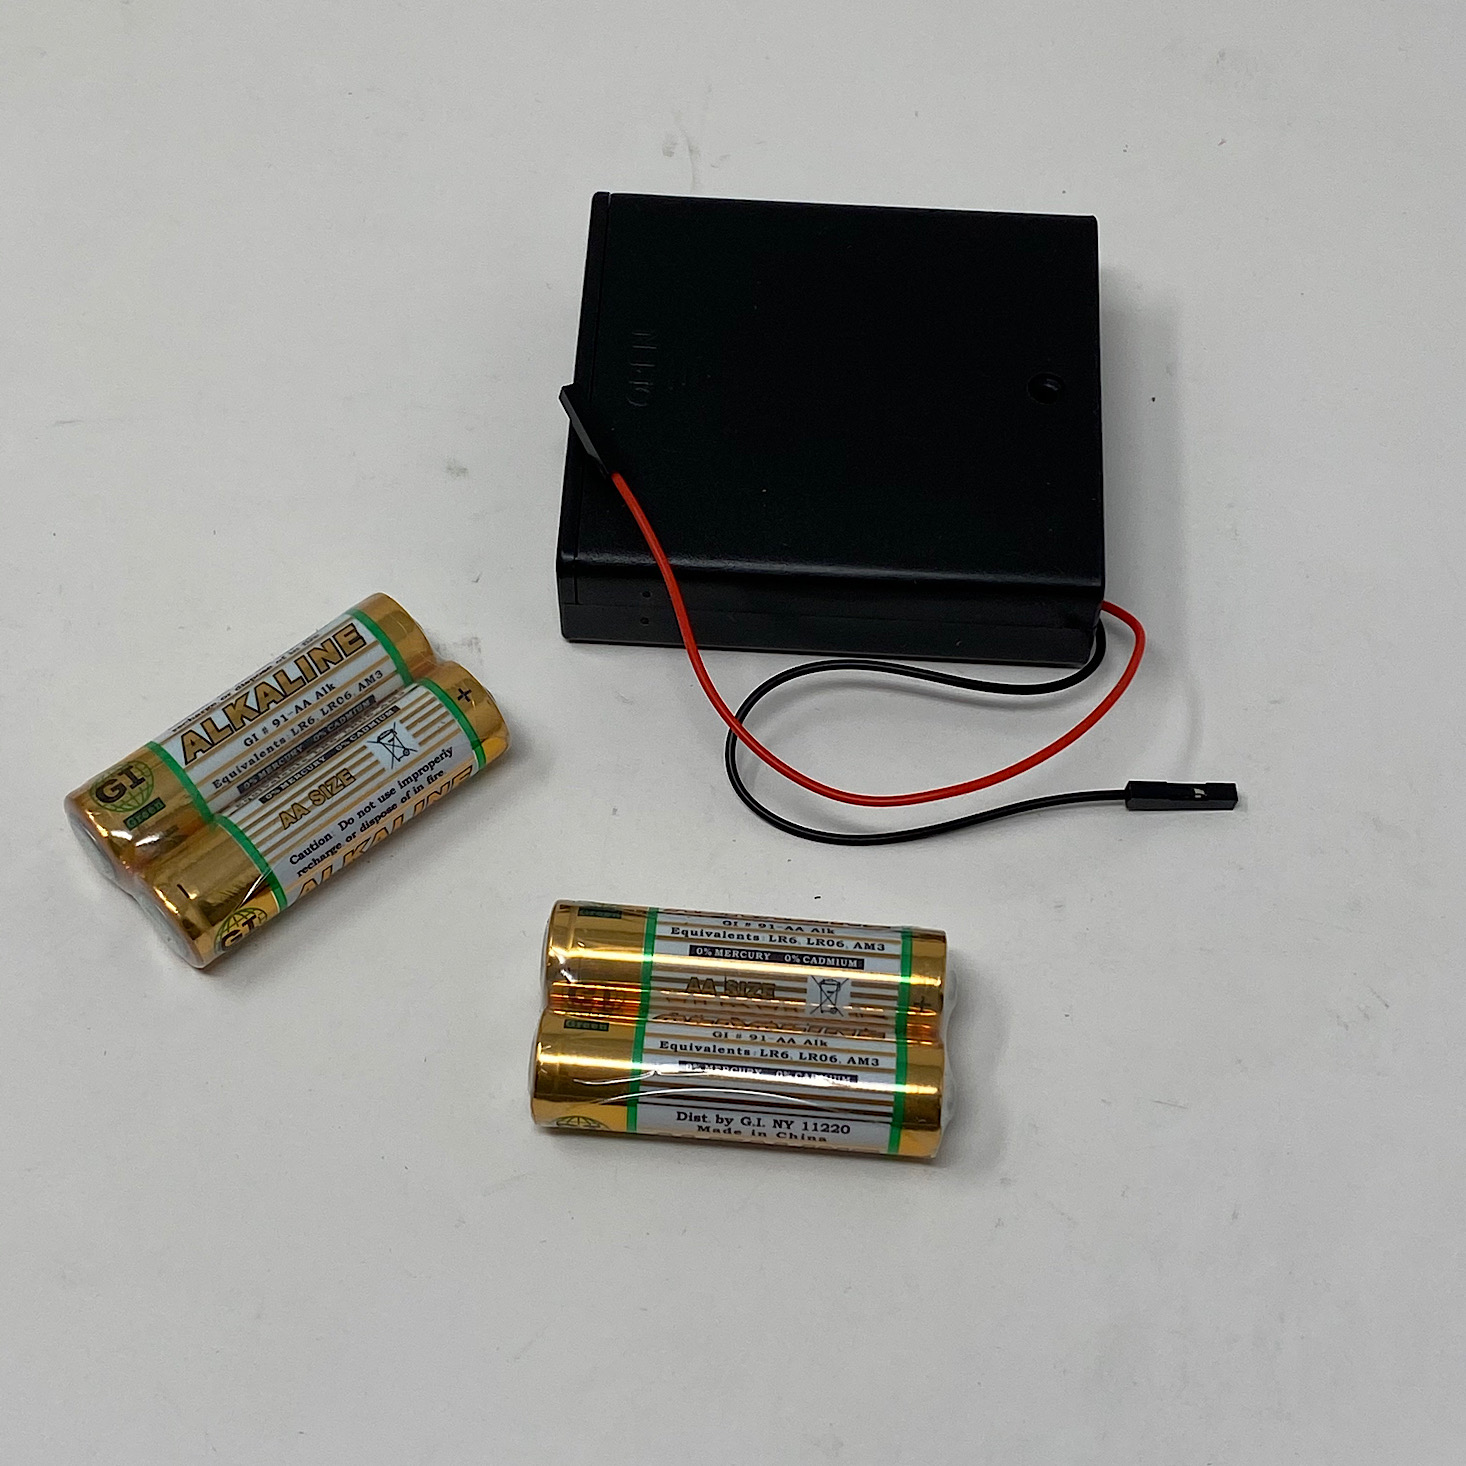
To add power, they provided four AA batteries for us and a battery pack with an on/off switch on it.

1 of 3

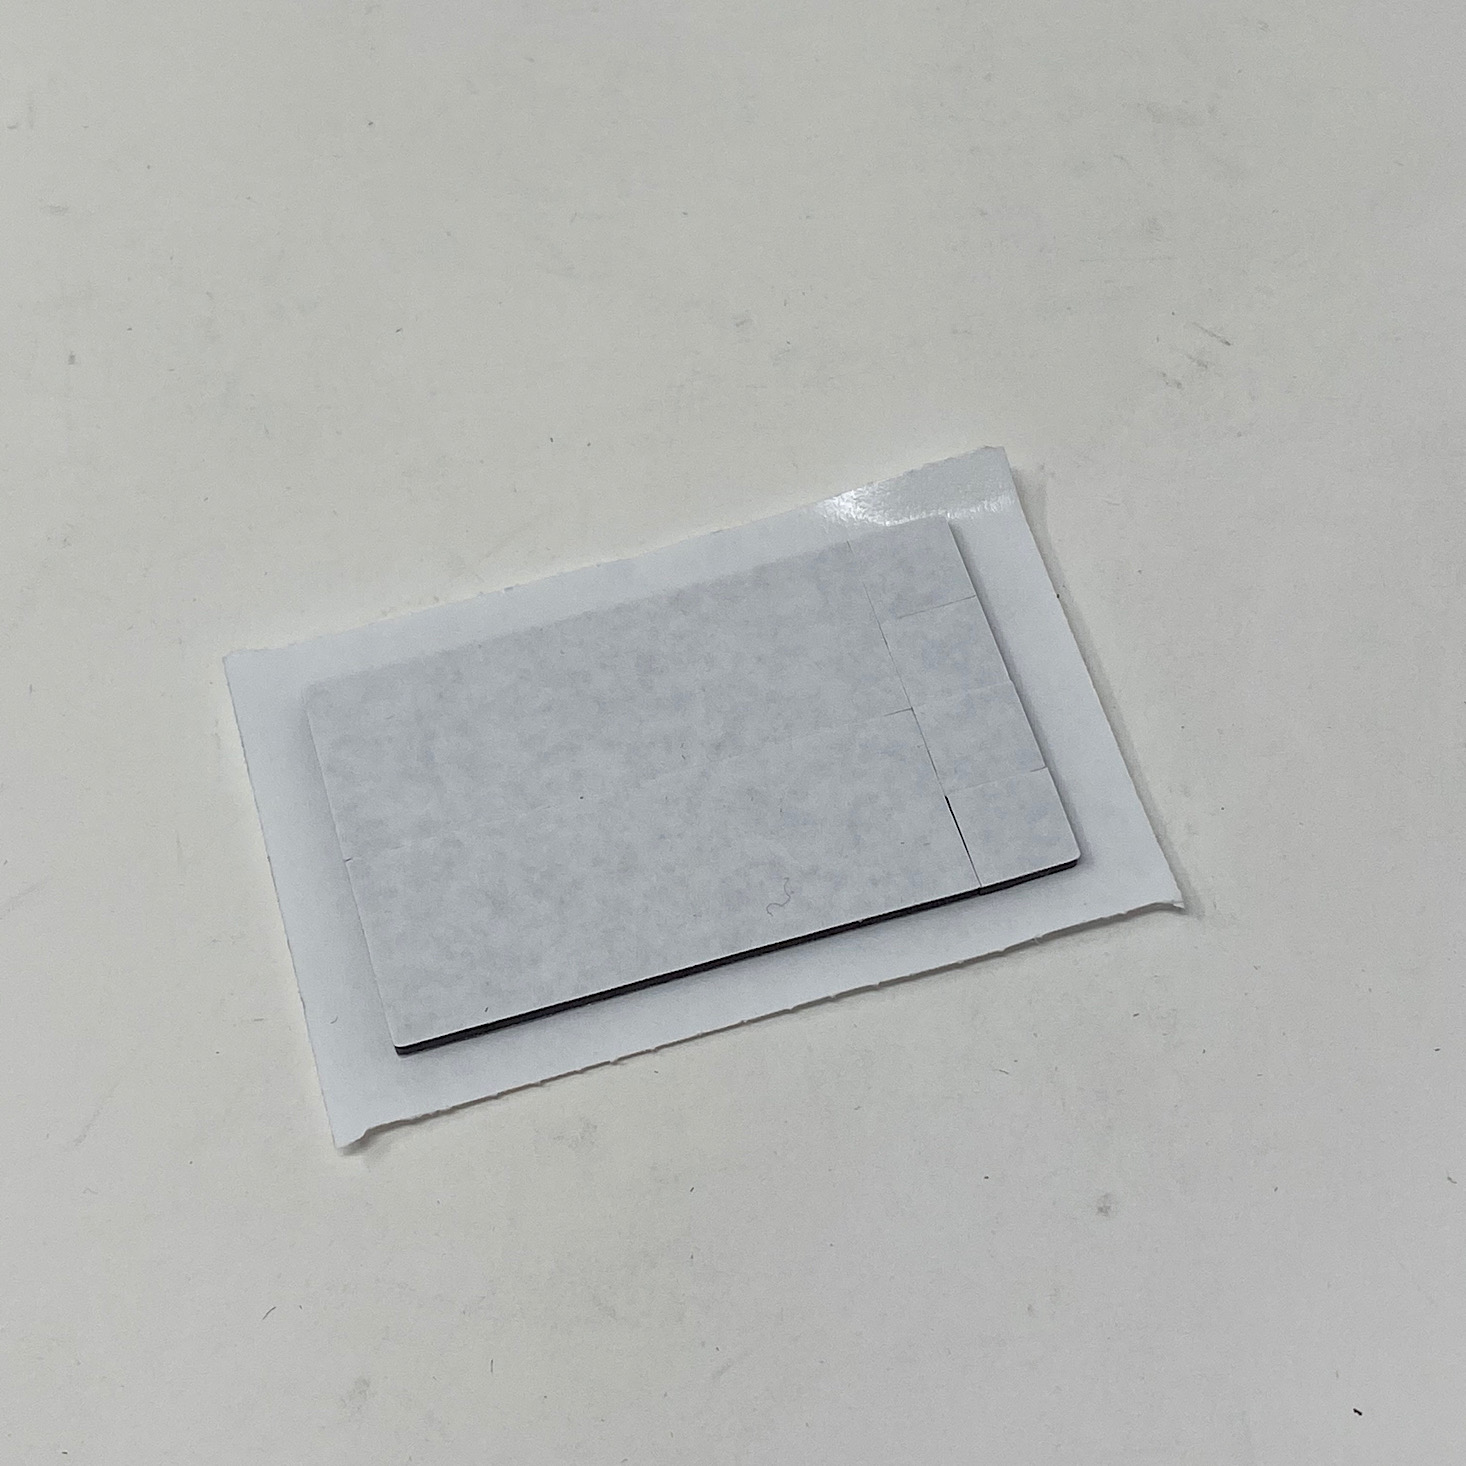
I closed up the battery pack and added some sticky foam strips to the bottom and then attached it underneath the fan base.

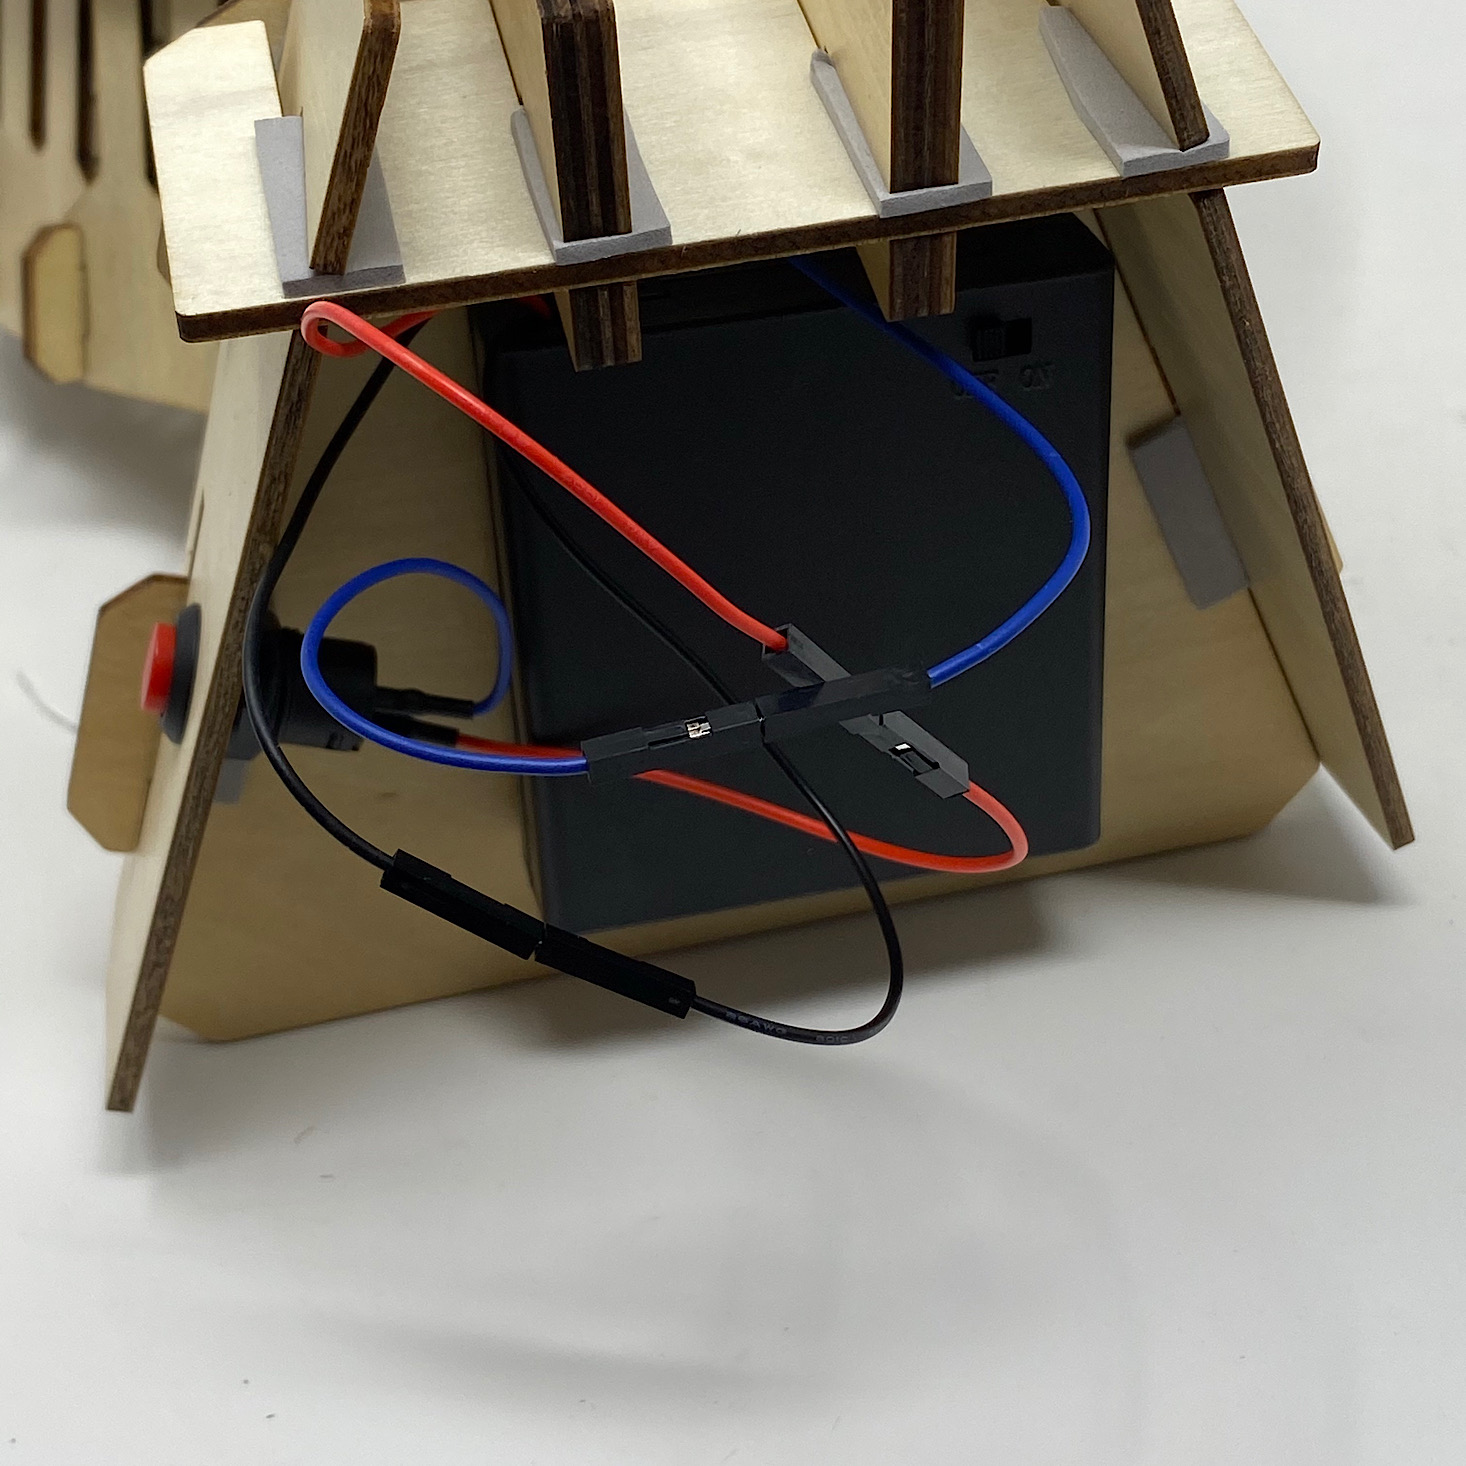
1 of 2
Next, I matched all of the wires by color (red to red, blue to blue, black to black) and then gathered them up and placed them to the side using a sticky foam rectangle to hold them out of the way.


1 of 2
The last step was to use the small sticky foam squares and add these little decorative ribbon pieces in the center.
1 of 3
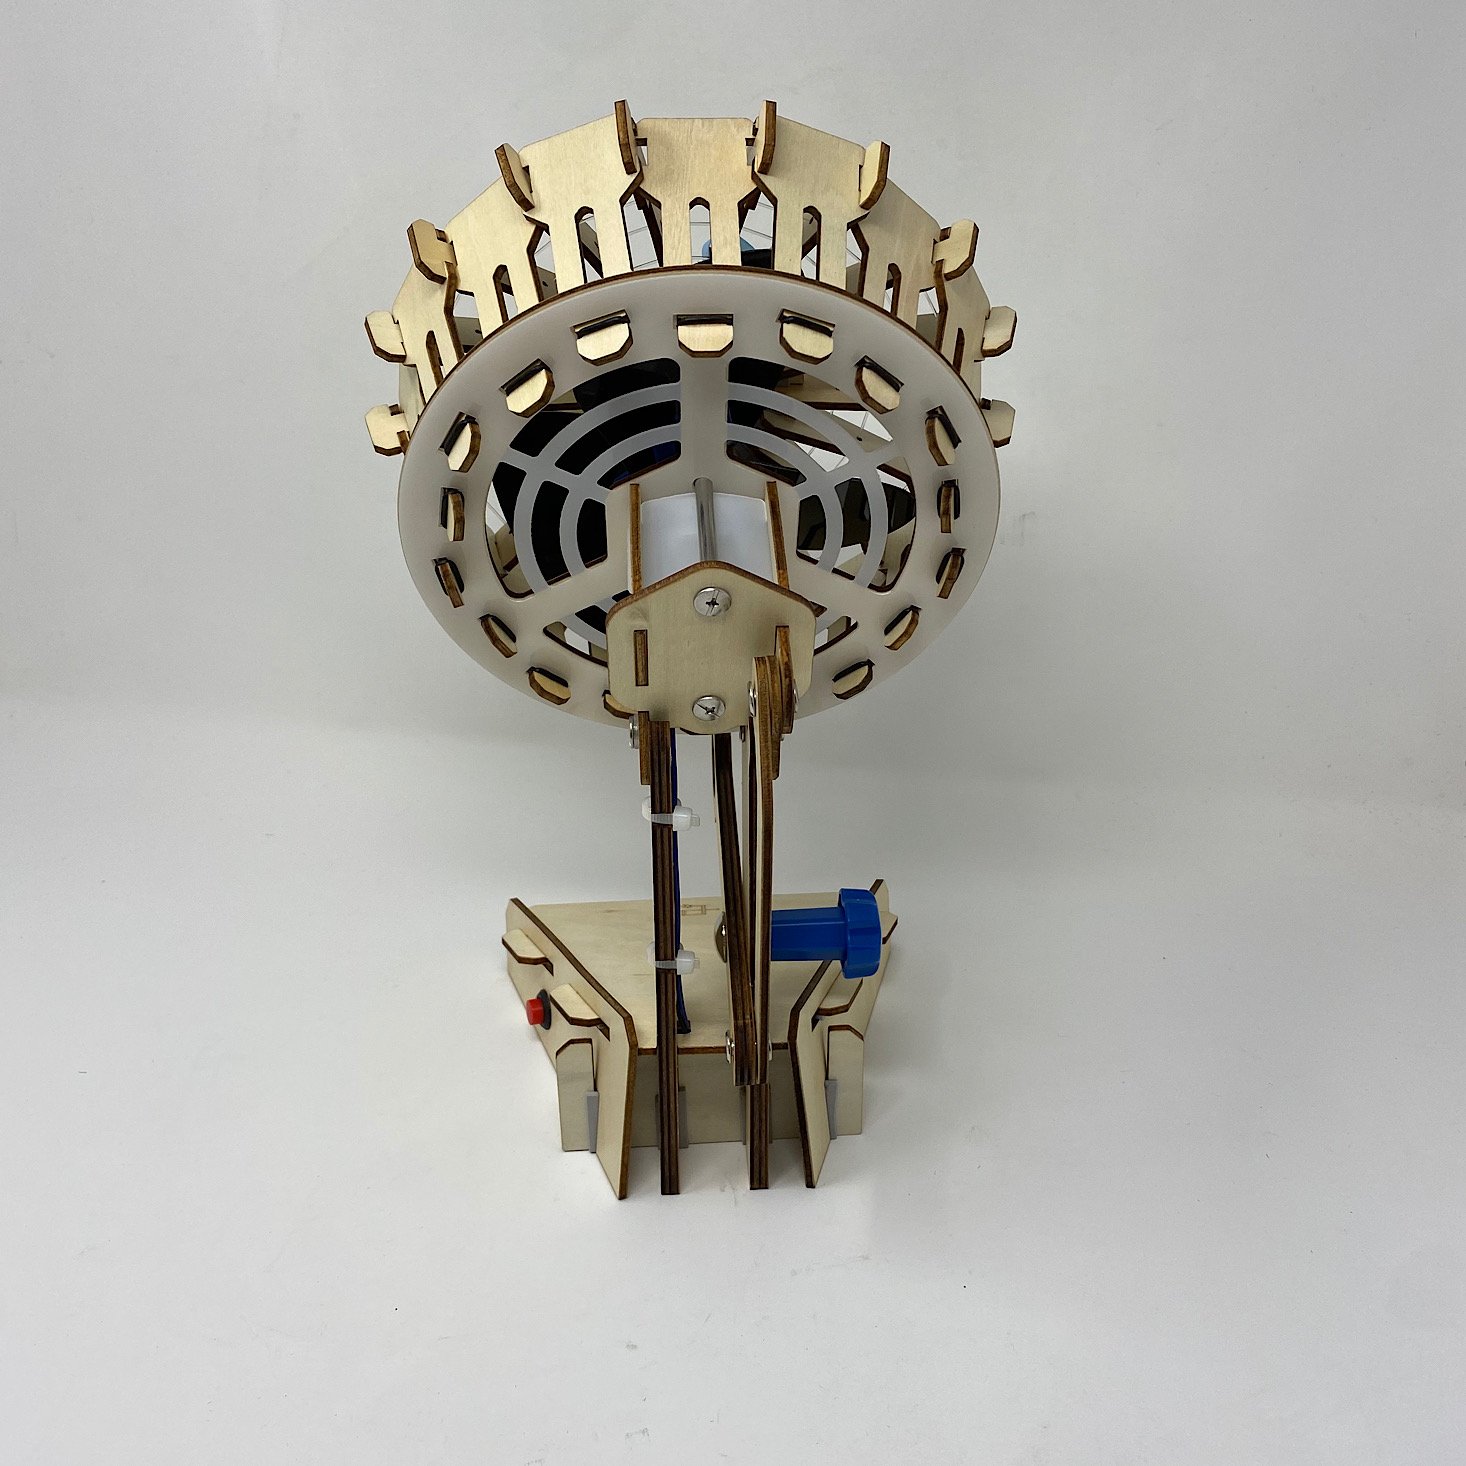
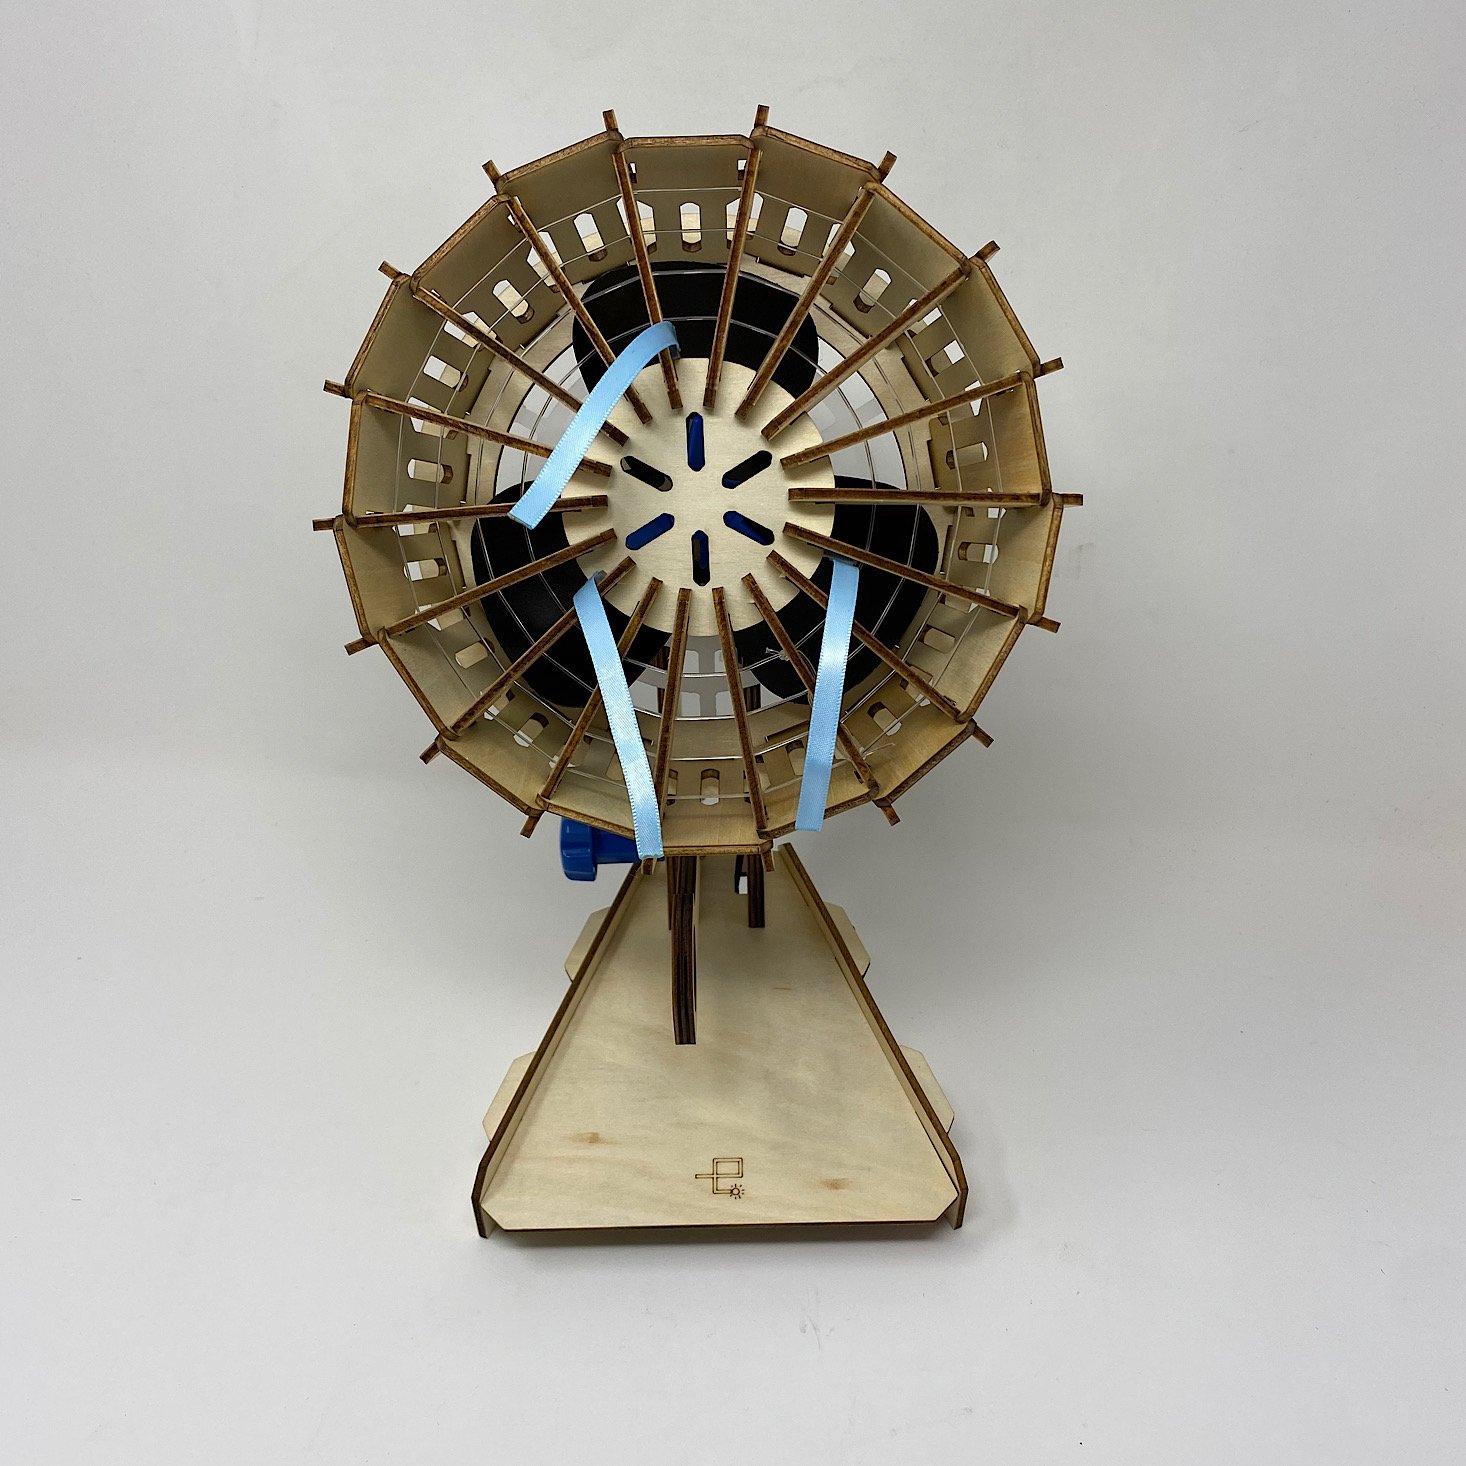
Here is my finished fan with the ribbons in place! I might not keep those on there, but it made for a fun decorative accent that demonstrated how well the air was blowing!
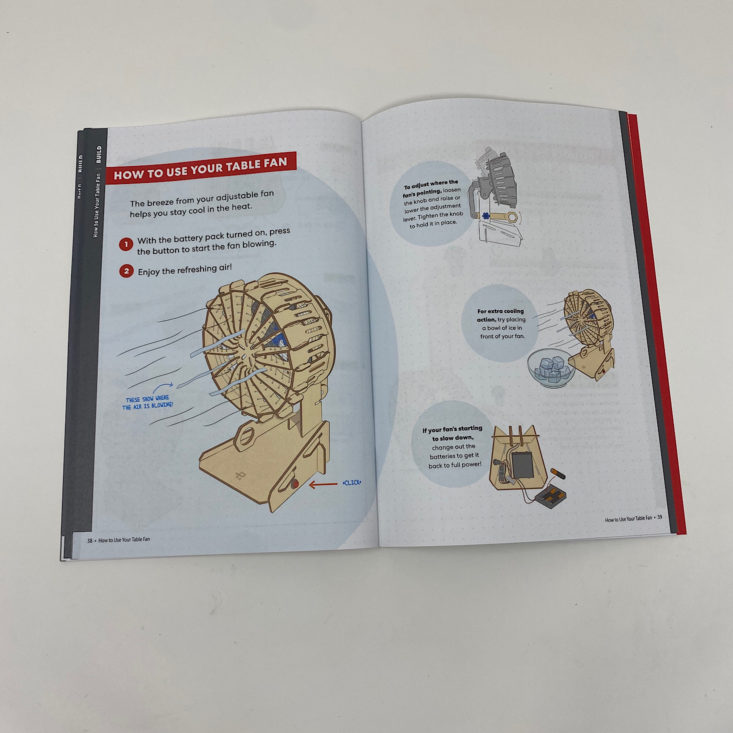
They included some directions on how to use our fan and even how to get some extra cooling by placing a bowl of ice cubes in front of it.
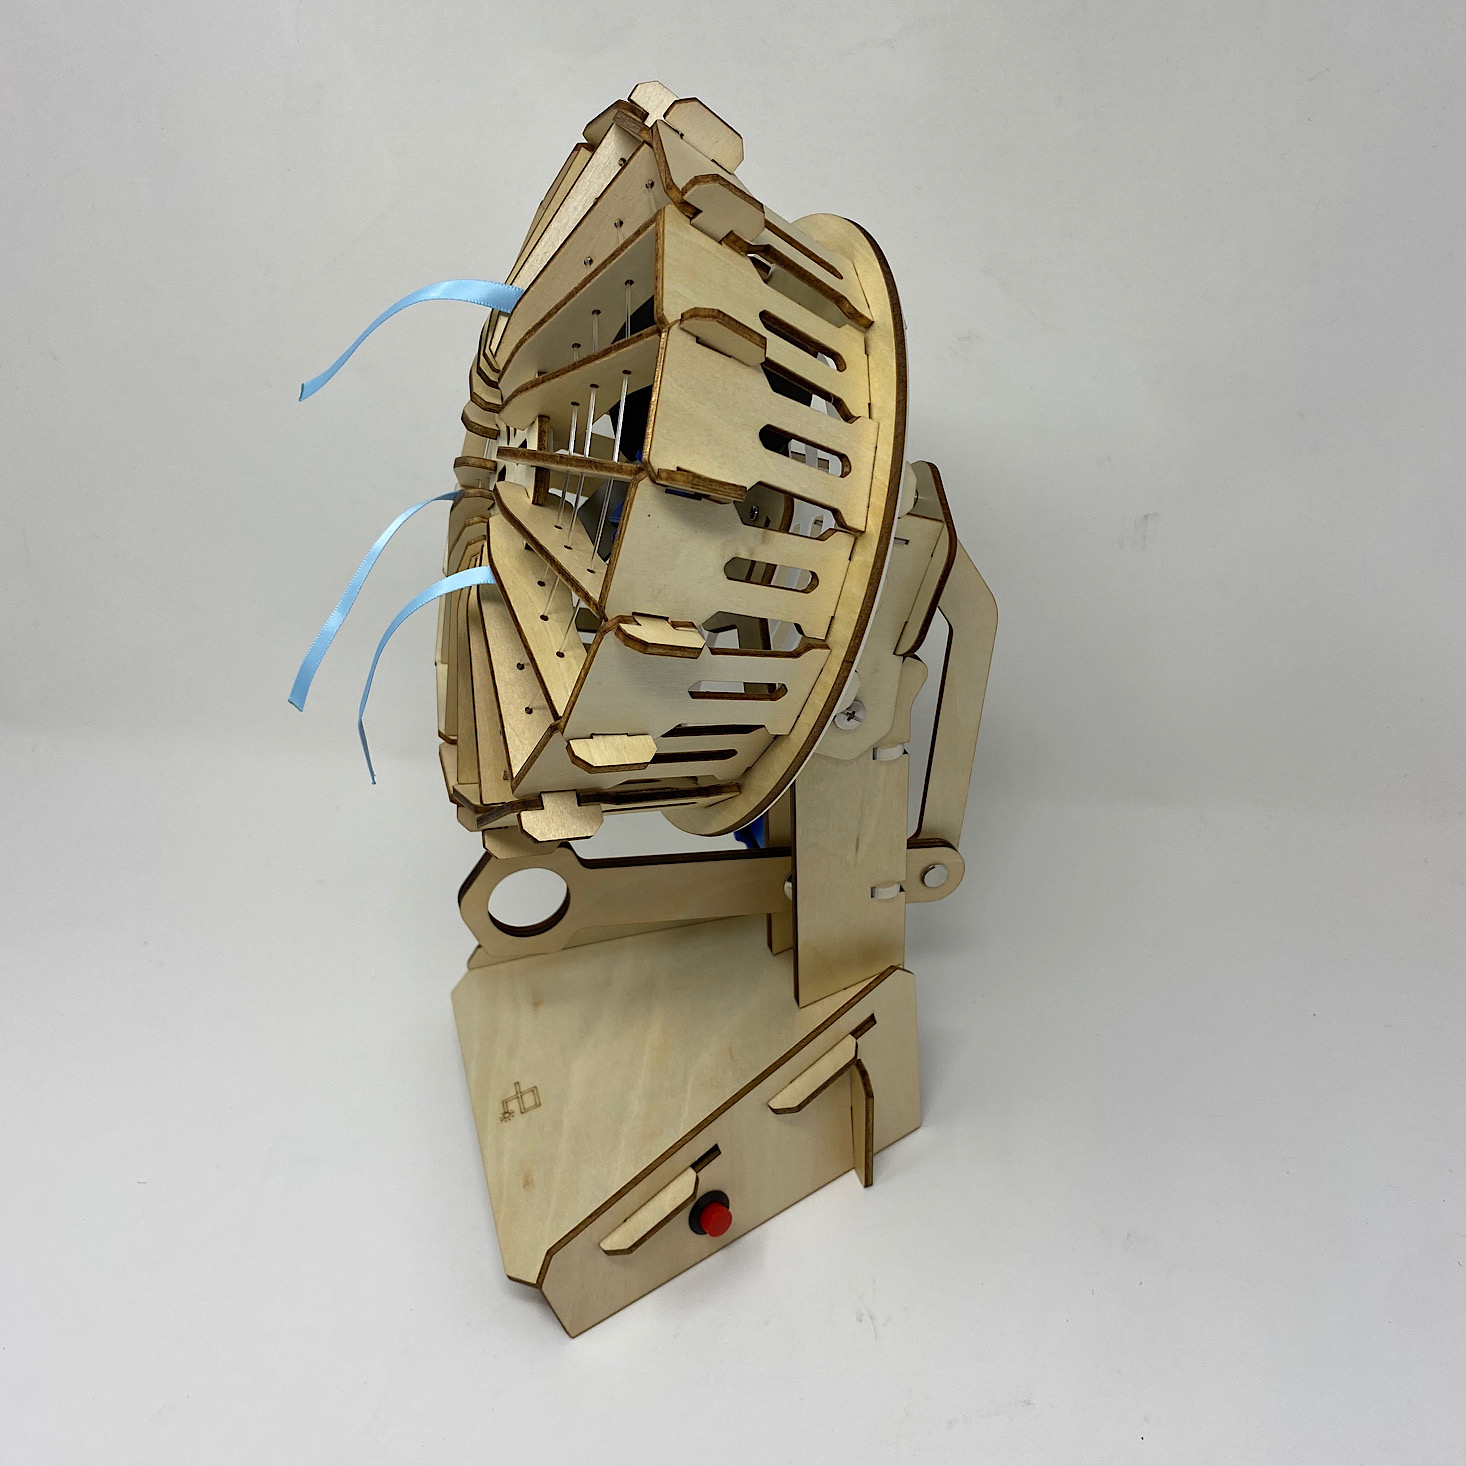
Here is my completed fan in action complete with the ribbon. It actually blows a decent amount of cool air and it's so easy to operate with the push of a button and the simple knob and handle to adjust it! The only thing that would have been slightly cooler was if it oscillated, but that might be a whole different kind of challenge!
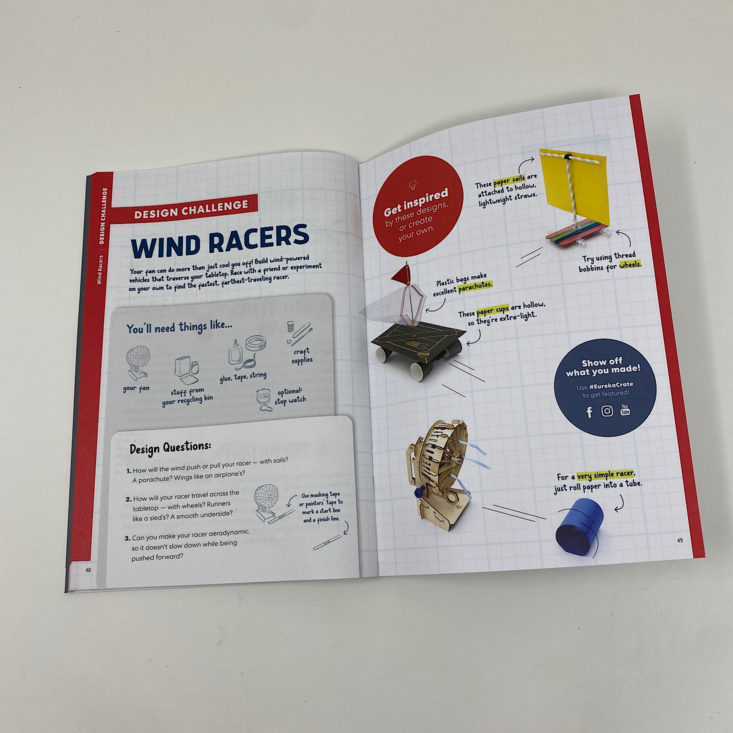
In our booklet, there is usually a design challenge section like this one. This month they challenge us to make wind racers using found objects and recycled materials. Then once we've created it, we test it out by having our fan blow air on it. This is a fun idea for a challenge!
Verdict: This month's Eureka Crate project was another one that had me thinking: how do they come up with this stuff? Seriously, this fan works well and will definitely get used, and the design and the way that they had us assemble it was so cool! It was really simple and slightly tedious, but it all came together so well and despite my little issues of pulling the line too tight, I was still able to be successful. This was a super creative project and not only did I have fun making it, but I also enjoyed showing off my work to my family! I can imagine a younger kid would be equally as proud to create their own fan, too!
To Wrap Up:
Can you still get this box if you sign up today? It is possible you might get this crate, but it is not a guarantee. From KiwiCo:
Crates are assigned each month based on availability and your crate history - not all subscribers receive the same theme each month.
Check out all of our KiwiCo reviews and the best boxes for teens!
Keep Track of Your Subscriptions: Add this box to your subscription list or wishlist!
What do you think of Eureka Crate?
Please do not enter your email address in the Name field or in the comment content. Your email address will not be published. Required fields are marked *. Remember to post with kindness and respect. Comments with offensive language, cruelness to others, etc will not be approved. See our full comment policy here.