


Oyster is a monthly STEAM-based "profession" subscription for kids ages 5-9. Each month you will receive an educational kit made with the help of professionals and rigorously tested by kids, which includes equipment, information, and experiments to try out a different profession. According to Oyster, kids closer to 9 will be able to complete the tasks independently, while younger kids will require participation from their parents.
This box is being reviewed thanks to MSA reader request!
My Subscription Addiction pays for this subscription. (Check out the review process post to learn more about how we review boxes.)

About Oyster
The Subscription Box: Oyster Kit
The Cost: $39.95 a month + free shipping. Save with longer subscriptions.
The Products: A new profession to explore every month through STEAM learning materials, online tests, and DIY projects
Ships to: The U.S. only
Oyster "Artist" Kit December 2019 Review
This is my second month reviewing Oyster Kit and my kids were absolutely thrilled to see this yellow box on our doorstep! Last month we learned all about doctors, dentists, and lab techs, and had a blast. I can't wait to see what this artist box will bring!
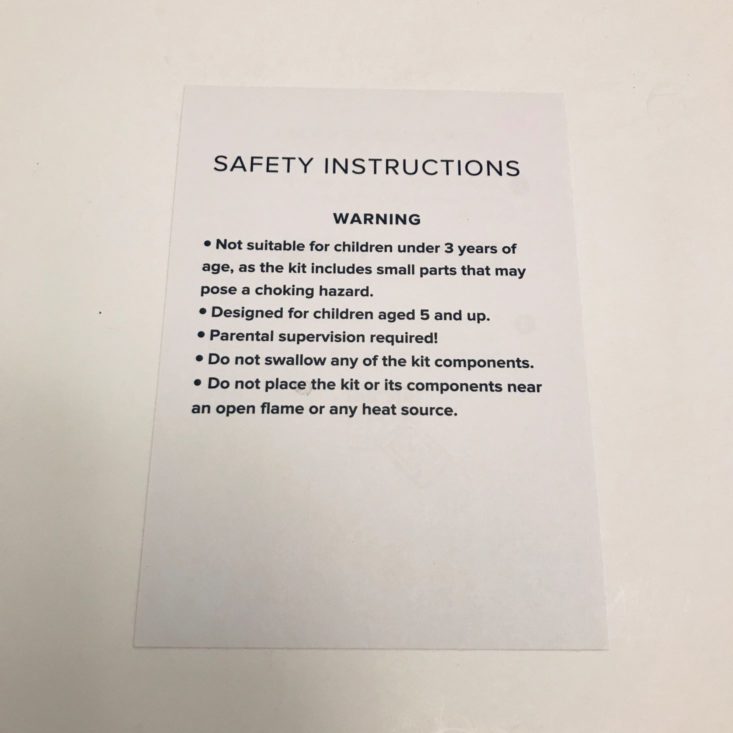
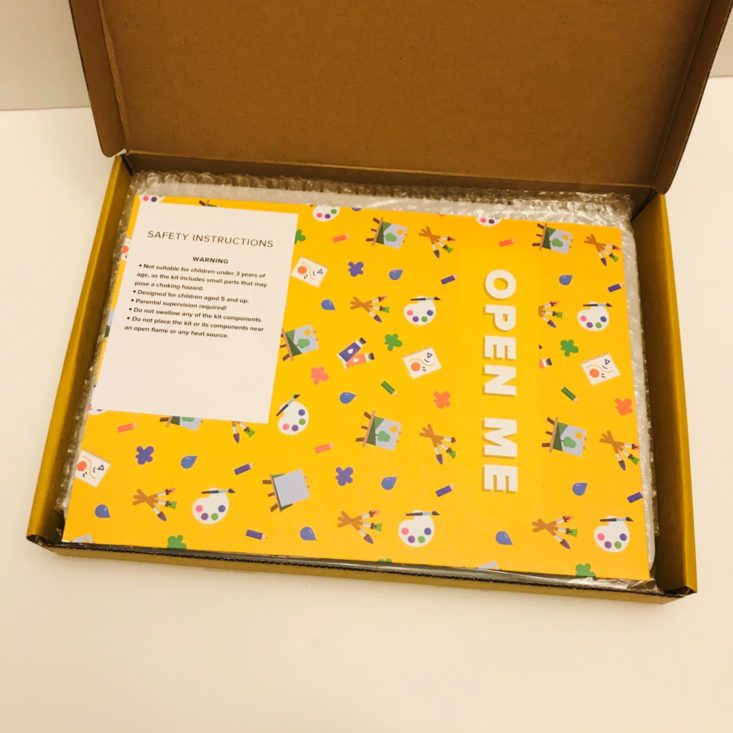
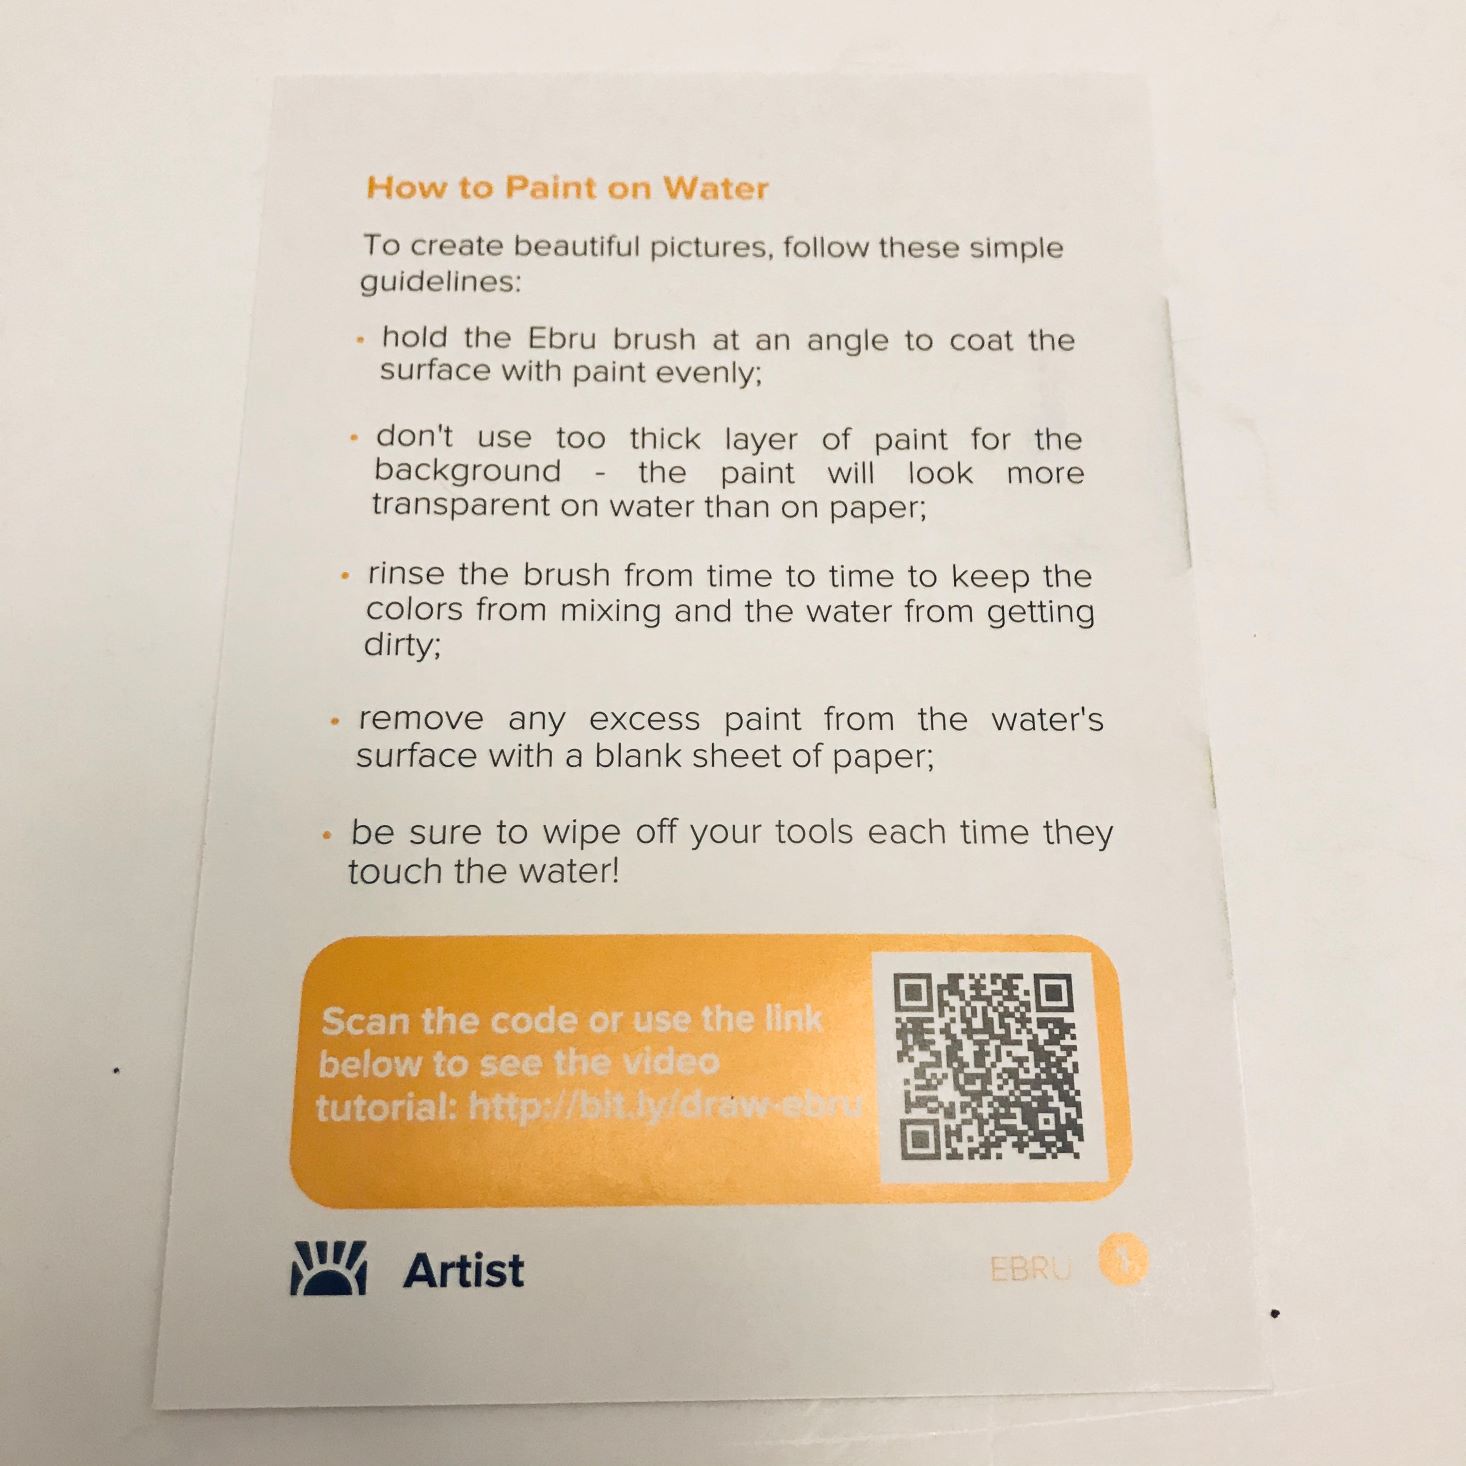
Safety first! Because this kit has a lot of small pieces, it is recommended for kids 5-8. Charlie is only 4, but I felt comfortable letting him participate because I was there to supervise. Some of the experiment cards include bonus material that can be found on their website and include QR codes for easy access.
Onto the fun stuff:
1 of 13
Artist Package
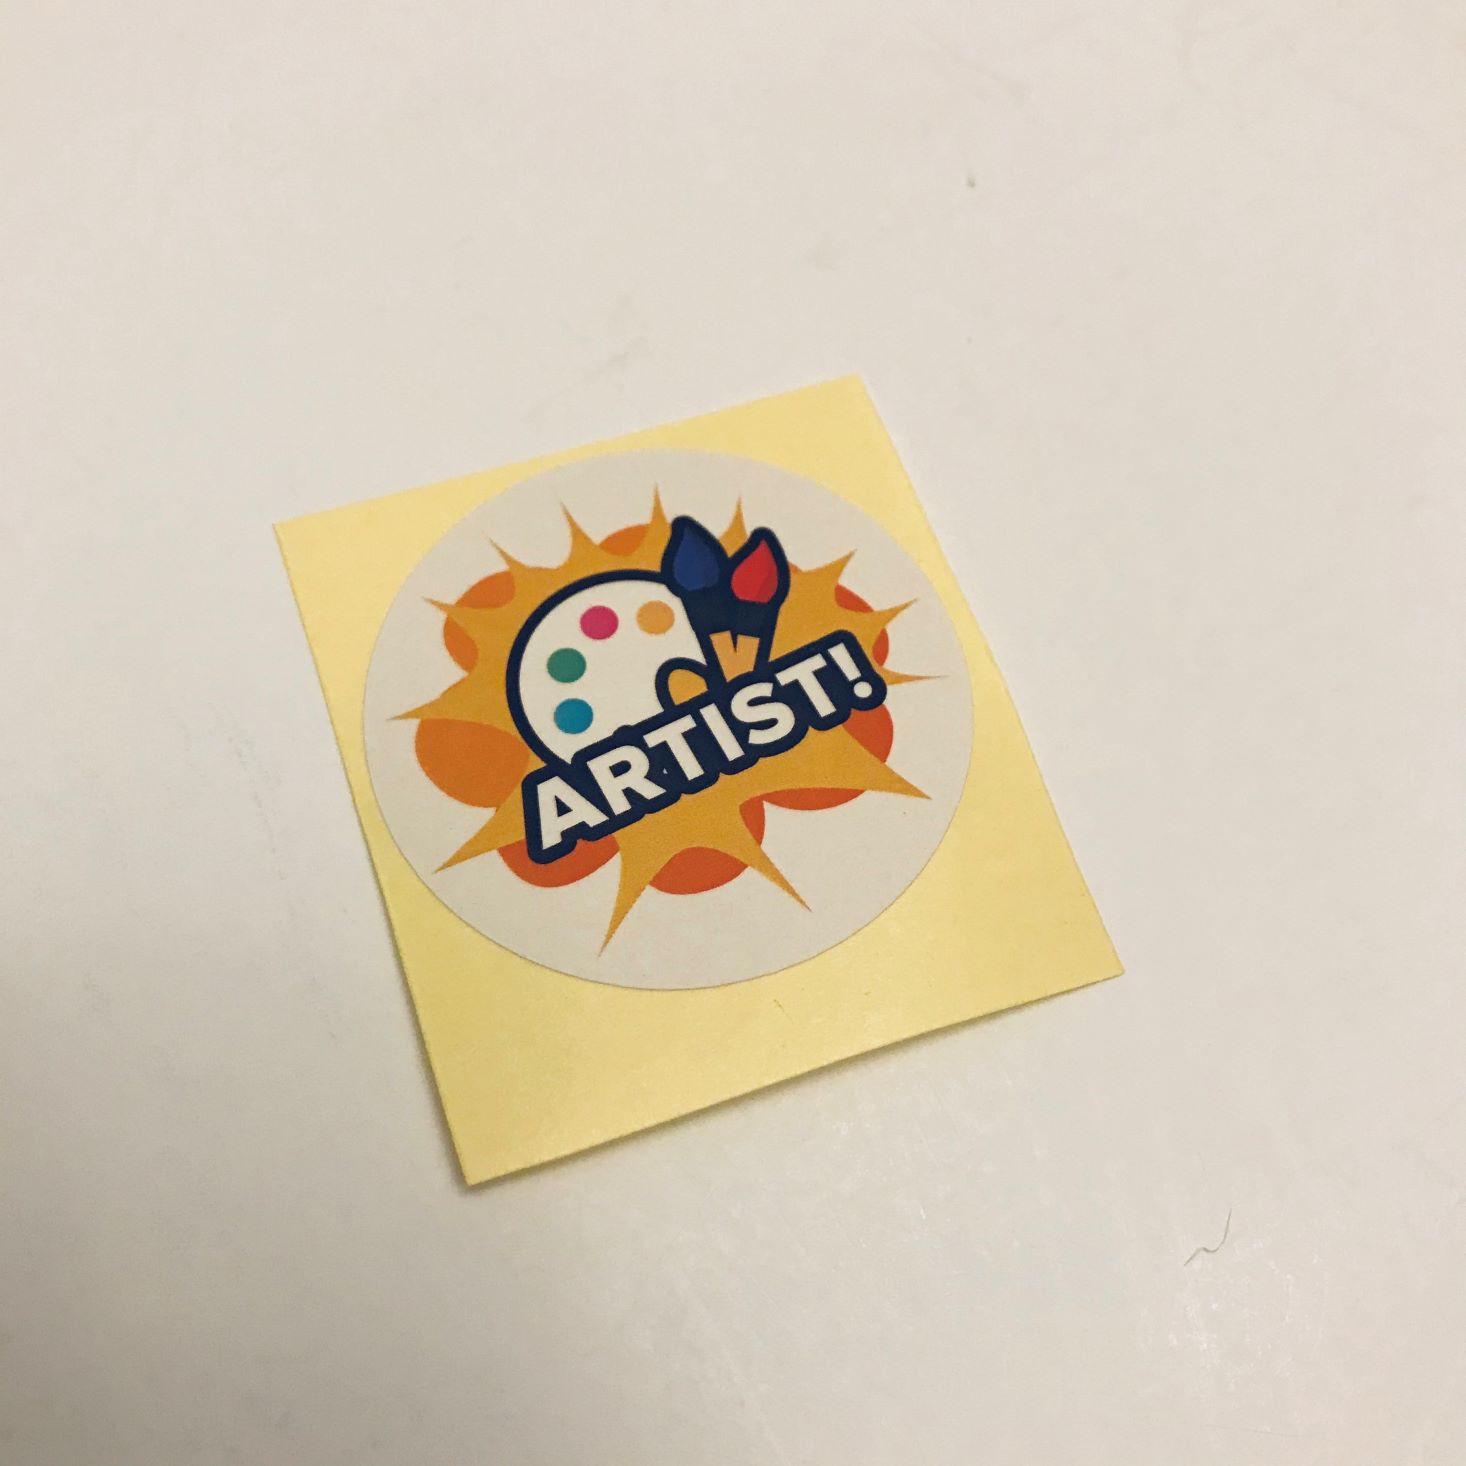
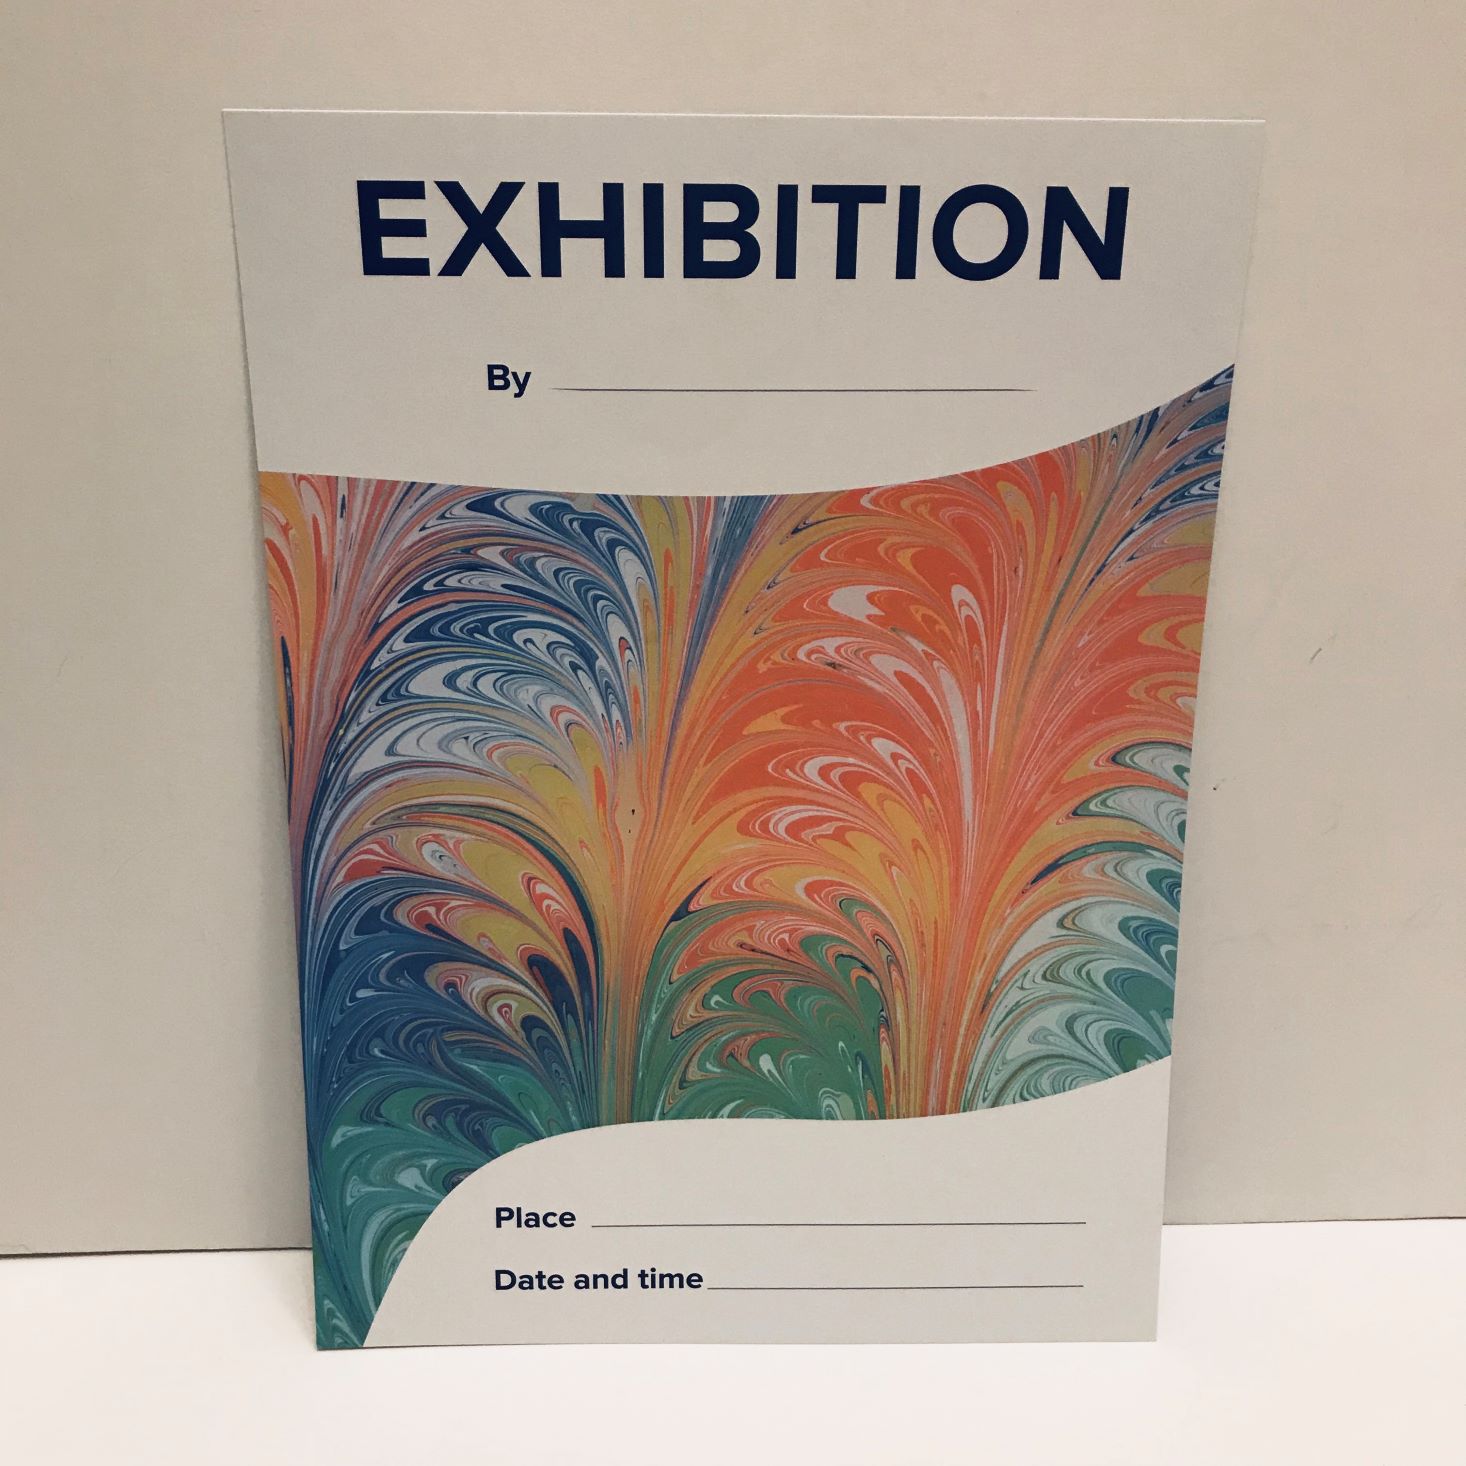
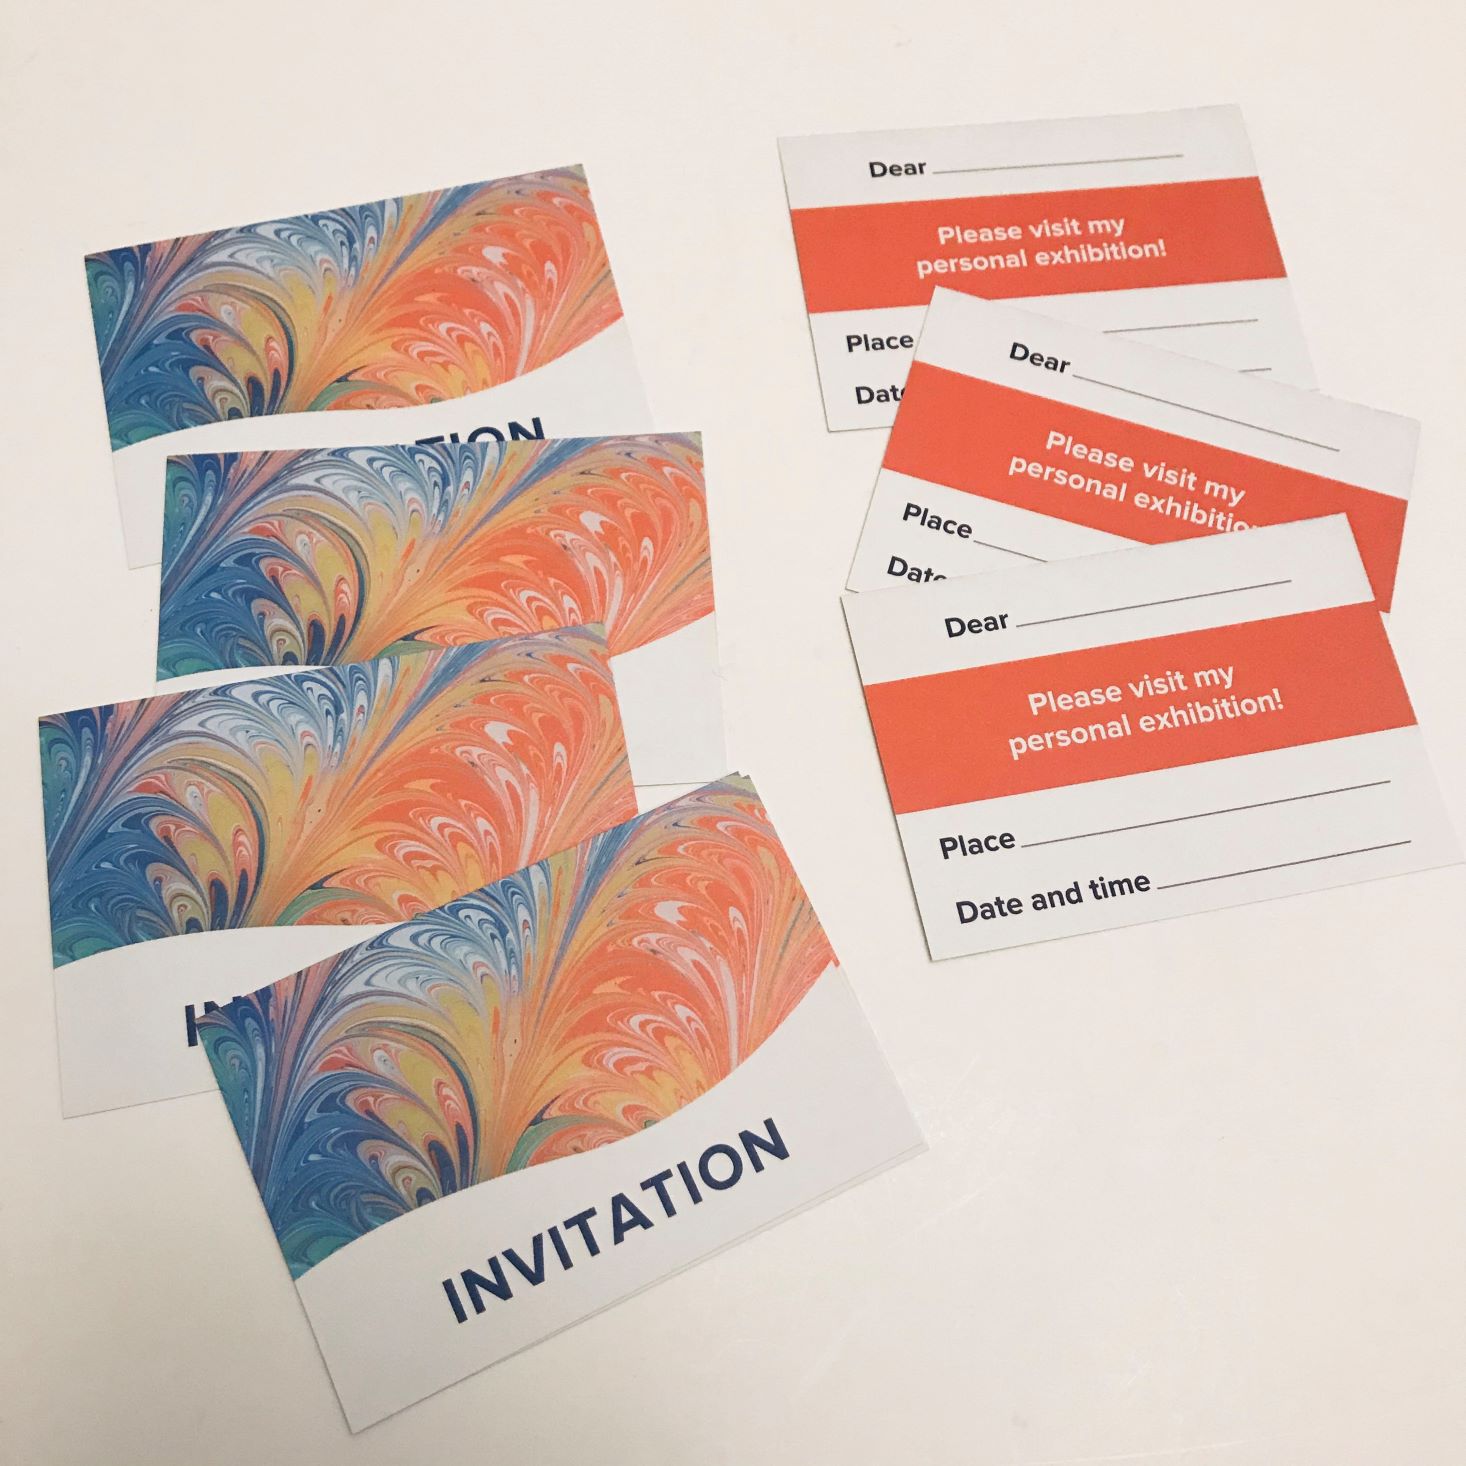
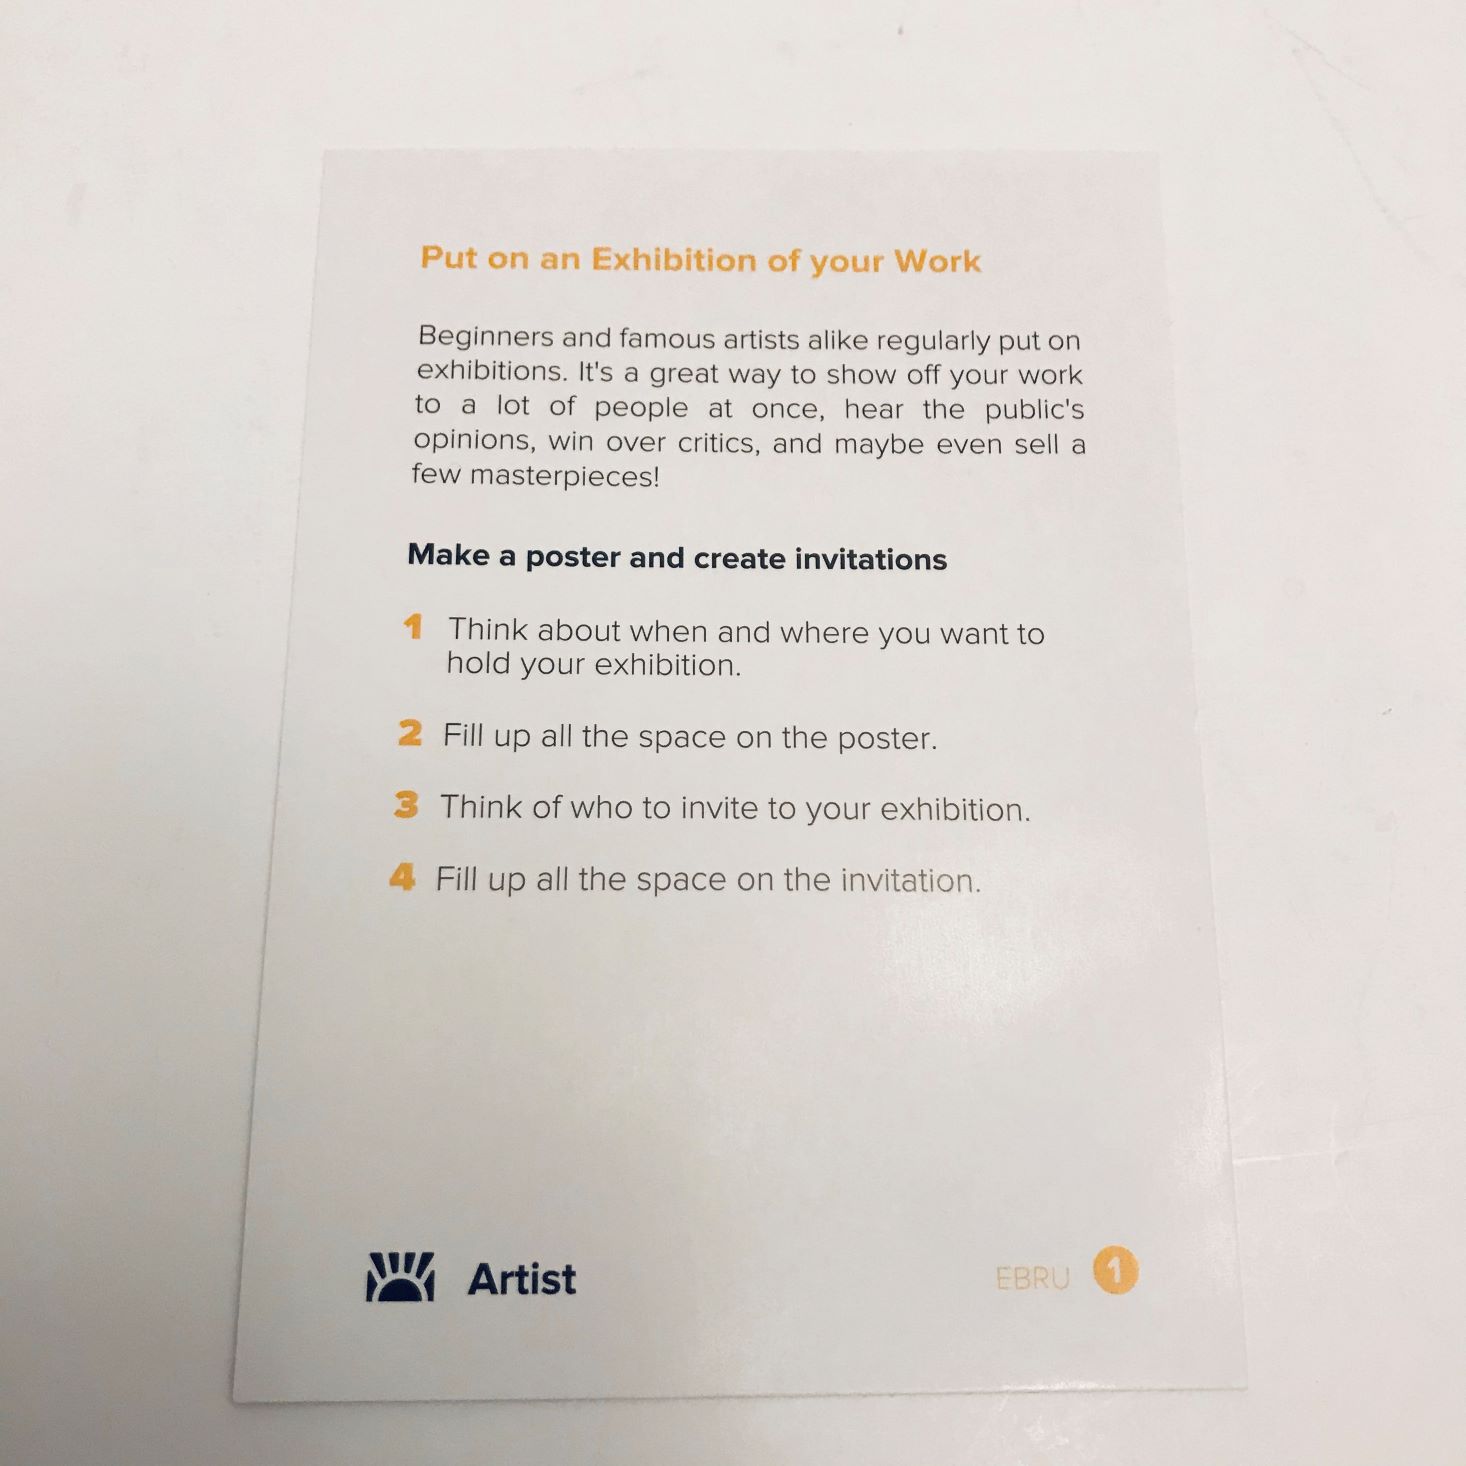
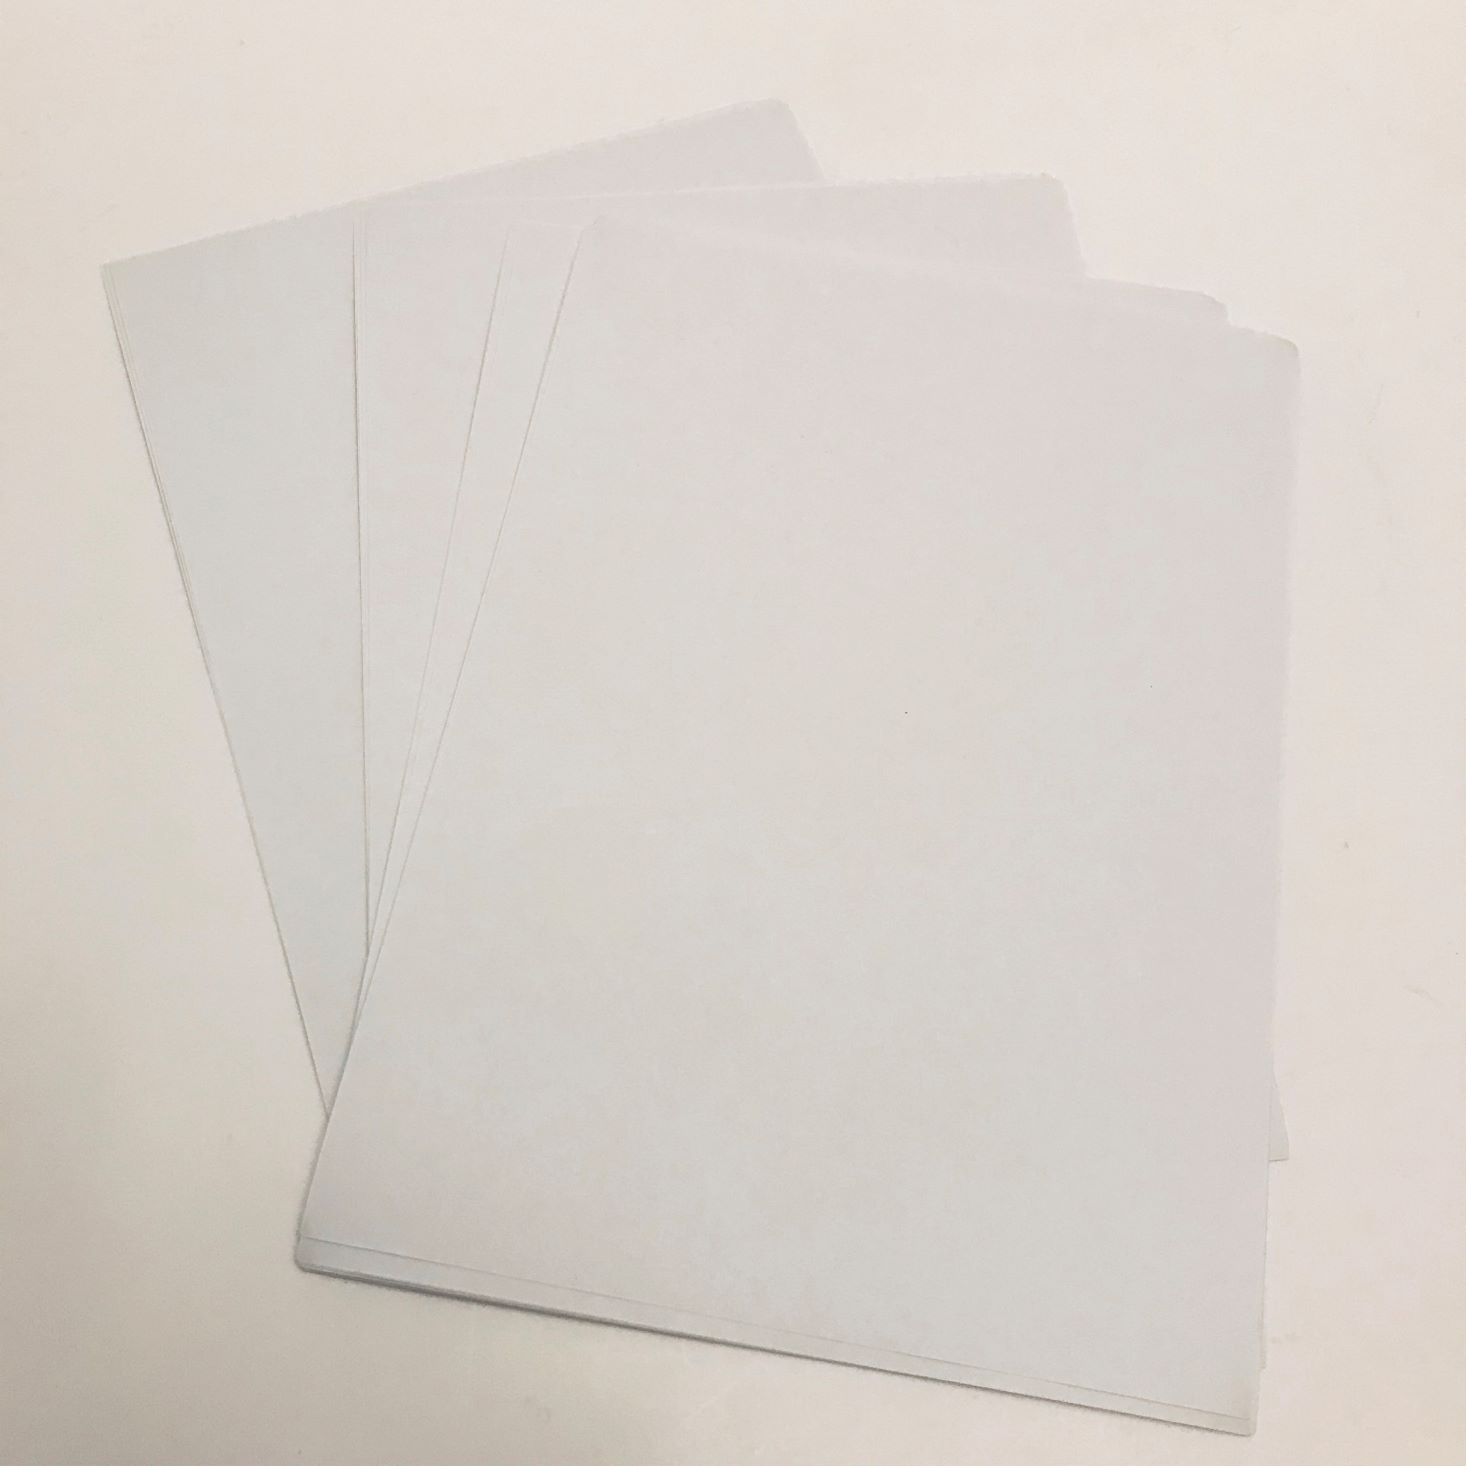
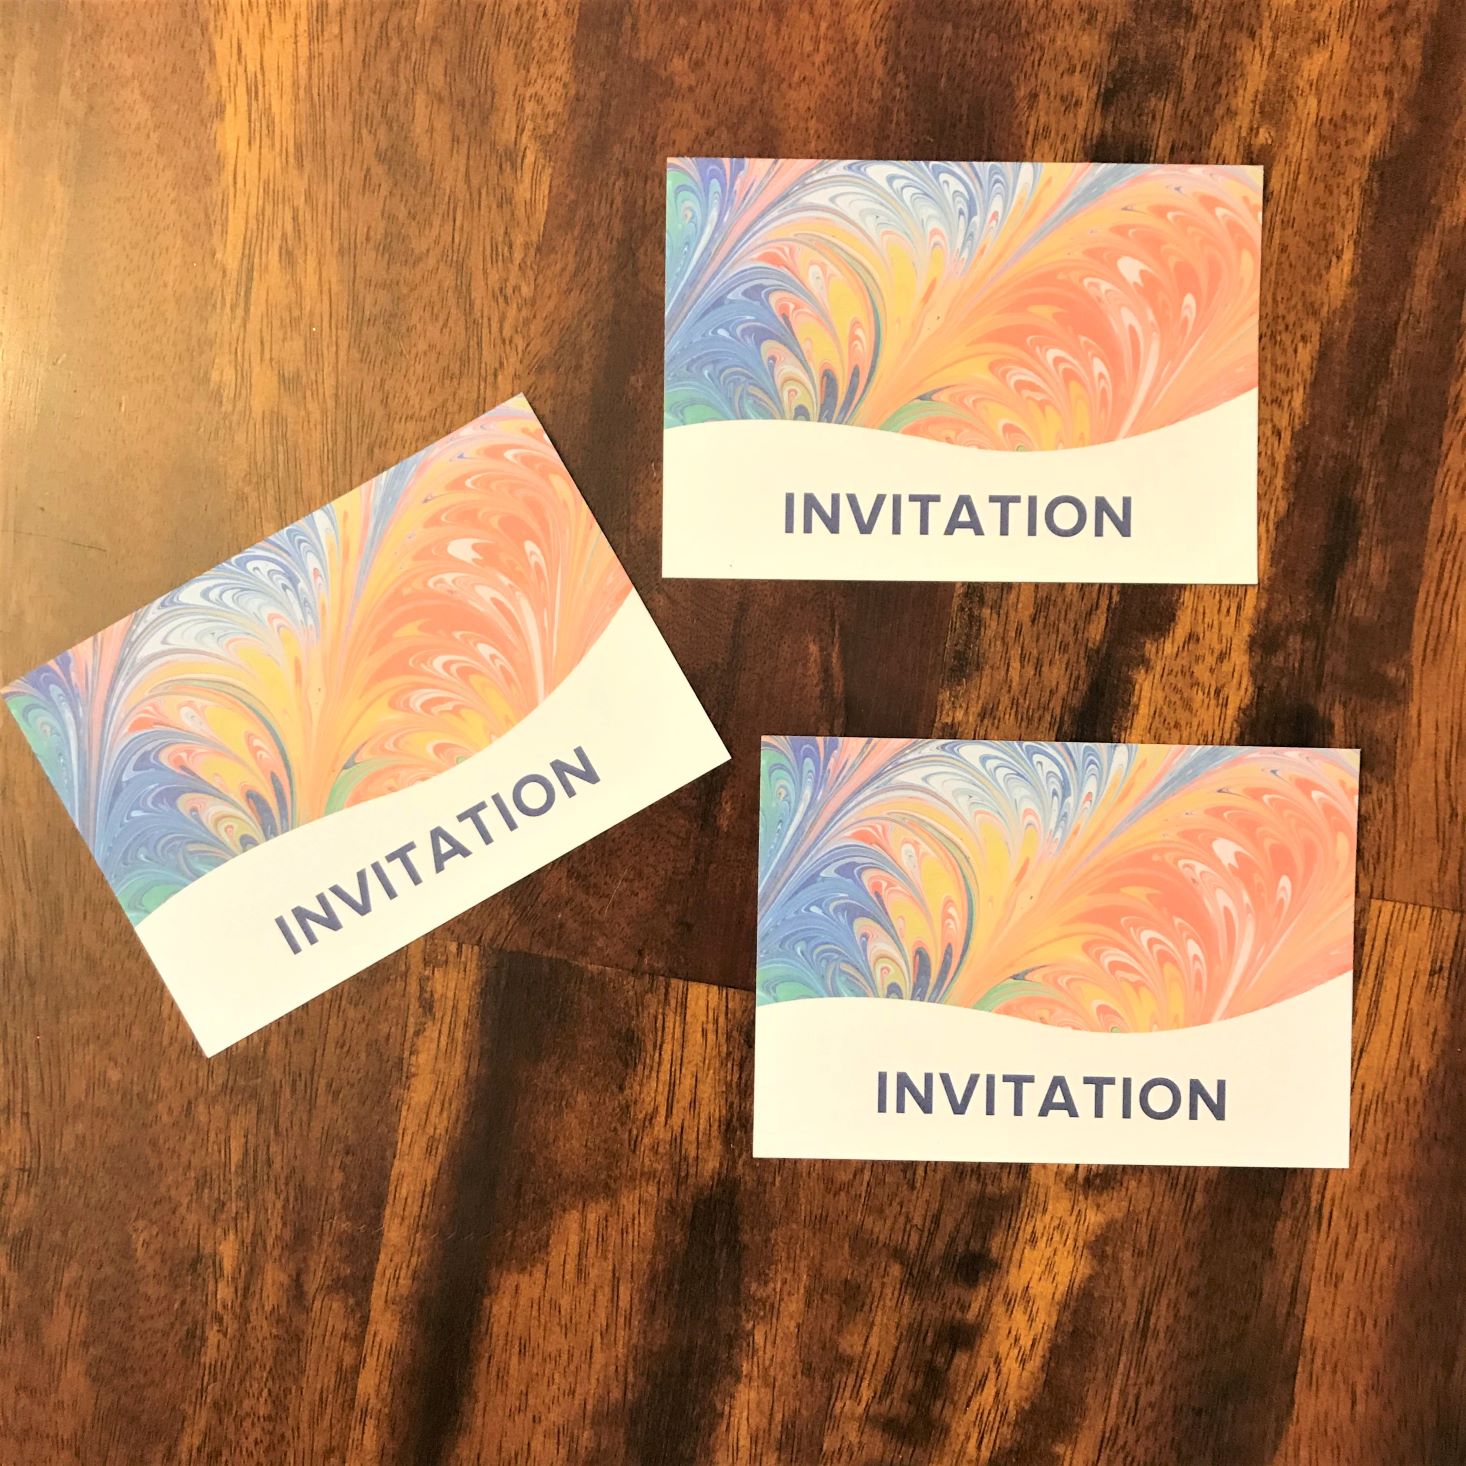
Isn't this envelope adorable?! The large re-useable envelope includes the directions and paper products to start out our profession as an artist. This month we are learning all about the technique to create Ebru art (also known as paper marbling.) We received 4 instruction cards, a stack of white 8.5" X 11" paper, an exhibition poster, and exhibition invitations. We also received an artist sticker to put in our professional record book we received with our first shipment.
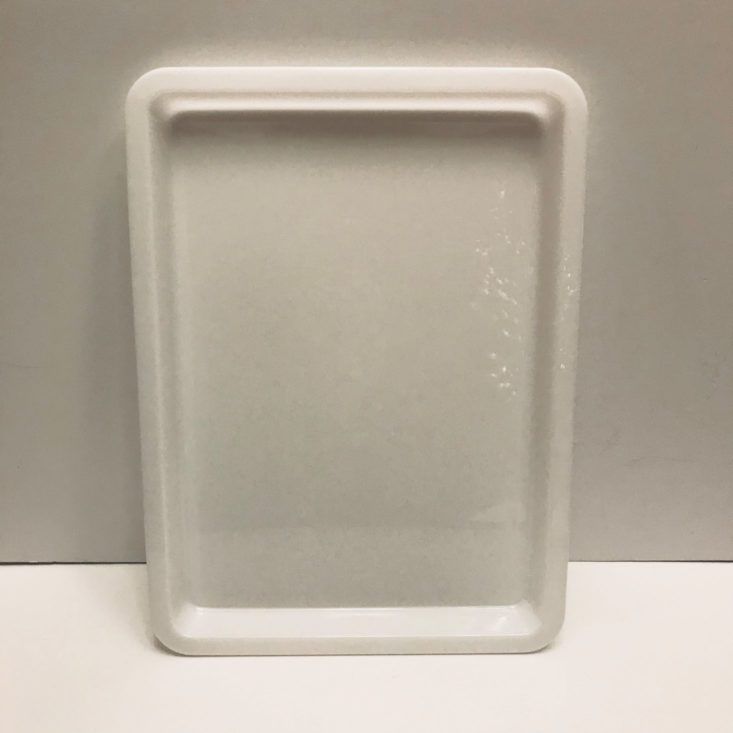
Plastic Tray
This plastic tray is just large enough to create artwork on the 8.5" X 11" paper. It is just the right depth for the thickening solution and creating our projects.
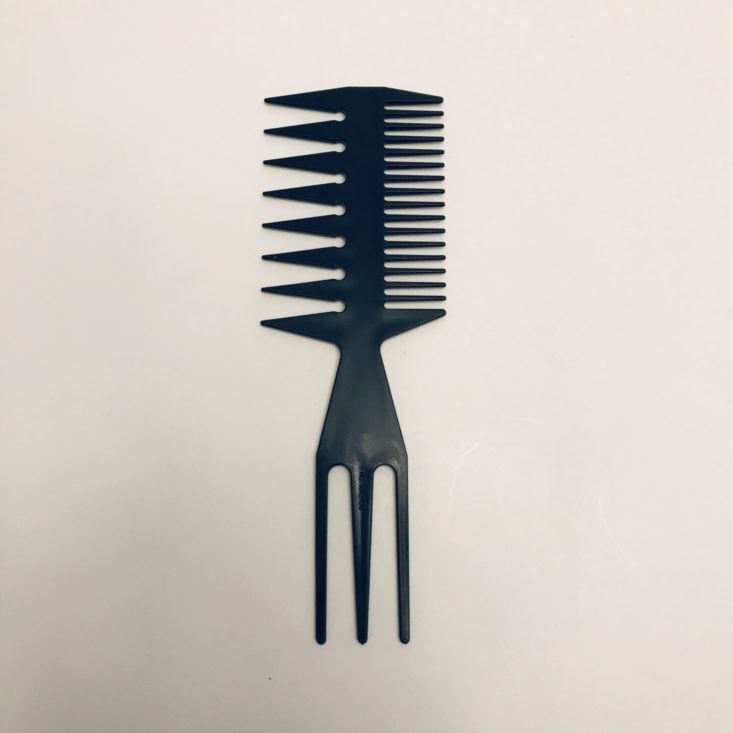
Ebru Comb
Honestly, I have never seen a tool like this in my life. My son thought it was a hair comb, but it actually is going to be used for combing through our Ebru solution. This thick plastic comb has a variety of teeth to create different patterns and textures in the Ebru solution. (More on the process down below.)
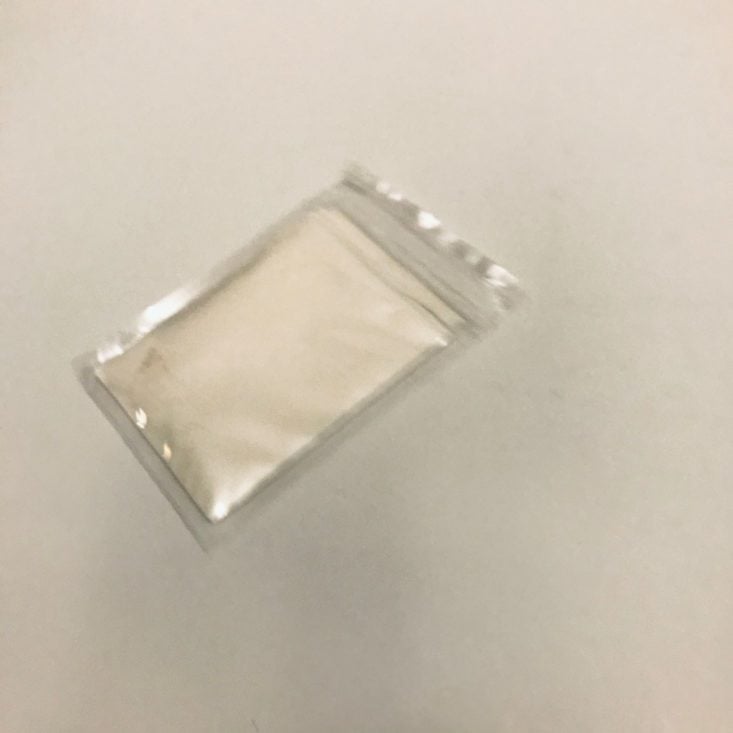
Thickener
We received an unmarked ziplock bag that I had to assume was the thickener. This product is used to create the viscous solution used to apply our paint on.
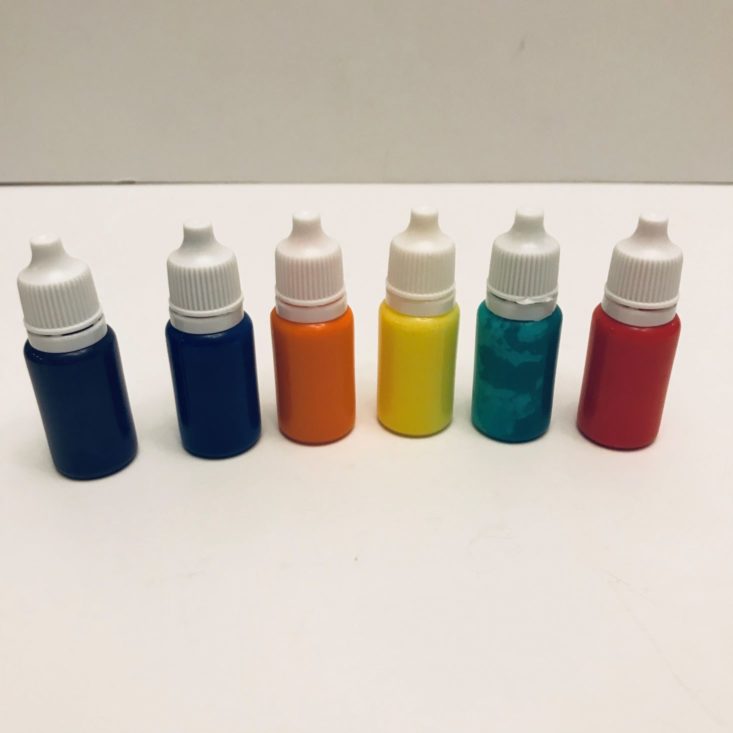
Paint
We also received 6 different colors of paint. These vials came unlabelled, so I'm not sure what type of paint they are, but we received blue, violet, orange, yellow, green, and red. I really like that they are in screw-top containers to help prevent leaking, but the white ring under the cap falls off very easily. The colors are vibrant and of a good variety to create some awesome pictures!
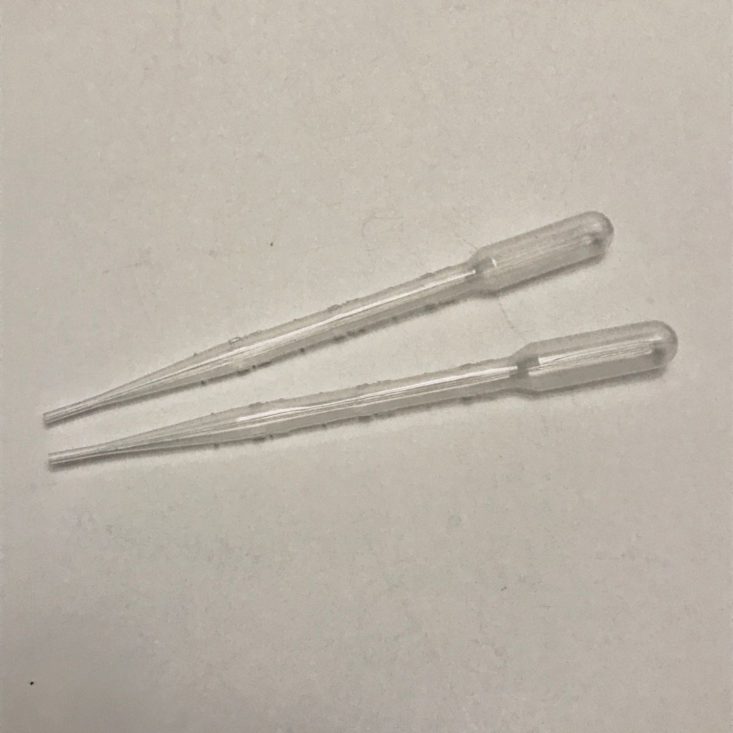
Pipettes
The directions said nothing about using pipettes, but I assume they are to be used to manipulate the paint and create different patterns. I played with them a little bit but found them harder to work with than the stir sticks. I will have to research using them for future projects to see how they can be used.
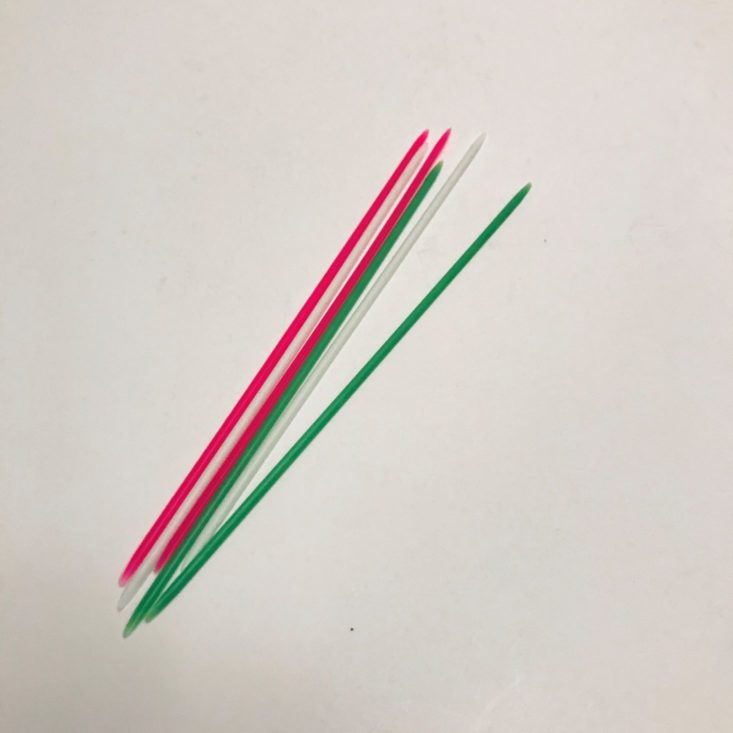
Stir Sticks
To create Ebru art, you use stir sticks to manipulate the paint into patterns and swirls. These can be used like a paintbrush to create flowers and other shapes. It takes a little bit of playing around with, but they are really fun!
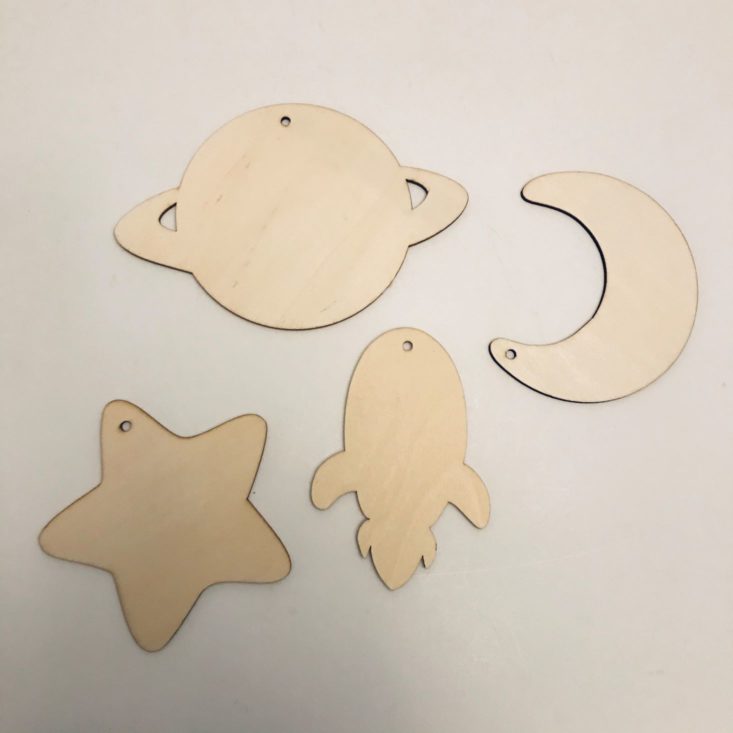
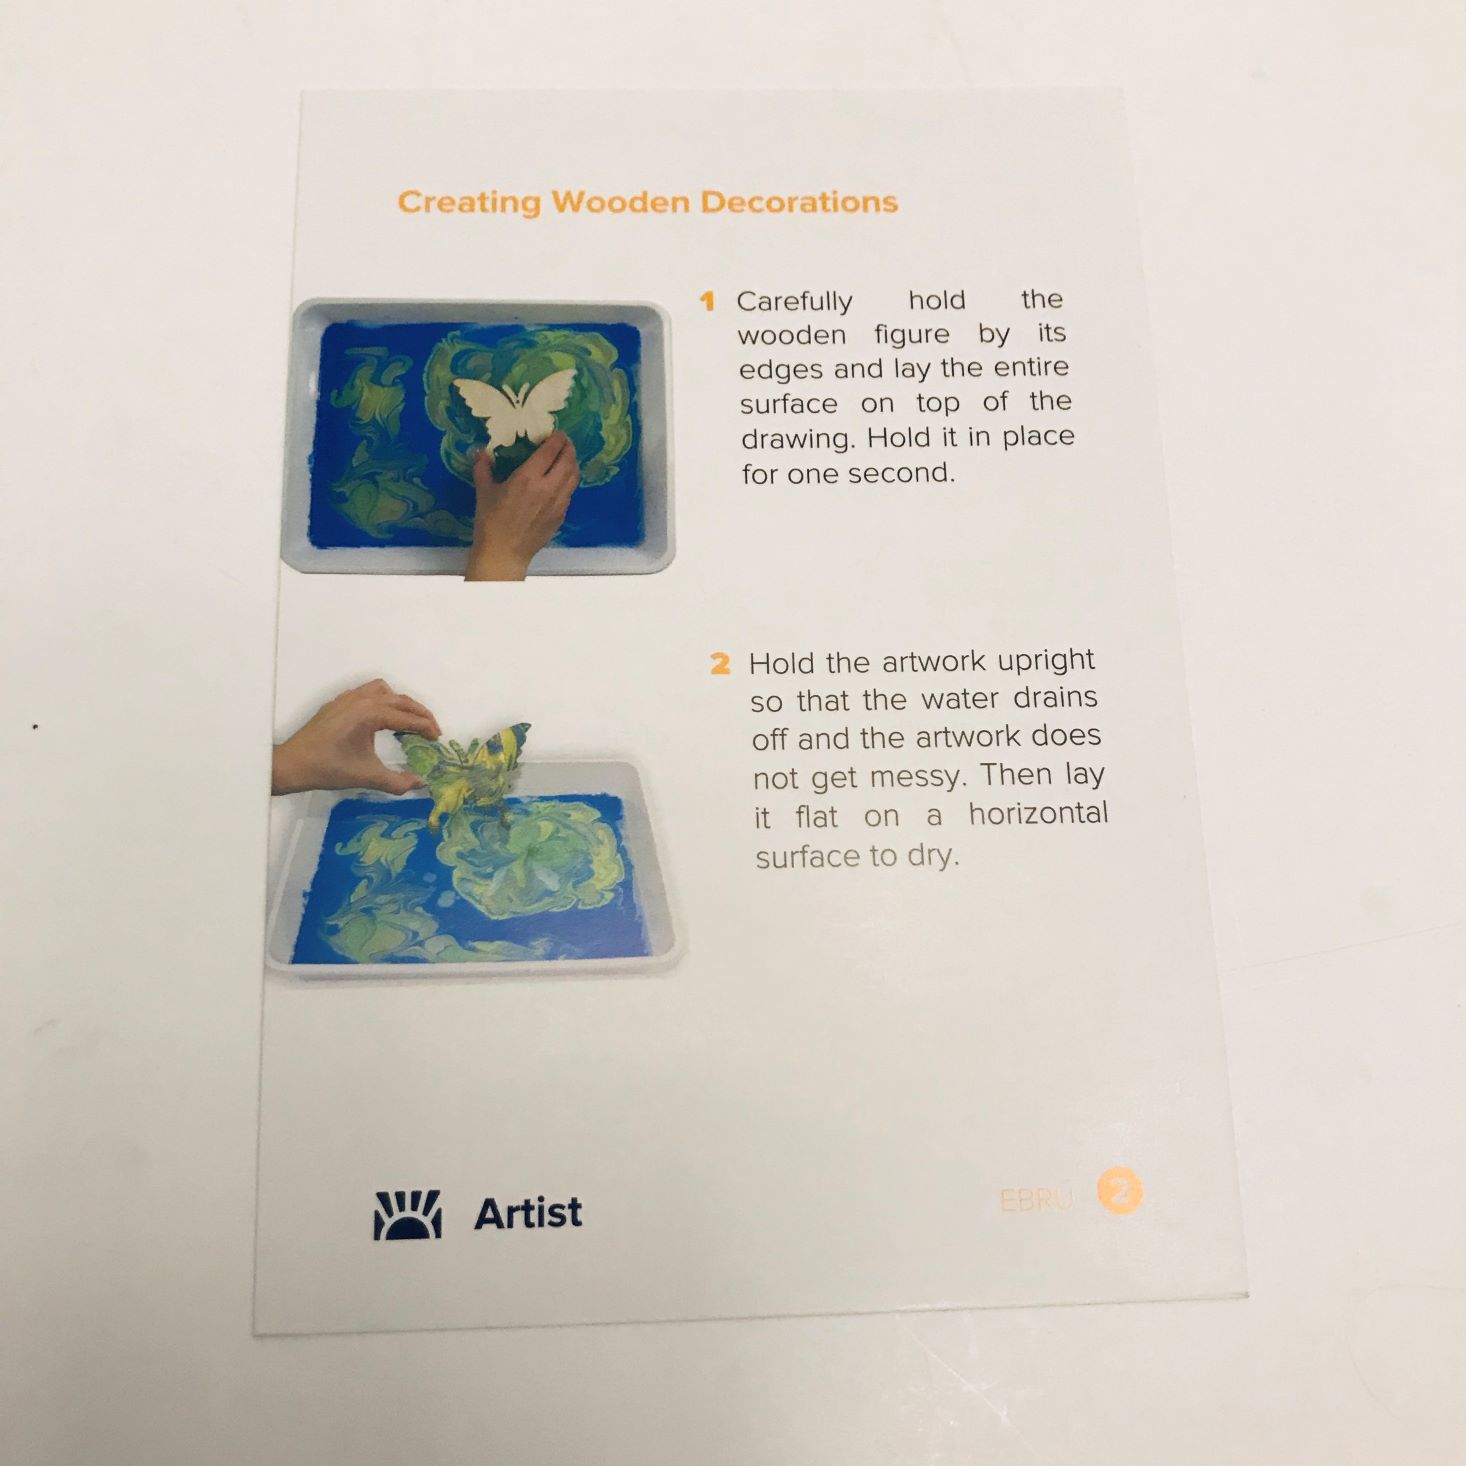
Wooden Space Decorations
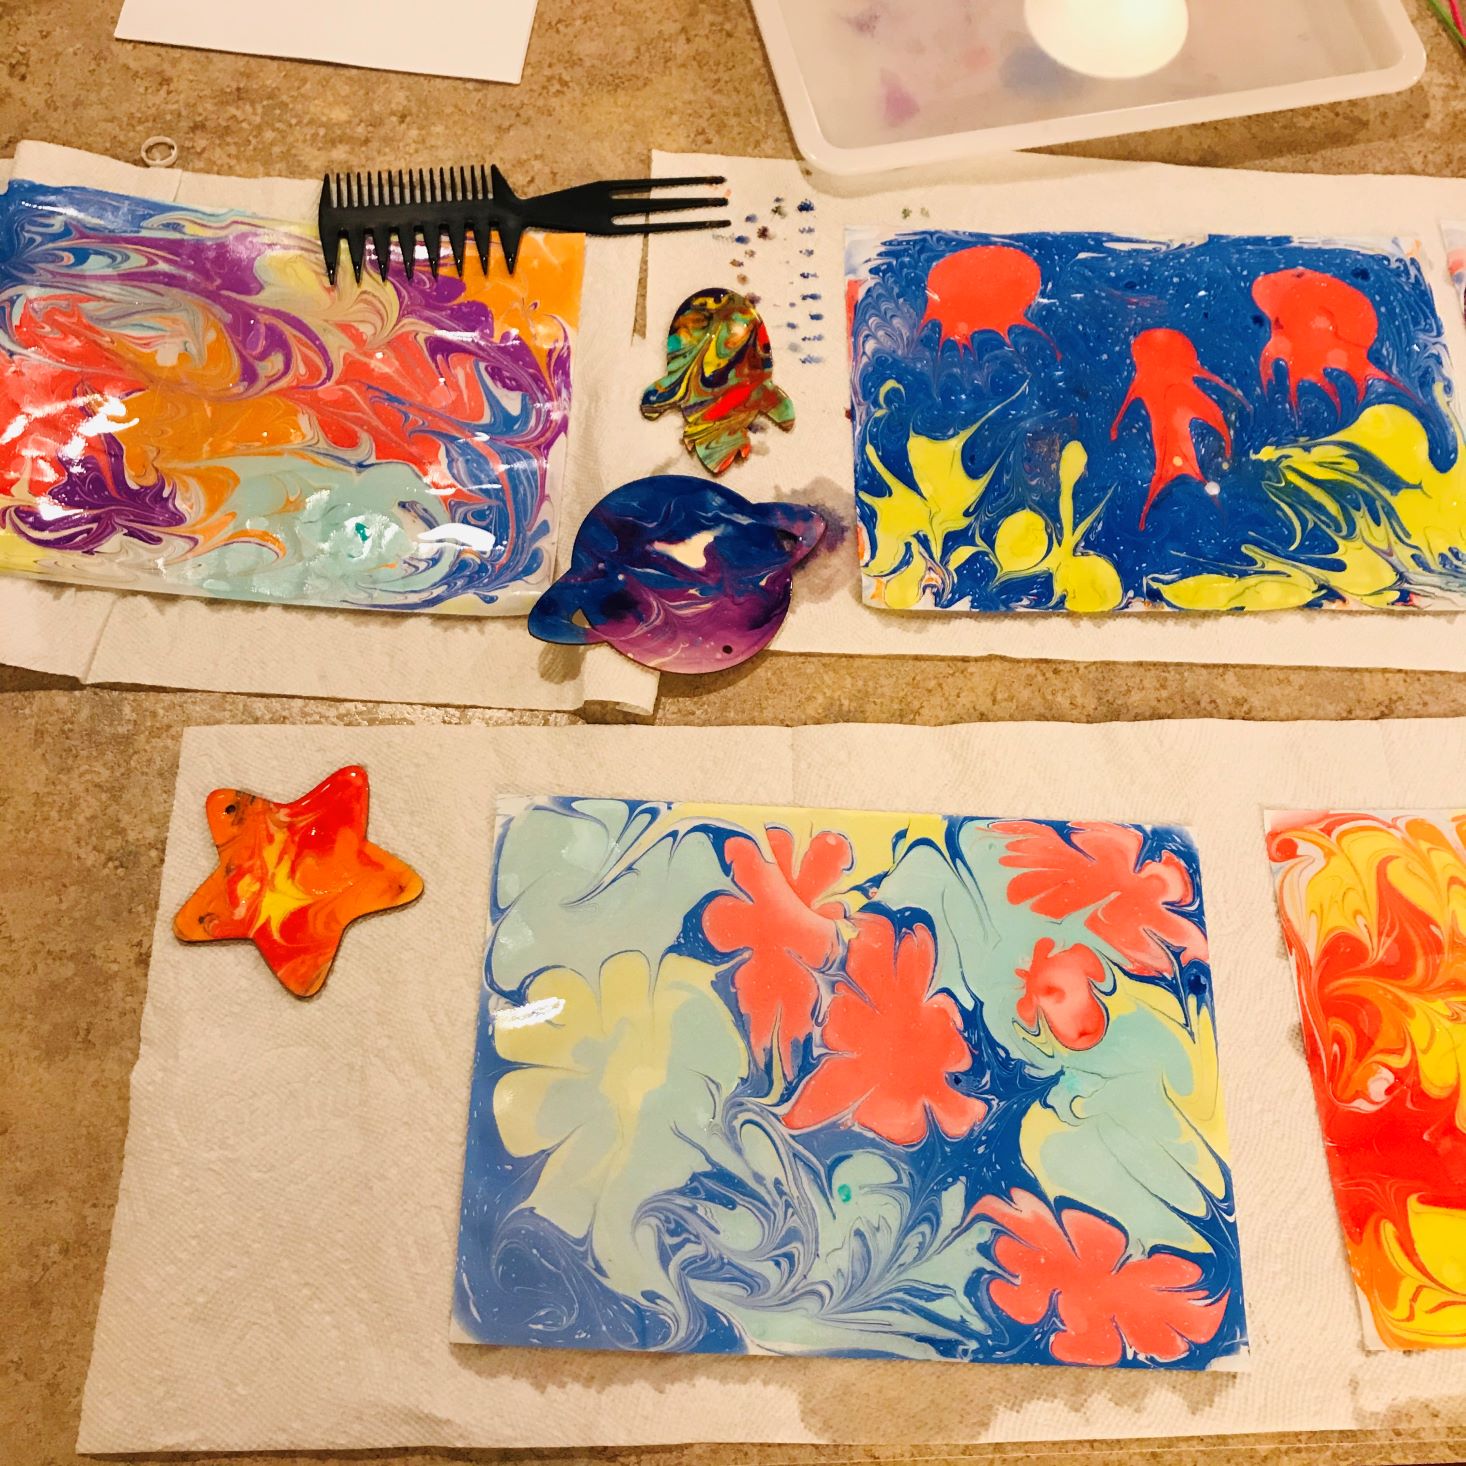
Not only did we receive a big stack of white paper, but we also received these 4 wooden space decorations. The instructions recommended us to practice on paper to perfect the technique before trying a wood ornament. Our box included a star, rocket, moon, and planet. I added white yarn through the holes in these to create ornaments after I was done painting them.
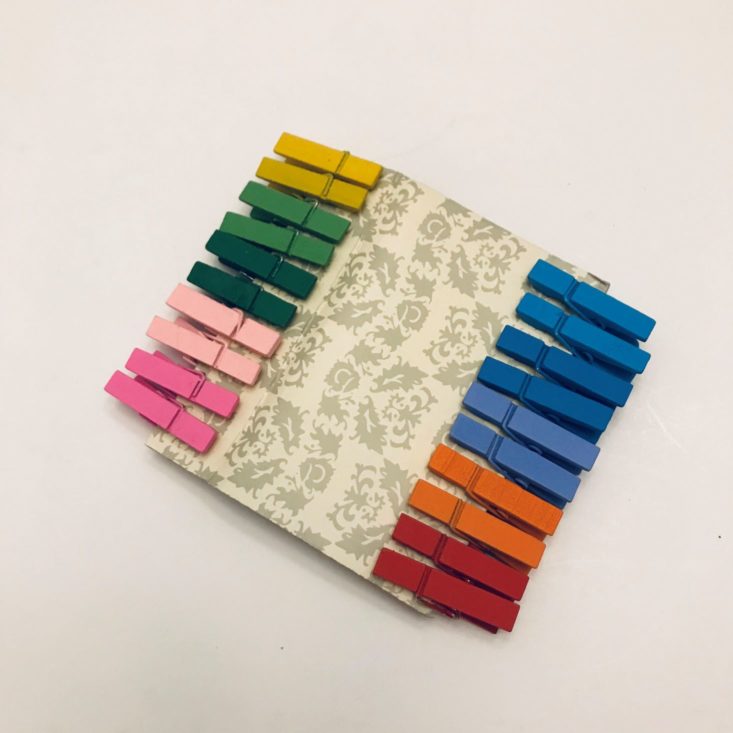
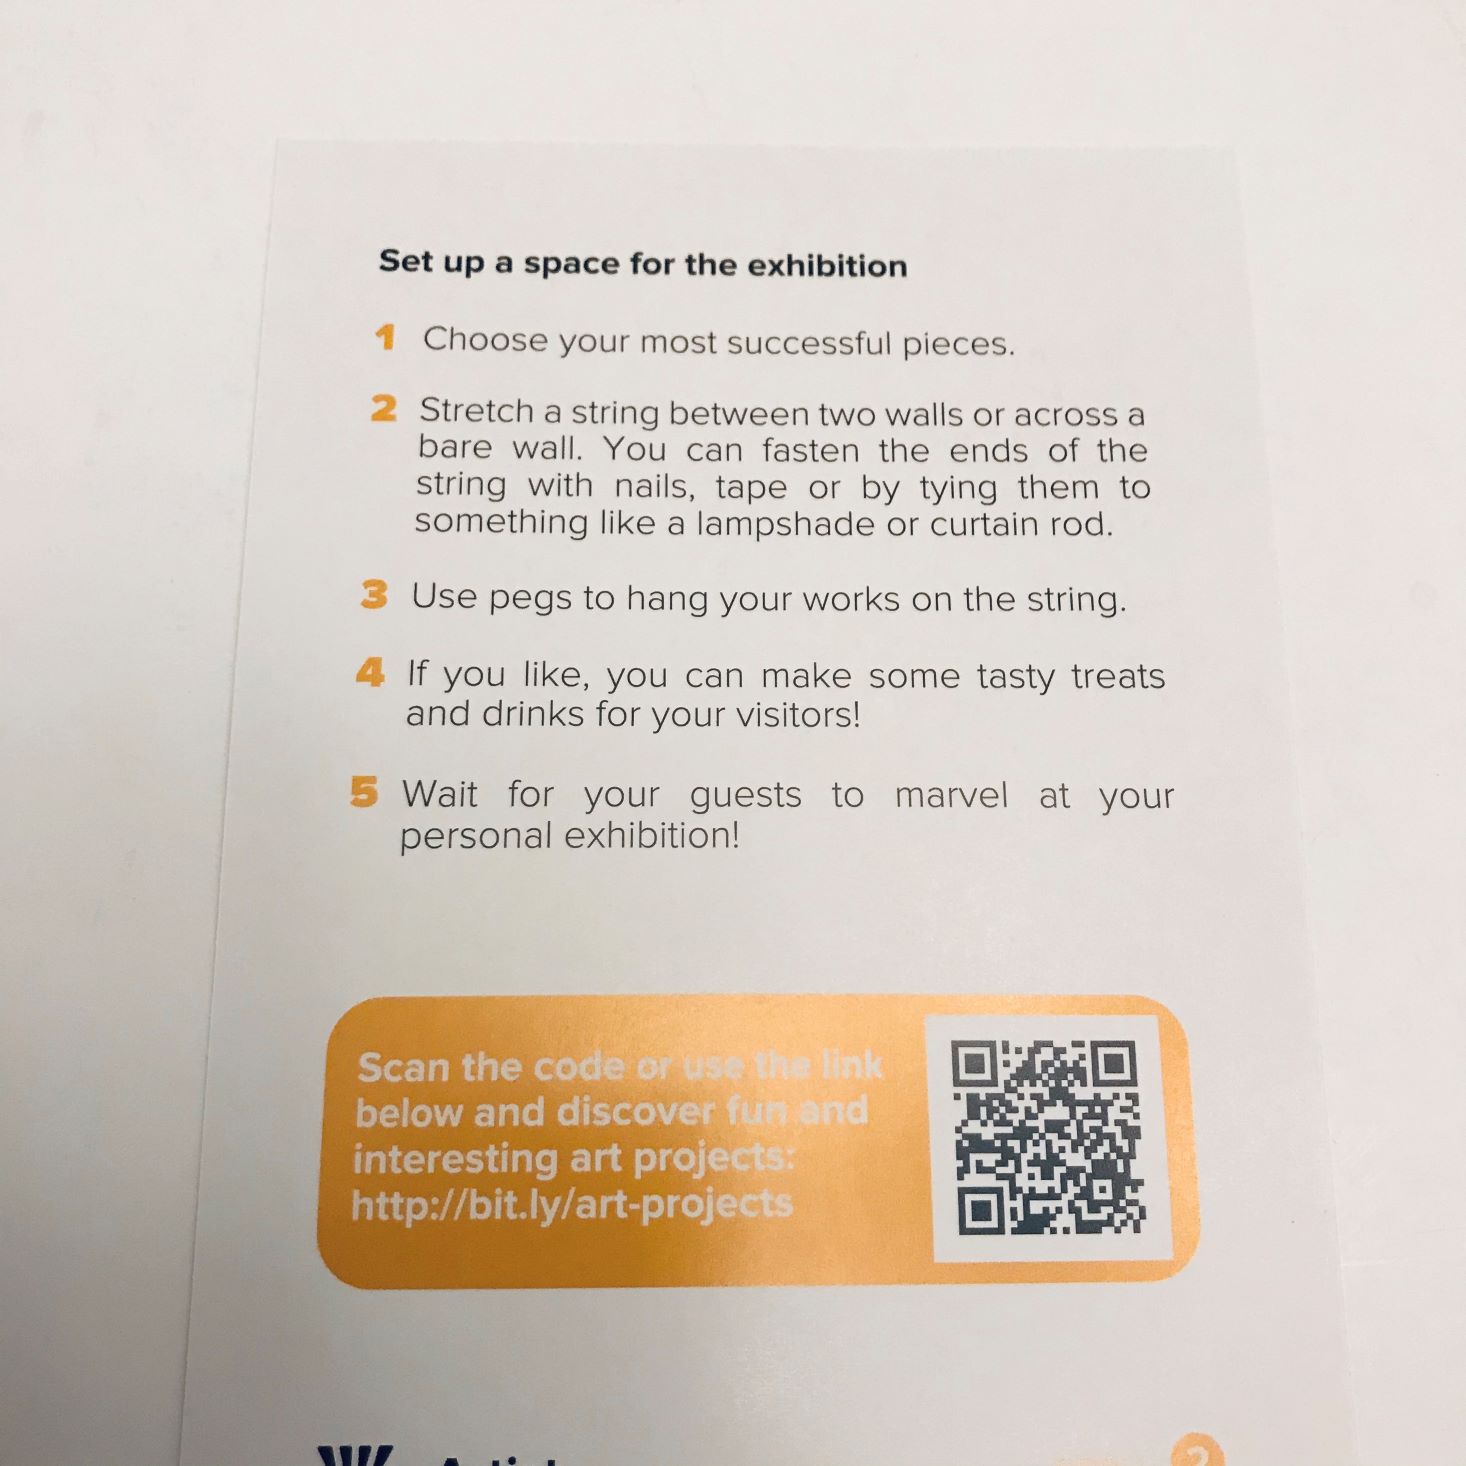
Multi-Colored Clothespins
To make our "exhibition" a success, we received 20 multi-colored clothespins to display our art. I love that they included this item because, after our art show, we can use these for tons of different uses!
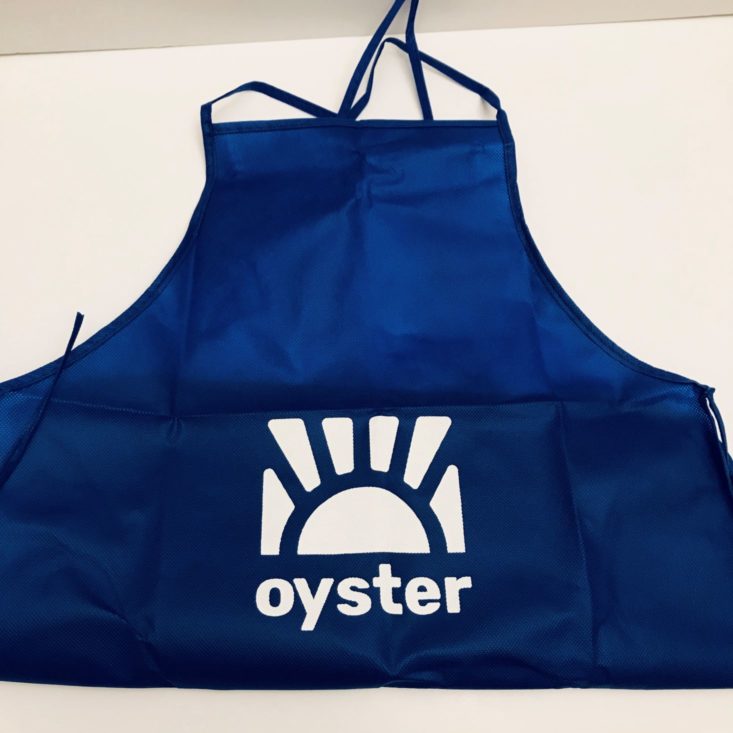
Oyster Apron
I don't think it's possible to be a good artist unless you get paint on yourself, and this apron has you covered. The Ebru solution is really thick and a little messy. When you add that with paint, you are in for all sorts of spills, so this apron was very welcome. It also really made my kids feel like artists. They looked (and felt) very professional in it!
Exhibition String
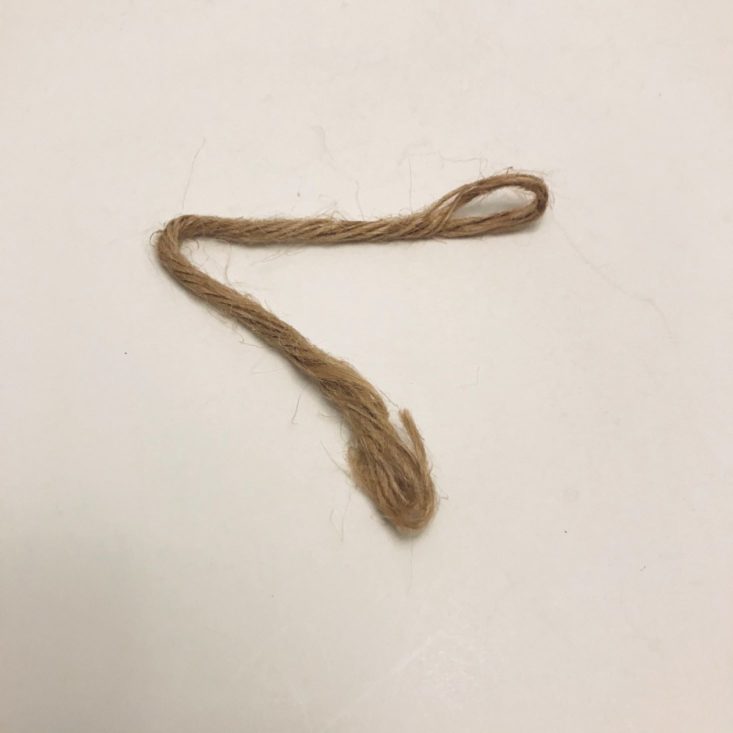
We also received a large piece of twine to help display our "exhibition." While it was a bit short to hang up all of our artwork, it was a great start and looked really cute with the included clothespins.
Project #1: Ebru Marbling
Now that we have gone through all of the included supplies, I will walk you through the process of creating an Ebru design. It was initially a little more time consuming than I had anticipated, but definitely worth it in the end.
1 of 4
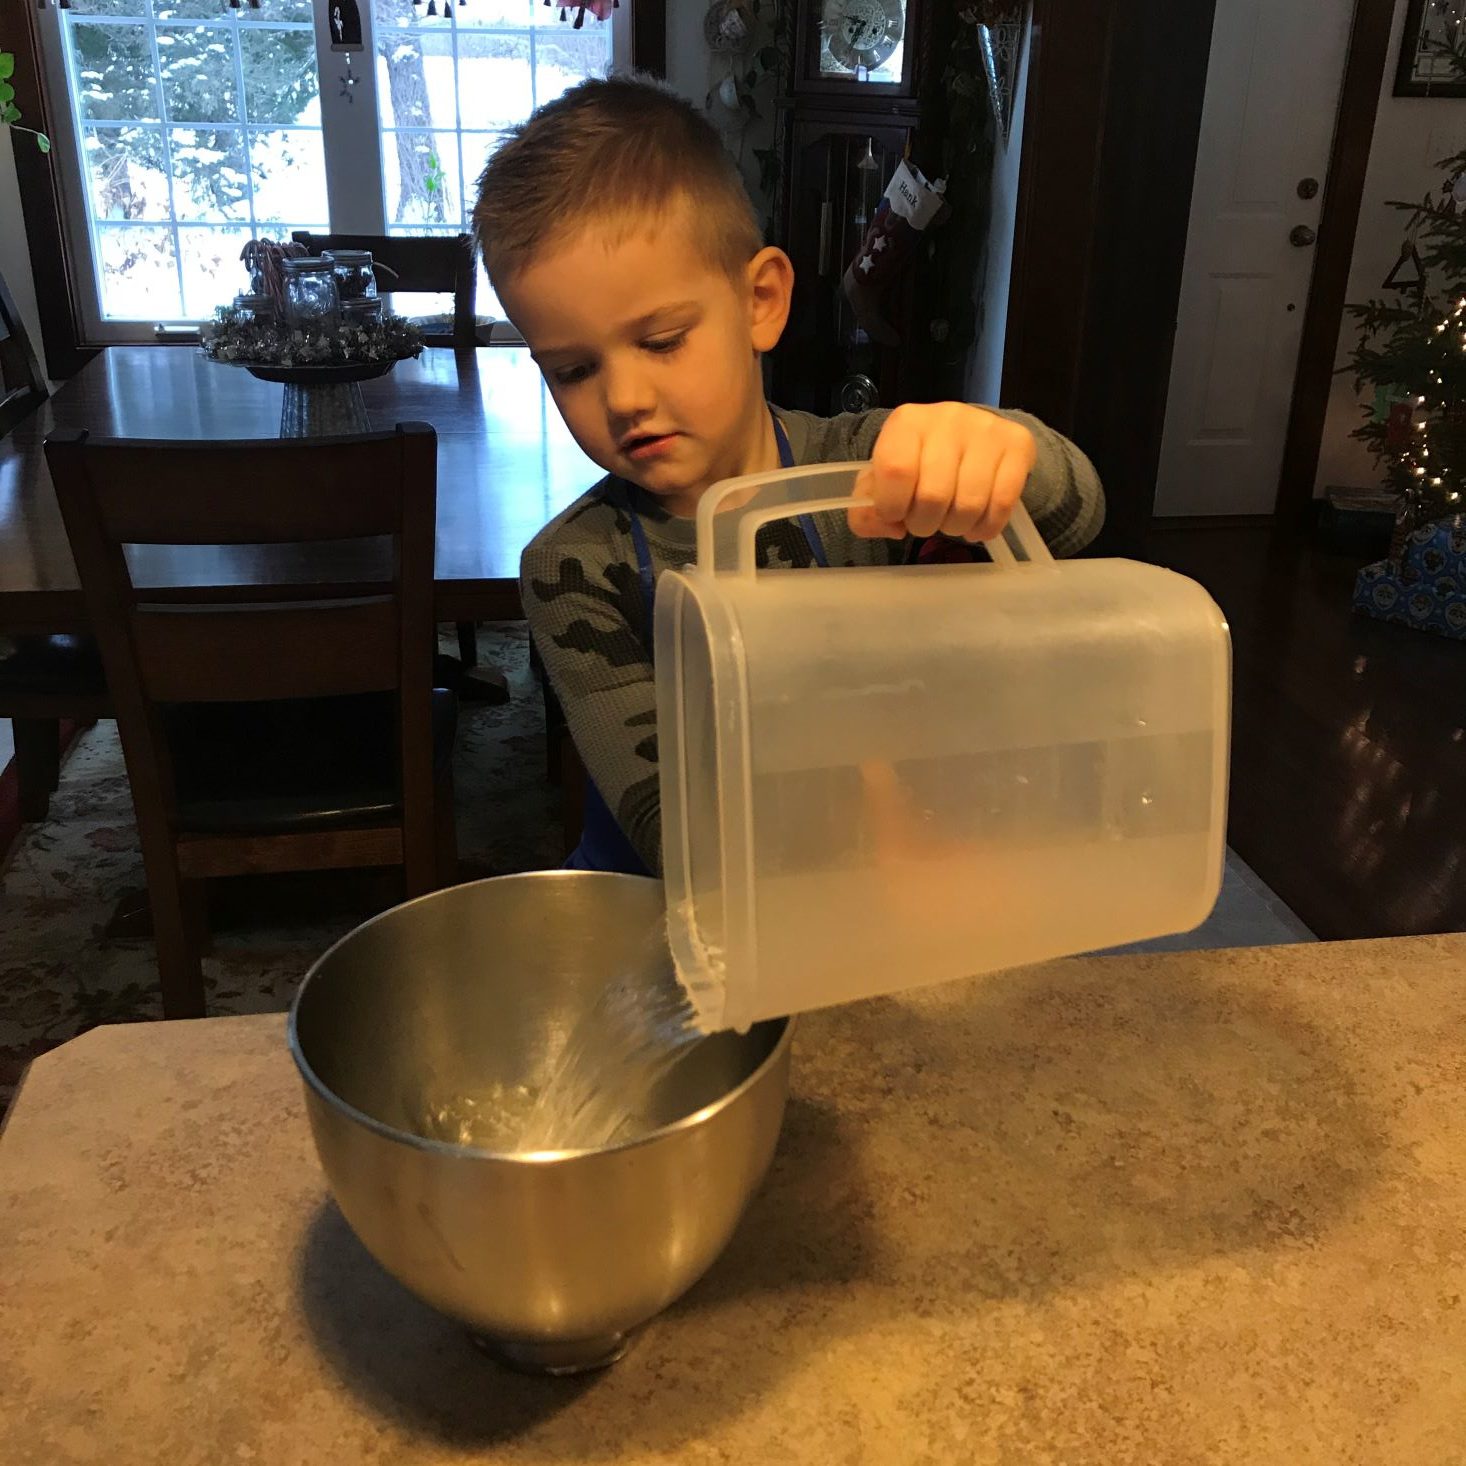
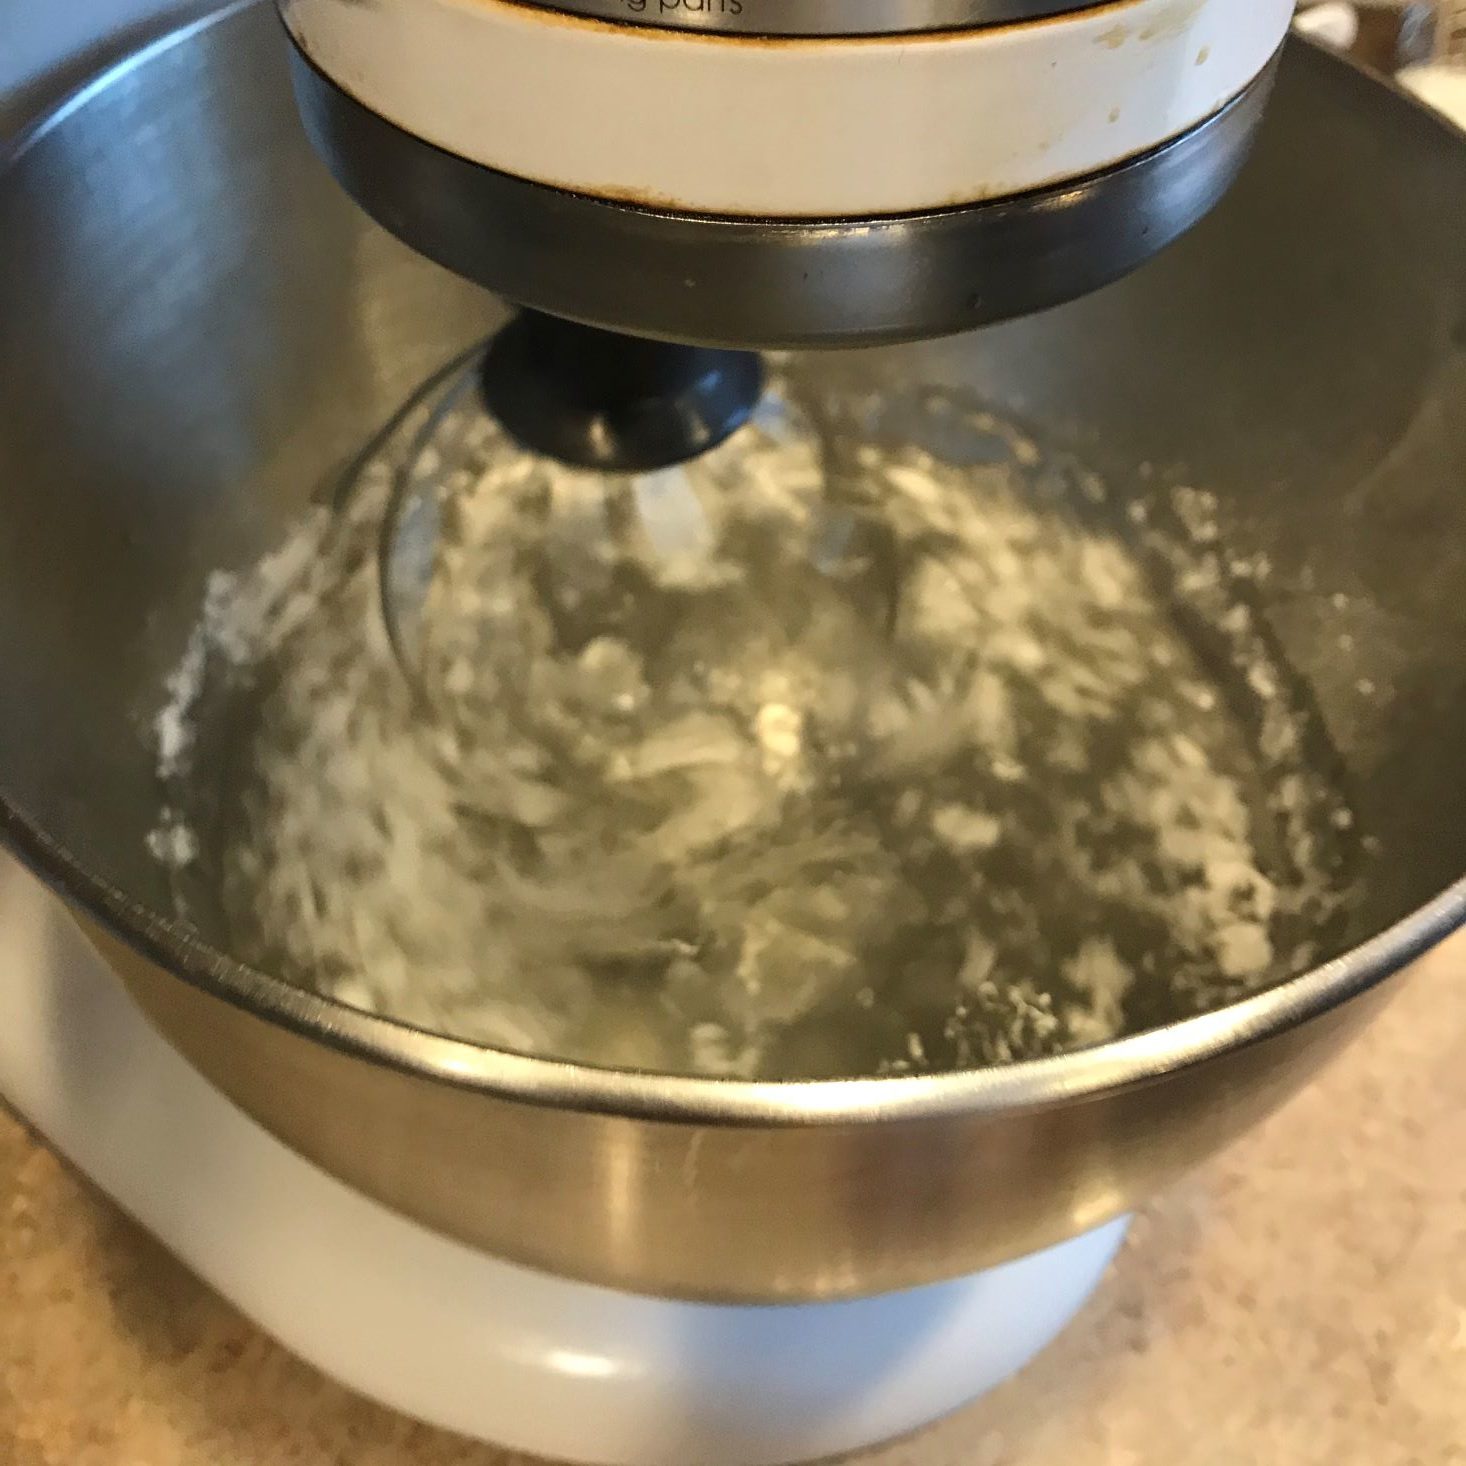
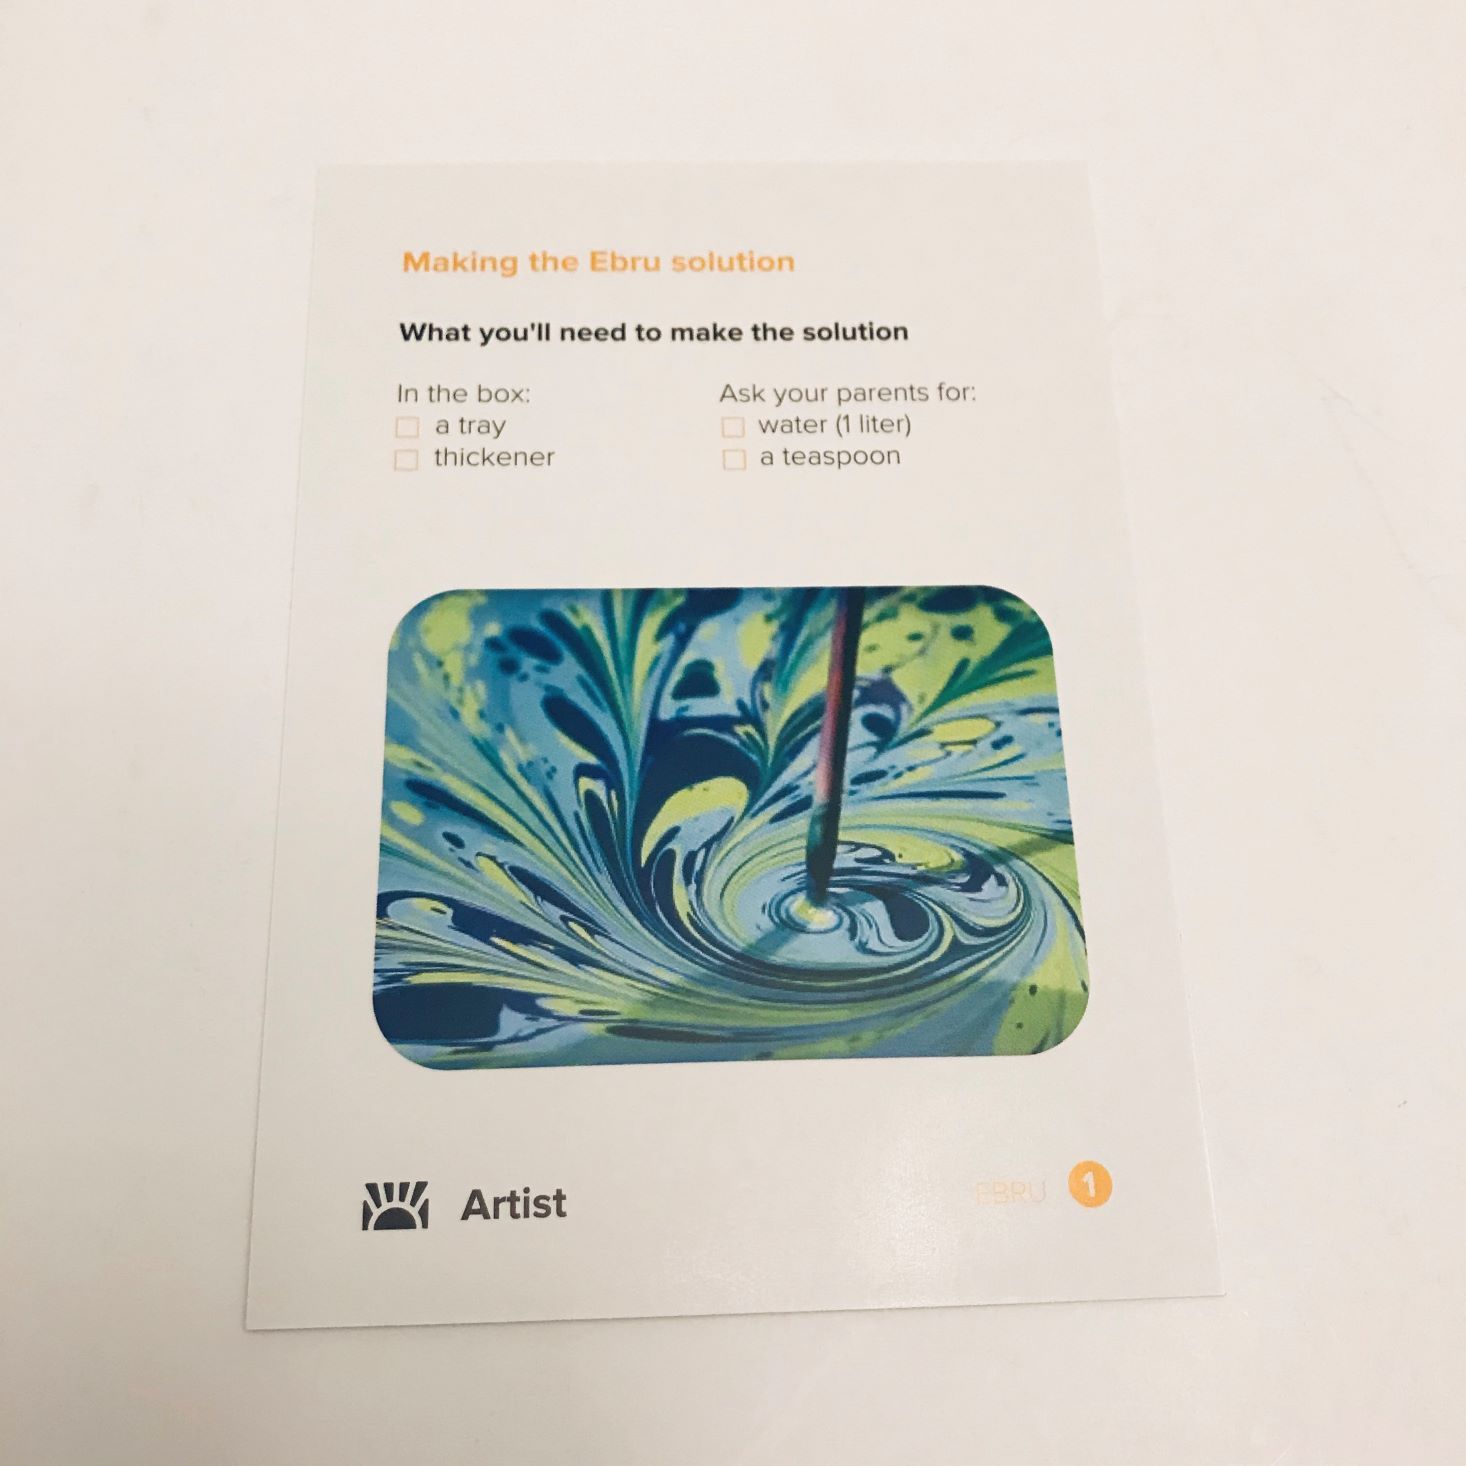
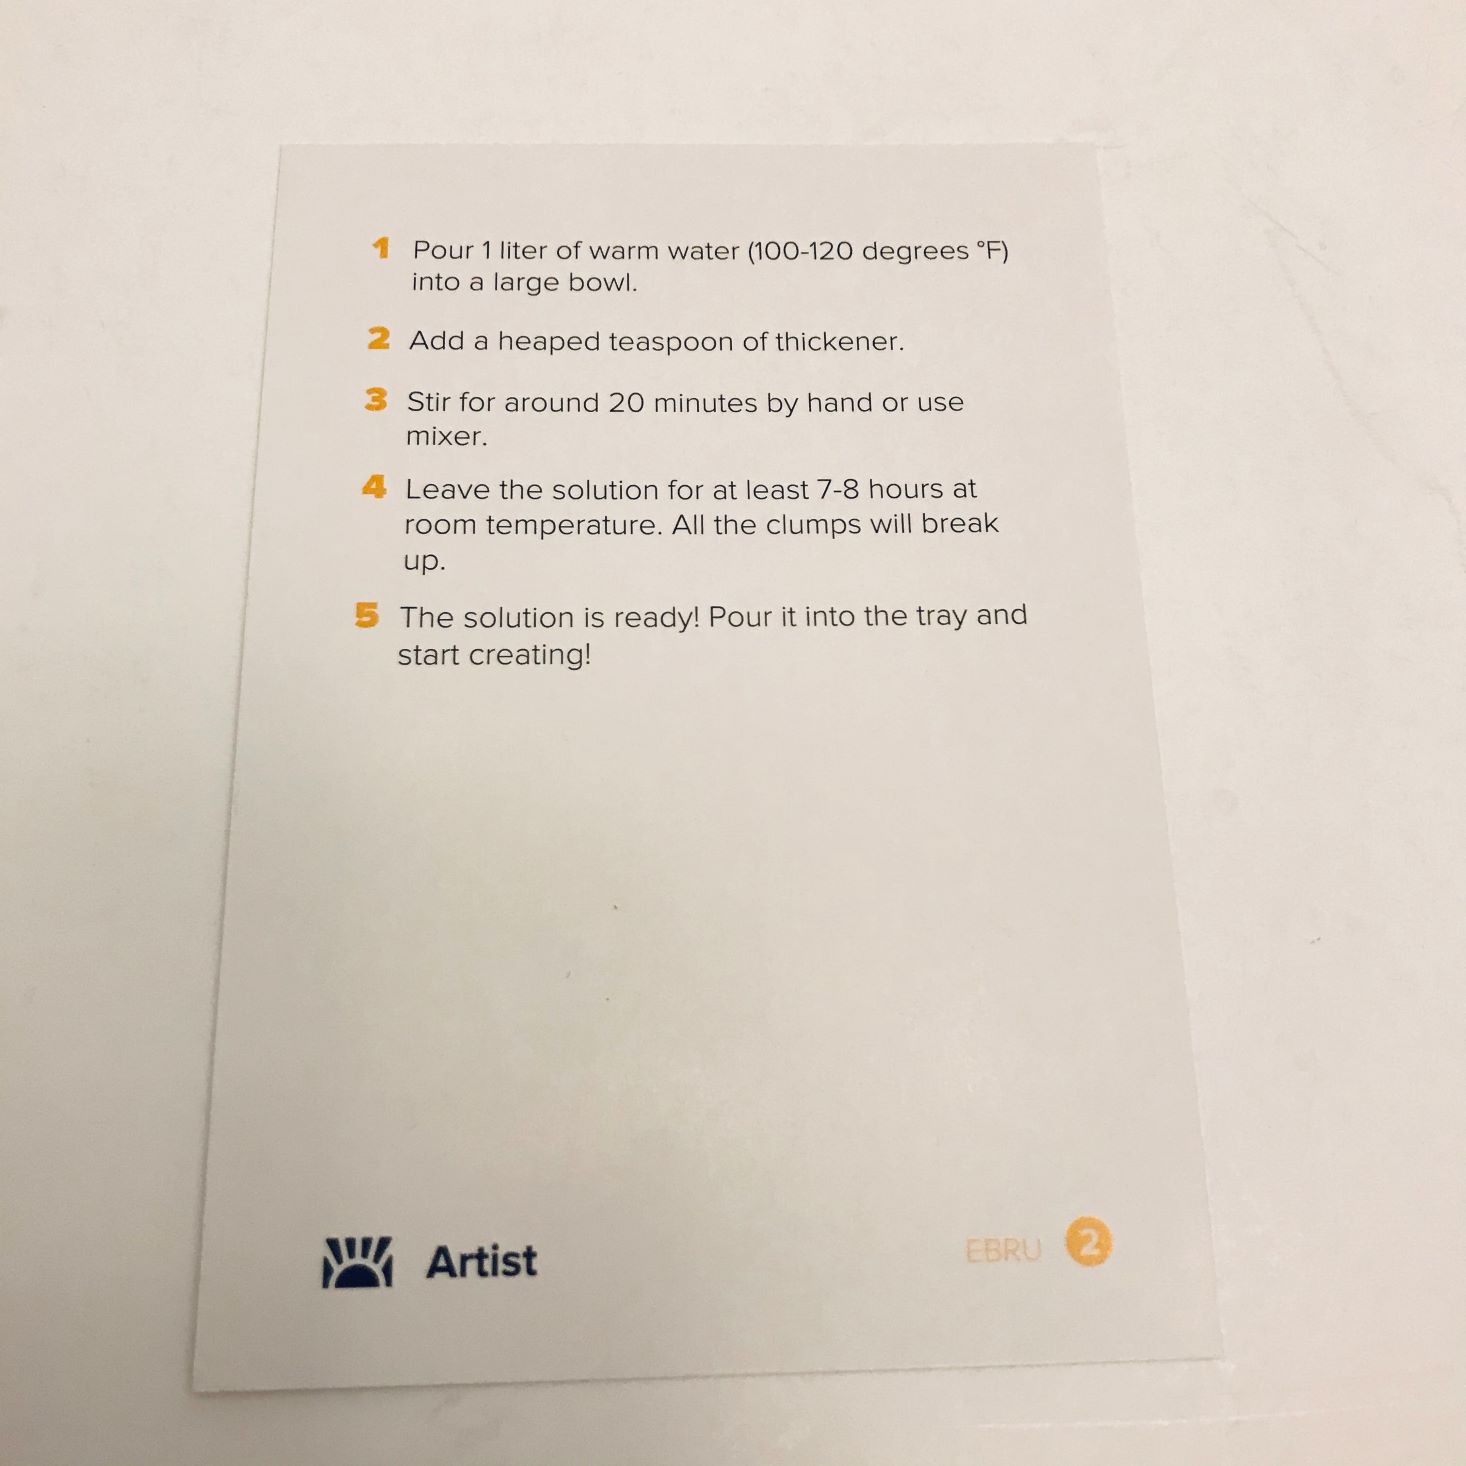
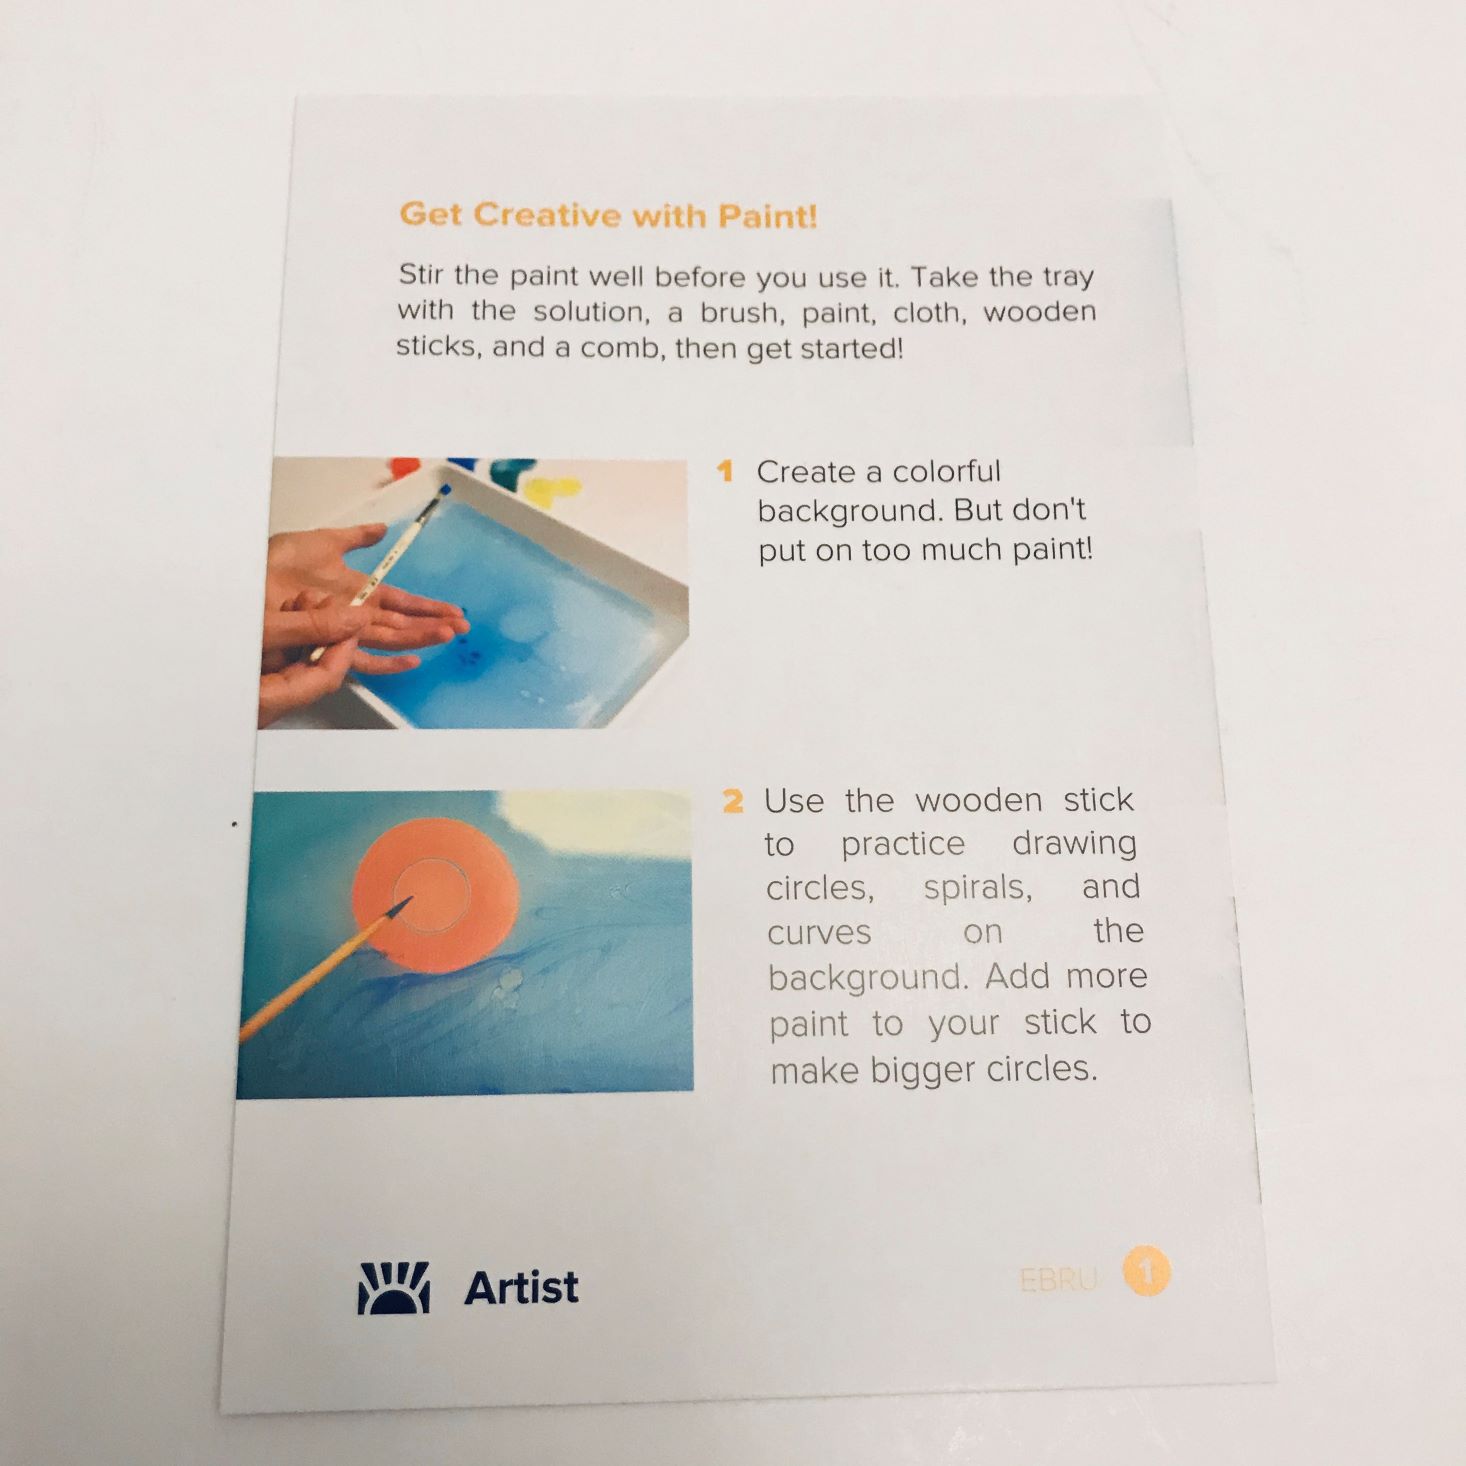
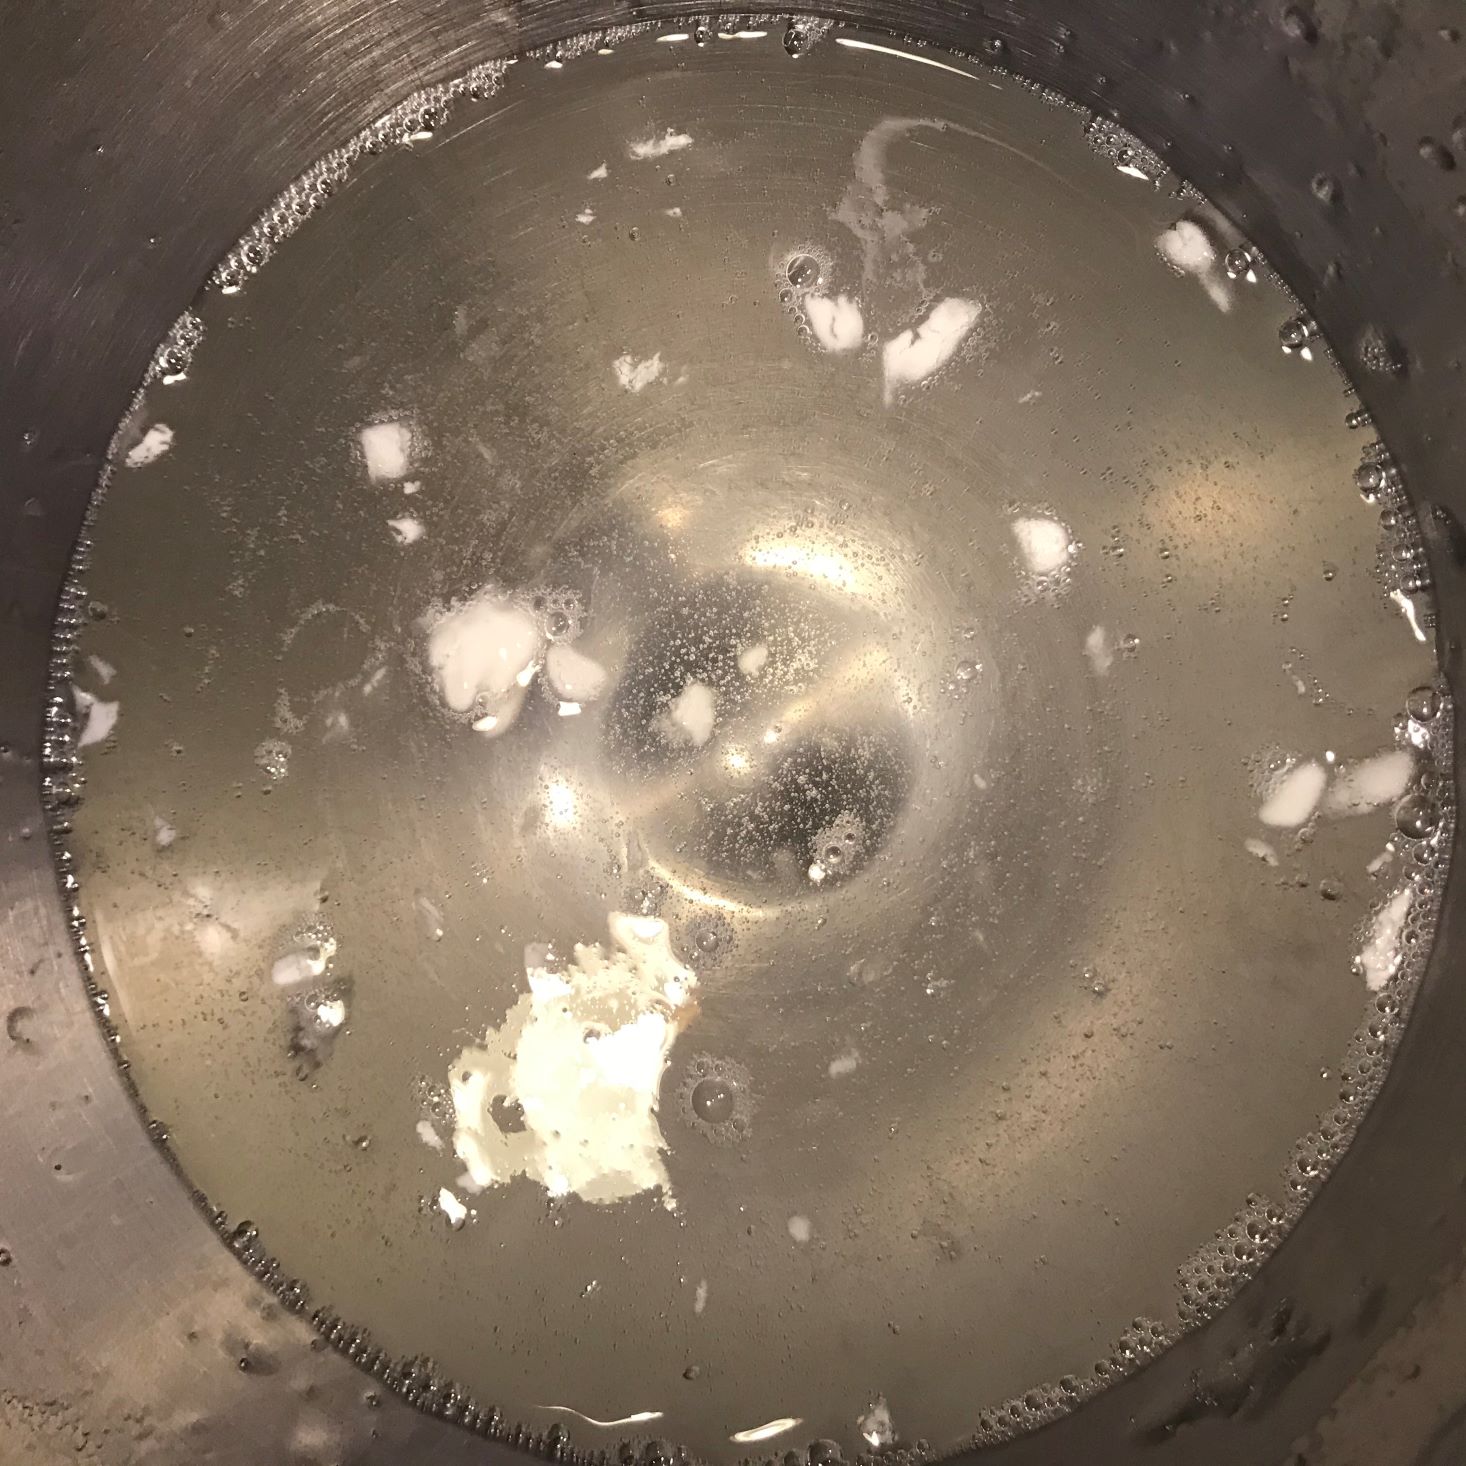
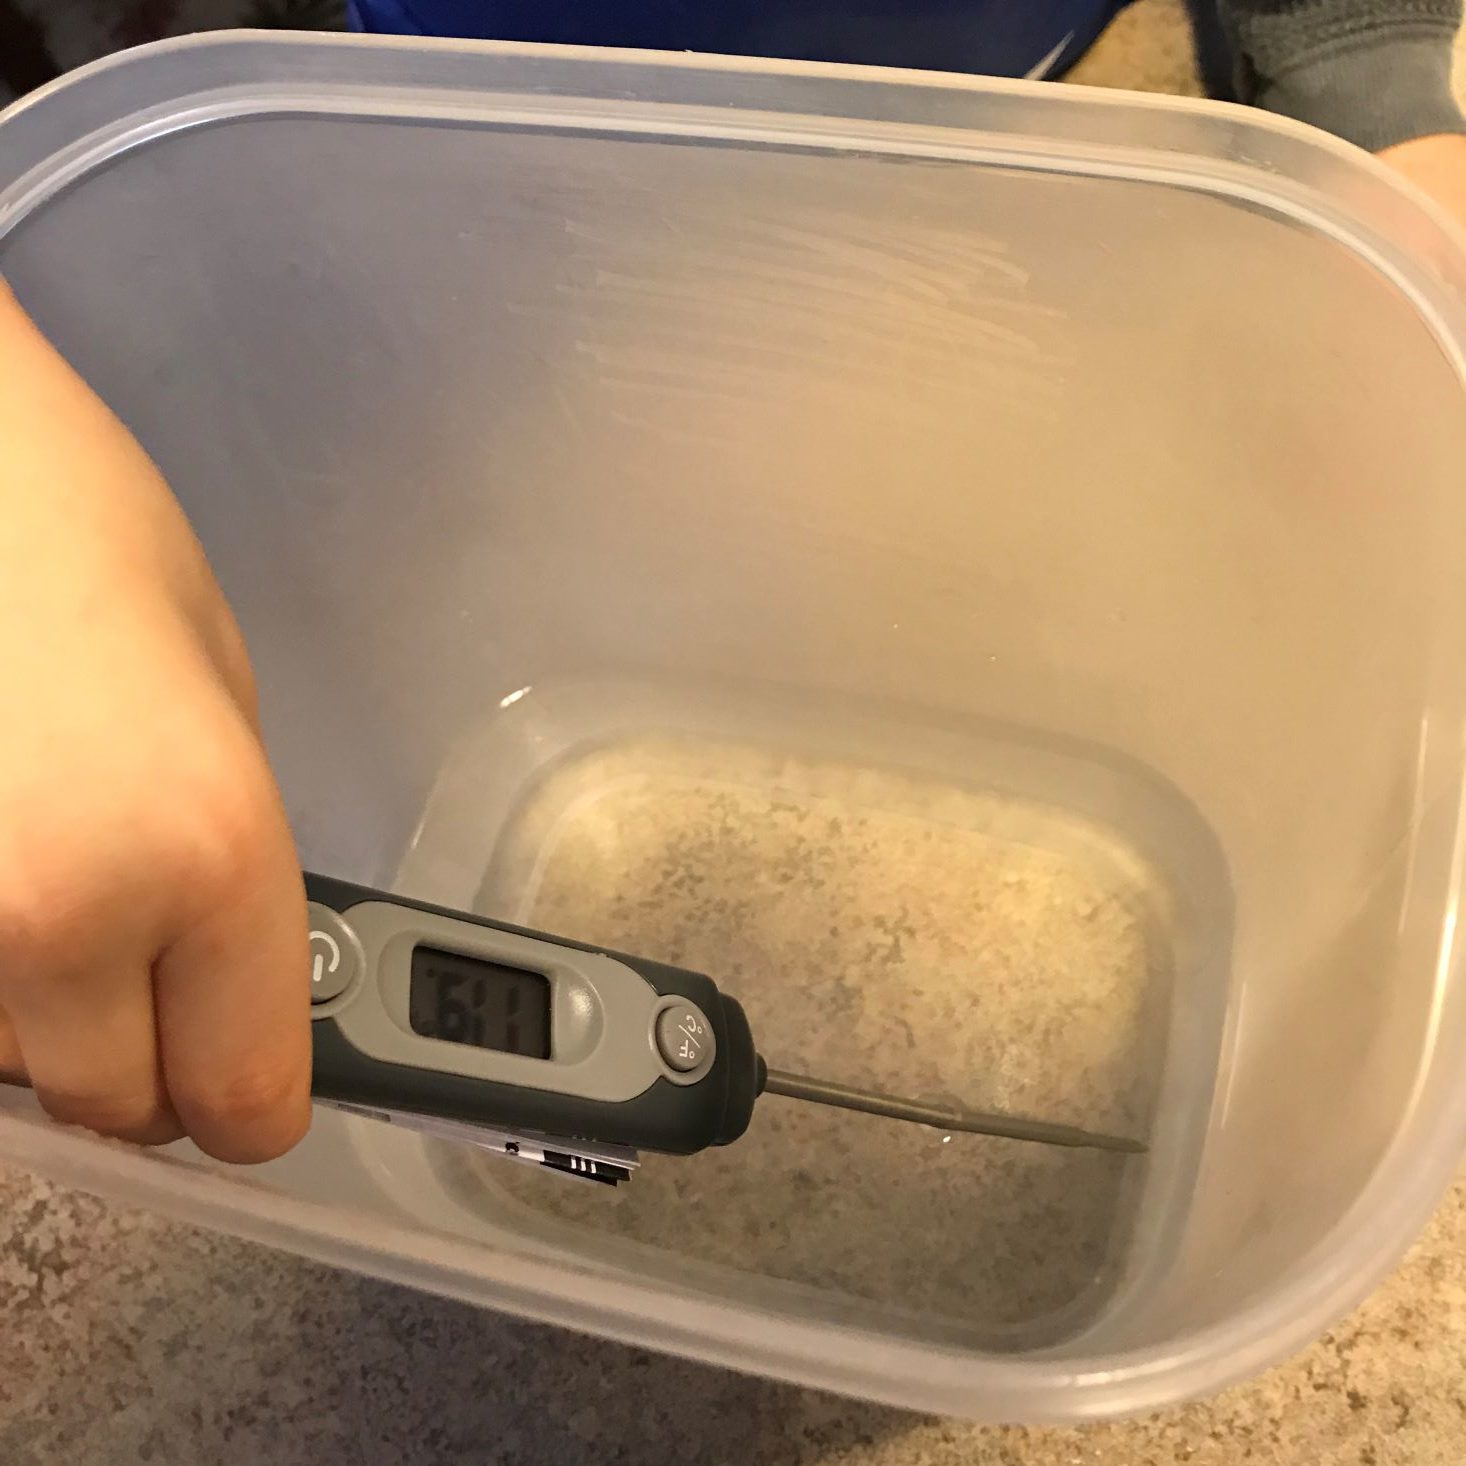
The first step in this entire process is to follow the direction card on how to create the Ebru solution. To make this solution you need the included tray and the included thickener. From home, you need a liter of water, a teaspoon, and I used a thermometer. First, you pour the 1 liter of warm water (100-120 degrees F) into a large bowl. Next, you add a heaped teaspoon of thickener, and stir for 20- yes I said 20- minutes. We used the mixer because there was no way my boys were going to be able to sit there for 20 minutes and mix. When the solution is done mixing, you are to let the solution sit at room temperature for 7-8 hours for all the clumps to break up. The solution is then ready. You pour it into the tray and start creating.

1 of 4
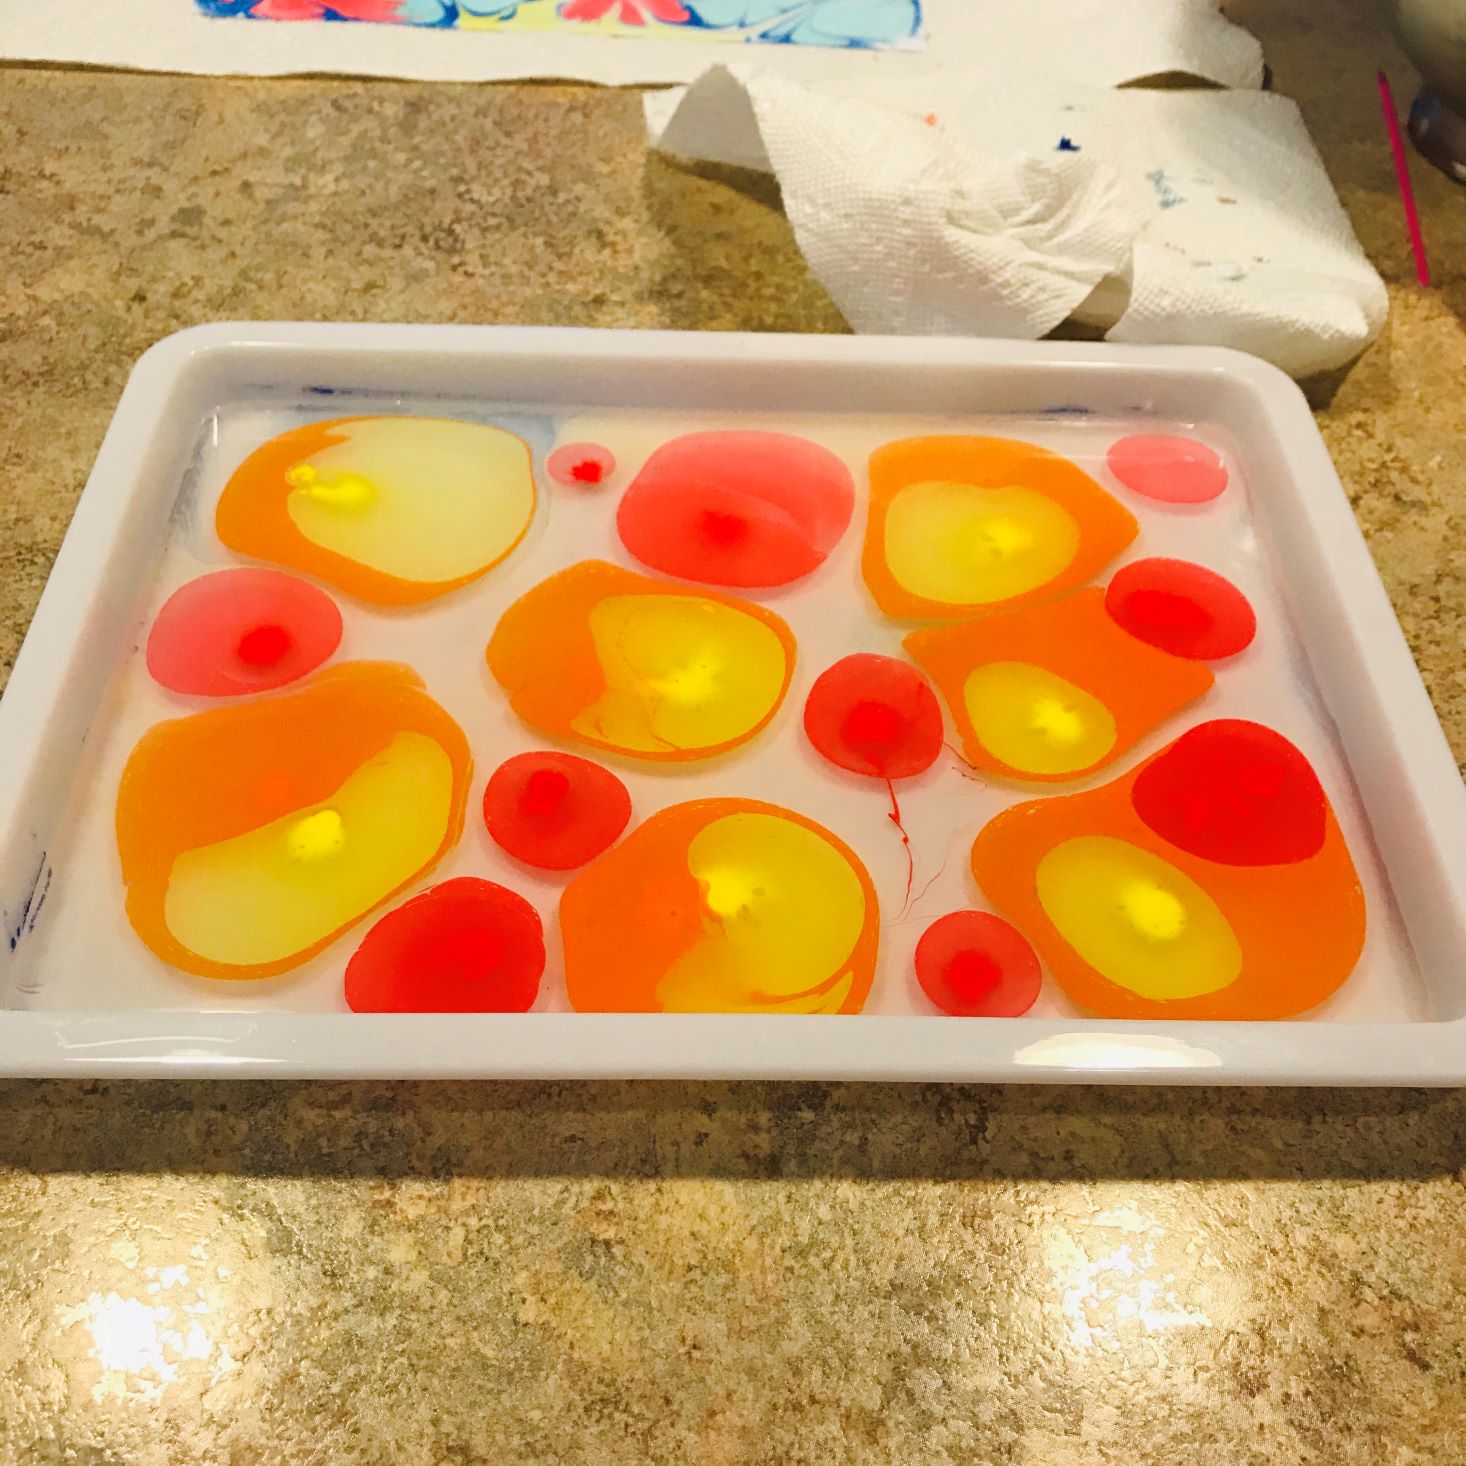
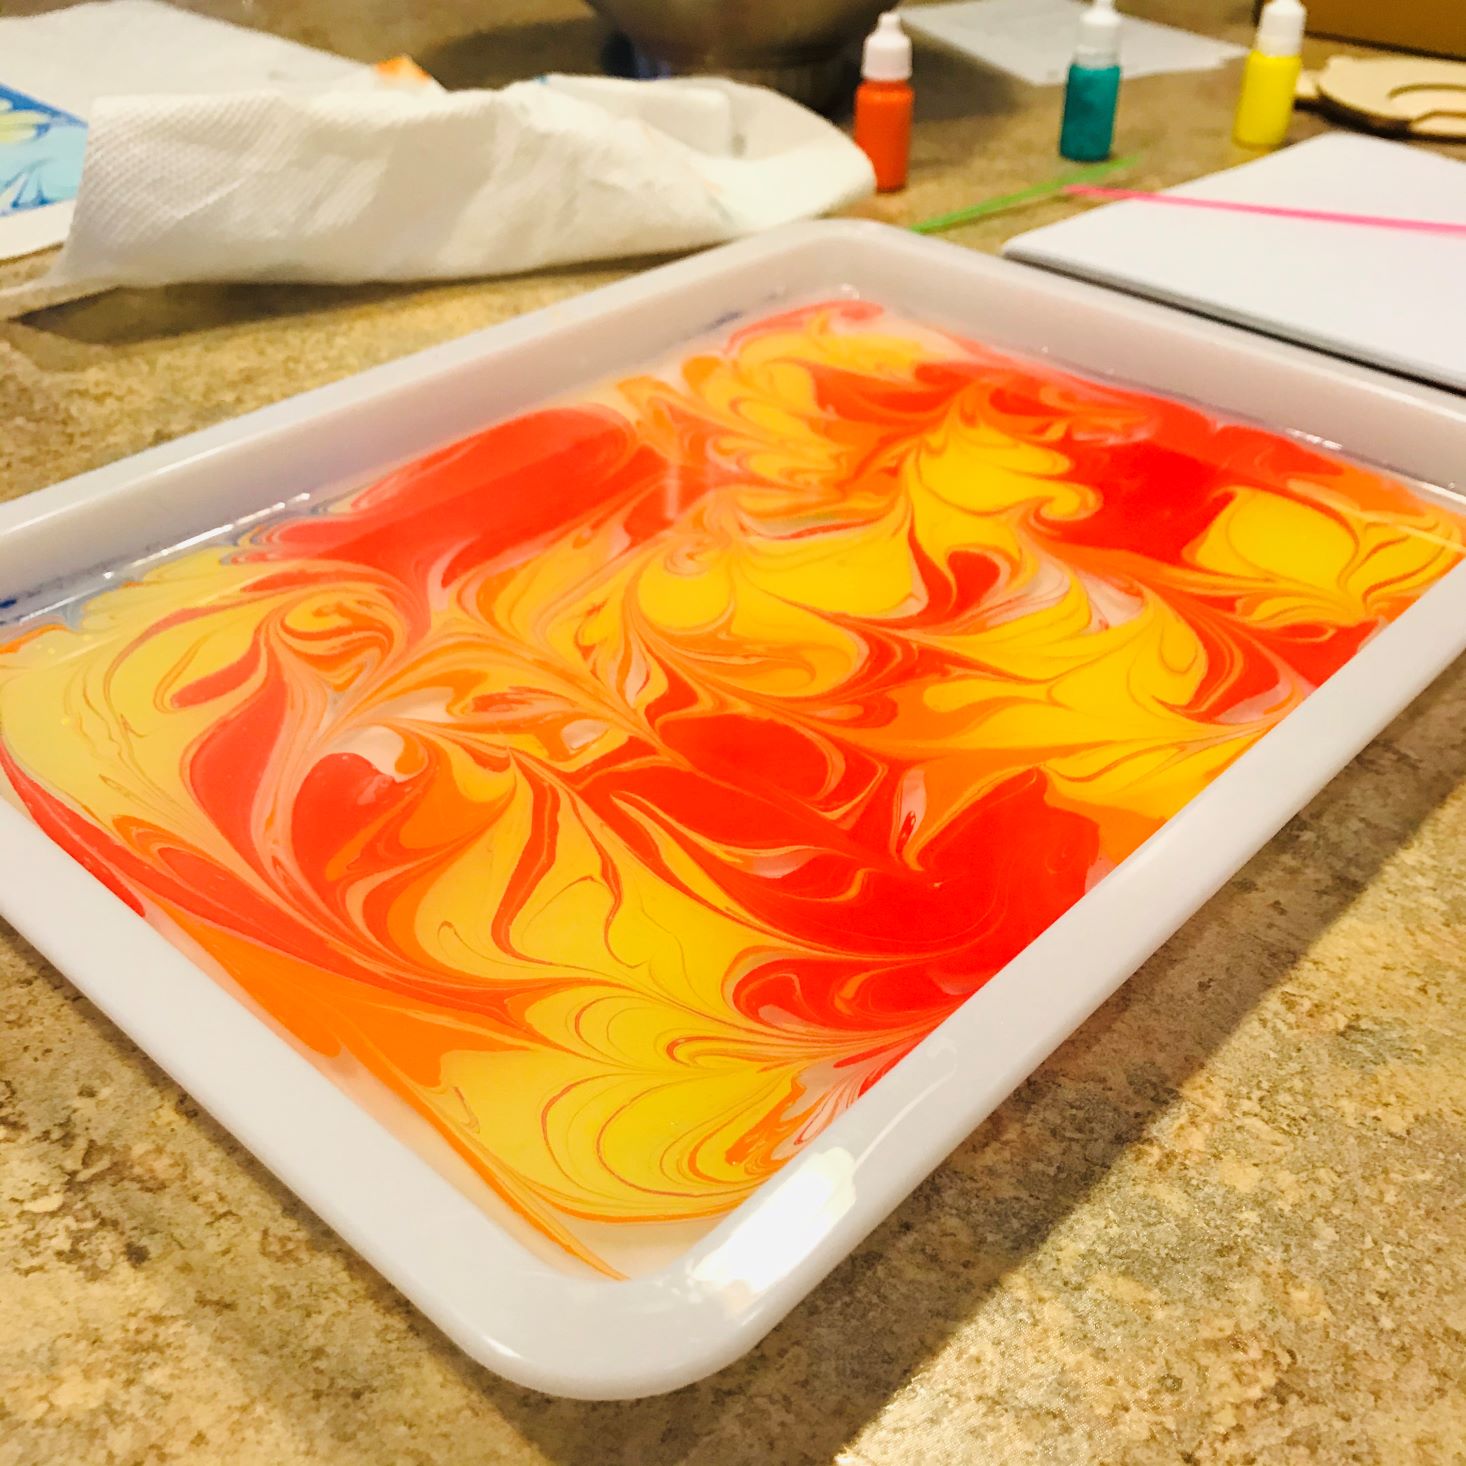
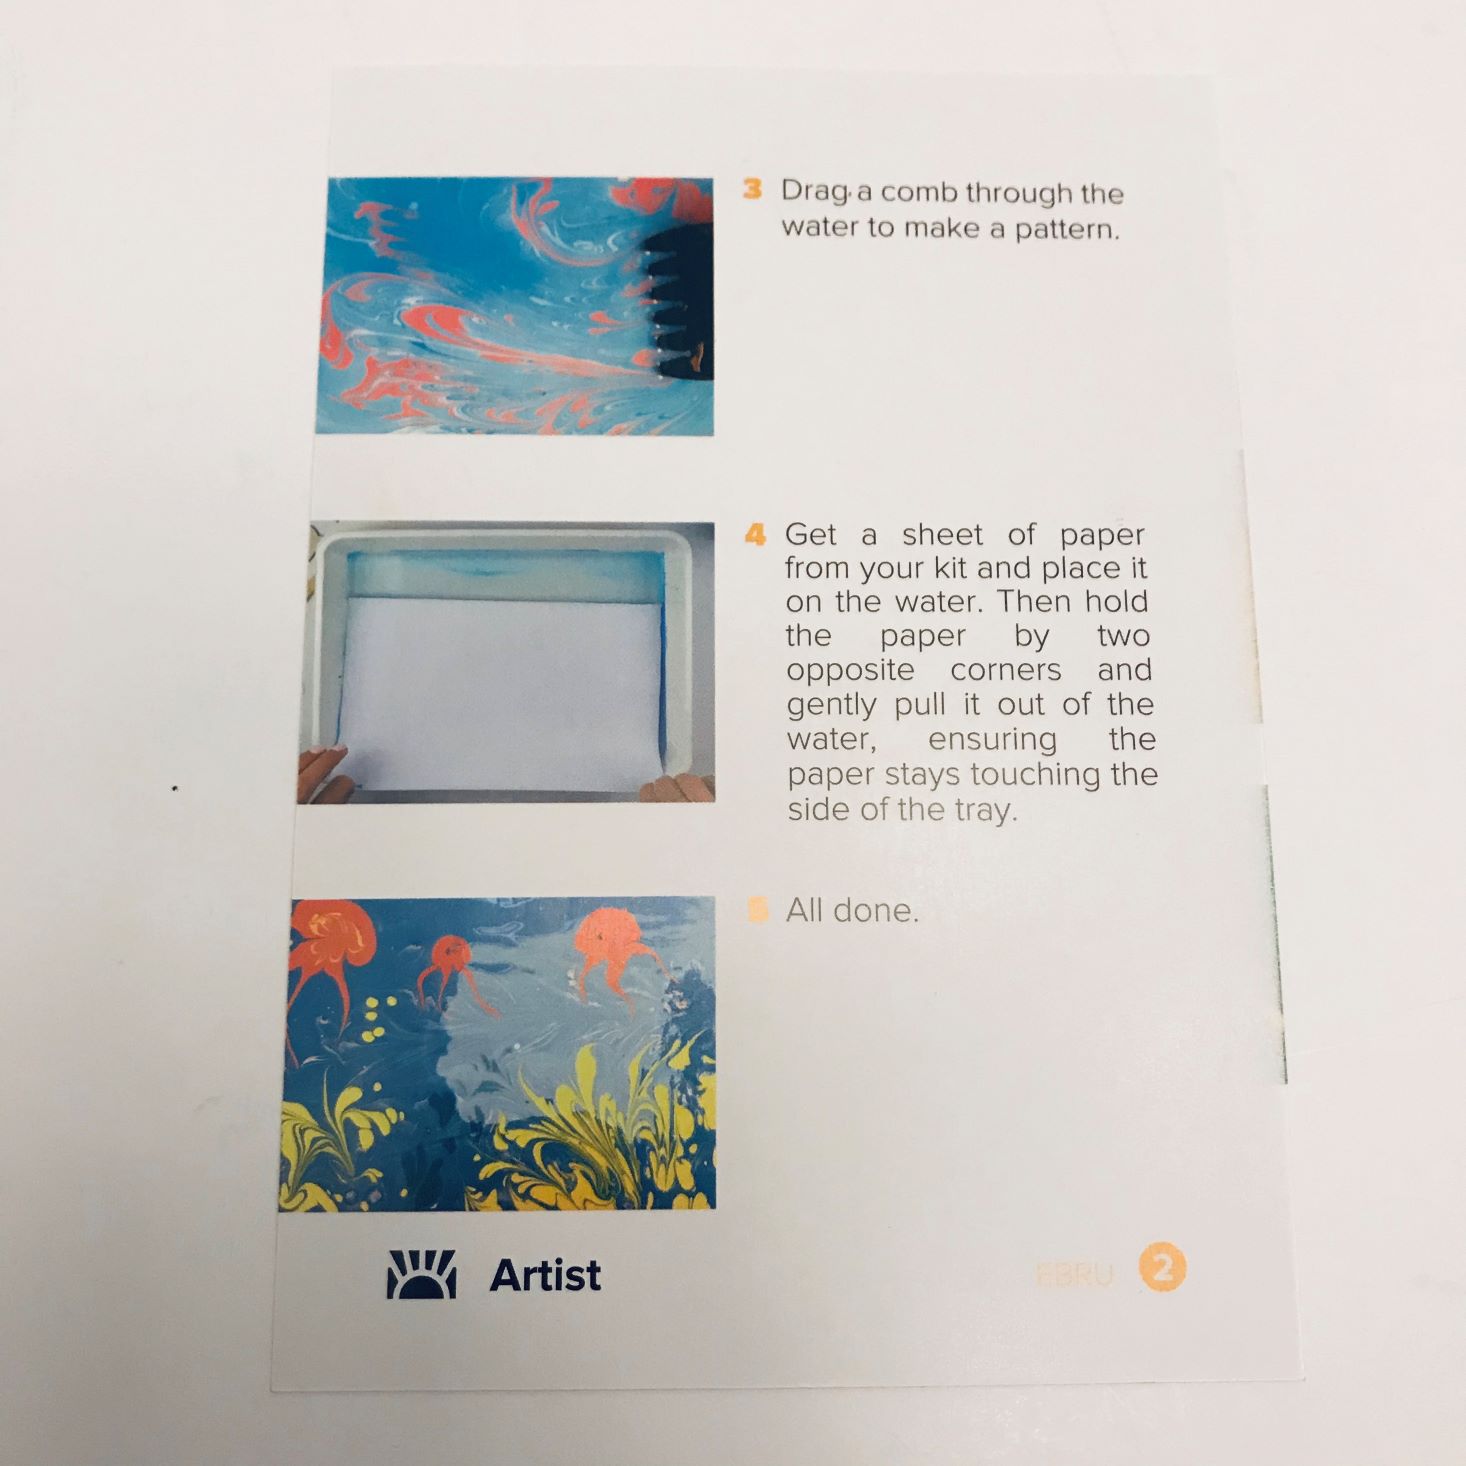
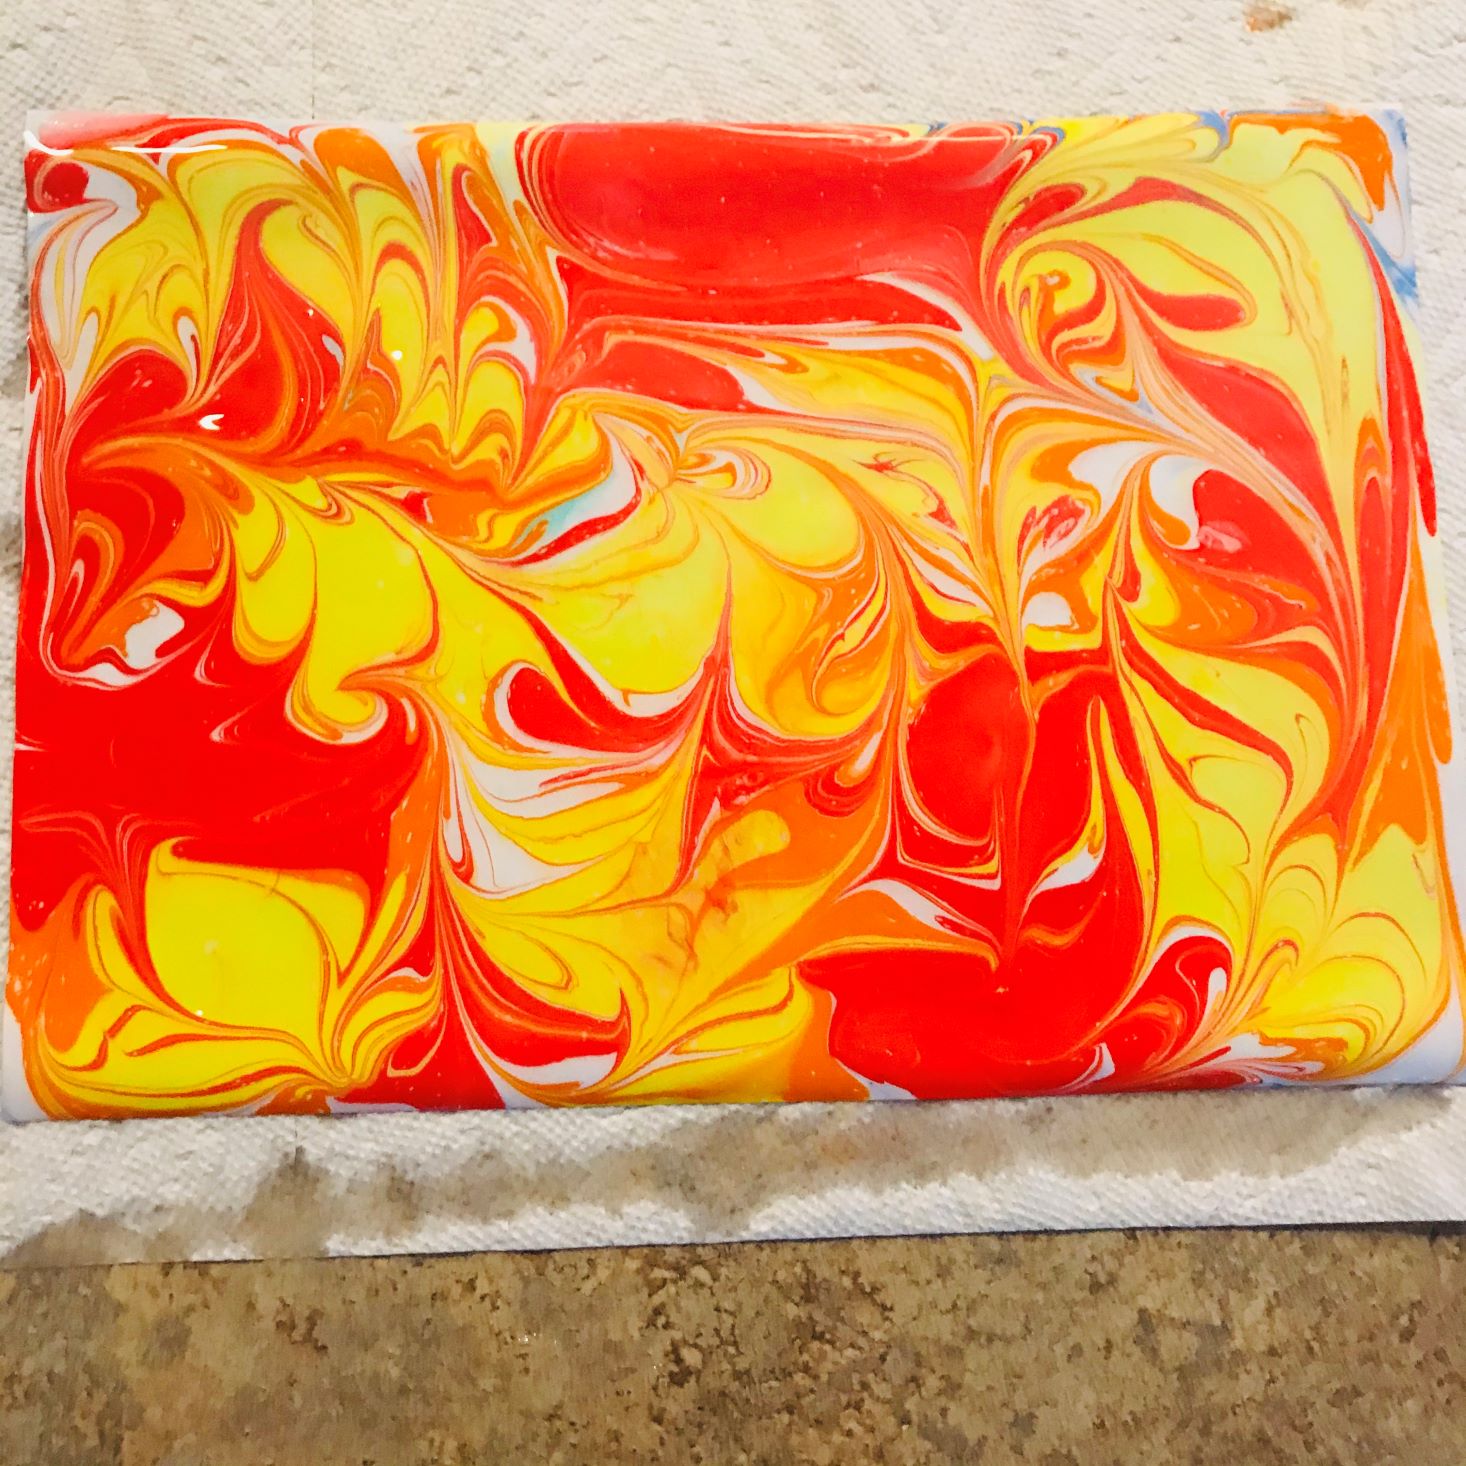
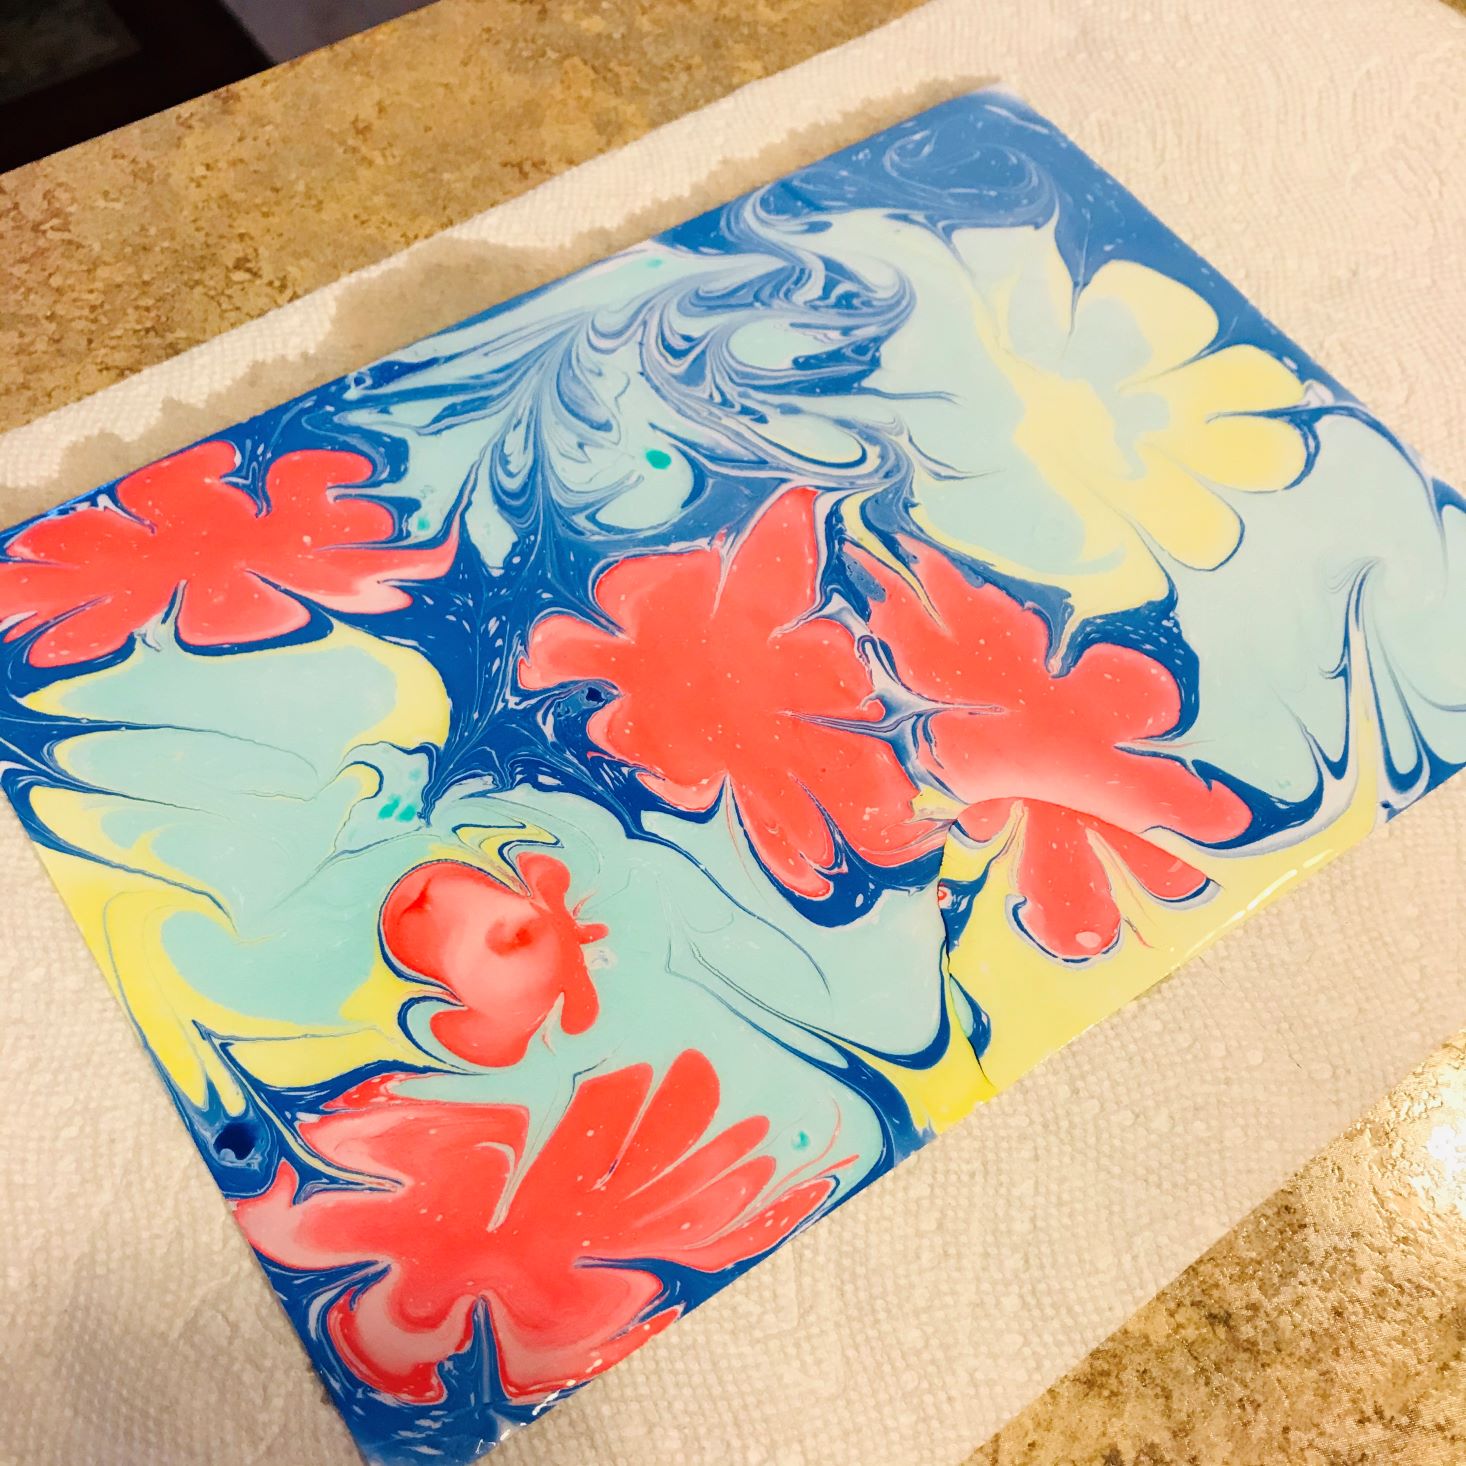
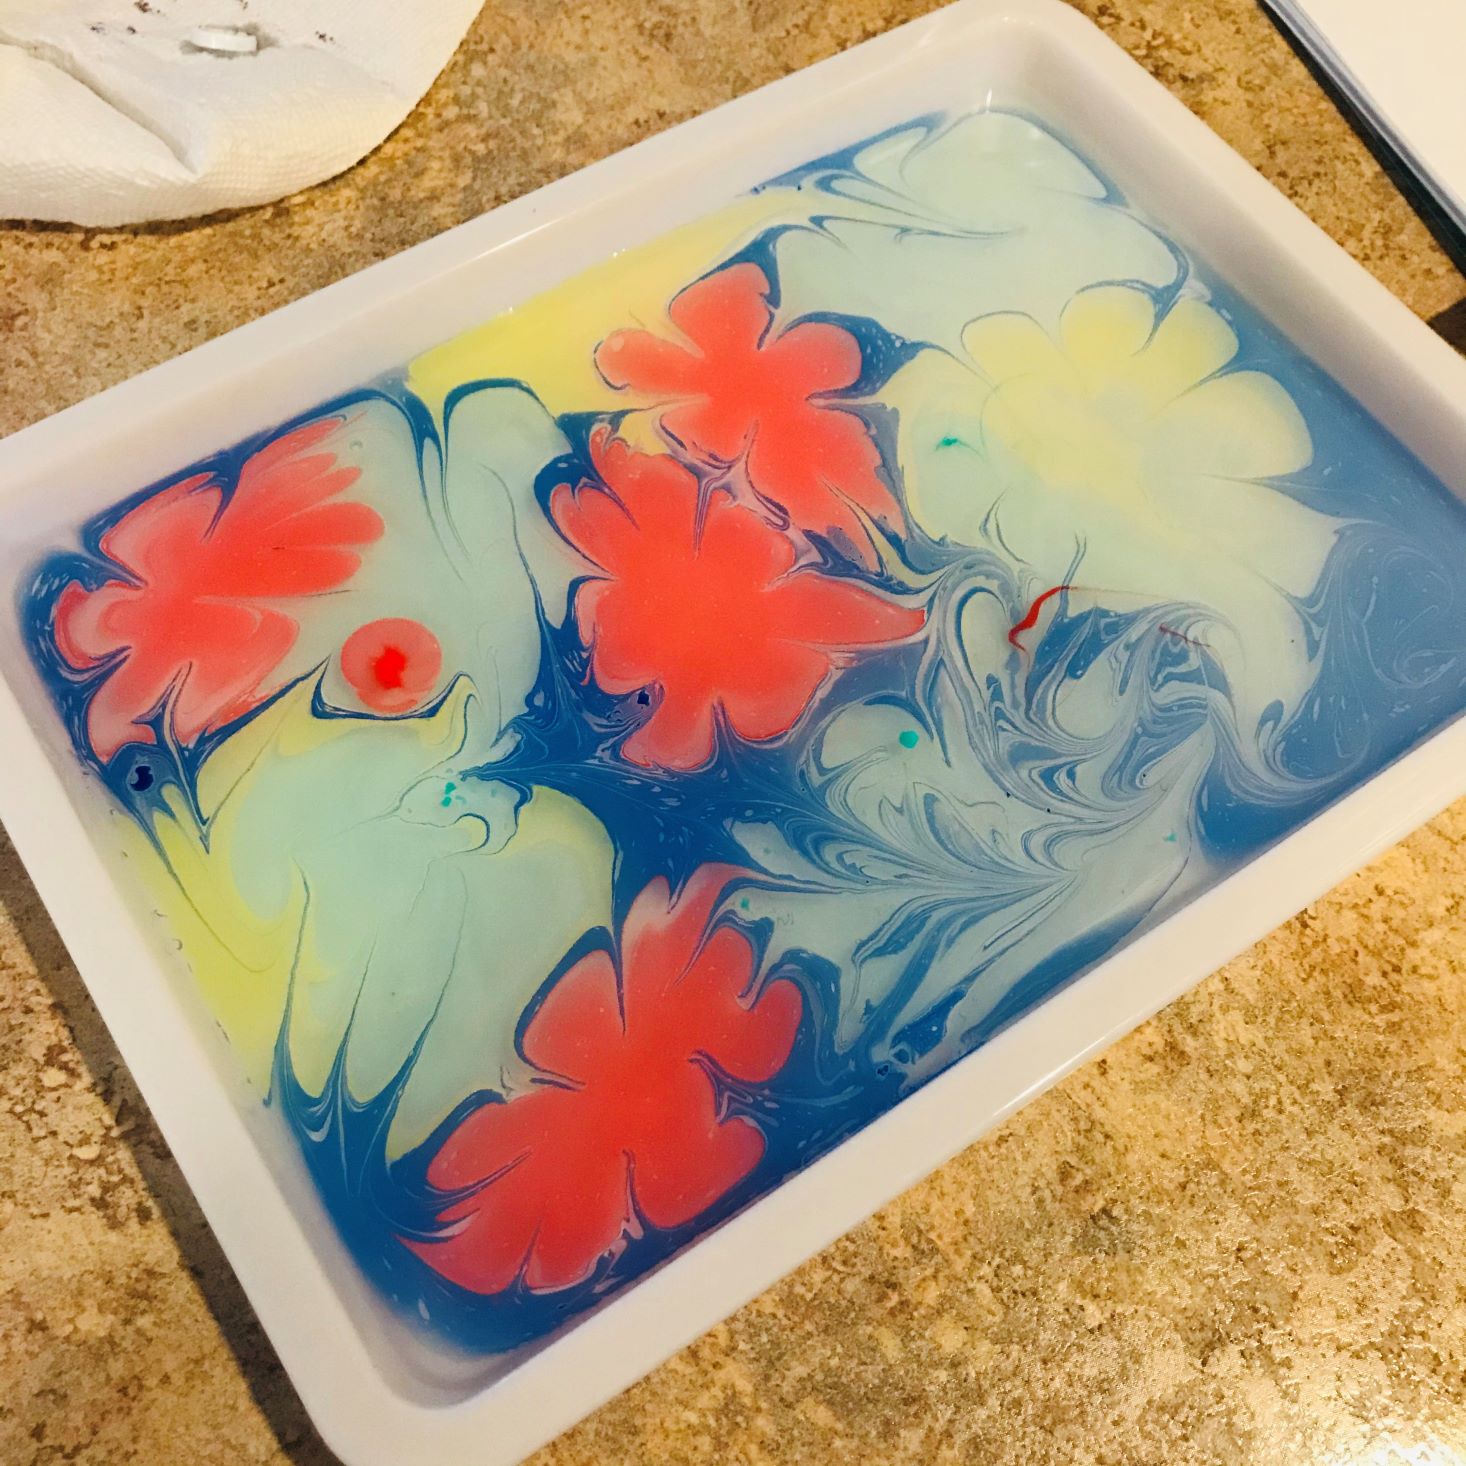
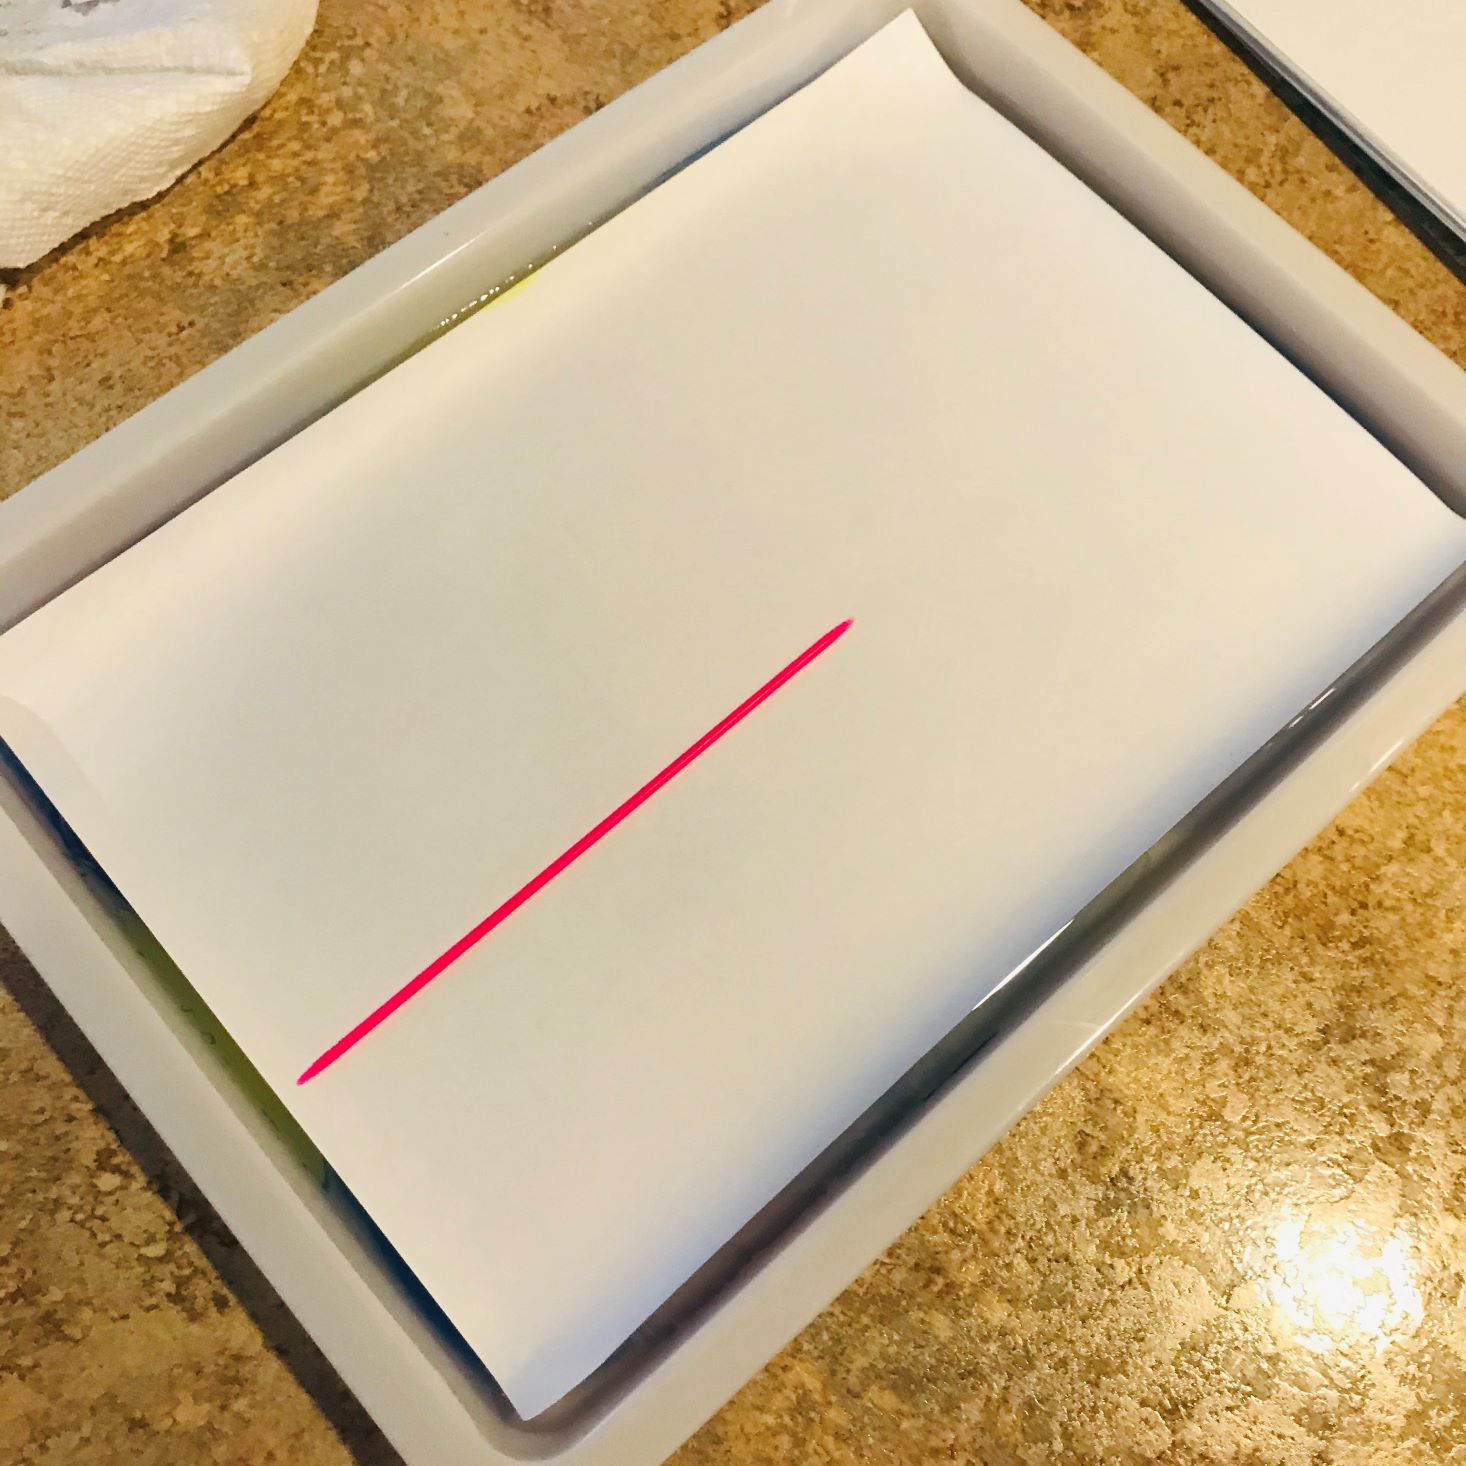
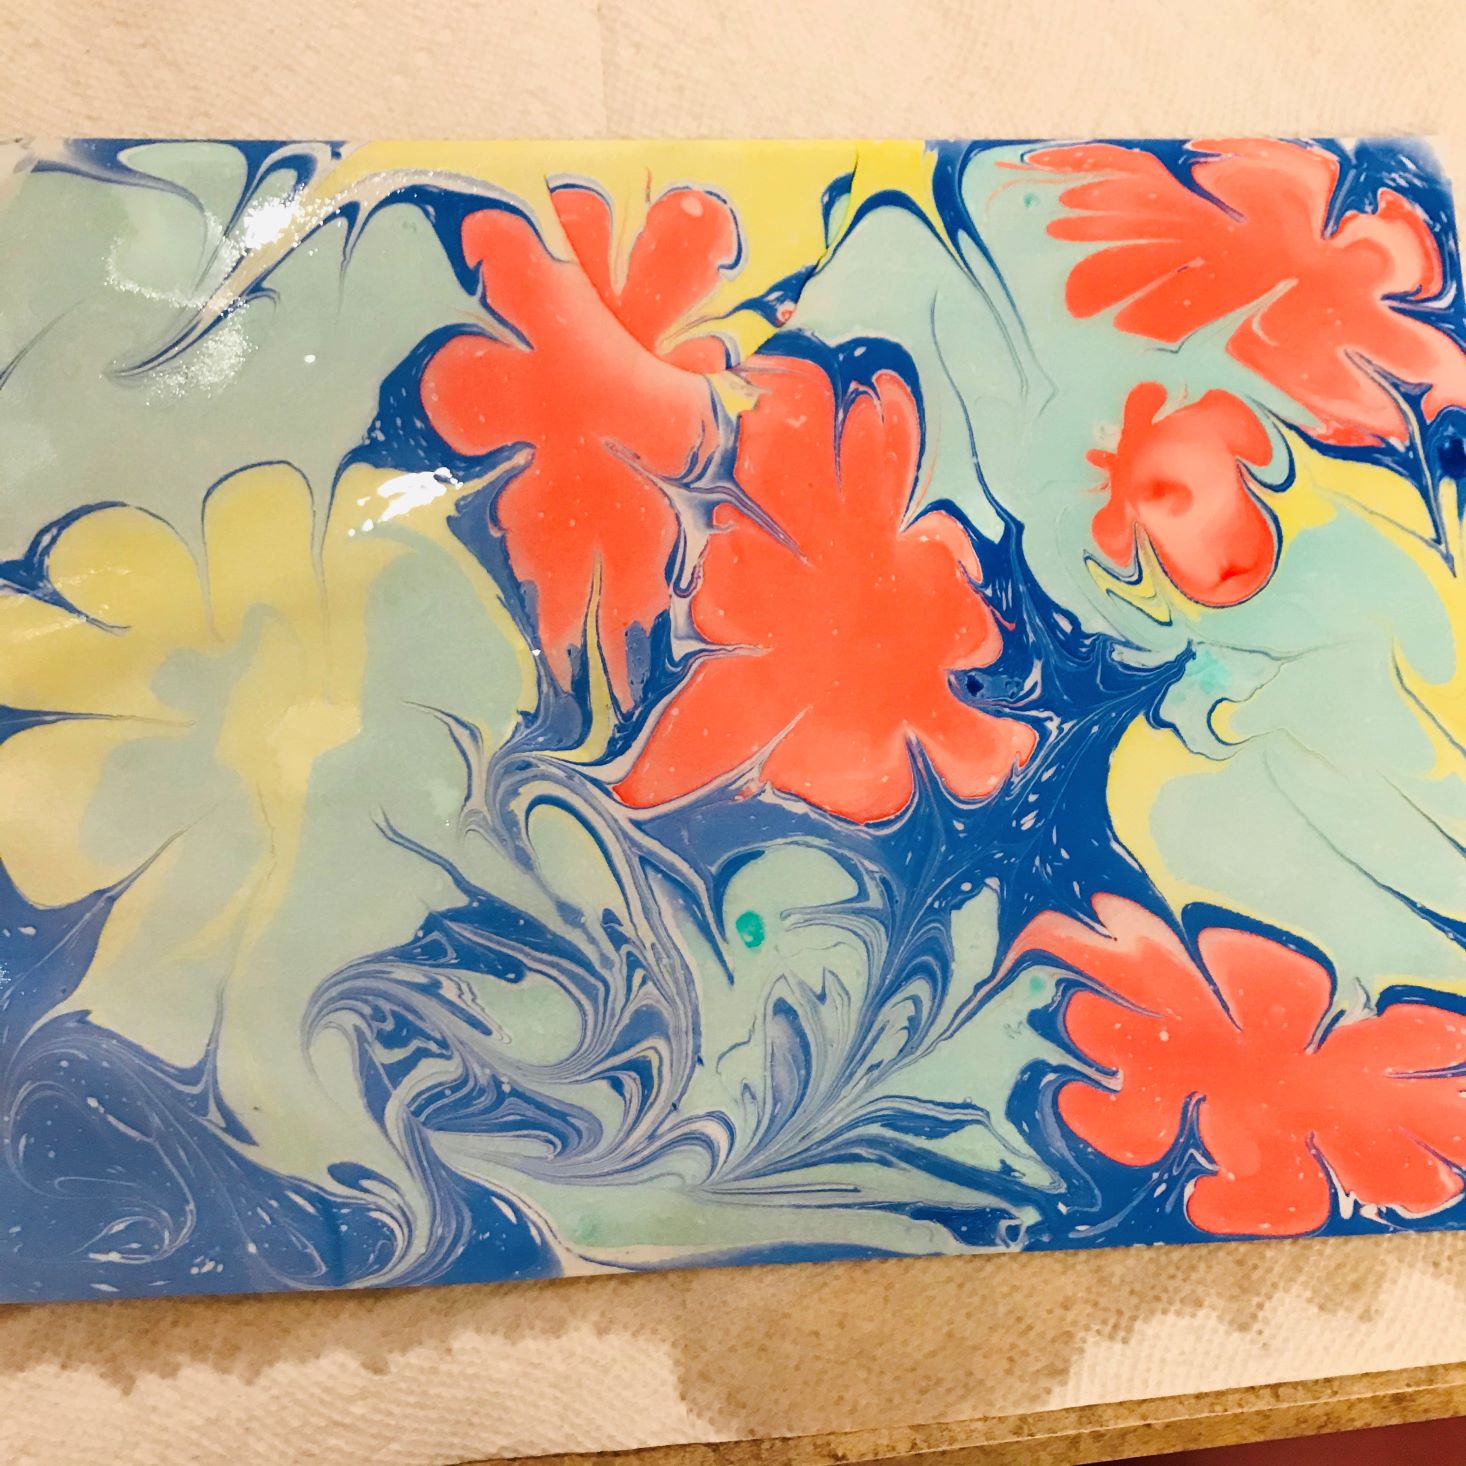
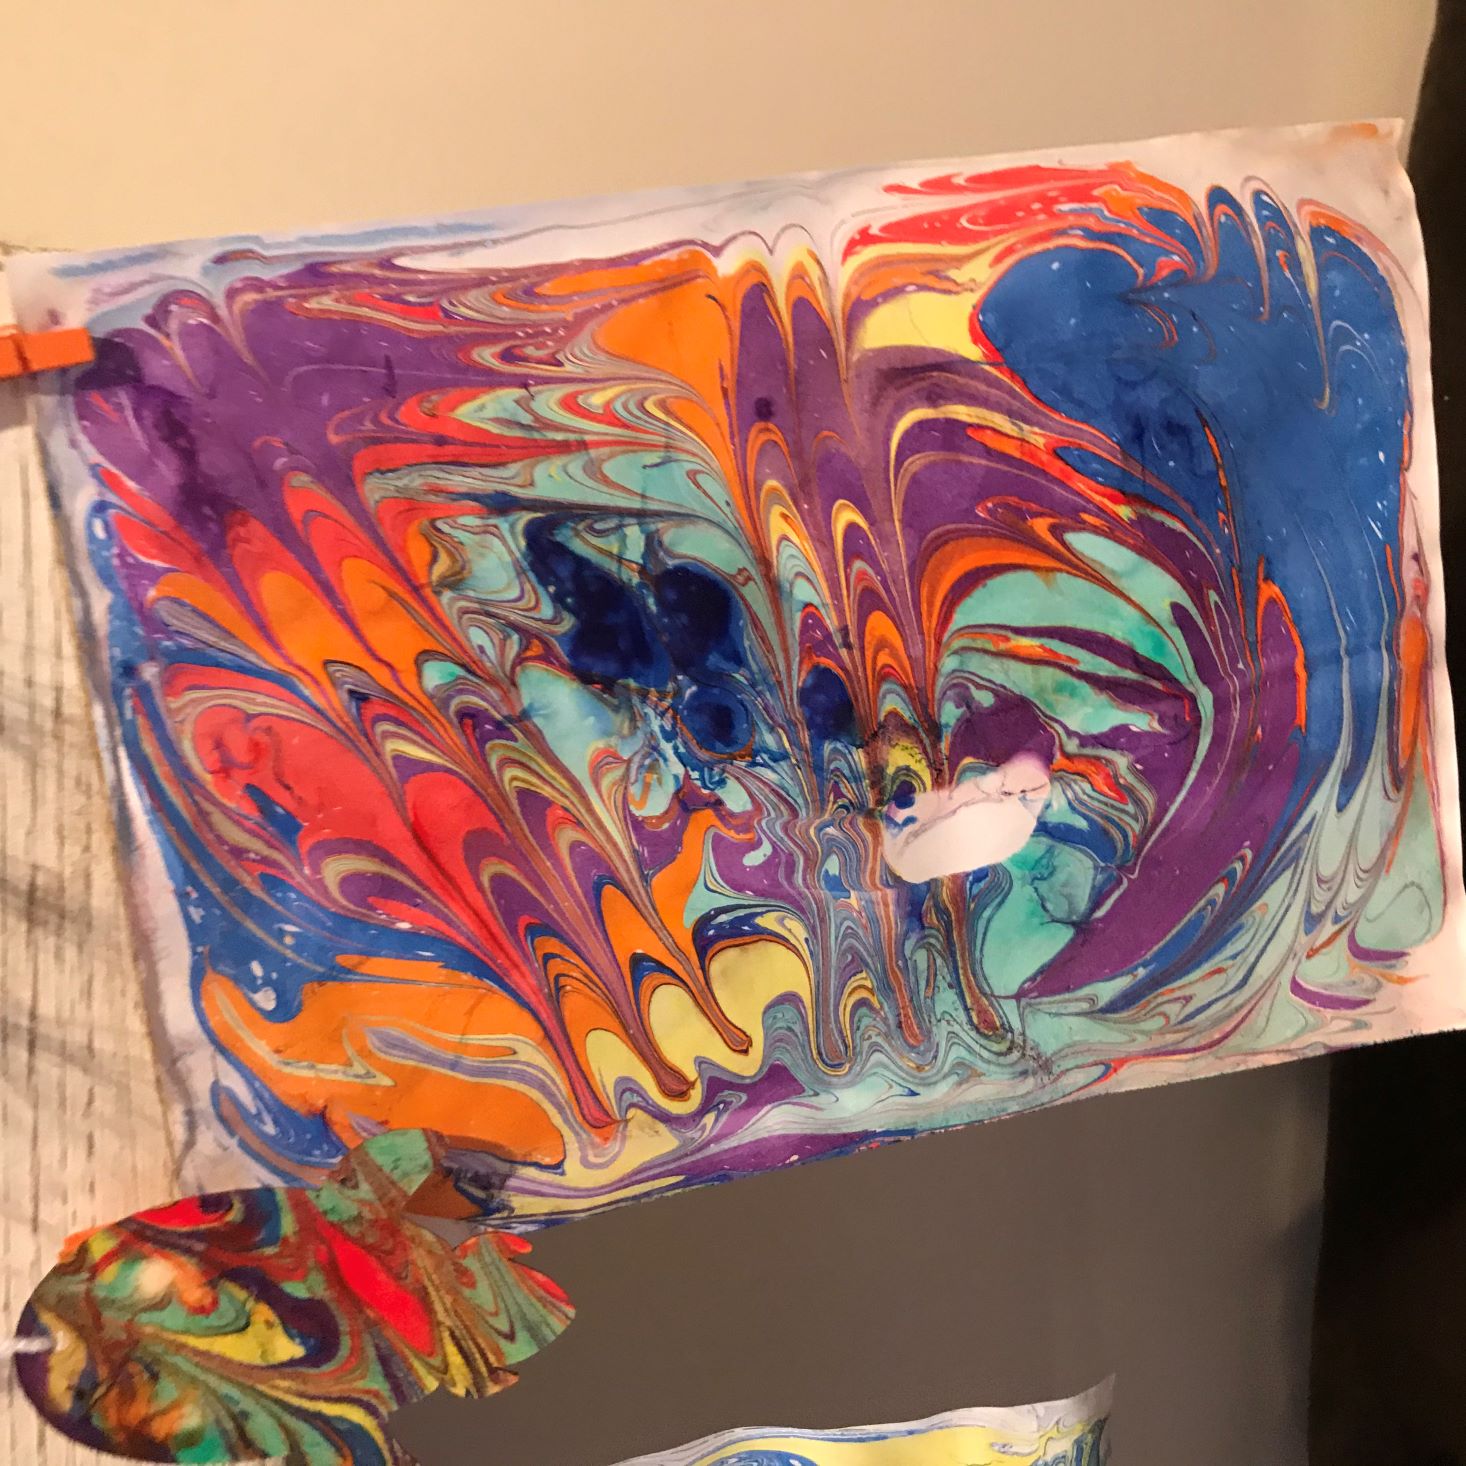
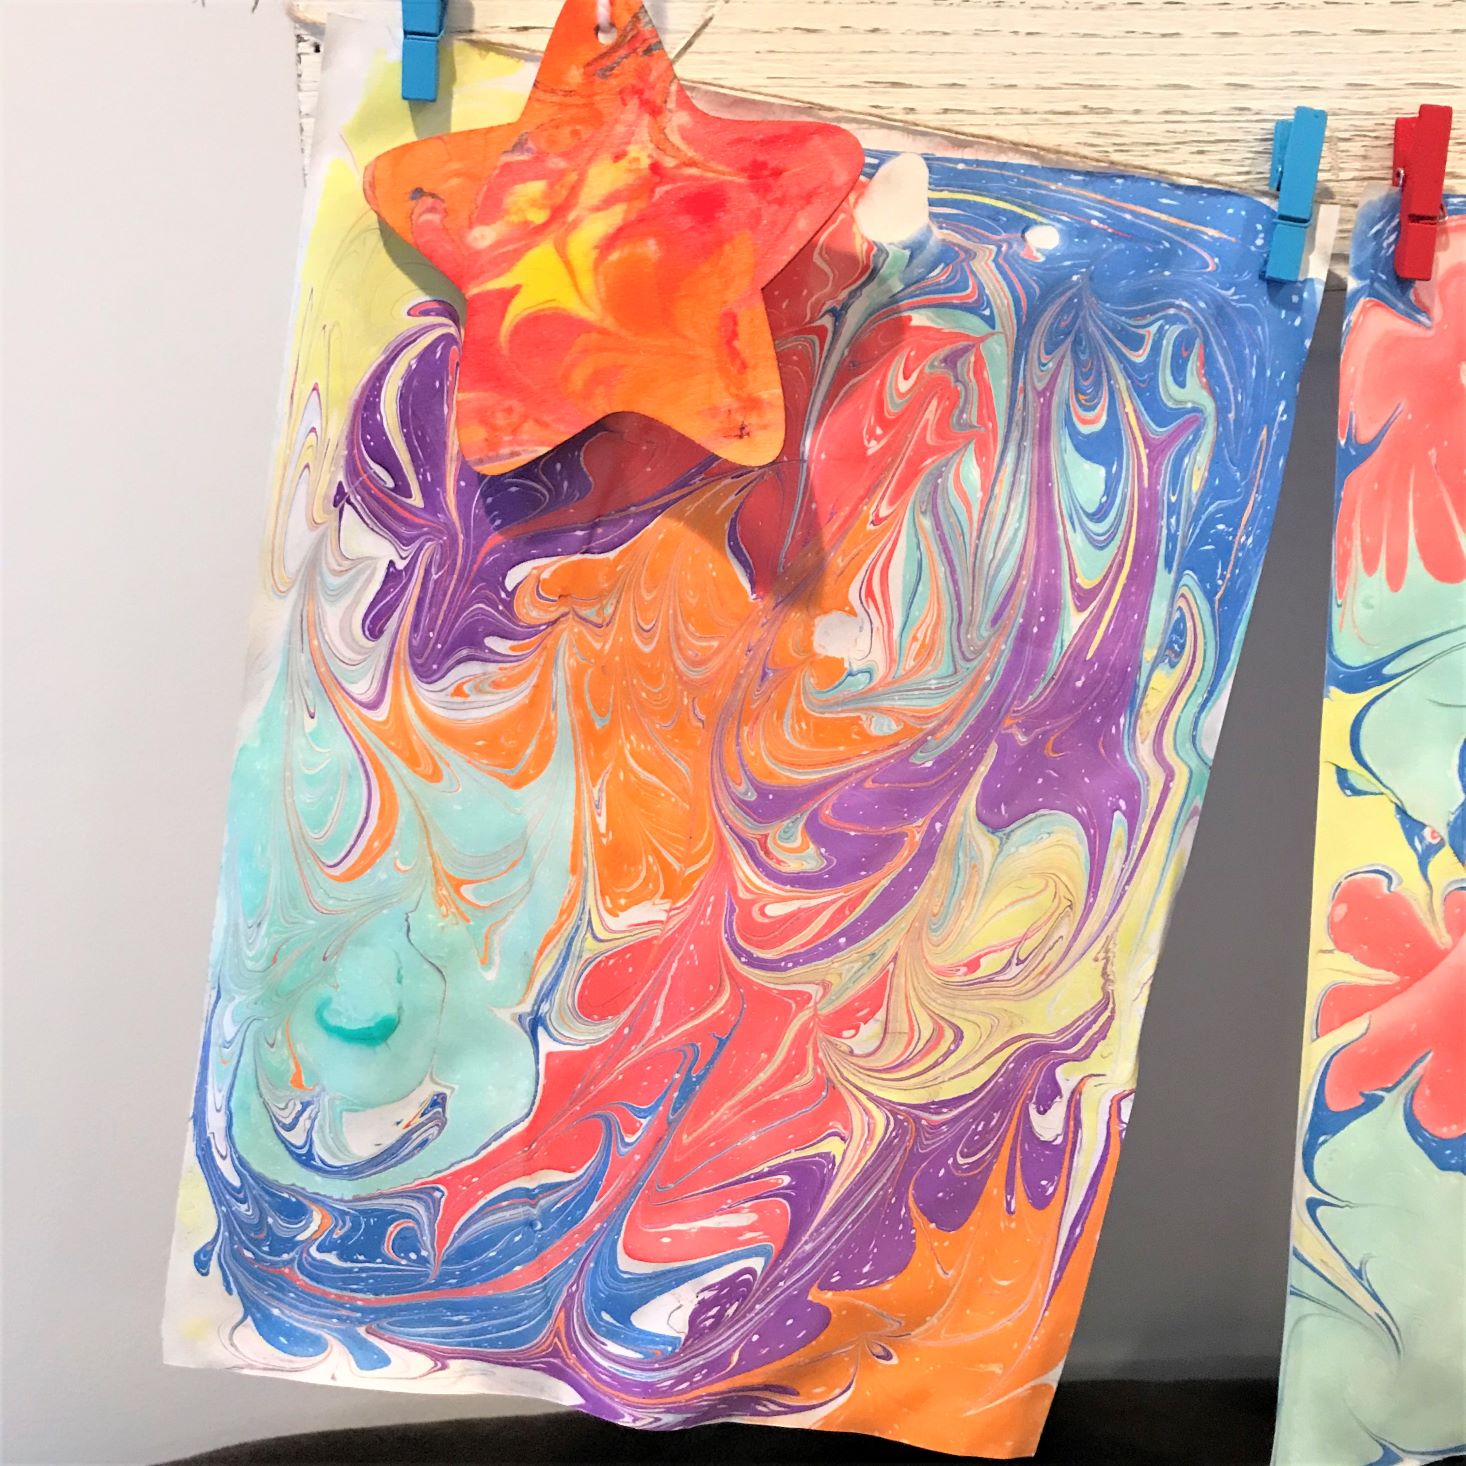
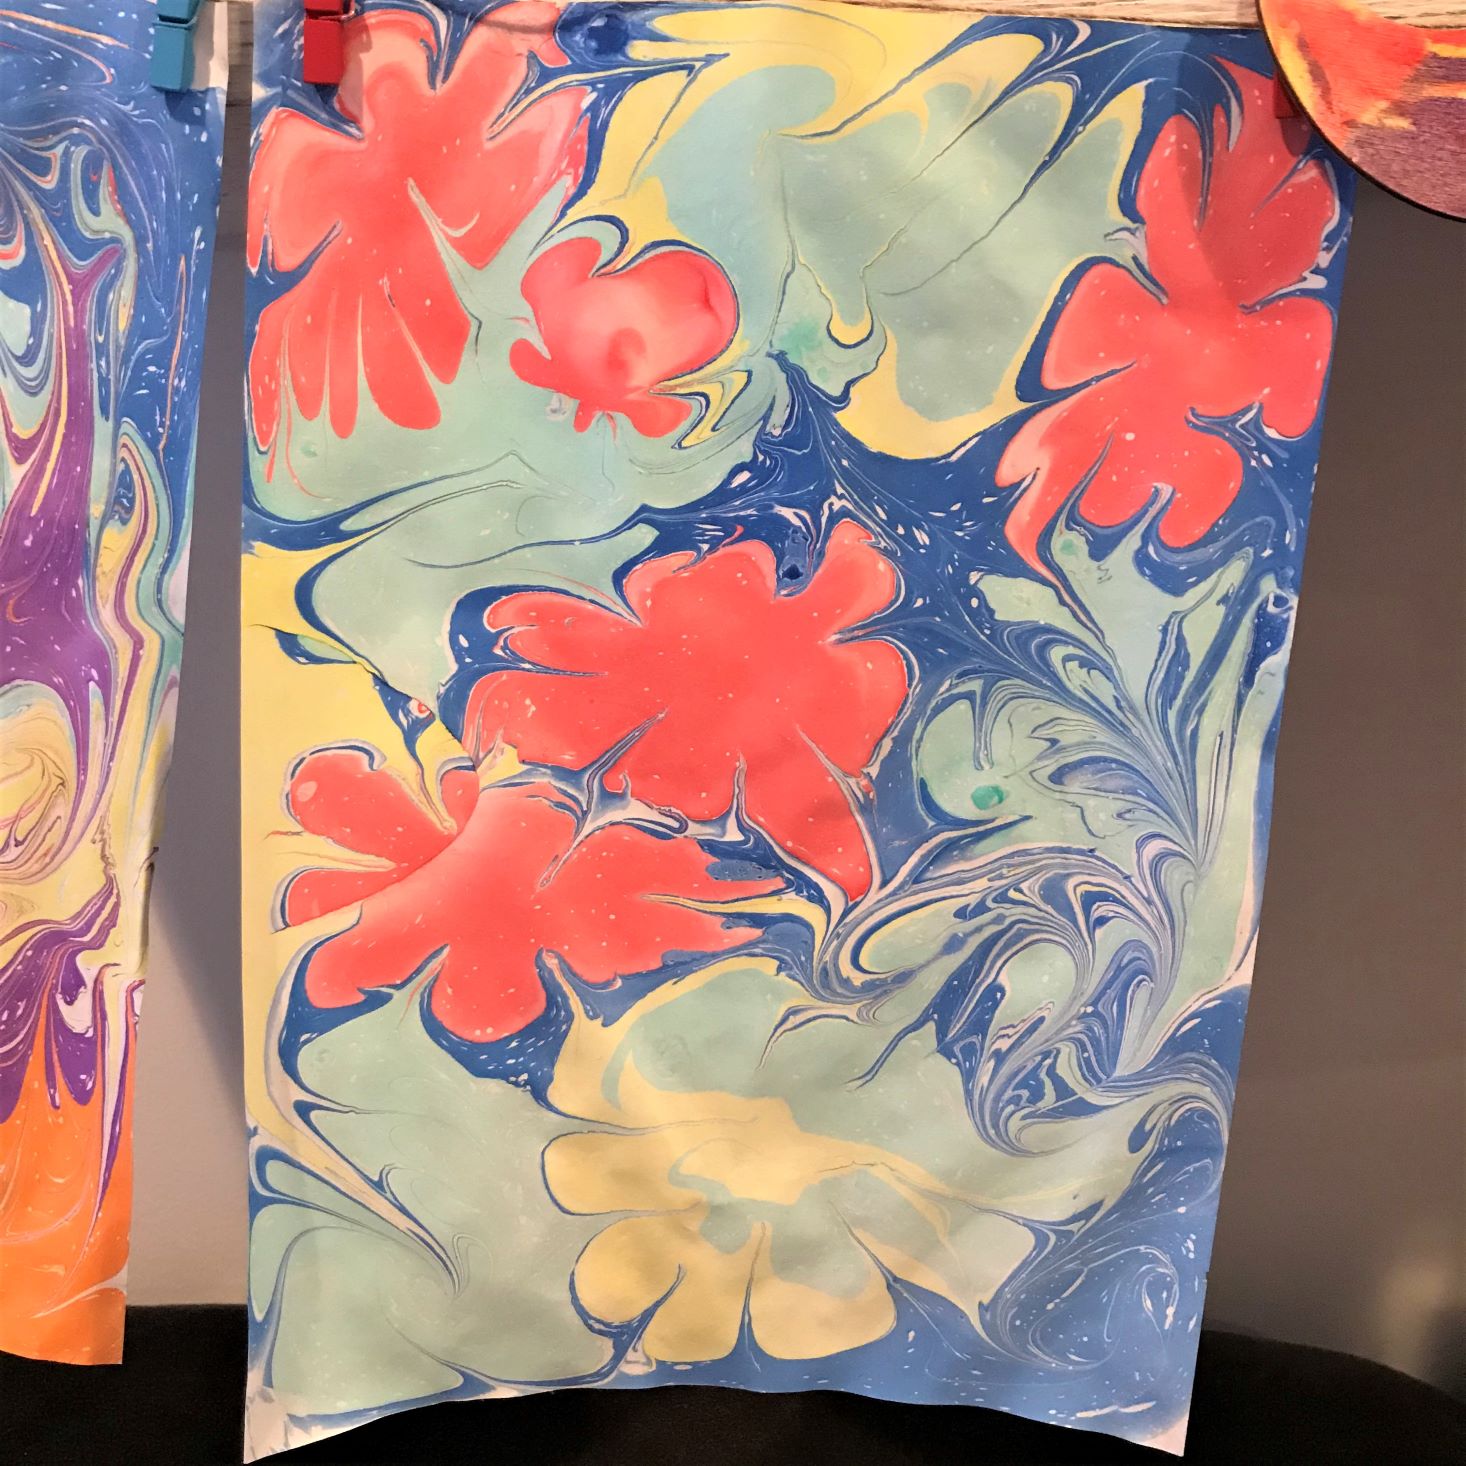
After impatiently waiting the 7 hours to pour the Ebru solution into our tray, we finally got to the fun part! The direction card stated to carefully drop paint into the solution (not using too thick of a layer) and basically swirl it around however you like with the included brush and sticks. I found the directions to be a little bit lacking, so I pulled up the video that is linked to the QR code for a quick tutorial. I then just started adding colors and playing around! Hank and Charlie really enjoyed mixing the colors and trying out the included tools. I had to assist so they didn't get too crazy, so I didn't get to take a lot of photos. Once we were satisfied with our pattern, we laid a white piece of paper over the top, rolled a pencil onto the paper to ensure no bubbles were underneath and lifted the paper up. To my surprise, ALL of the paint adhered to the paper, and the solution was left clear! We then set the saturated paper on a piece of paper towel to dry.
1 of 3
Here we used the stir stick to form flowers. My husband felt this particular piece had a definite '70s vibe, and I have to agree!
1 of 6

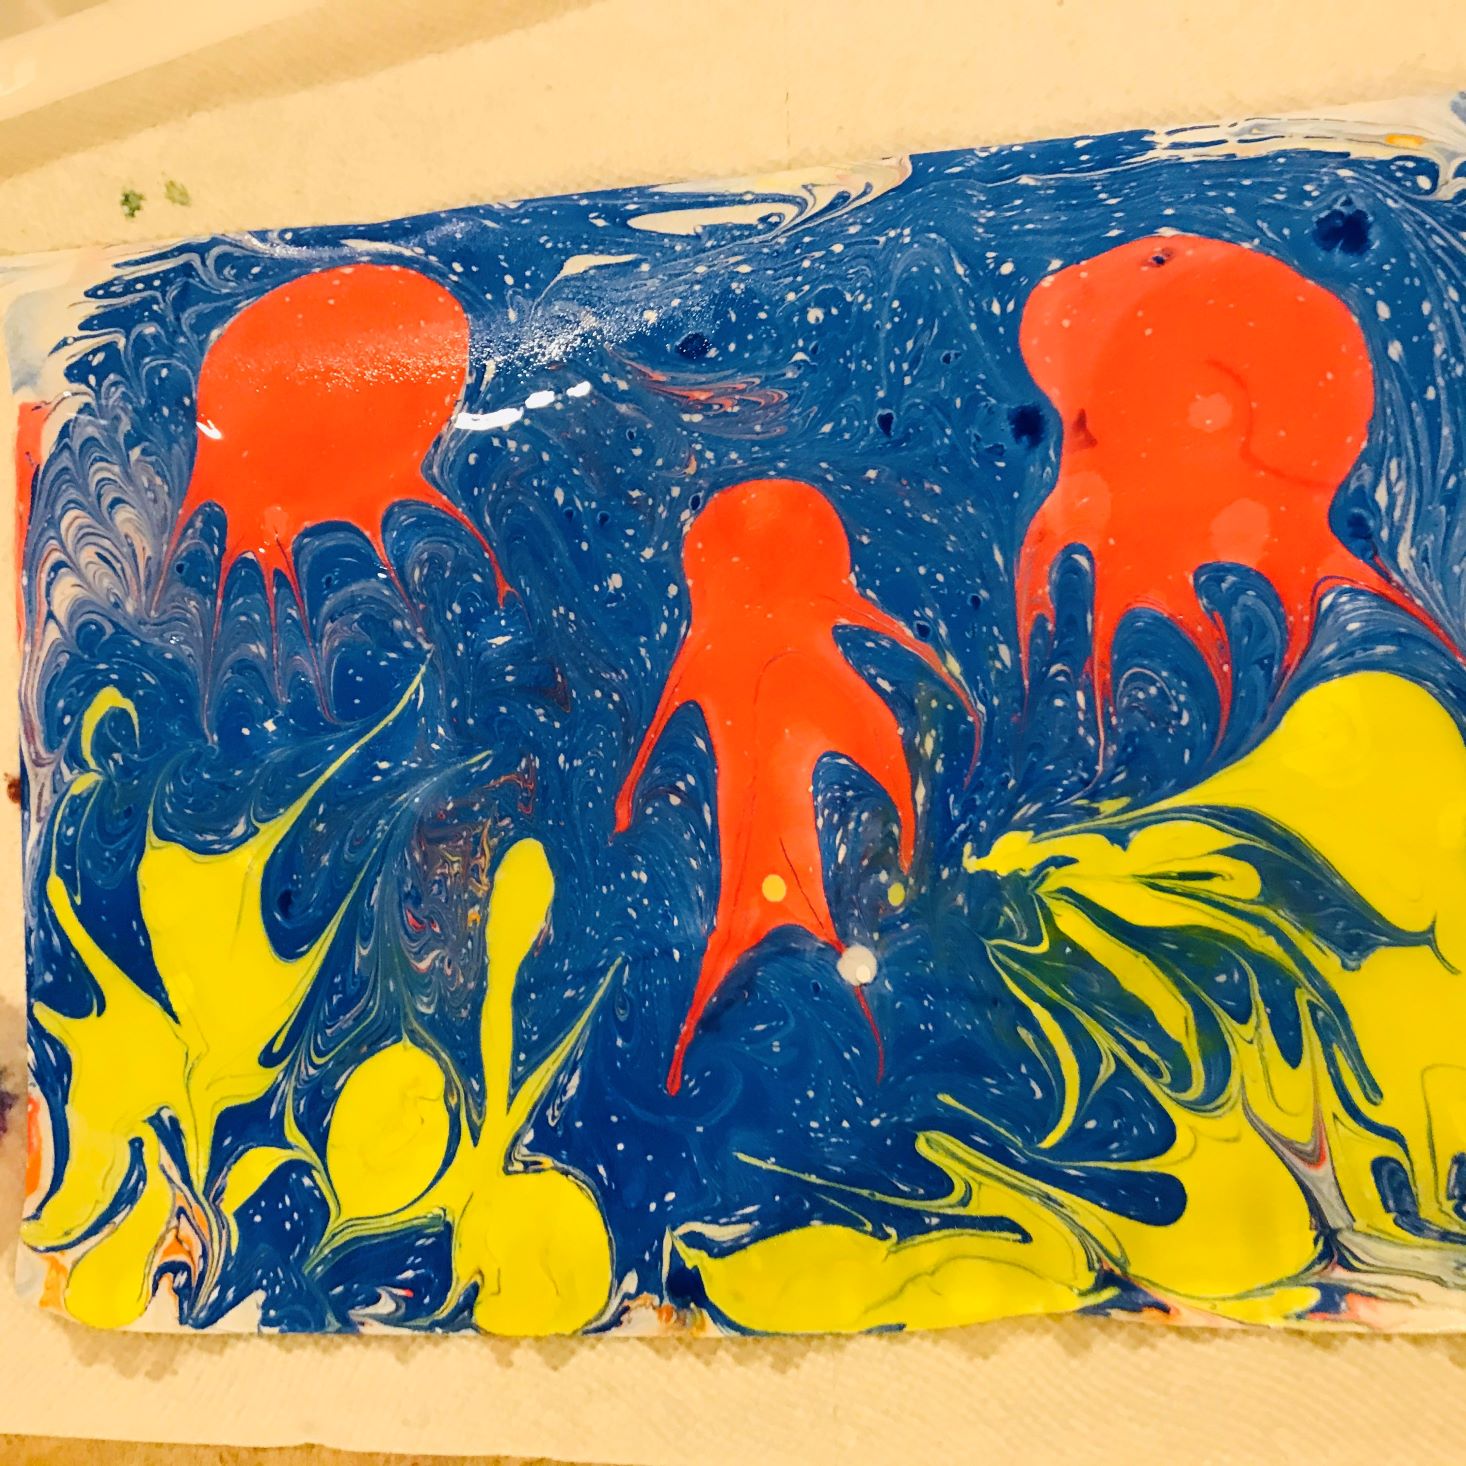
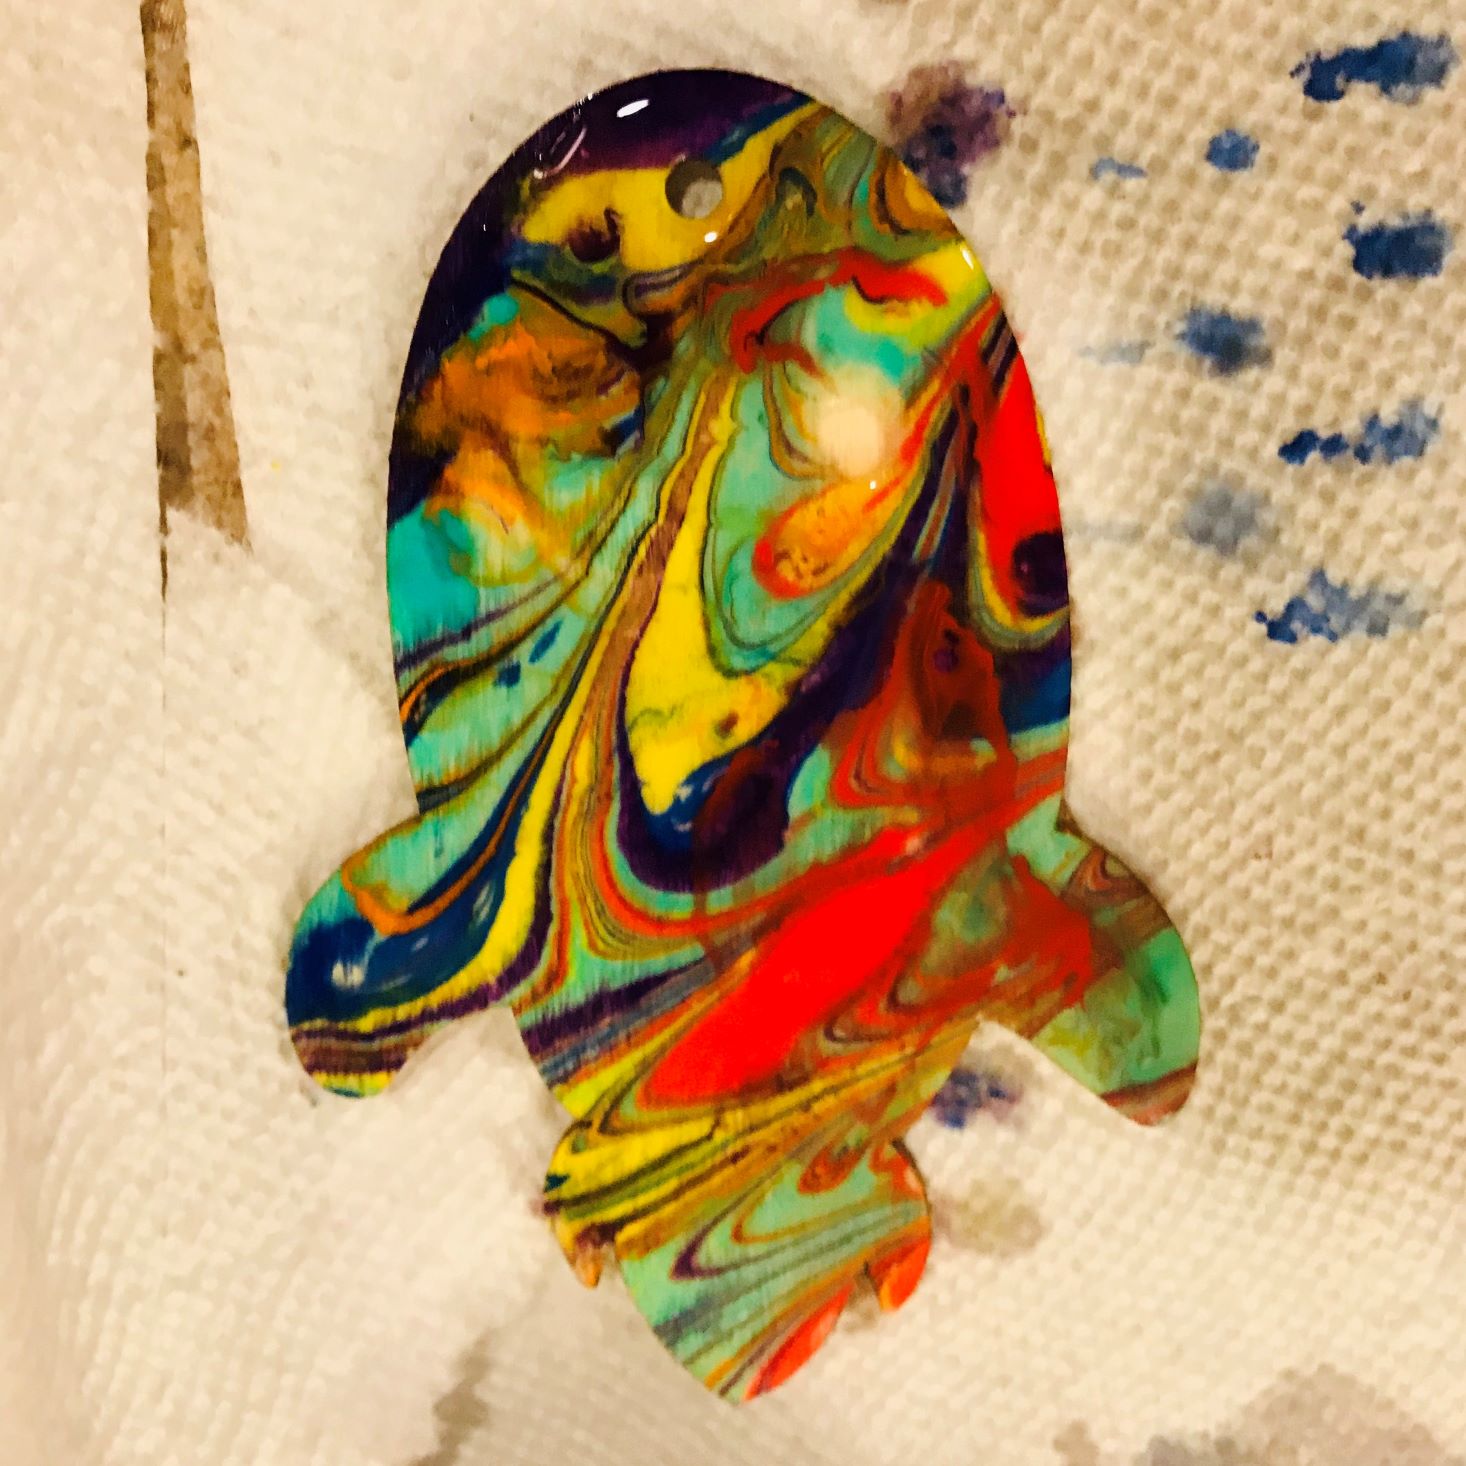
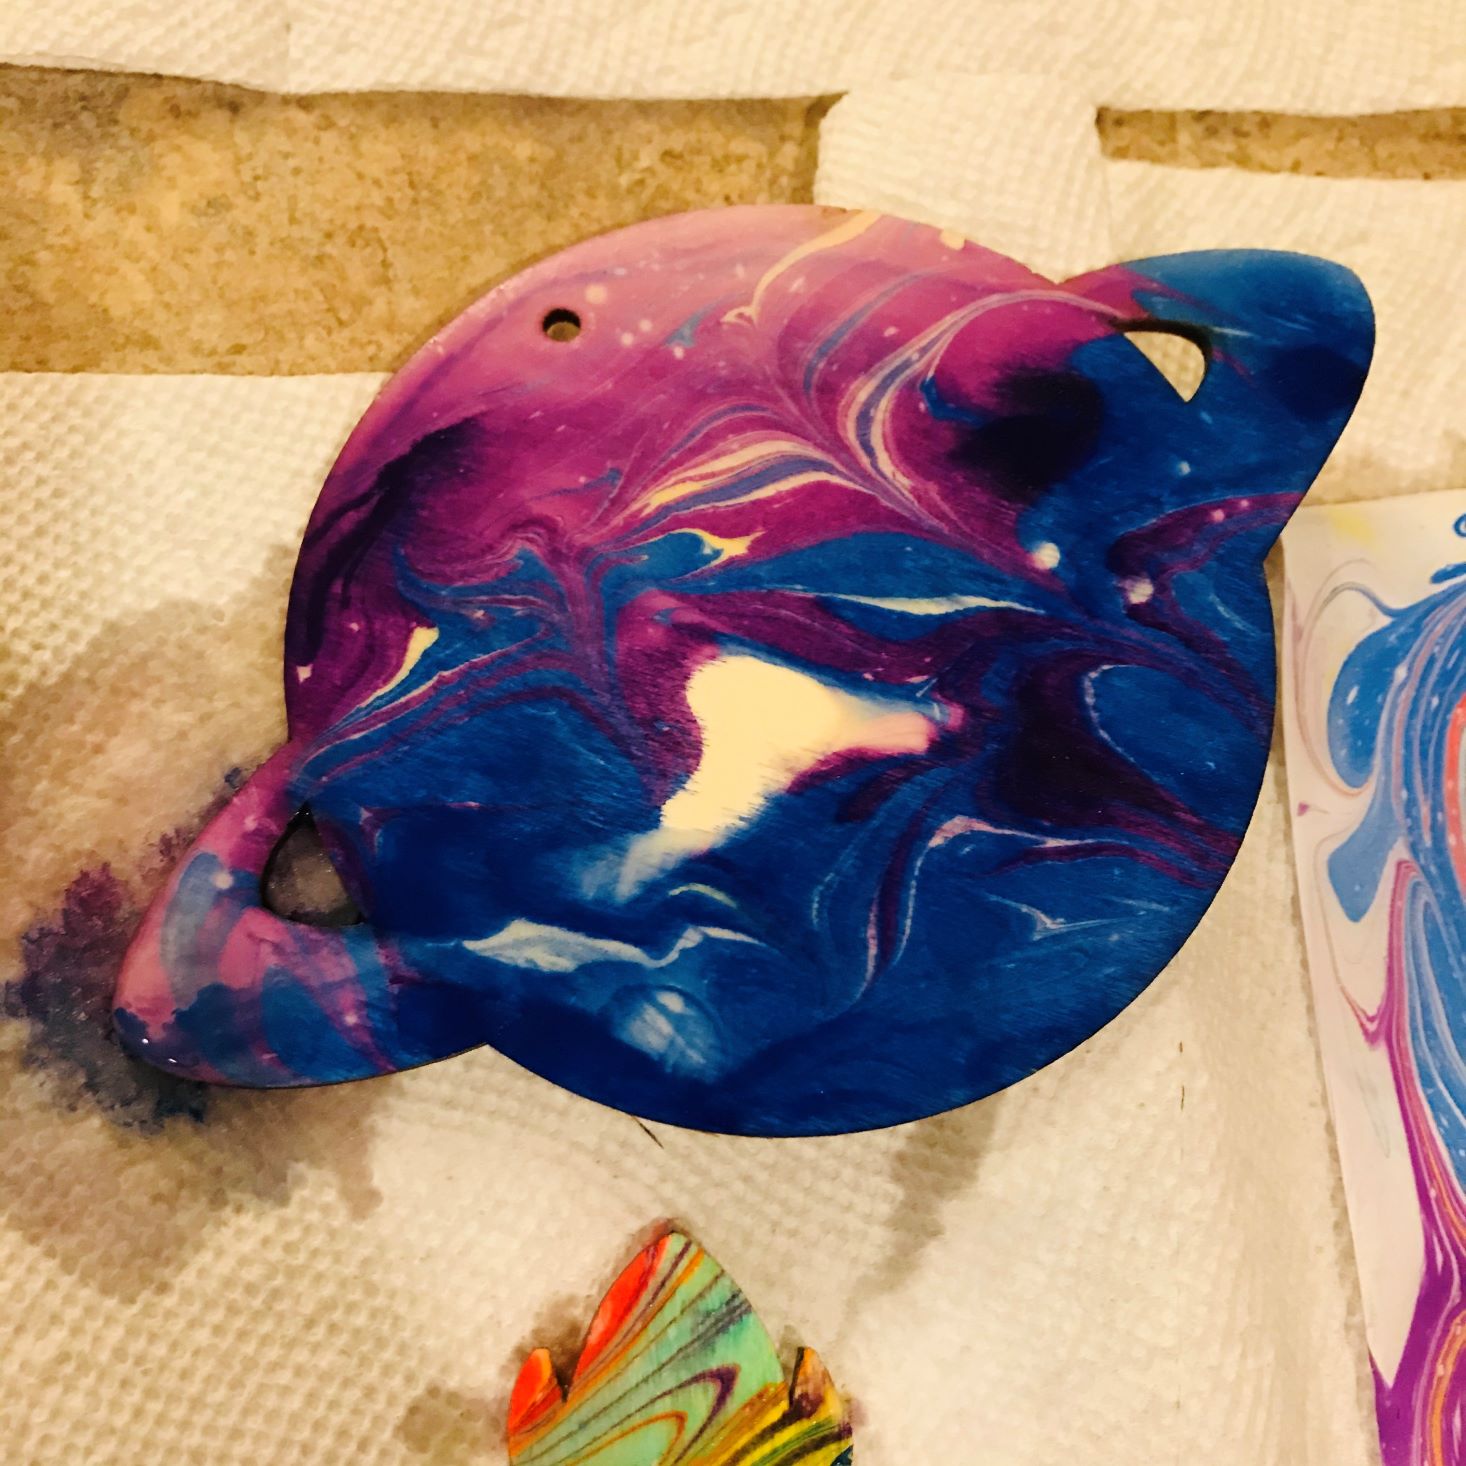
It was absolutely amazing to us that after each and every picture, the solution was clear and we were able to use new paint and create new designs. Talk about fun! It was totally worth the all-day procedure of creating the solution! We experimented with many colors and designs. Of course, we had to make a purple and yellow picture to celebrate the Minnesota Vikings! I do want to mention that the paper comes out extremely heavy and wet with the solution so these projects need a safe spot to dry. I used paper towels at first, but as you can see, it bled right through. I ended up putting them all on a thick piece of cardboard and drying them overnight on the dining room table. I didn't get a lot of good pictures creating the wooden decorations, but the process was completed following the same steps, just with a smaller amount of paint.
Project #2: Exhibition
1 of 10
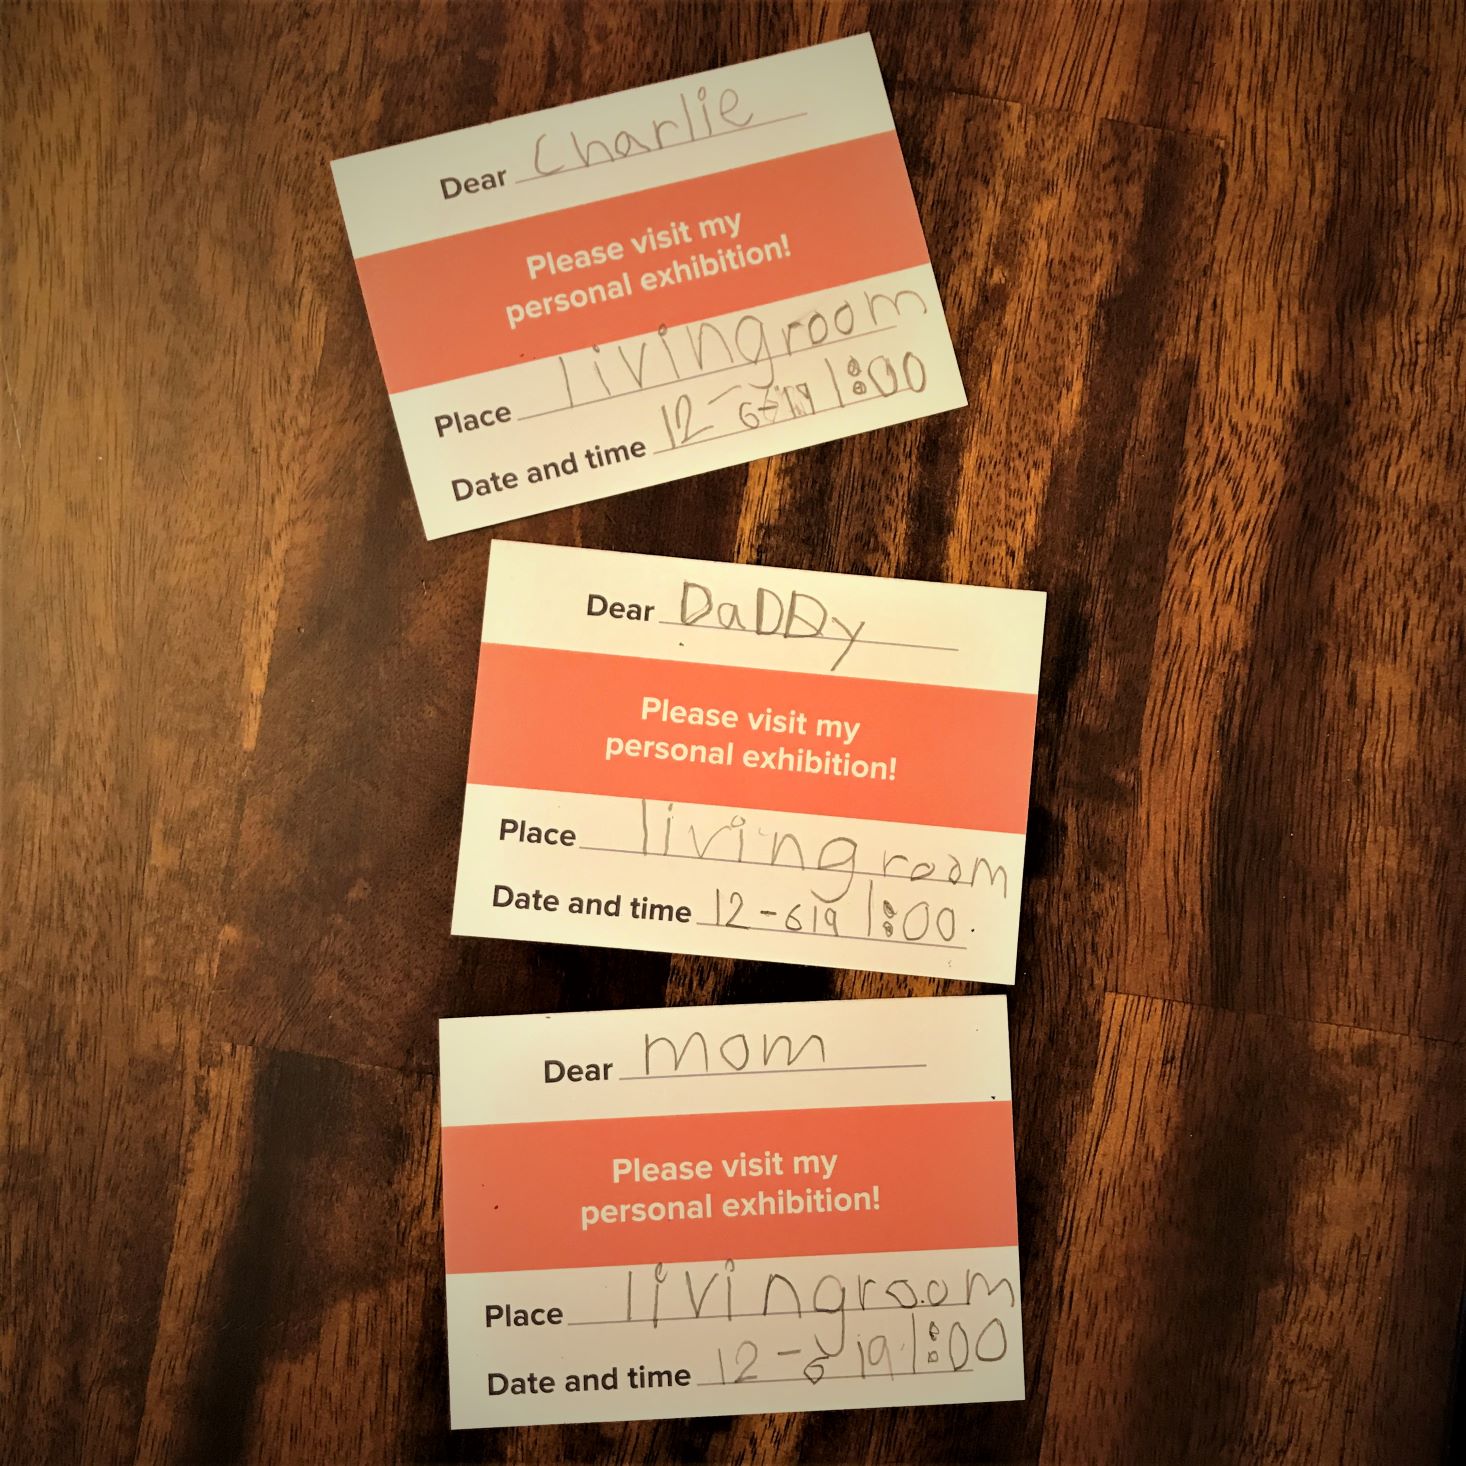
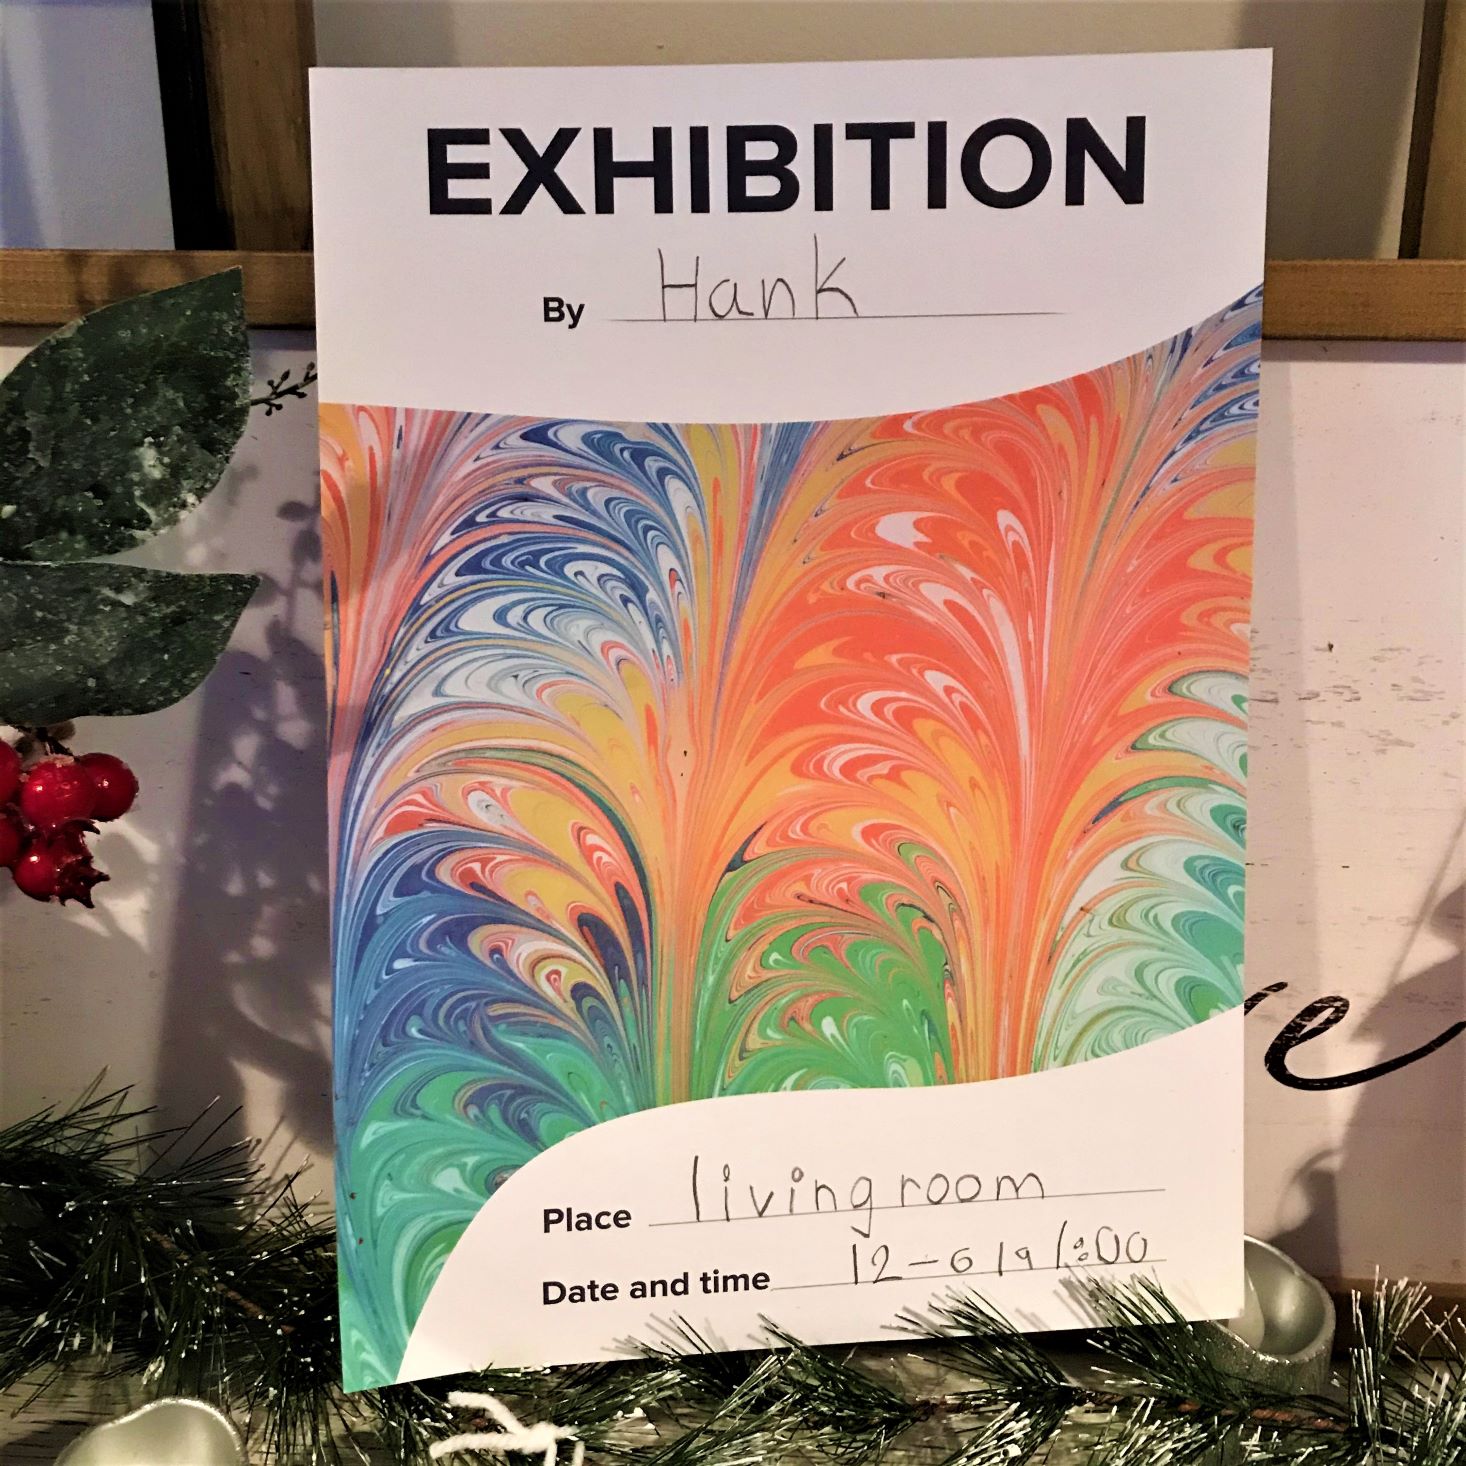
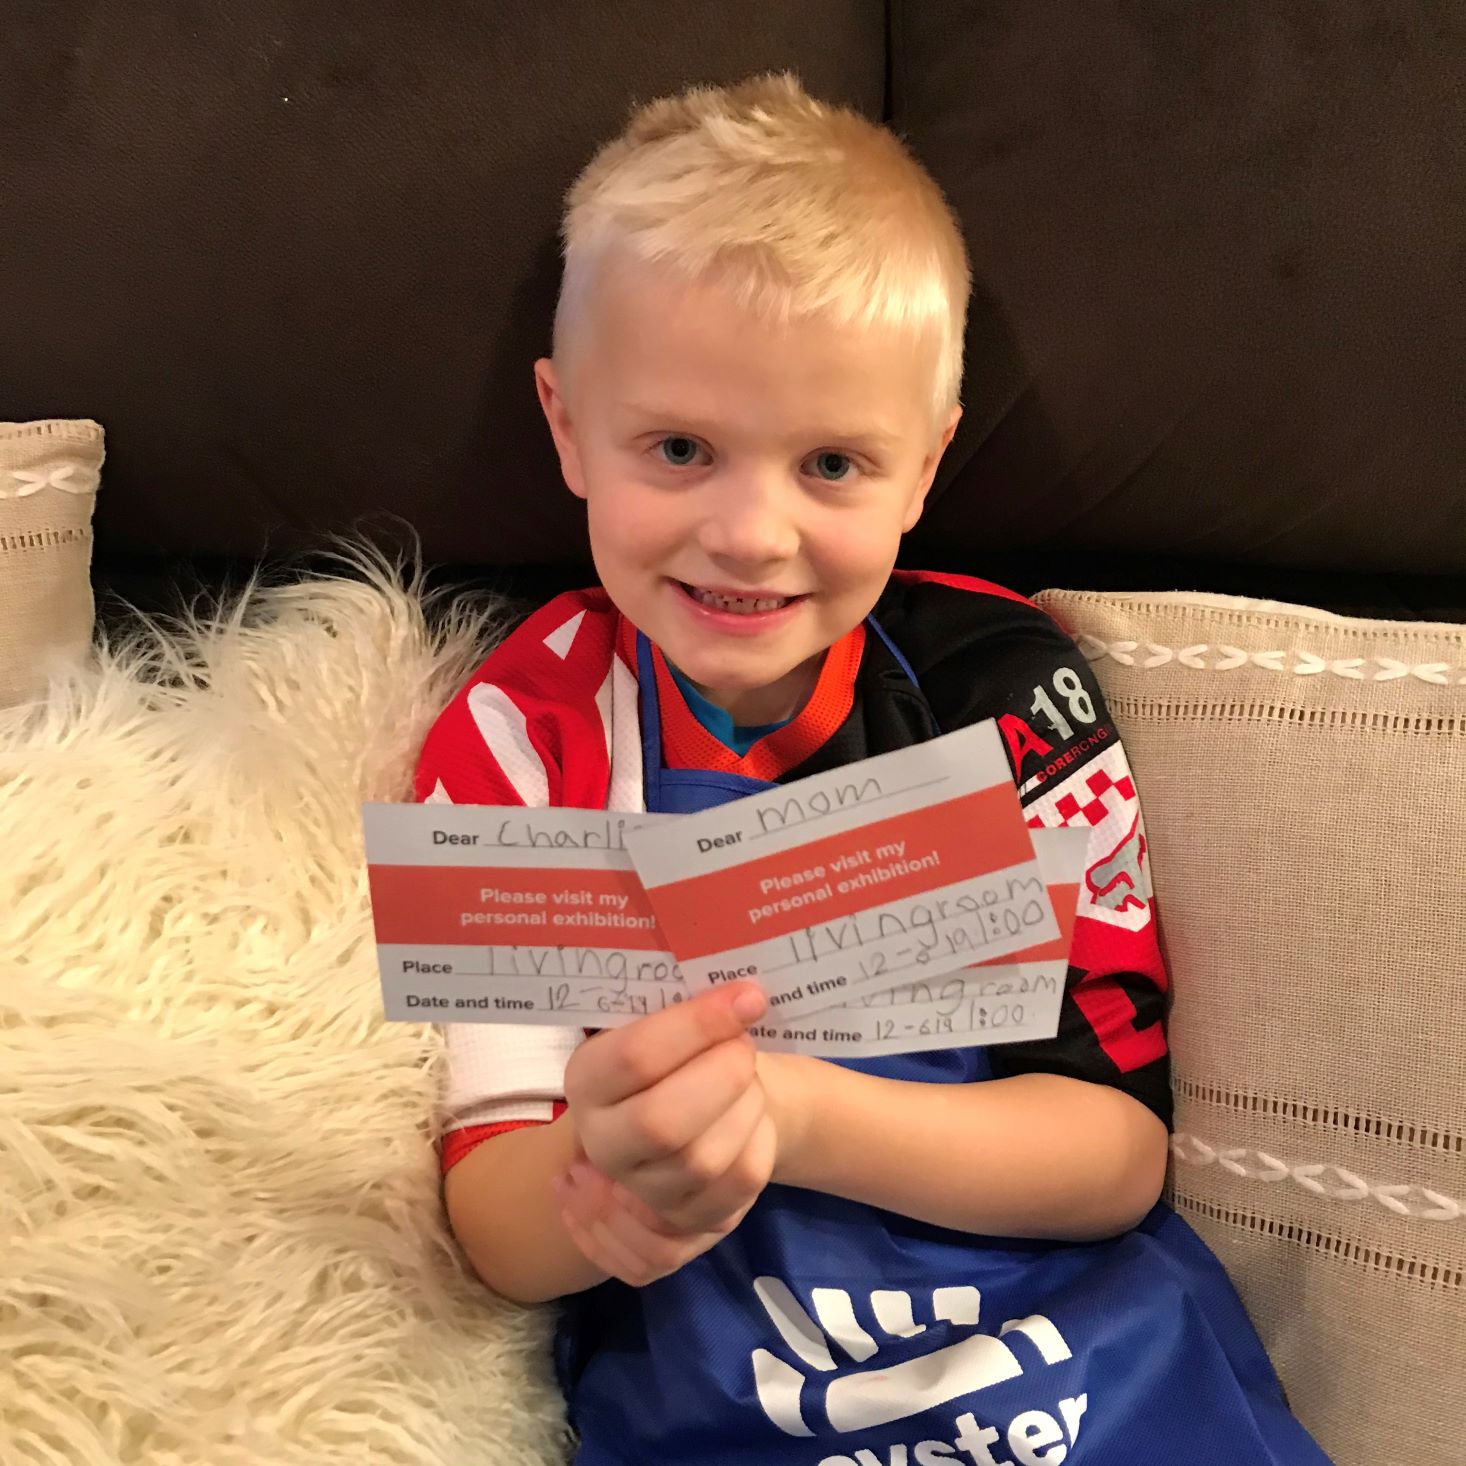

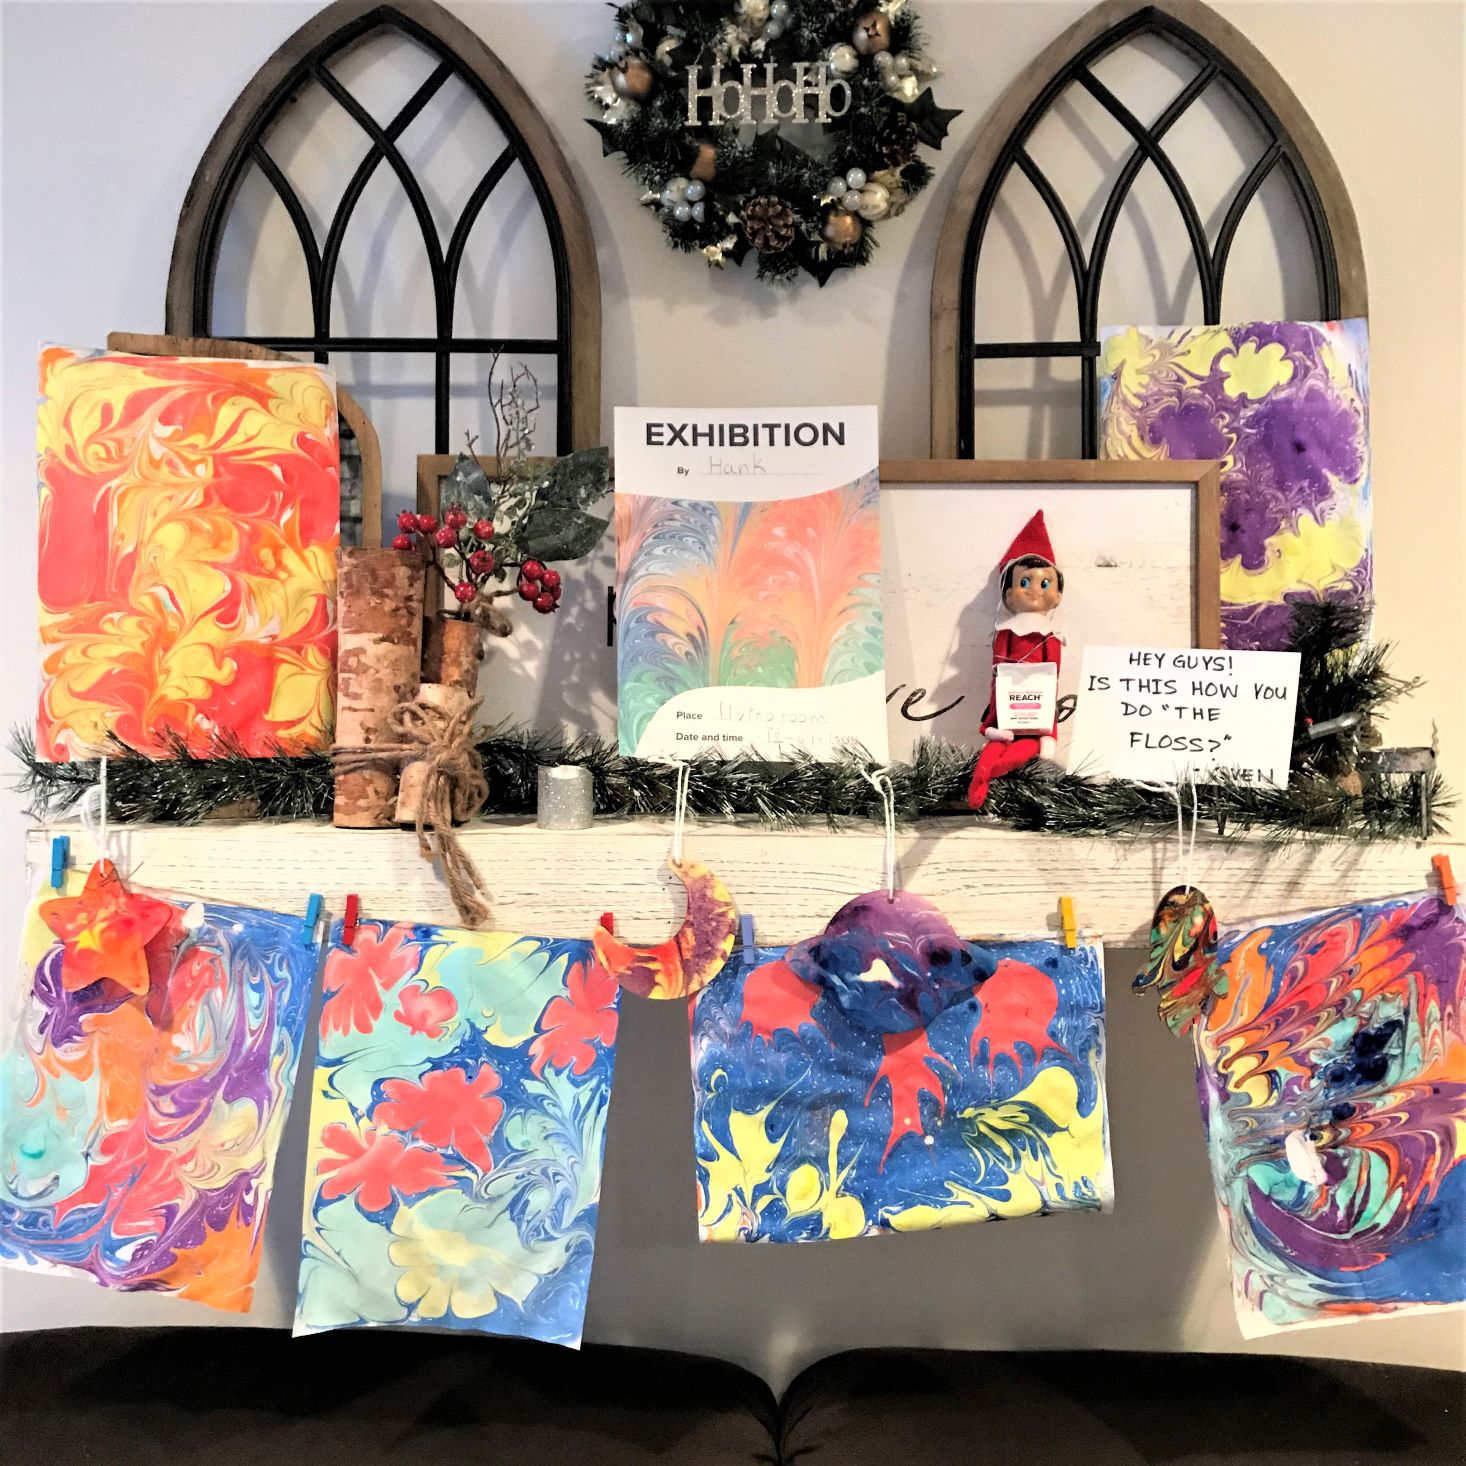

While our artwork was drying, Hank went ahead and filled out the exhibition poster and invitations. He passed the invites out to our family and used the string and clothespins to display the artwork. He is hugely into the Elf on the Shelf right now, so he wanted to include him in the display. He placed everything exactly where he wanted it. I think it turned out to be a marvelous display! And he was so very proud!
Verdict: This was my second month of Oyster kit and it was awesome! While last month seemed to have a lot more activities, this month taught us a new technique we have never done before. I also was really impressed that they sent 2 different mediums to create this Ebru technique on, as well as the exhibition poster and invitations. These items led to interesting discussions about what actual artists do, and how they get their name out to the public to make a living. While some of the directions were a little bit lacking in this month's box, I found the website to answer all of my questions. I feel this box was very well curated, very educational, and extremely fun! We had a wonderful time and spent hours creating different designs and artwork that will make great Christmas gifts for the grandmas and grandpas! I also enjoyed the fact that they sent enough thickener to create another batch and create more using this technique! (Pinterest has a ton of ideas I want to try!) I can't wait to see which profession we get to try next month!
Between making the solution and creating our artwork, we worked on this box for over 10 hours. While we didn't receive quite as many items as last month, I feel the curation and the teaching was worth the $39.95. With all of the paper they included, I could probably make over 50 pieces of artwork, and still have ink left!
To Wrap Up:
Can you still get this box if you sign up today? Possibly; it depends on kit availability.
Check out our first Oyster Kit review and our list of the best subscription boxes for kids for 2019!
Keep Track of Your Subscriptions: Add this box to your subscription list or wishlist!
What do you think of Oyster?

Please do not enter your email address in the Name field or in the comment content. Your email address will not be published. Required fields are marked *. Remember to post with kindness and respect. Comments with offensive language, cruelness to others, etc will not be approved. See our full comment policy here.