


Confetti Grace is a bi-monthly DIY craft subscription that sends a box filled with enough craft supplies to create two of the same featured projects. That way, you have one to keep for yourself and one to give away.
“Throw Kindness Around Like Confetti” is this company’s motto, and these projects give the gift of quality time with family and friends. To top it off, 20% of net profits are donated to worldwide charities!

There are two subscription options: regular bi-monthly boxes for $28.95/shipment, or the option to add on an additional project set to make with a friend for $34.95/shipment.
This review is for the Original Subscription DIY box, which is $28.95 bi-monthly (plus free shipping to the continental U.S.).
This box was sent to us at no cost for review. (Check out the review process post to learn more about how we review boxes.)
About Confetti Grace
The Subscription Box: Confetti Grace Original DIY box
The Cost: $28.95 bi-monthly + free U.S. shipping
The Products: A specially curated box filled with enough craft supplies to create two of one project: one to keep, and one to give away, or to share with a friend! (Recommended ages are 8 years to adult)
Ships to: The continental U.S. for free!
Confetti Grace Original DIY Box March/April 2021 Review
Confetti Grace always puts a smile on my face, so I couldn't wait to dig into the March/April box. With St. Patrick's Day over and Easter right around the corner, I wasn't sure what to expect but was pleasantly surprised when I opened the box. Read below to find out what type of crafts we created this month.

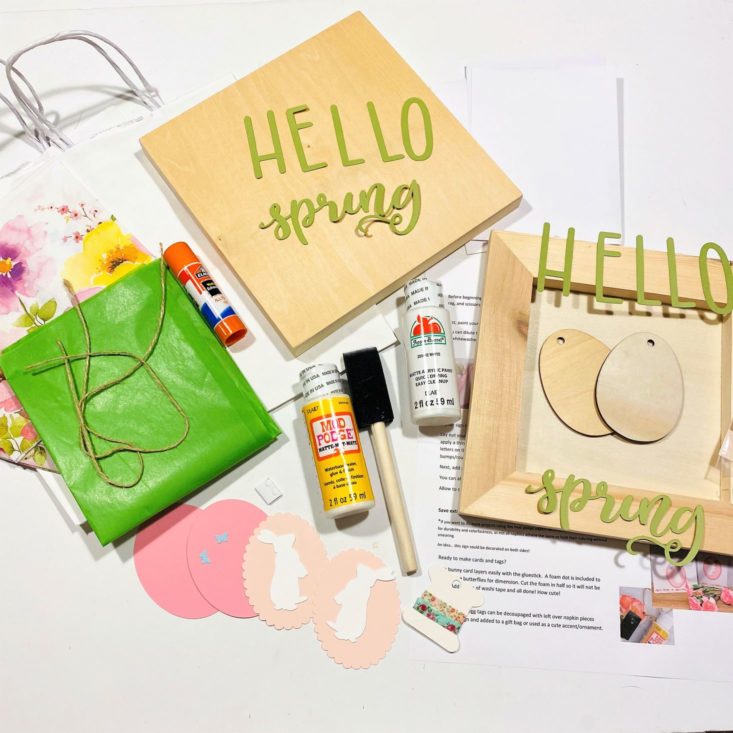
Each month we are sent enough supplies to create two projects, two greeting cards, and packaging materials. Along with the supplies, we also received a detailed instruction sheet that includes pictures with tips. This month we were sent supplies to create two "Hello Spring" Signs, two bunny cards, and gift bags with wooden tags and tissue paper.
Project #1: "Hello Spring" Signs
This month's main project was these adorable wooden signs. Because painting was involved, Hank immediately volunteered to be my crafting buddy and we had a lovely mother/son date. My mom's birthday is this month, so Hank decided he wanted to give the sign he made to her as a gift. Such a thoughtful little man.....if I do say so myself!


1 of 4


To create our sign projects, we received two 8" X 8" wood squares, beautiful floral printed napkins, acrylic paint, mod podge, a glue stick, a paintbrush, and embellishments. All supplies were name-brand and high quality. This month was a bit lighter on embellishments than usual, but even so, the finished product turned out lovely.
Step-By-Step


1 of 3

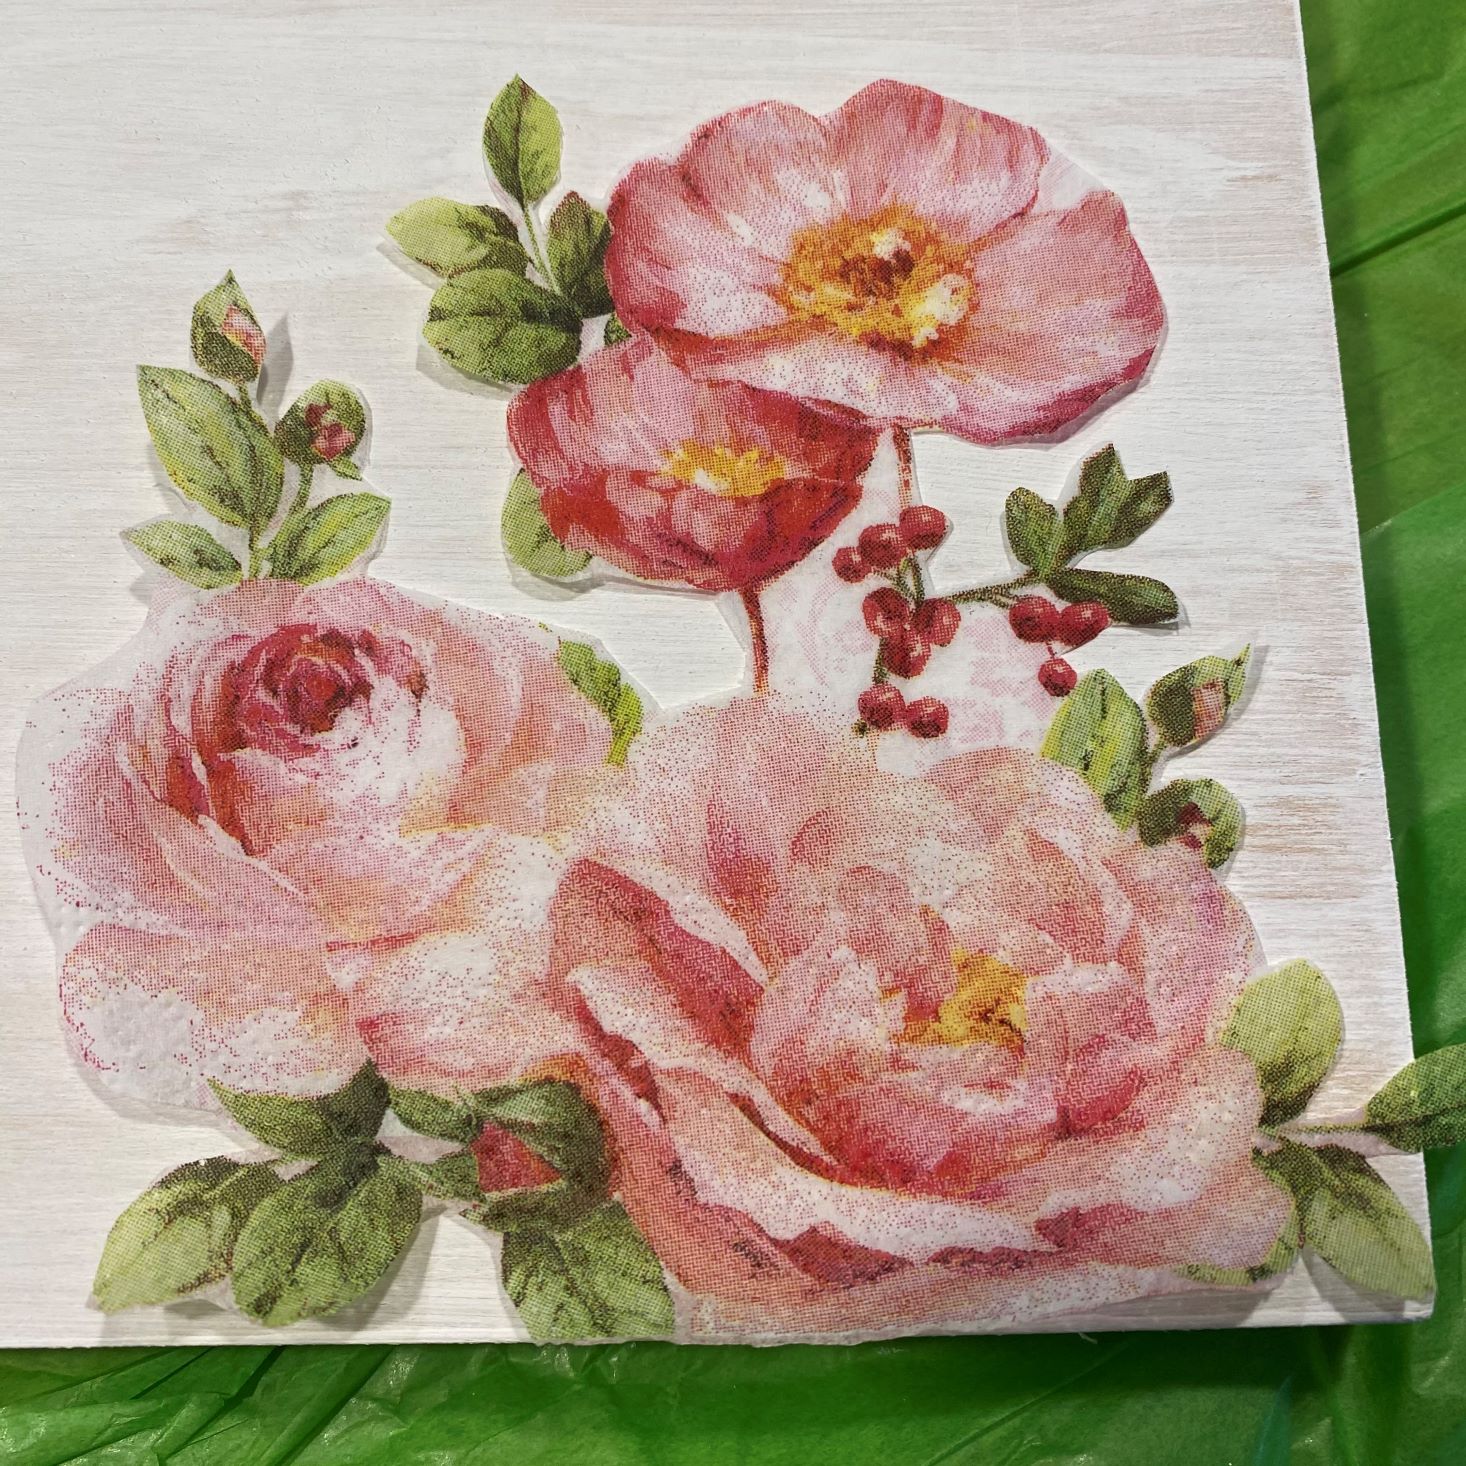
The first step in creating our signs was to decide if we wanted to leave them au natural or paint them. I decided I wanted a light coat of white paint on my sign to give it a "shabby chic" look, and Hank decided to follow suit. To protect our table we laid out the ripped tissue paper our box contents were wrapped in and started painting. While we didn't paint the backs of our signs, we did paint the top and all four sides, setting them aside to dry for about 30 minutes.

1 of 6


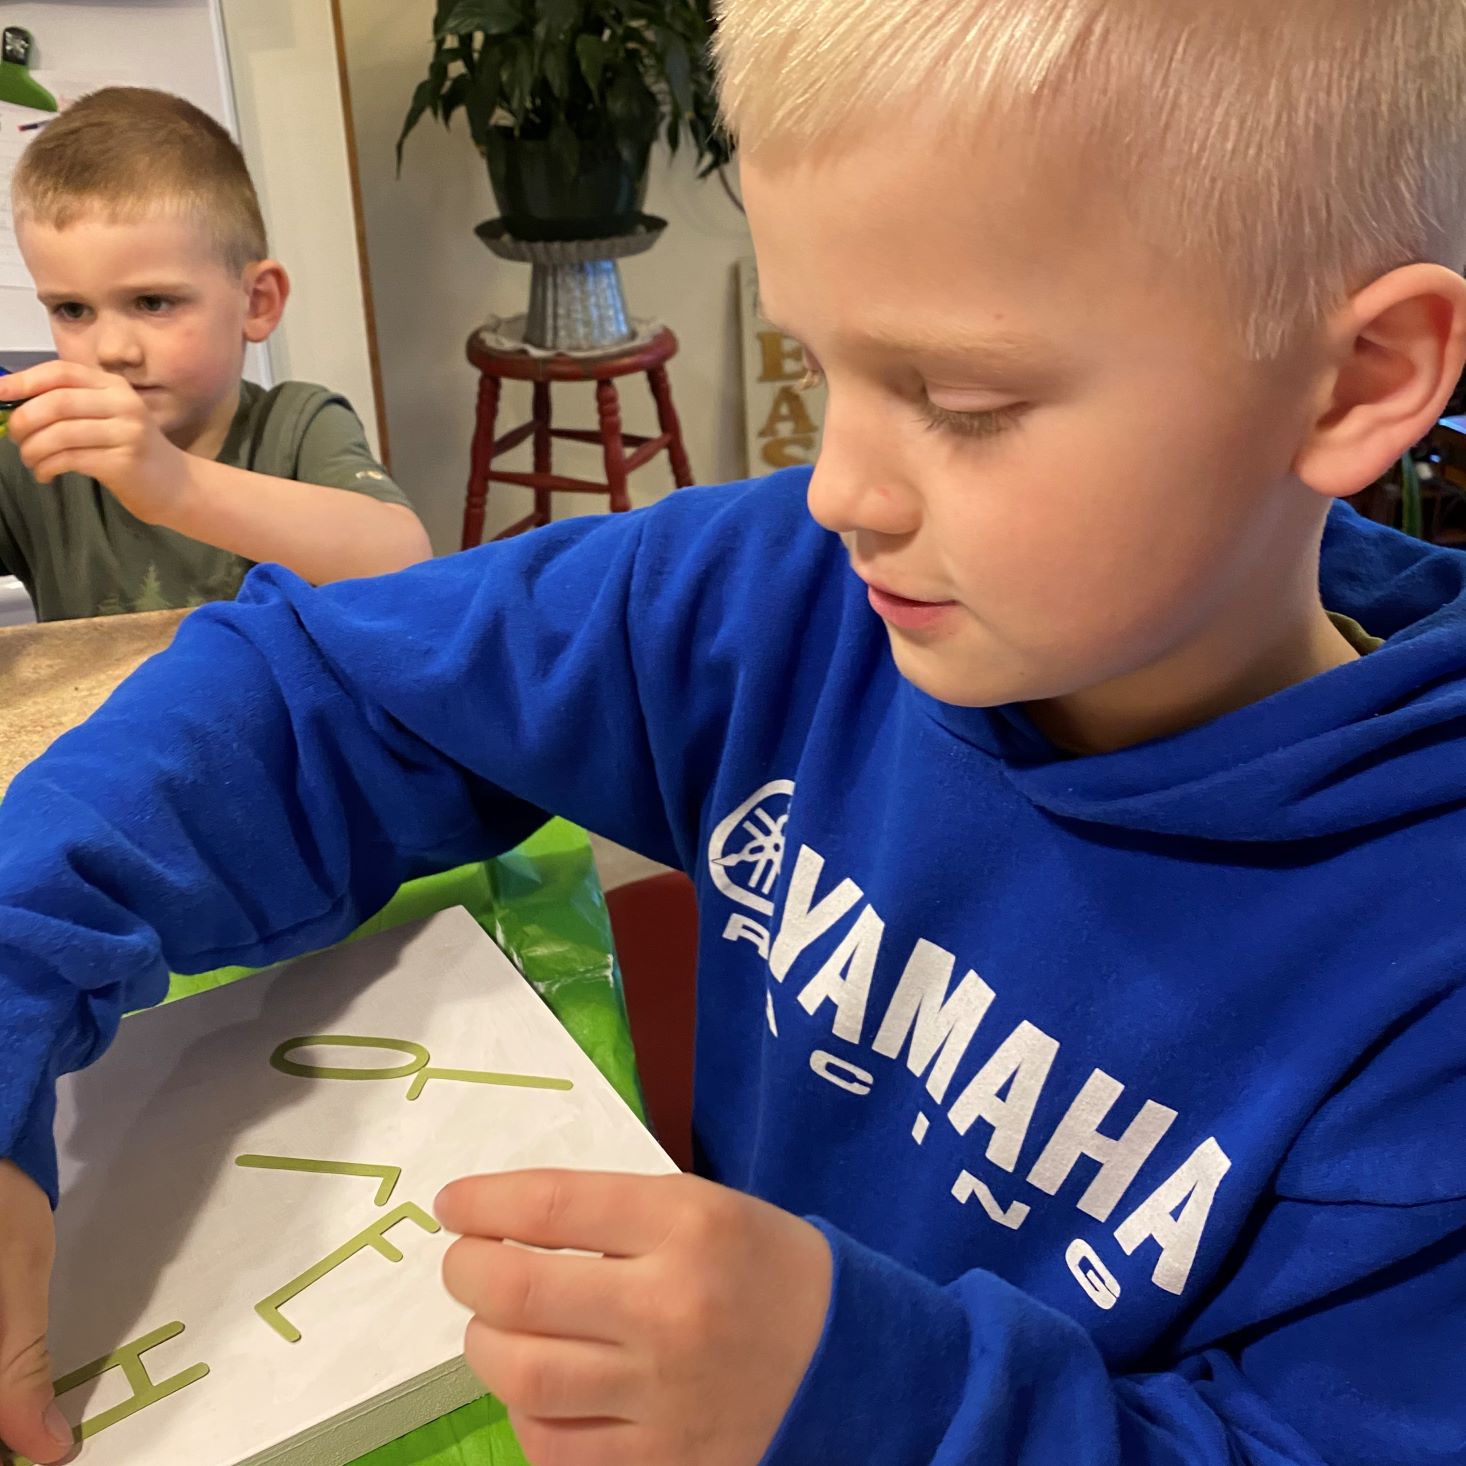

While our boards were drying, Hank and I peeled apart our napkins and decided which pieces to cut out. Using a pair of very sharp scissors, I trimmed around the flowers we wanted to include on our signs. (Hank tried cutting, but struggled as my "good" scissors are humungous and hard to navigate in a little hand.) The instructions suggest getting as close as you can to the flowers to really give it a hand-painted look, so we did our best. Once the flowers were cut out, we laid them on our boards and played around with the designs. I chose to use the word "HELLO", while Hank used "Hello Spring." Removing the laid-out embellishments, we applied a light coat of mod podge and secured our designs in the desired place. Once in place, we used our foam brush to gently apply another layer of mod podge over the top of the entire piece.


1 of 2
And here are our finished projects. Like I said above Hank decided to gift his to grammy for her birthday, so you can check out how cute he packaged it up below.
Project #2 Bunny Cards


1 of 2
Spring is one of my favorite seasons, and I find myself unable to resist the cuteness of a floppy-eared bunny. These adorable cards not only include bunnies, but also scalloped edging, floral washi tape, AND butterflies! Plus the instructions were super easy to follow, (you literally just have to look at the picture) and they turned out super cute!


1 of 3
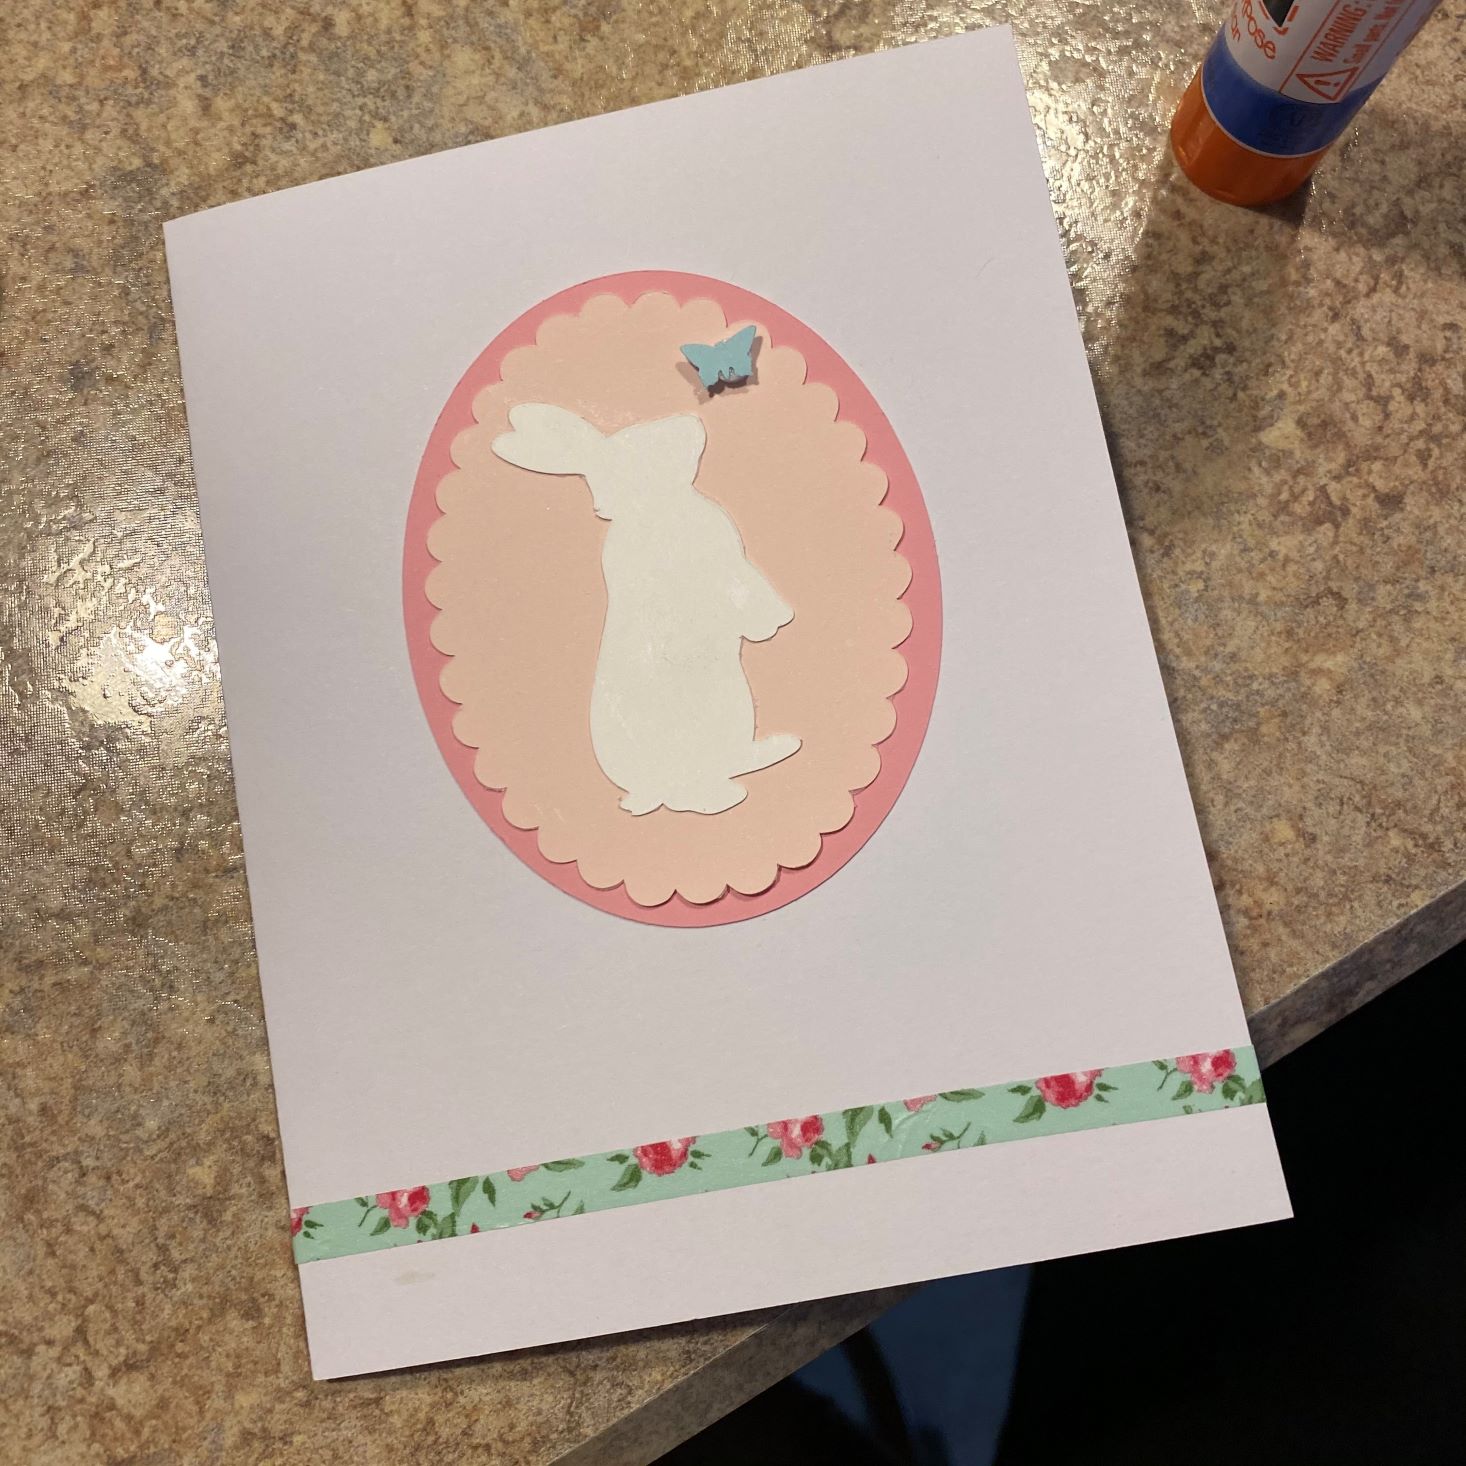
I hardly got any pictures of the card-making process just because it was so easy to do! Hank and I each applied our washi tape and glued our oval bunny scene together and voila, ready to send!

A perfect card for an (almost) perfect grandma!
Project #3 Gift Bags and Tags


1 of 2
The last project we received were these white gift bags with green tissue paper, twine, and a couple of wooden eggs. What could we be doing with those eggs you ask? Check out below!


1 of 2
Using the scraps leftover from the napkins, I cut out an oval and applied it to one of the eggs, while piecing together pieces for the other. Using the same technique as our signs, these eggs whipped up in two minutes and turned out really special. I plan on making these tags to place on Christmas presents next year with Christmas napkins!


1 of 4


I just love how this month's signs turned out, and I am especially fond of those cute wooden eggs on the packaging! Hank can't wait to give his bag to grandma, and I can't wait to see her open it. There is absolutely nothing like giving a homemade gift from the heart!
Verdict: Confetti Grace really had me in mind when creating this month's box. "Shabby Chic" is my life, and whitewashed boards and floral prints are something I incorporate a lot in my décor, so I couldn't wait to dig into this! Our signs took less than an hour to complete, which was a perfect after-school project, and gave me a chance to share my hobbies with my son. Also, because the napkin/mod podge technique was new to me, I learned something that I plan on trying out again. I can't wait to see what May/June has in store! What do you think the theme will be?
Confetti Grace costs $28.95 per bi-monthly delivery, so each gift package averages out to about $14.48. After being a little underwhelmed with last month's box, it is safe to say that they redeemed themselves with this one! I love the finished products, and would totally pay $14.48 for my sign, card, and egg detail.
To Wrap Up:
Can you still get this box if you sign up today? Yes! Sign up today to receive this set of projects.
Check out all of our Confetti Grace reviews and our top craft box subscriptions as voted on by our readers!
Keep Track of Your Subscriptions: Add this box to your subscription list or wishlist!
What do you think of this month’s Confetti Grace? Who did you share your project with?

Please do not enter your email address in the Name field or in the comment content. Your email address will not be published. Required fields are marked *. Remember to post with kindness and respect. Comments with offensive language, cruelness to others, etc will not be approved. See our full comment policy here.