

Amazon has launched a STEM Club Toy subscription box! This monthly subscription delivers "handpicked, high-quality Science, Technology, Engineering, and Math toys" to your door for $19.99/month.
This subscription looks like any other shipment from Amazon, with no exterior branding on the box or special insert.
There are 3 age range options:
- 3-4-year-olds (counting, building, and cause and effect)
- 5-7 year-olds (hands-on experiments and explorations of electricity, earth science, and simple math)
- 8-13-year-olds (more complex projects and experiments based on principals of physics, chemistry, and engineering)
My Subscription Addiction paid for this box. (Check out the review process post to learn more about how we review boxes.)
This is a review of the 5 to 7-year-old age range Amazon STEM Club, $19.99/month.
About This Educational Subscription Box for Kids
The Subscription Box: Amazon STEM Toy Club
The Cost: $19.99 per month
The Products: Each month you will receive a different, age-appropriate STEM toy.
Ships to: U.S. (free shipping)
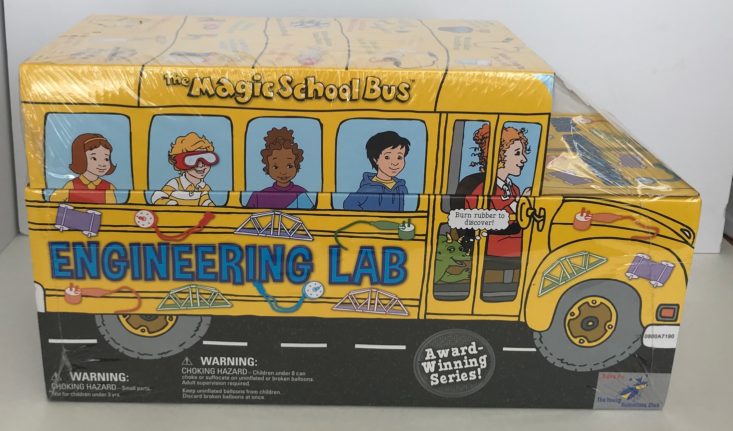
March's Toy: The Magic School Bus Engineering Lab
The Magic School Bus Engineering Lab - Retail Value $39.99 (found here for $29.99)
My kids LOVE the Magic School Bus, so when they saw this, they were beyond excited! I was pretty excited to show it to them, too. I wasn’t sure the show was actually still relevant other than being on Netflix, so it was great to see that there are still Magic School Bus toys out there! This set is designed for ages 5-12 and I think that it would actually be best for the older end of that group since there is so much science behind it, but of course, the littles will think it’s cool too, but probably need a lot of adult assistance. Just a warning- this might be the longest review ever!
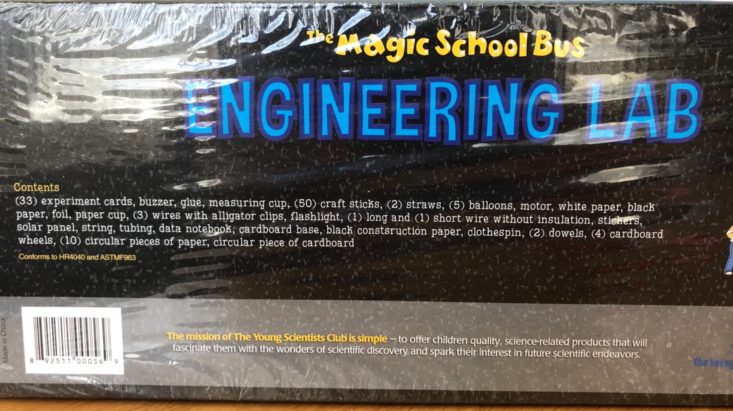
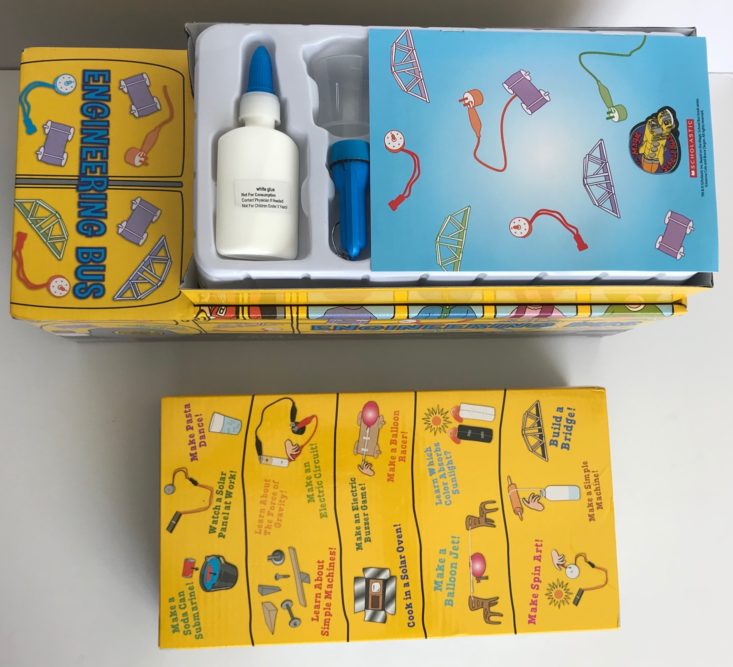
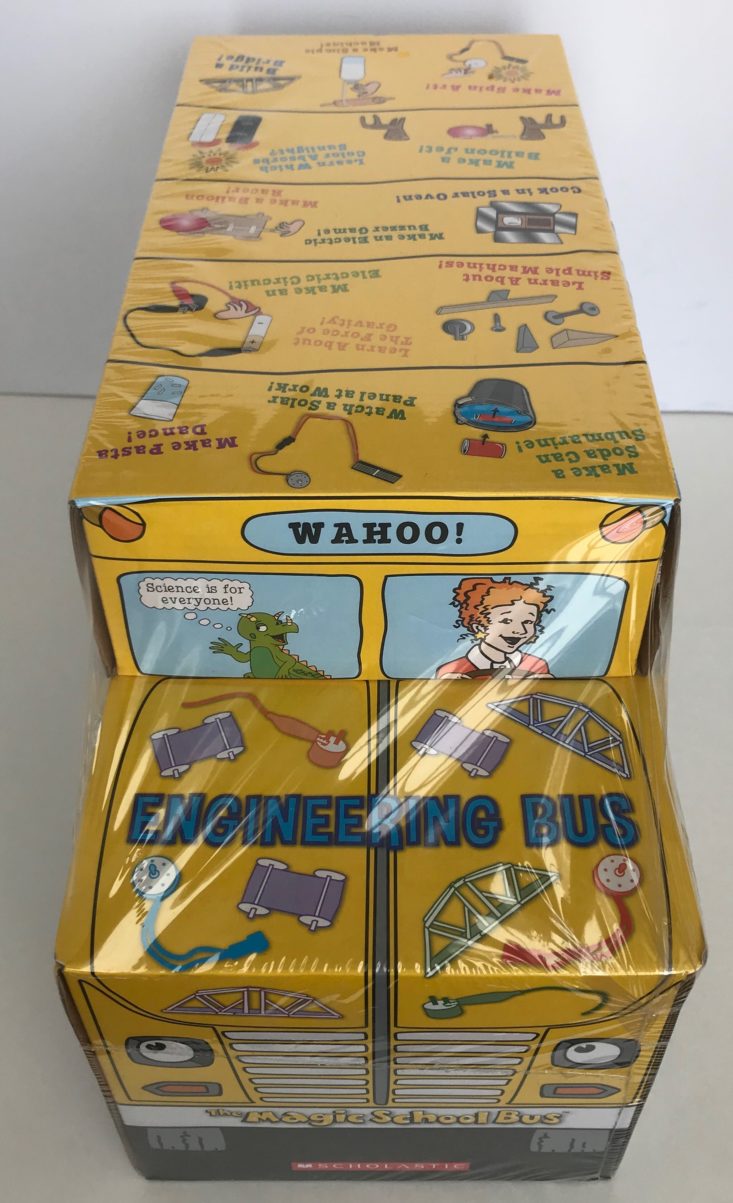
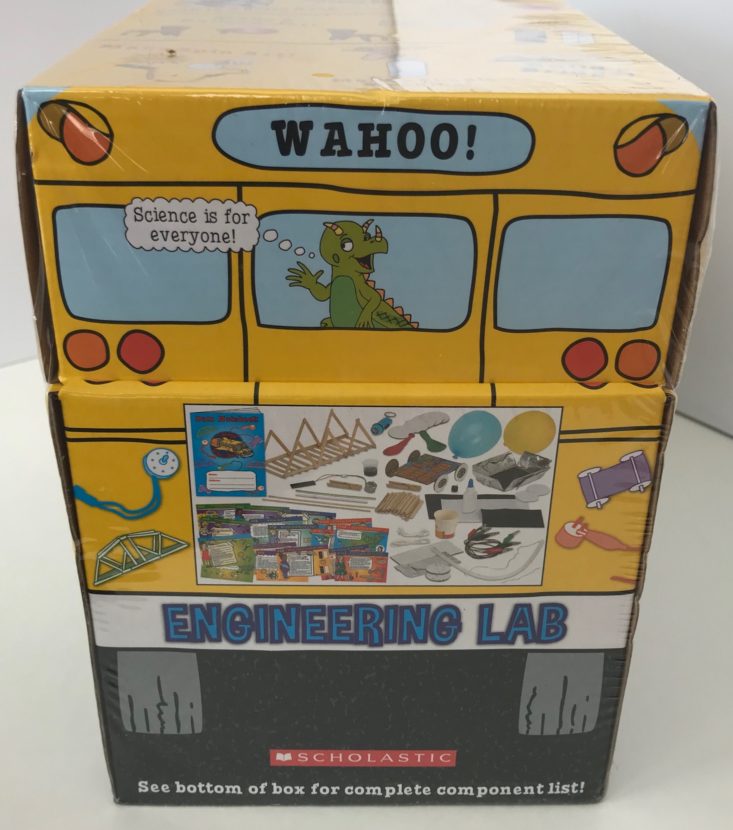
The top of the box showed all of the different projects you could do, while the bottom had a list of the contents in the bus. Easy to find!

The bus was packed up neatly with everything carefully placed inside in either its own bag or separate storage spot. So creative and cute to package it all up inside of the school bus! Even now, after completing a lot of projects, every piece of the bus is being used to either hold something or was designed to be used as part of a project. It’s such a great use of material and it will all be recyclable when we really get finished.
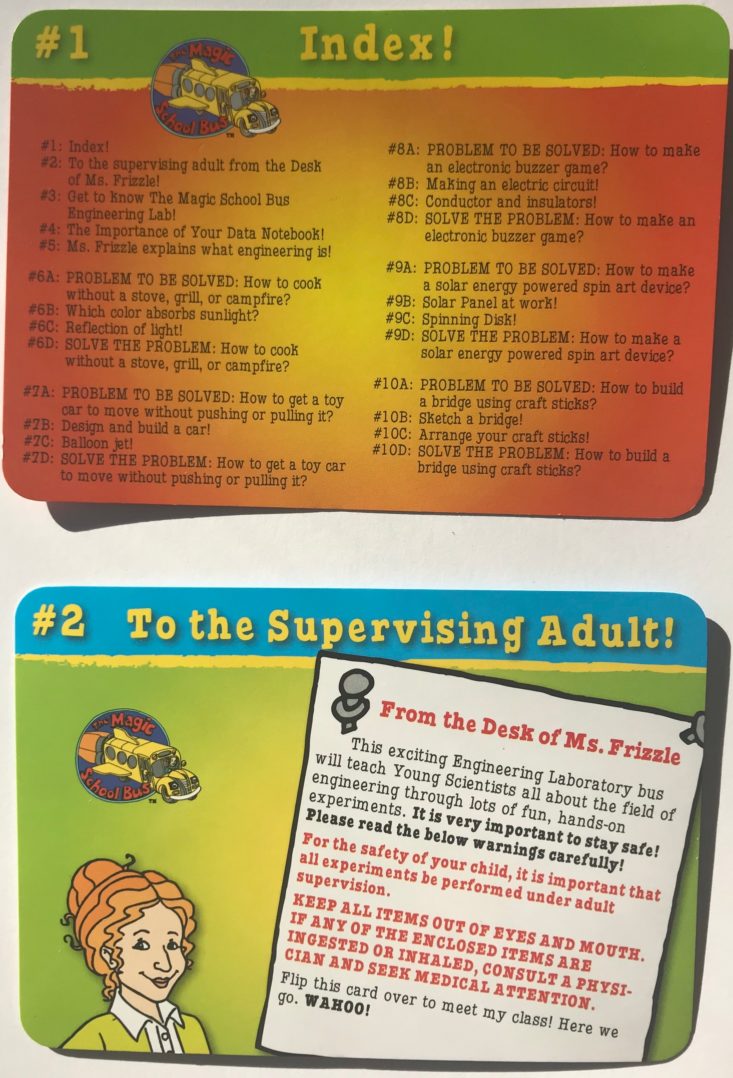
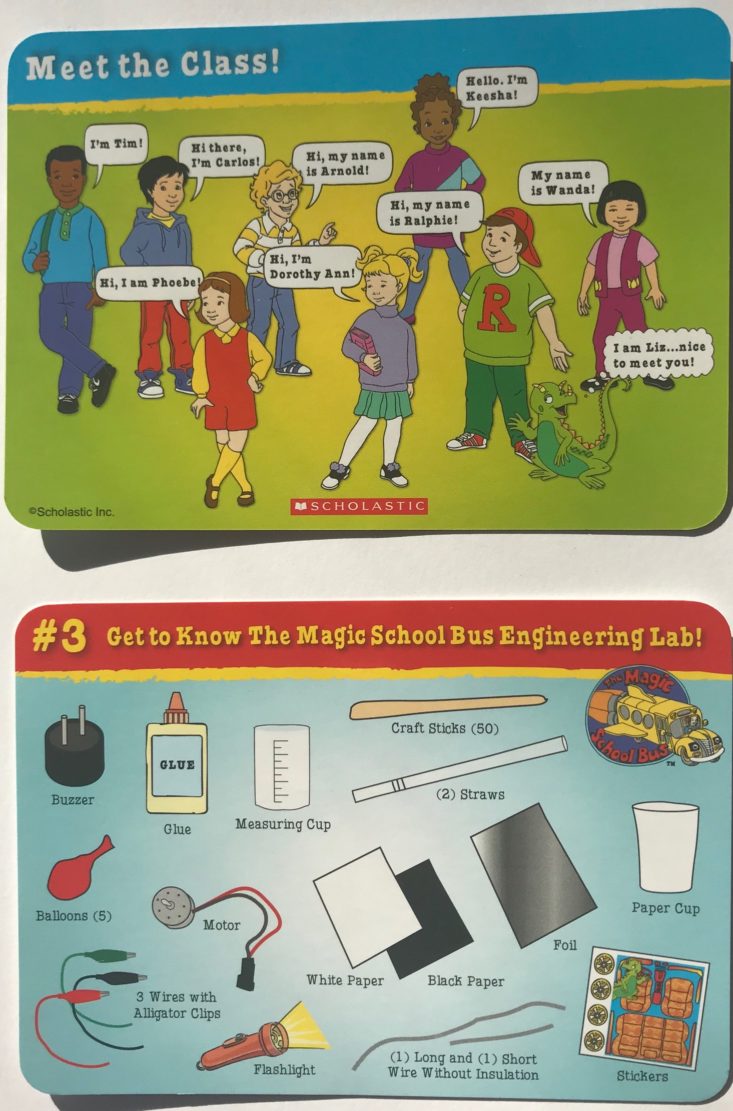
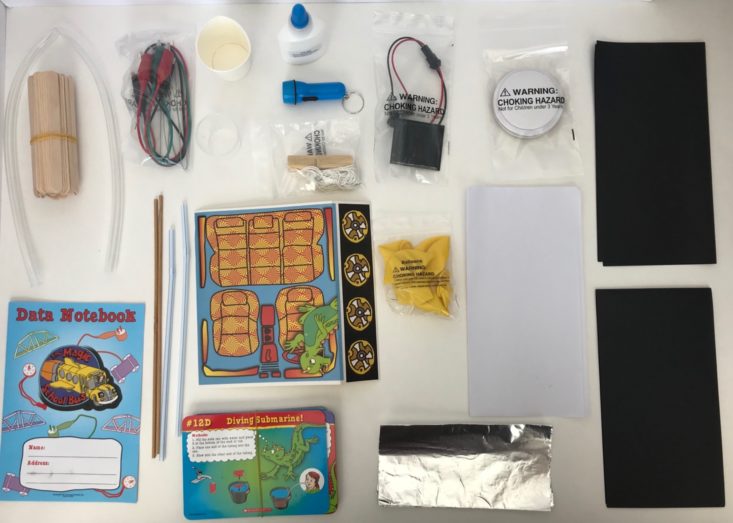
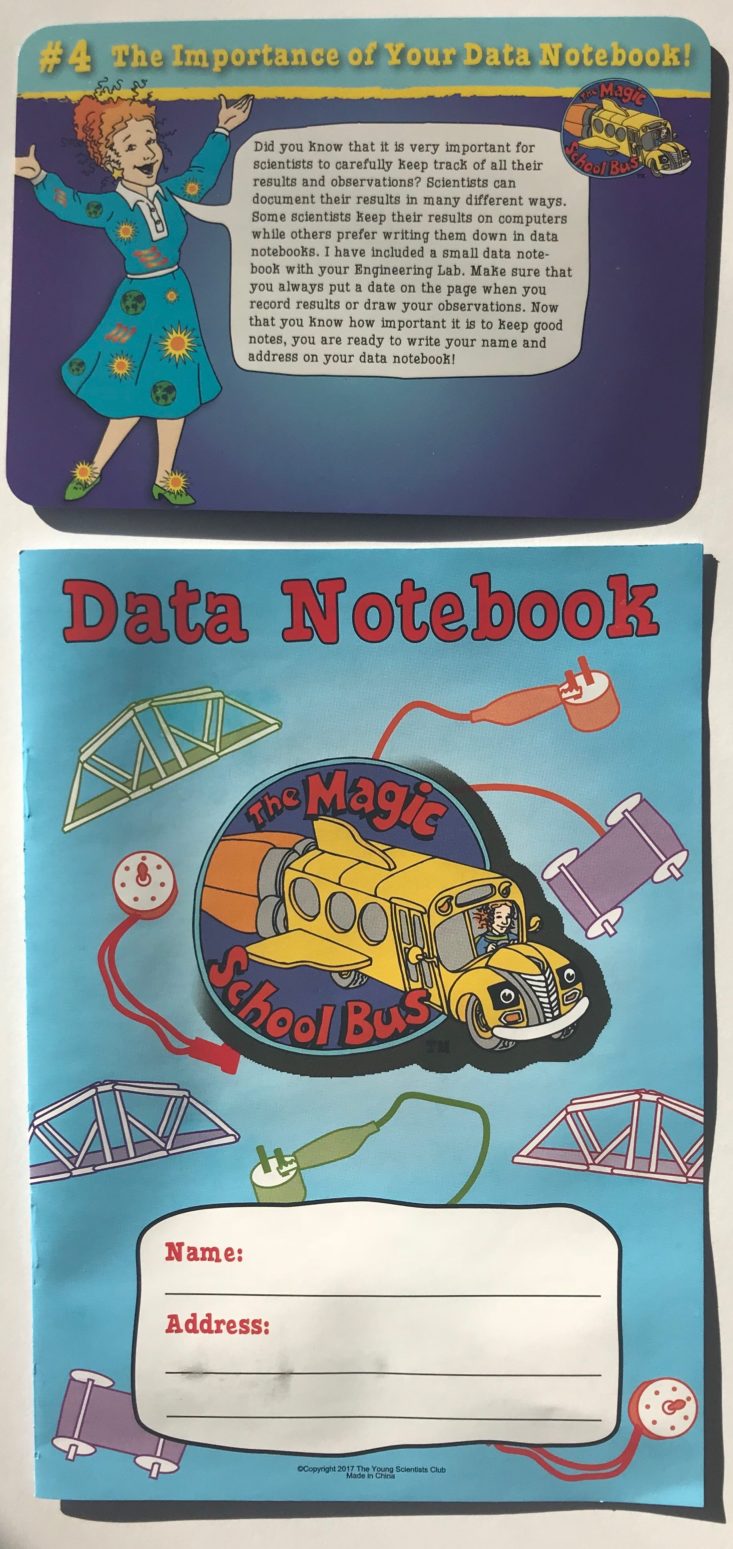
Included in the box was a set of laminated cards that provide all of the information you need. The first part was an Index of all the cards included (listing the projects) and a note to the Supervising Adult. There was also a card where you got to meet the class and a materials list complete with pictures.

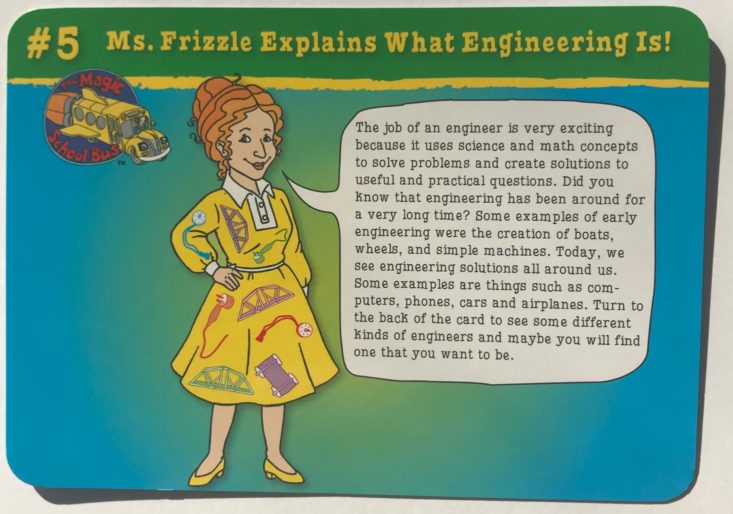
This was the Data Notebook that was included. It provides room to answer the problems and sketch out your ideas.
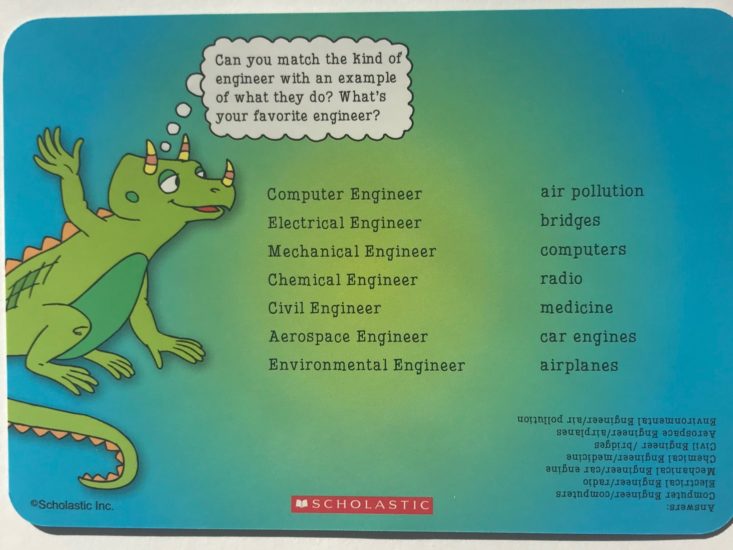
Ms.Frizzle and Liz also explain what Engineering is on one of the cards and list some different types of engineering careers. A great little reference for kids (and adults!).
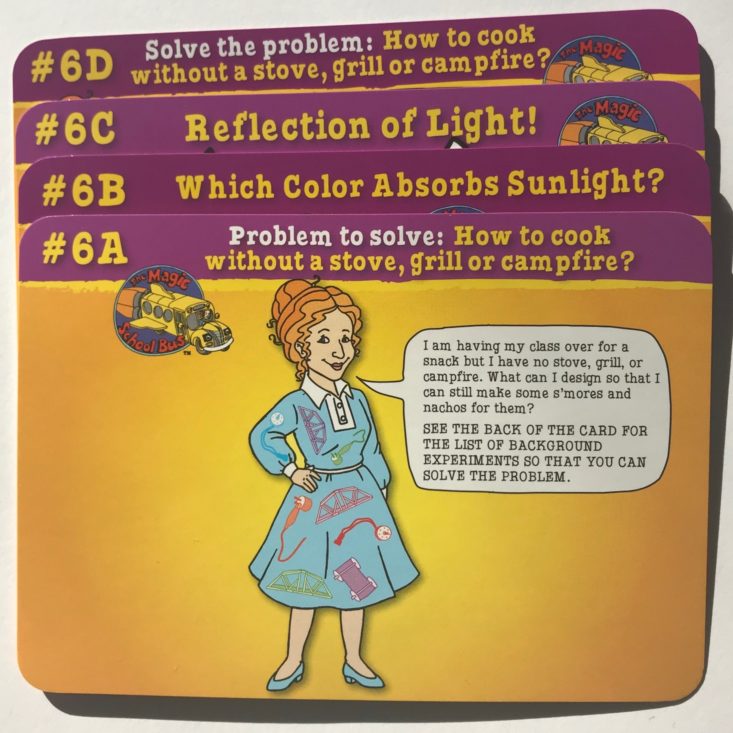
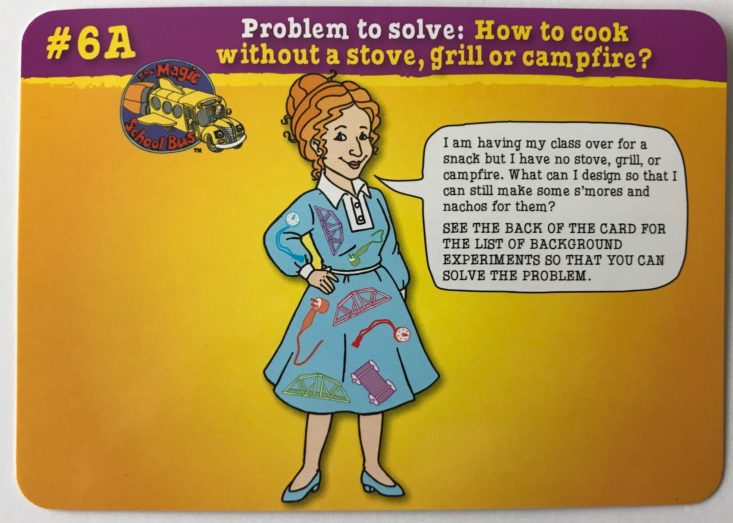
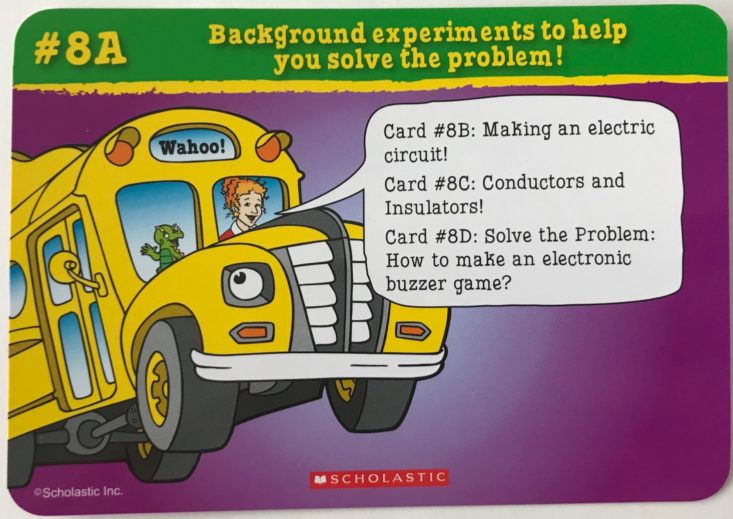
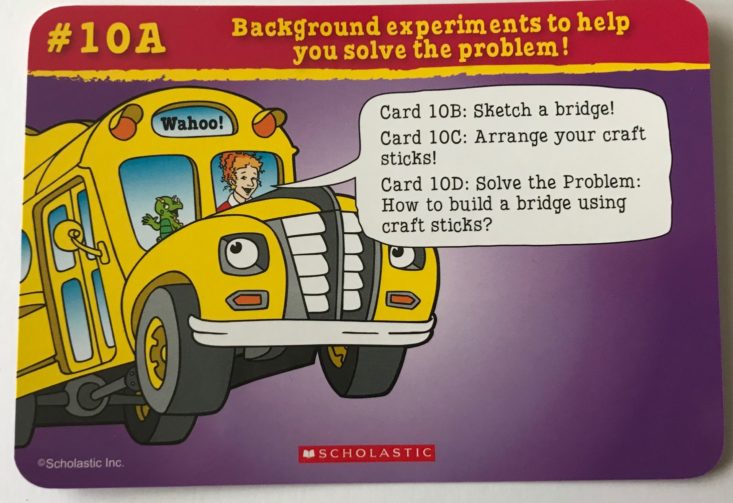
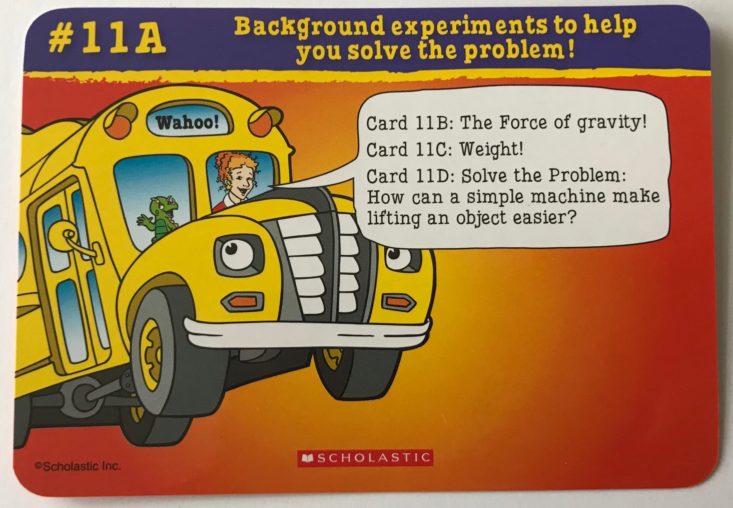
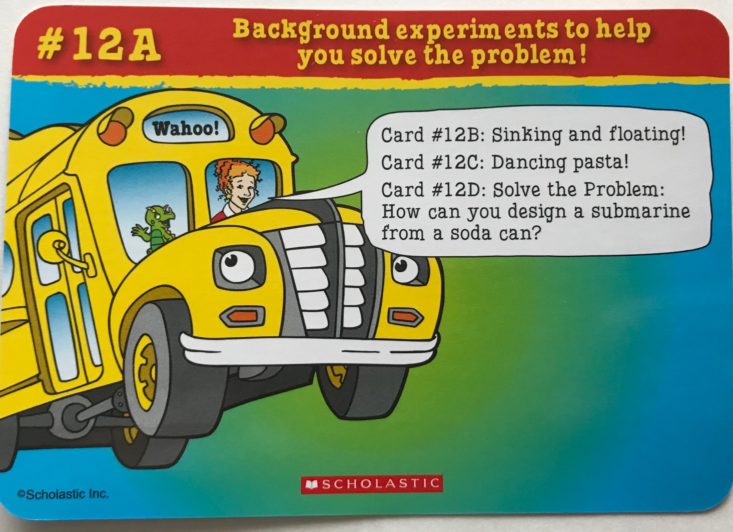
The projects were all presented as problems that Ms.Frizzle or her class had that needed to be solved. The first card identified the problem on the front and the back listed the background experiments you would be doing to solve the problem on the following cards. The final card was the big experiment that all of the background experiments were leading up to. I thought this was a great way to present the information and an awesome way to build slowly upon one another. This way you can separate it into various mini-lessons and spread it out over several days or have some freedom to do whatever works for you.
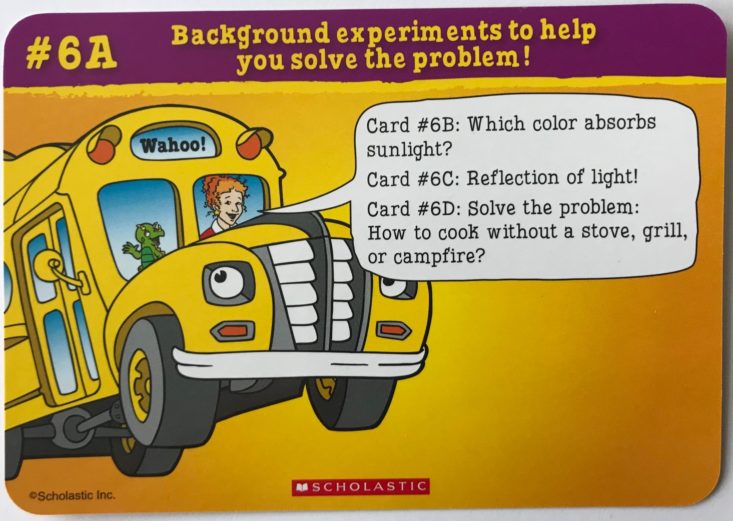
Here is a closer look at the format that each problem follows. The front of the first card presents the problem while the back shows what you will do on each of the following cards.
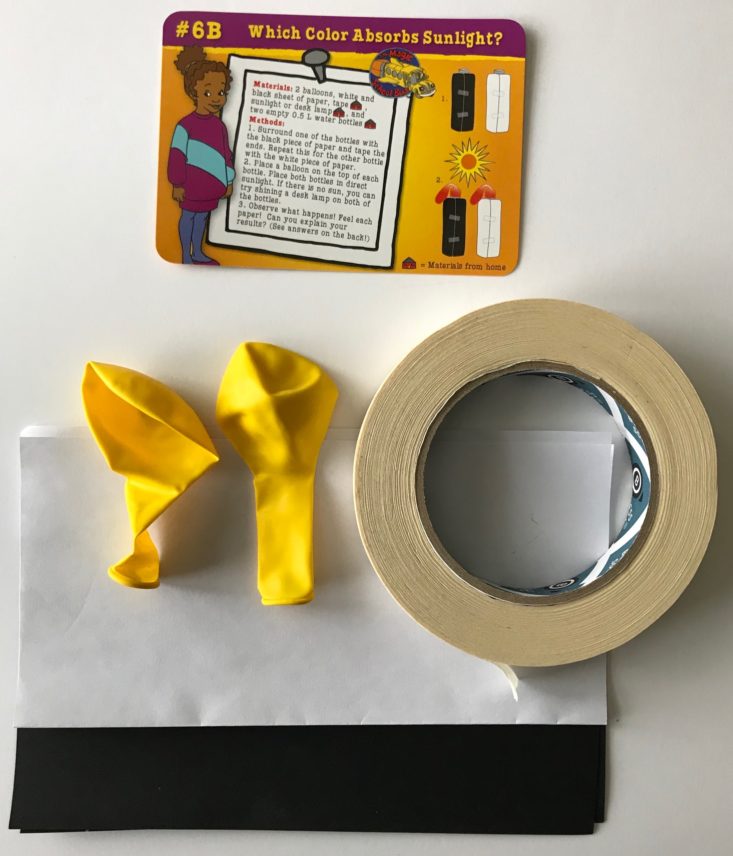
The second card explains the first background experiment. I love that the materials card gives a little house icon every time there is something that you need to get from home, in most cases, it was something simple like tape, but of course, this first card required two water bottles which we didn’t have around the house. The other thing we have been missing lately is sunlight!

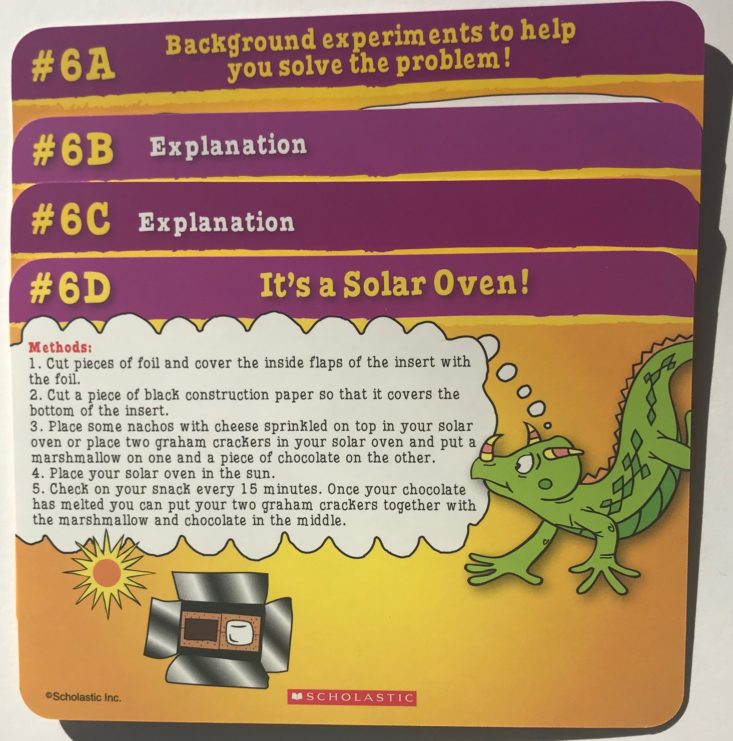
The idea was simple enough- wrap one empty bottle in black paper and one in white, then put the balloon on top and add some sunlight (or a desk lamp) and see what happens. The back of the card then gives an explanation for exactly what should happen and why.
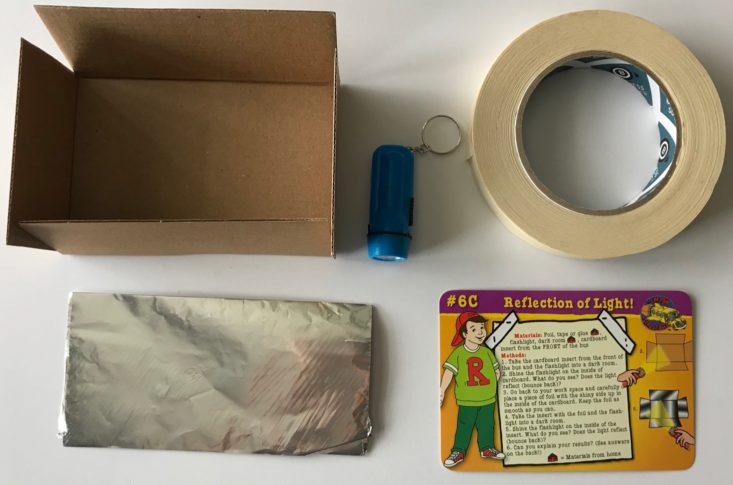
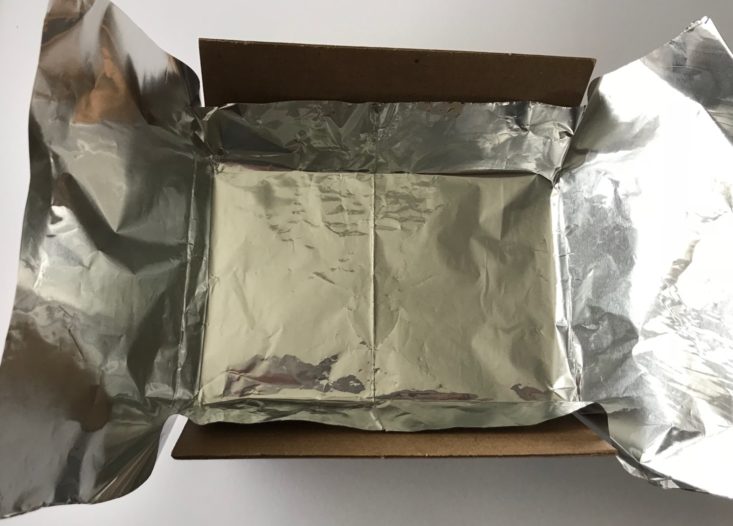
The next background experiment is again very simple and the only required extras were tape and a dark room. We used a piece of the cardboard from the bus and lined it with the included foil, then used the enclosed mini flashlight to observe how light reflected off of it.
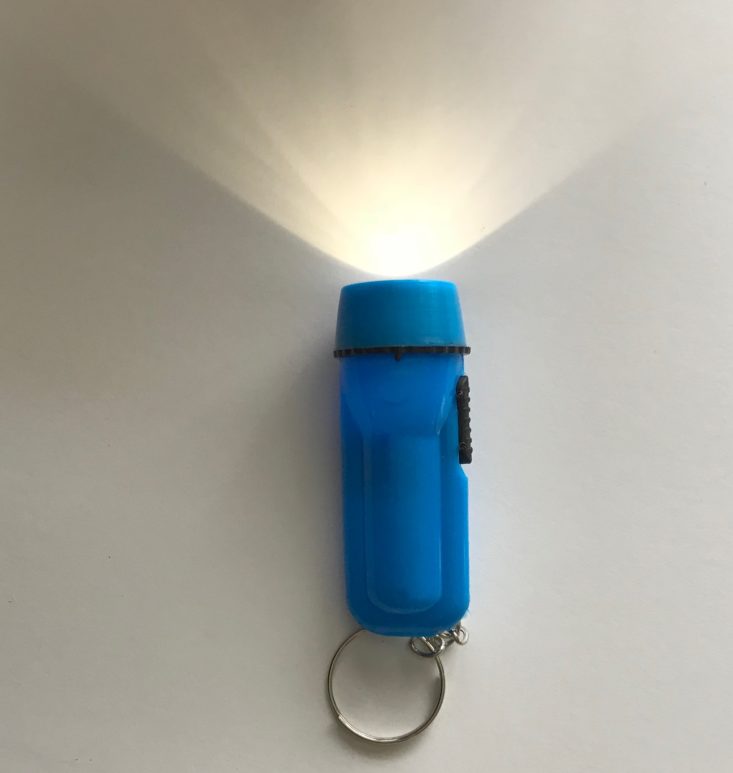
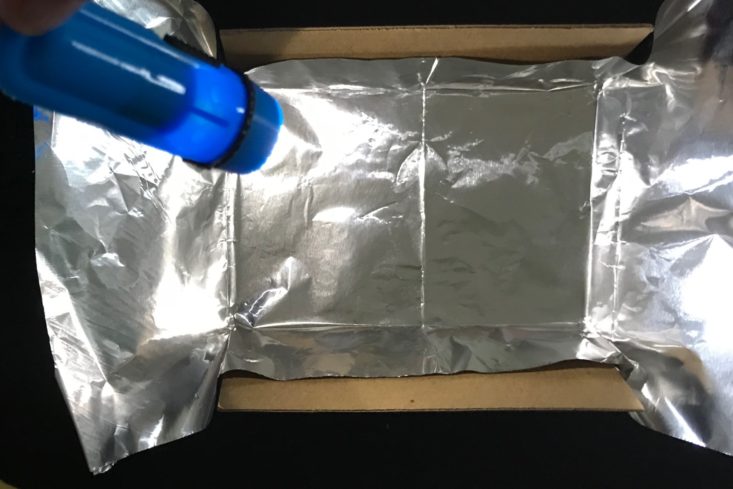
Can I just say that I loved that they included this tiny flashlight? This is something they could have easily had us get from home, but this was such a cute little accessory. It’s definitely not the best quality, but it worked and has a little keyring attached so kids will love it!
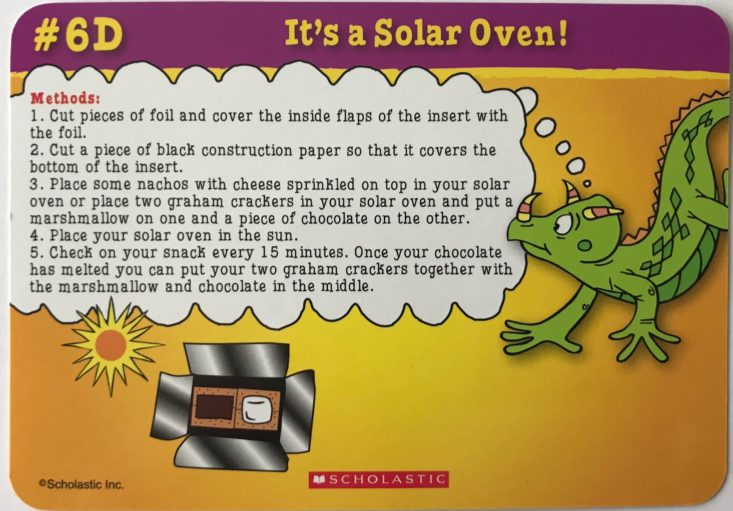
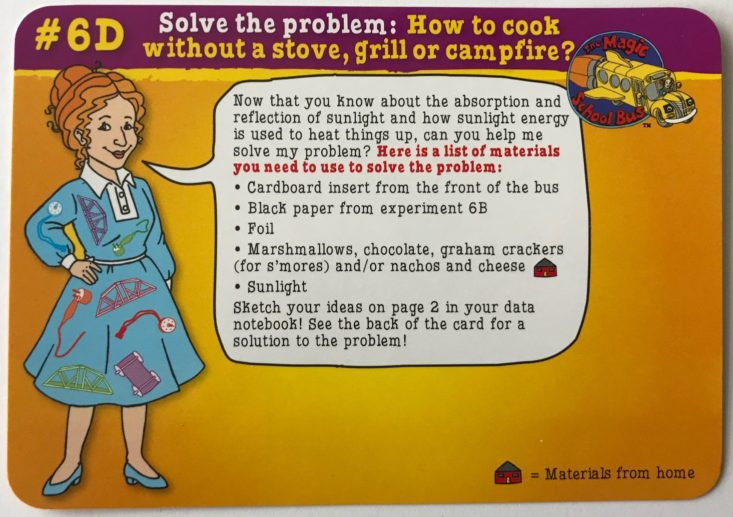
So now that we had learned about sunlight, reflection, and heat through those mini-experiments, it was time to solve the main problem and create our solar oven. They provided the list of materials and this time we needed to have either nachos and cheese or supplies for S’mores.
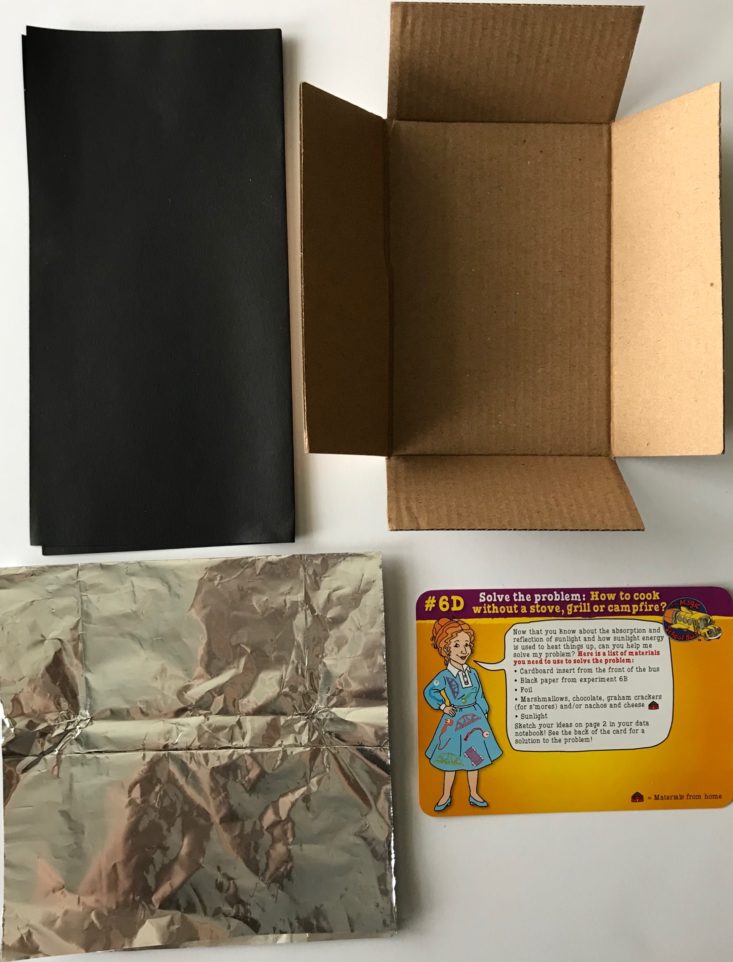
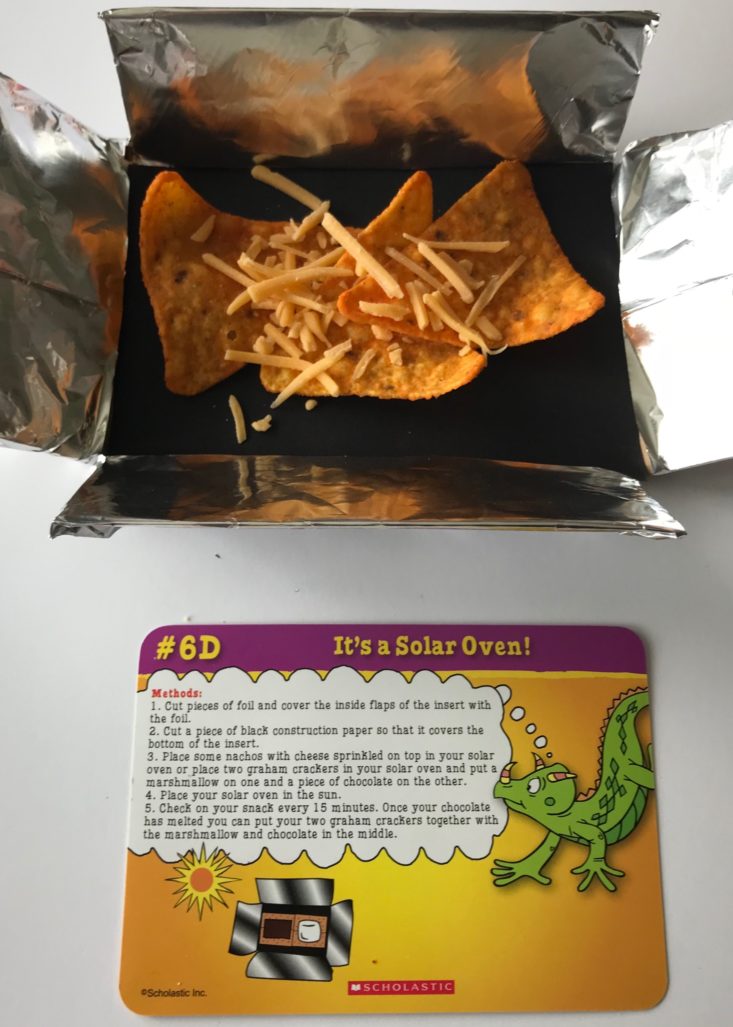
The other materials were all very simple and it was so easy to put together; just wrapping the cardboard in foil and adding the black paper. We didn’t have any marshmallows or regular tortilla chips so I had to make do with some Doritos and cheese. Since it’s been overcast, cold and rainy here for the past few days we are going to have to wait to really test out our solar oven, but this will be easy to set aside and save for a fun outdoor activity!
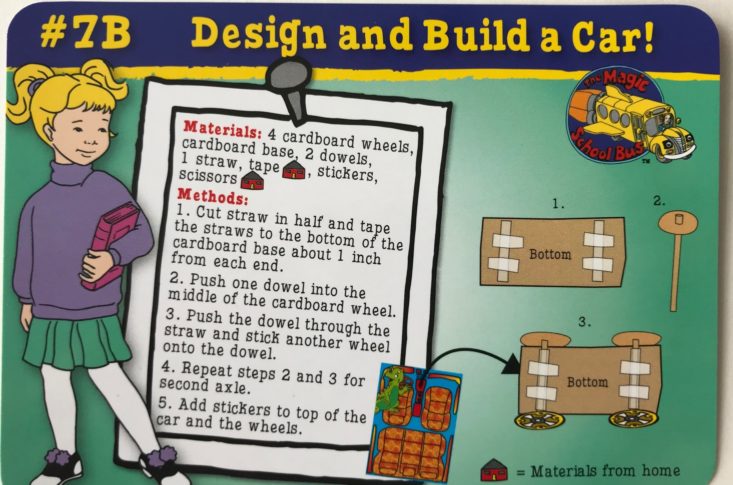
Our first step of the next problem was to build a car so that eventually we could solve the problem of how to get a car to move all by itself without pushing, pulling or using a motor.
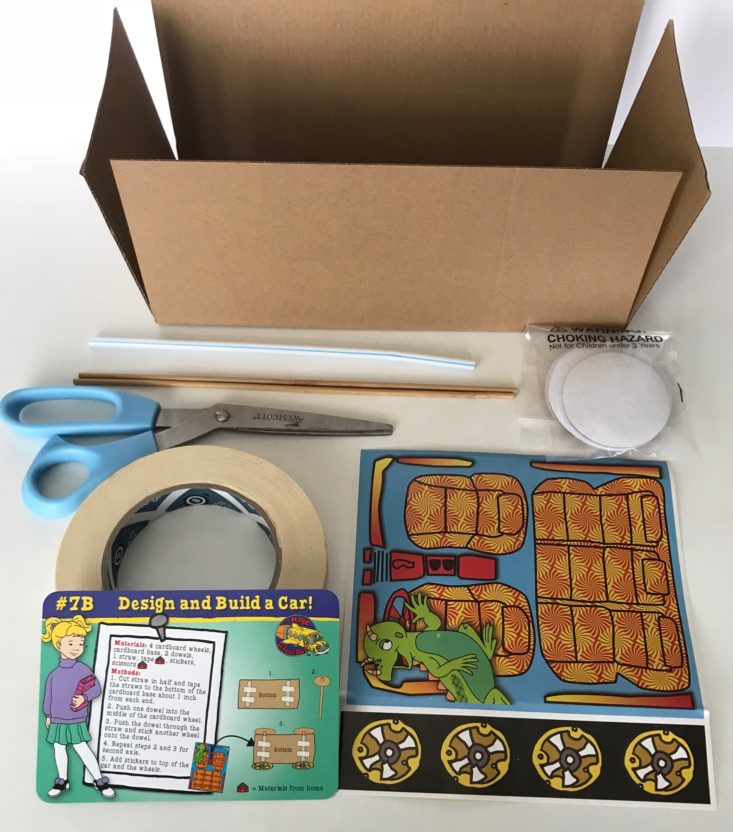
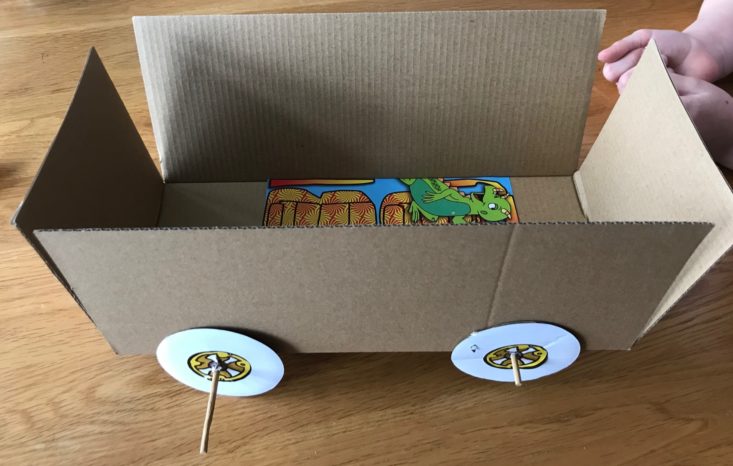
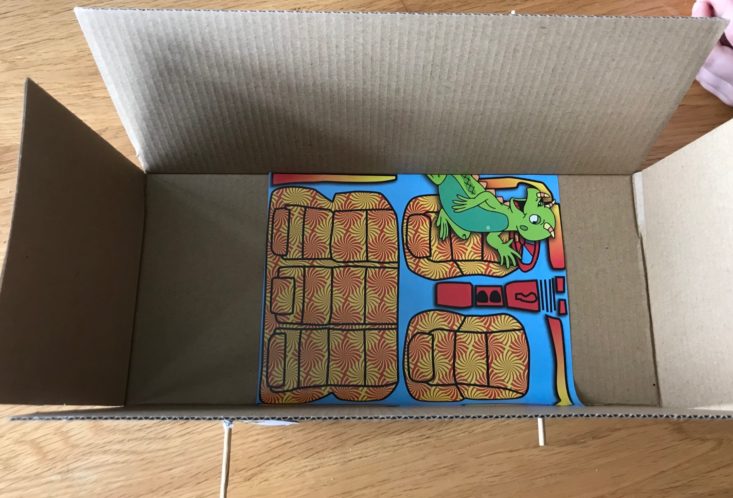
The only extra materials we needed were scissors and some tape. It was really easy to build the car, but I’m not sure I used the right piece of cardboard from the box because our car ended up being a bit wobbly and our wheels stuck out a lot longer than in the pictures.
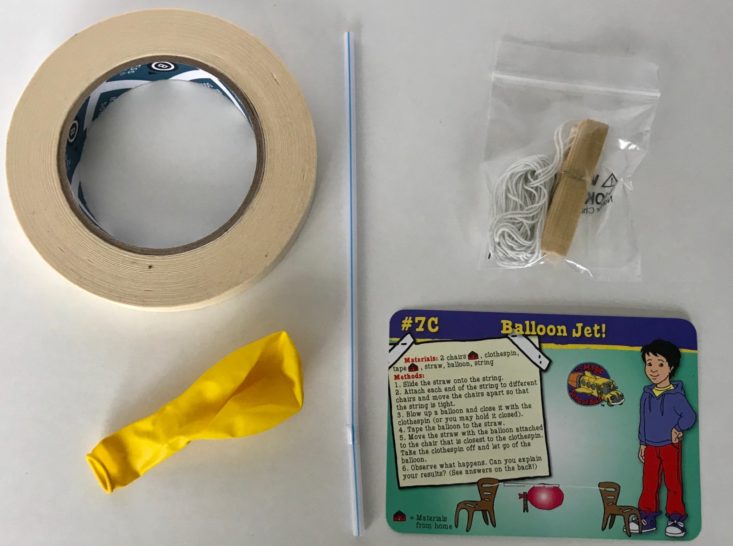
The next part was to make a balloon jet using the included balloon, string, clothespin, and straw. We had to provide tape and two chairs.
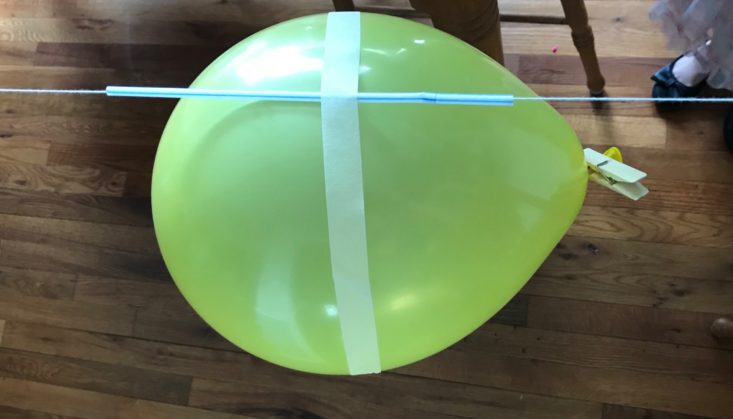
This was really fun and my daughter and I were able to do it over and over again. We put the straw on the string and then tied the string taut to the ends of two chairs. Then we blew up the balloon using the clothespin to hold the end together. Next, we taped the balloon to the straw and slid it to one end of the chairs. We released the clothespin and let our balloon go. So easy and fun to do, plus it’s something we can repeat again and again.
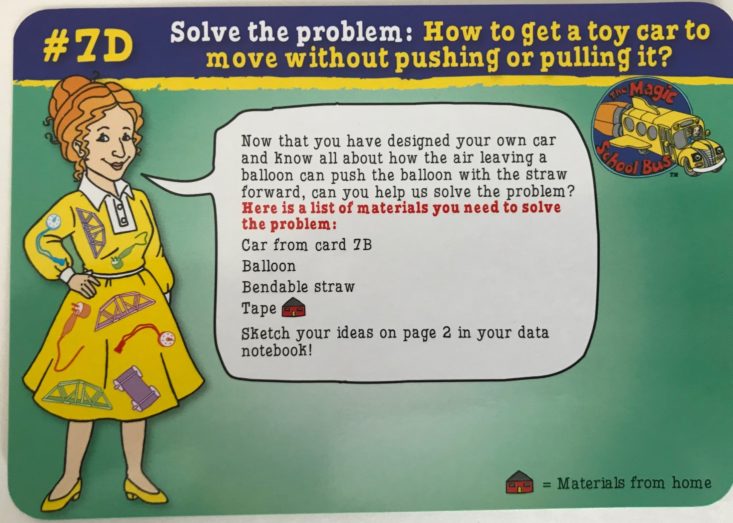

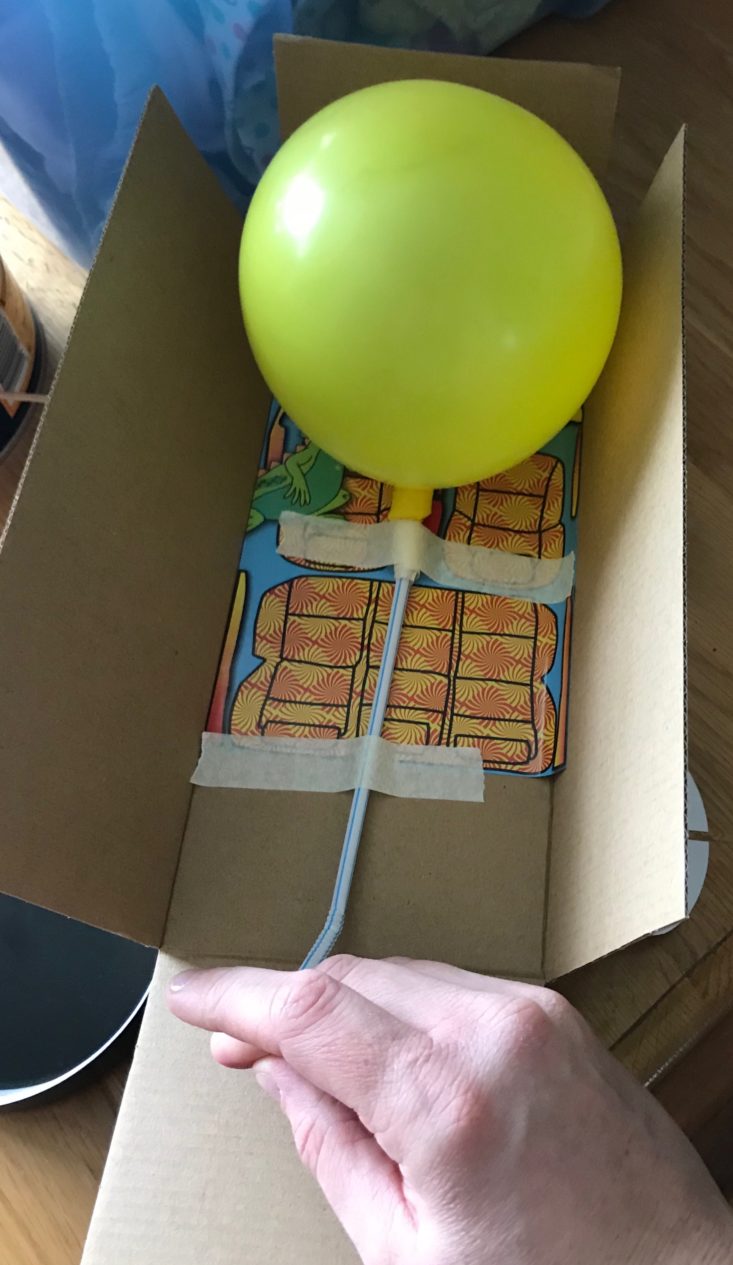
The last step was to put it all together. We needed to use the extra straw and tape it to the inside of our car then attach the balloon to one end. The idea was to blow into the straw to fill up the balloon with air and then put your finger over the end of the straw to hold it. Then you remove your finger and the balloon power is supposed to propel your car. On account of our uneven, wobbly wheels, our car did not move….at all. Oops. I’m not much of an engineer, I guess, but now that we have the concept down, I think we could easily apply it to one of the many toy cars that we have and repeat it with better results!
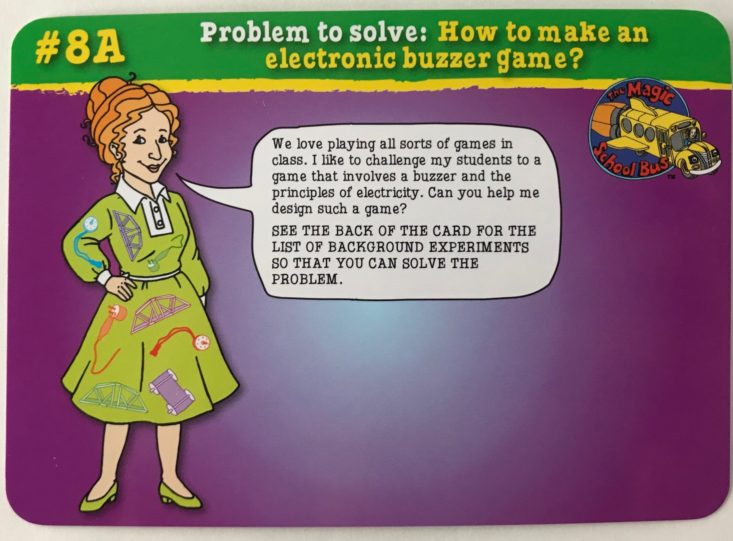
The next problem was making an electric buzzer game. It sounded really complicated to me at first, but this was actually the easiest experiment. First, I needed to get a battery, I chose AA.
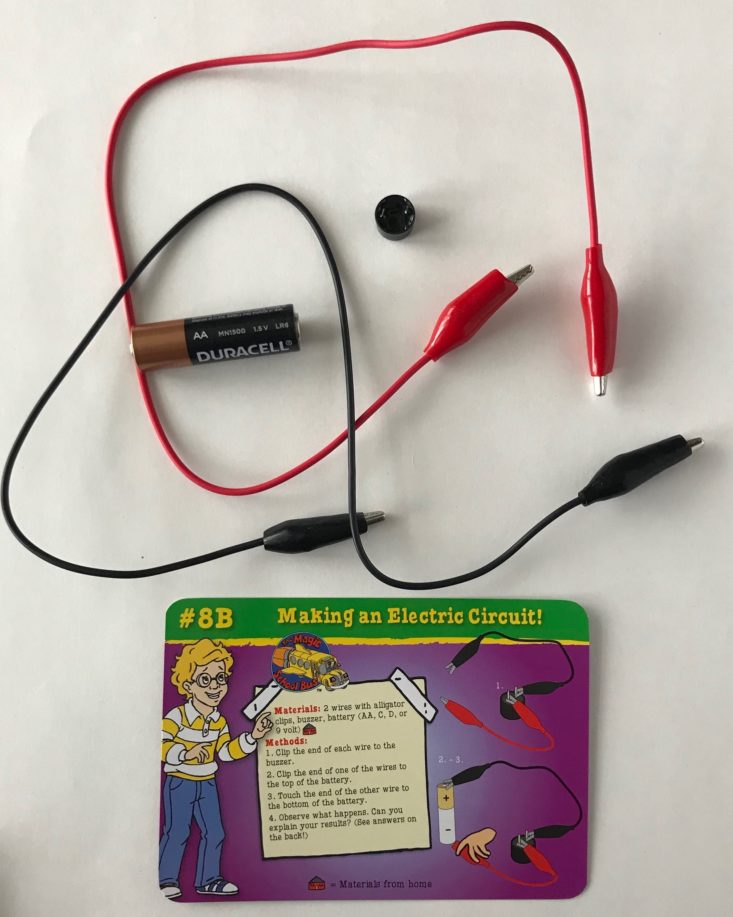
The sound was pretty faint, but this worked right away. The hardest part was getting the alligator clips to stick to the top of the battery. I really liked that the alligator clips had thick rubber grips around them - it made me feel better about a kid using them - not that we were really generating that much power.
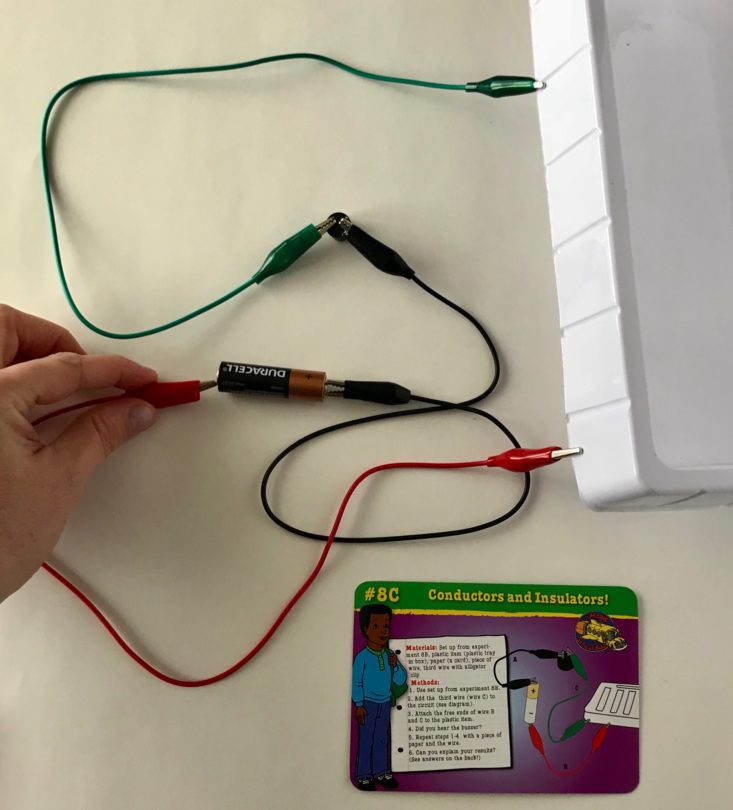
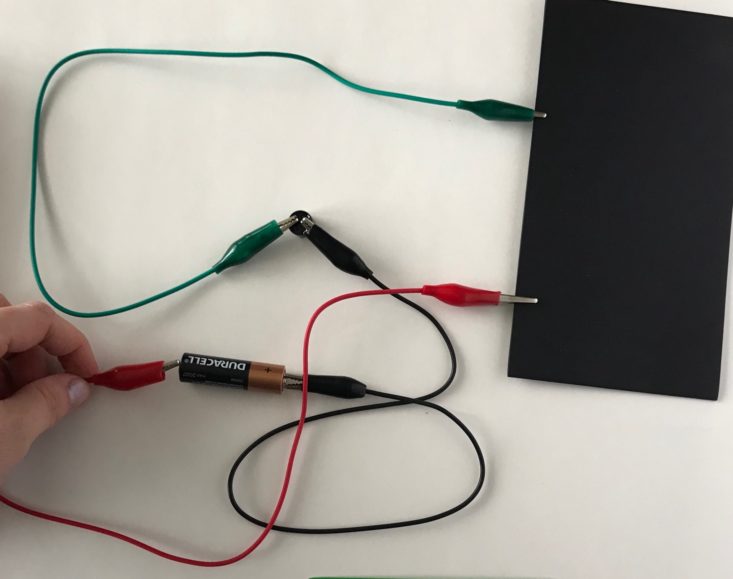
The next step was to use the materials from the first part, but this time we added in a third alligator clip so that we could see whether one of the plastic trays and a piece of paper would allow the buzzer to buzz. The clips all being different colors and matching the colors in the picture were very helpful in getting this setup.
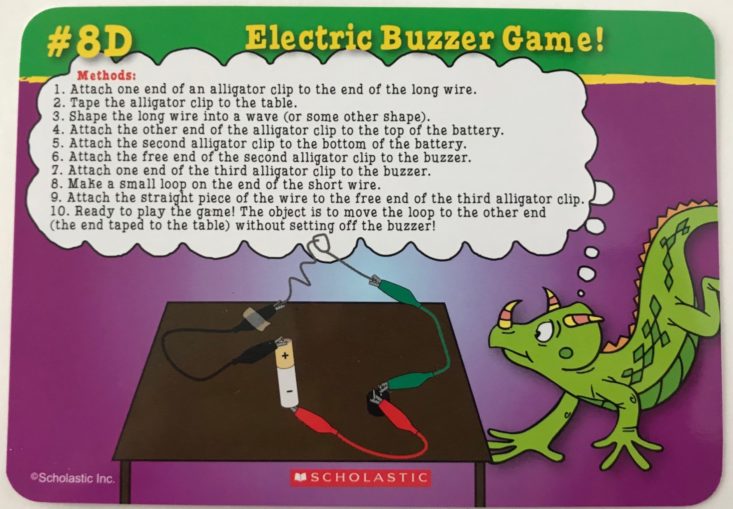
The final piece for this problem was to create a buzzer game. This was really easy to do using the materials we had, plus some tape and two included wires- one long and one short. The goal was to slide the short wire that we had curled into a loop over a longer wire that we had shaped into a wave without making the buzzer go off. This time the buzzer sound was pretty faint since it had so many pieces to travel through, but my daughter had fun playing with this and again, it was so simple! I think that’s the theme here-everything is so simple and basic, but really teaches a lot about the science behind it and gives great explanations as to why these things are occurring. The cheat sheets were great for me to have to explain them!
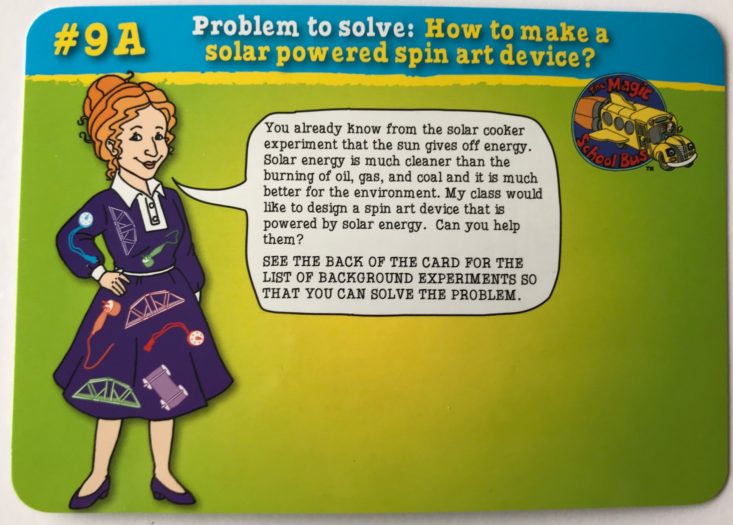
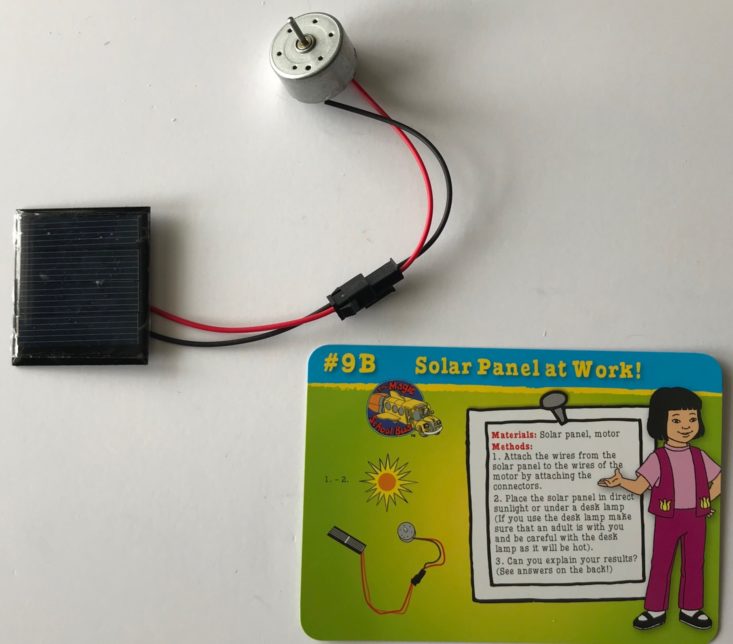
Our next problem was to make a solar powered Spin Art machine. Again, sounds complicated, but it absolutely was not. The first part was simply exposing the included solar panel to sunlight (we used a lamp instead) so that the little piece would spin. I had to hold the lamp over it for a good bit before I got it to work.
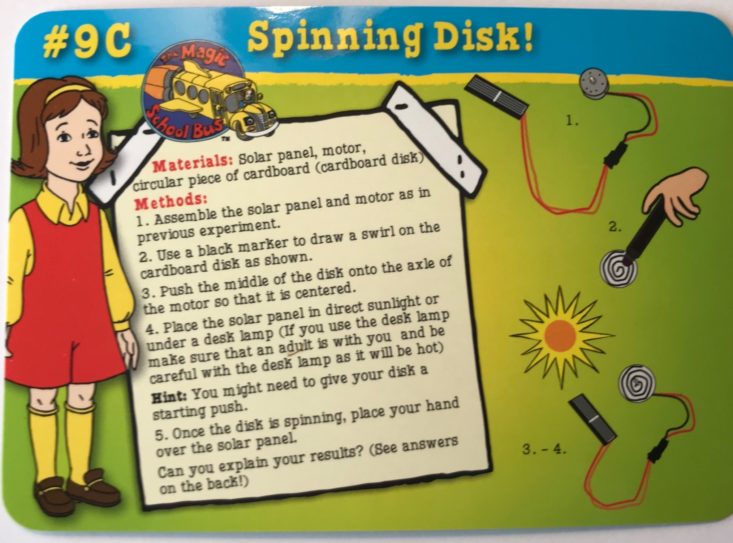
Next, I drew a black spiral on the included cardboard disk (I had to provide my own marker) and stuck it through the little pin in the middle. Then I added more sunlight (lamp!) until I got it spinning. I had to hold the lamp pretty close to get it to move though.

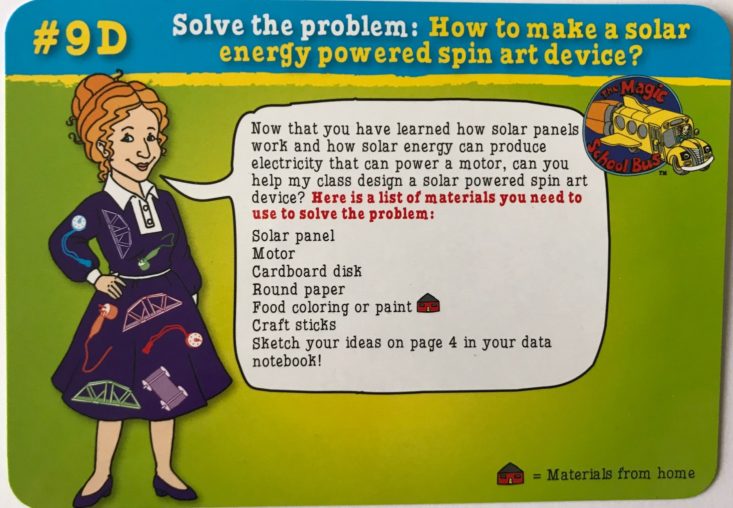
Now we were ready for our artwork! We added a piece of the included circular paper (they included several so we could repeat many times!) to the top of our cardboard disk and put our device inside the bus top like they suggested. Now we had to provide food coloring or paint, which we chose food coloring.
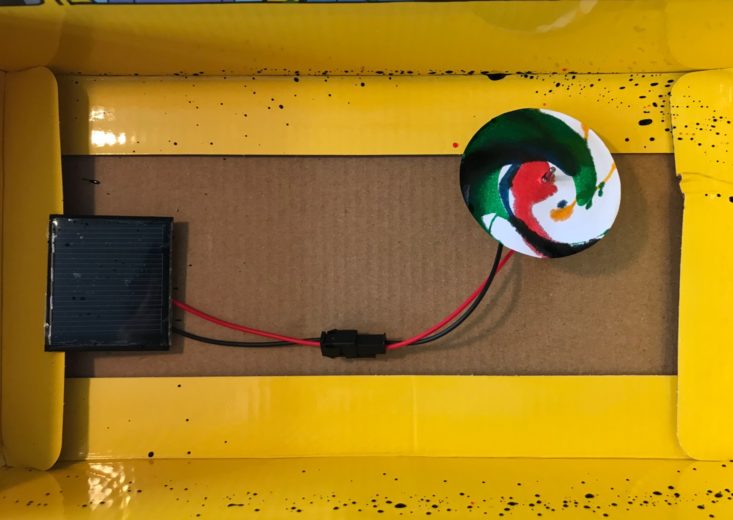
I got the disk spinning with the lamp and my daughter added the drops of food coloring as it spun. It squirted everywhere, but the mess was contained inside the box and our little art piece turned out pretty decent! I love that we can repeat this again too! I might see if I can get a little bit of a bigger piece of paper on there, but it really is pretty small, so I’m not sure how that will work.
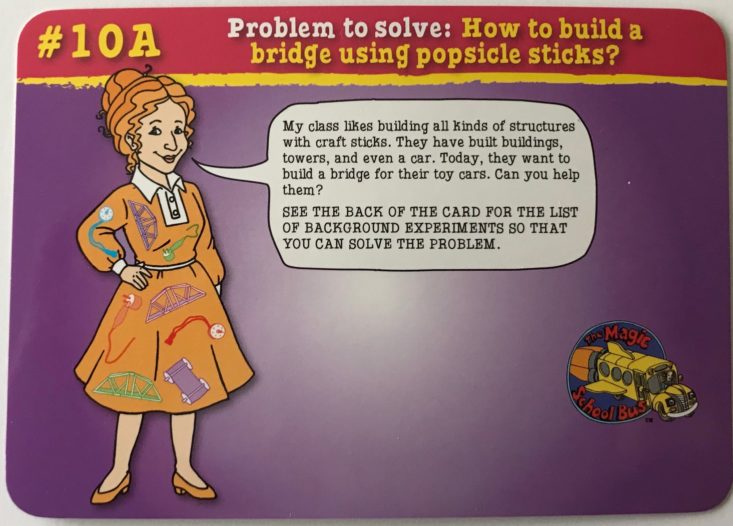
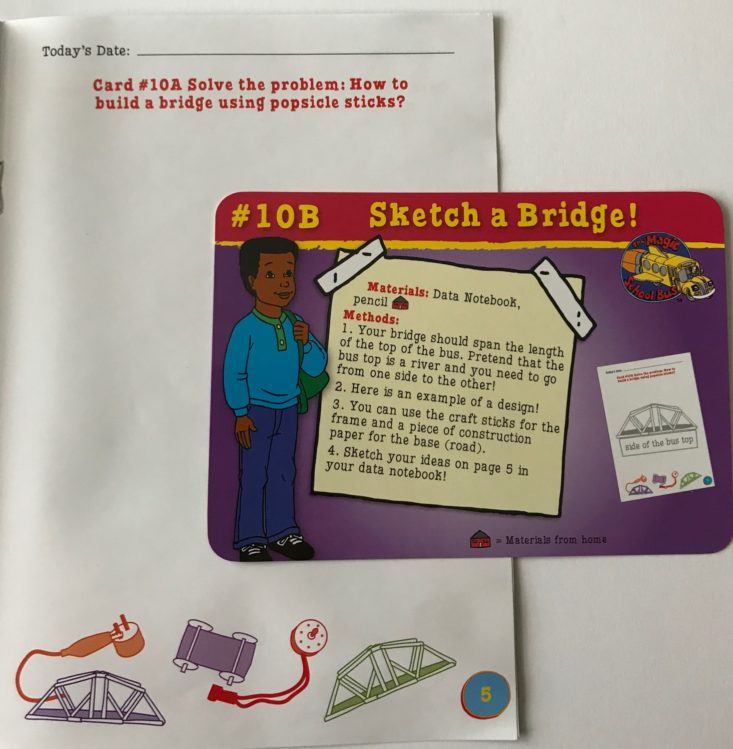
The next problem we haven’t tried yet. The idea is to make a bridge using the provided popsicle sticks. First step is to use your Data Notebook and sketch out a bridge design.
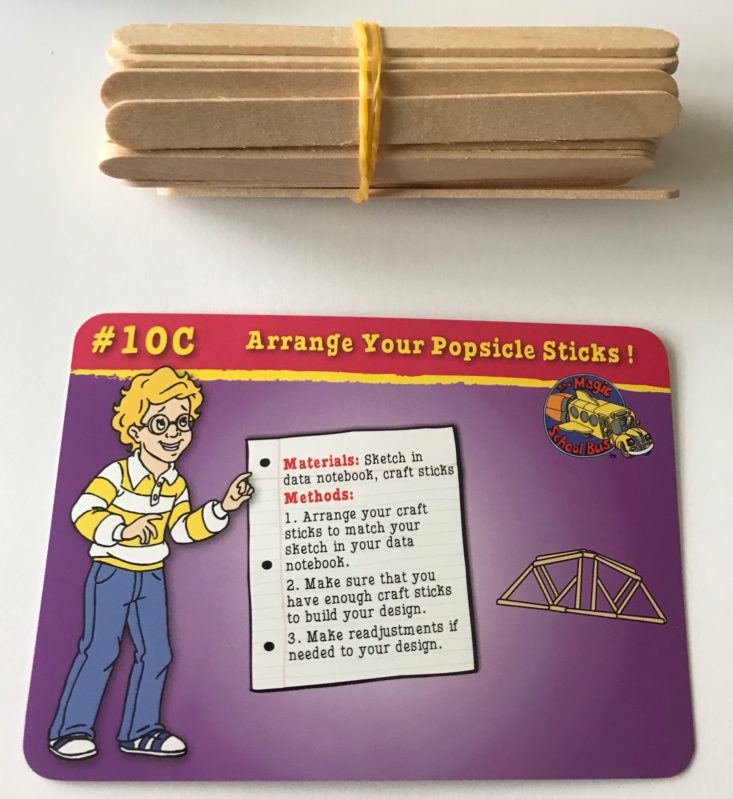

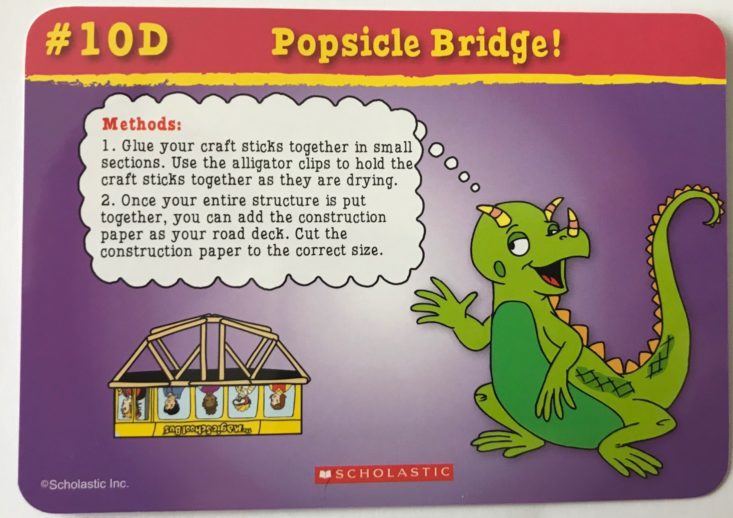
Next, you arrange your popsicle sticks to match your design that you sketched and make any adjustments. The last part is to create your bridge using the popsicle sticks and glue. They also recommend using the alligator clips from the buzzer experiment to hold the sticks together as they dry. Then when your bridge is finished you can use the included piece of black construction paper to set in the bottom of your bridge as the roadway.
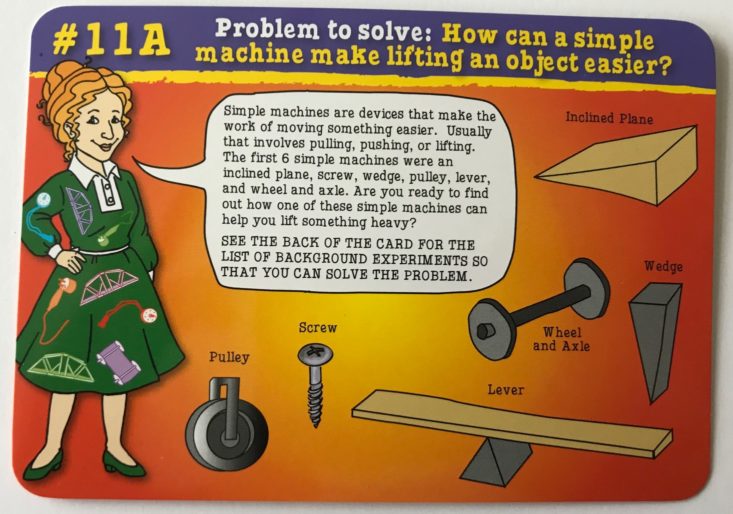
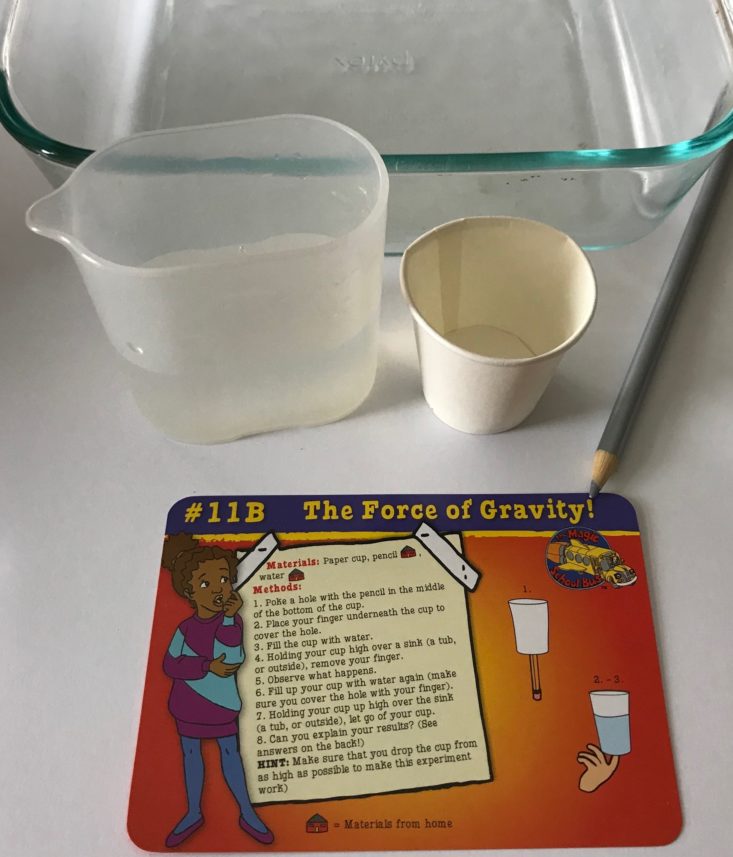
The next concept we explored was gravity and simple machines. We needed a pencil and some water and a container to catch the water in. We poked a hole in the included paper cup with our pencil and held a finger over the hole to plug the water and then let it go. Then we dropped the cup from a distance to show how gravity works.
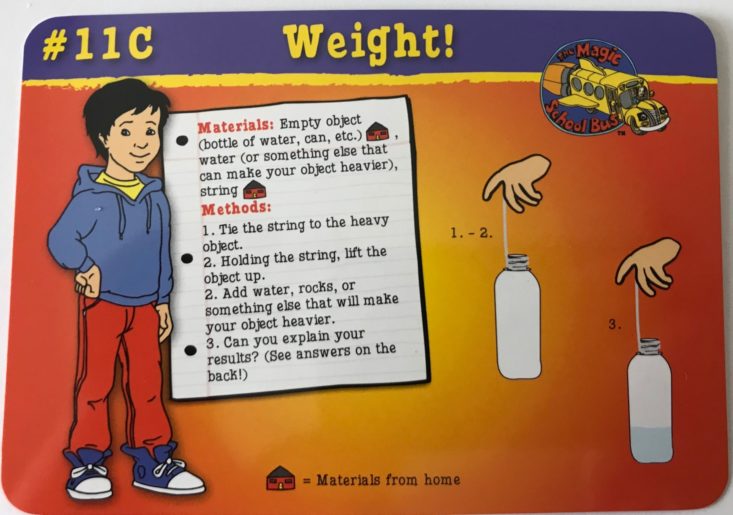
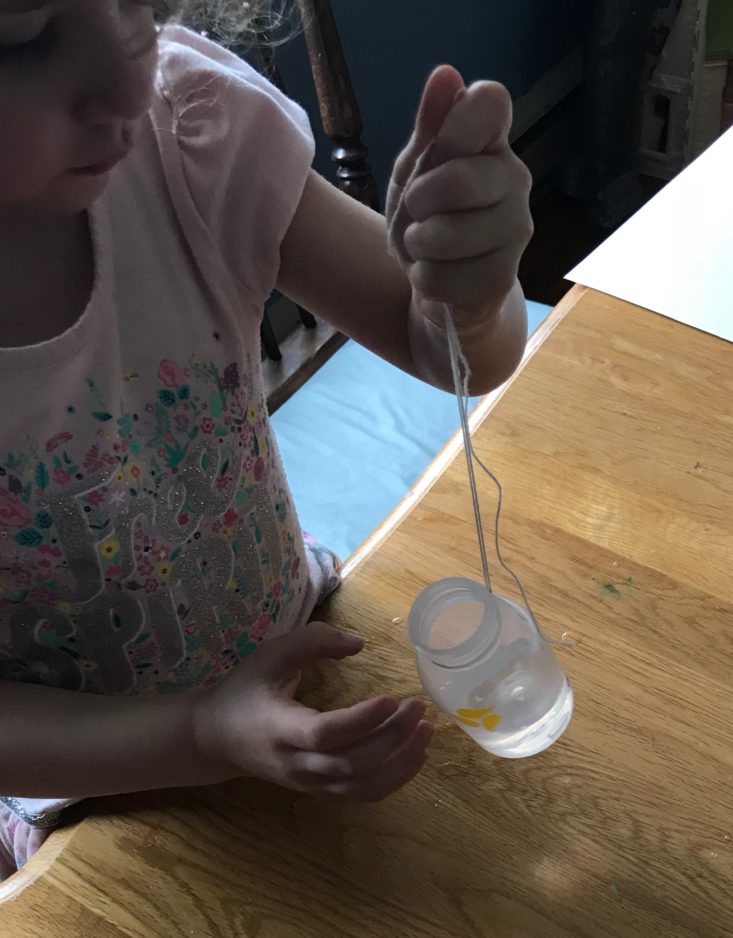
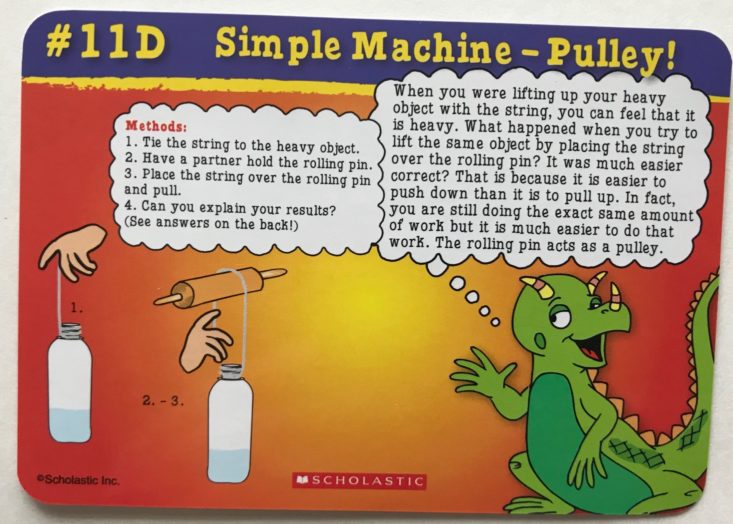
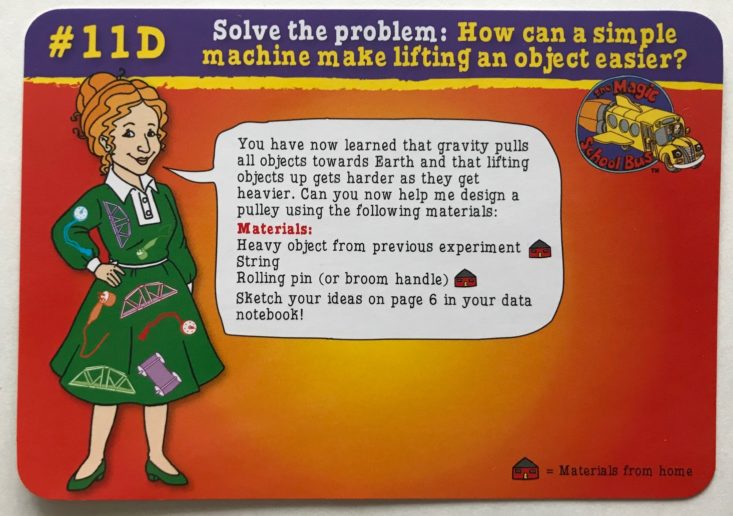
After that, we tied the string around a bottle and added water to explore the concept of weight. The final part of this was to create a simple machine pulley using a rolling pin and our water bottle on a string. We didn’t get to this since it was just me and my 3-year-old and it was a little difficult to get pictures and assist her, but I’m sure it’s a great activity to demonstrate how a pulley works!
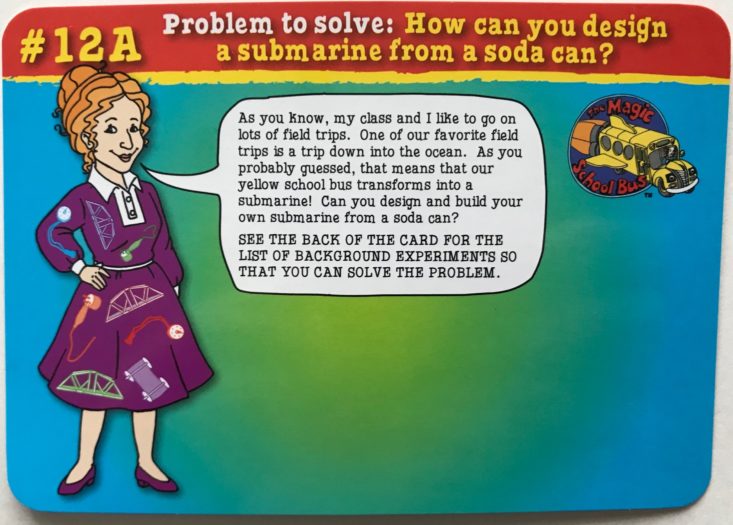
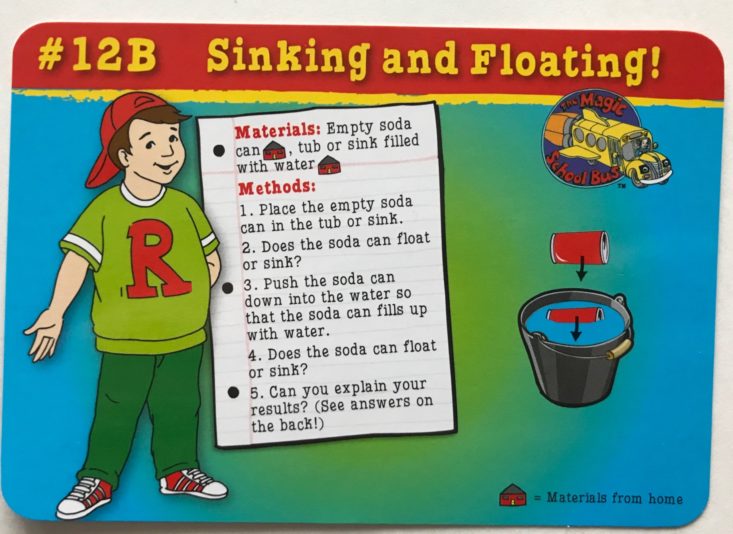
We did not get to this last experiment at all, but it’s very basic and will be a great one to do outdoors once it’s nice! The first part is just to observe whether a soda can will float in a bucket or tub of water.
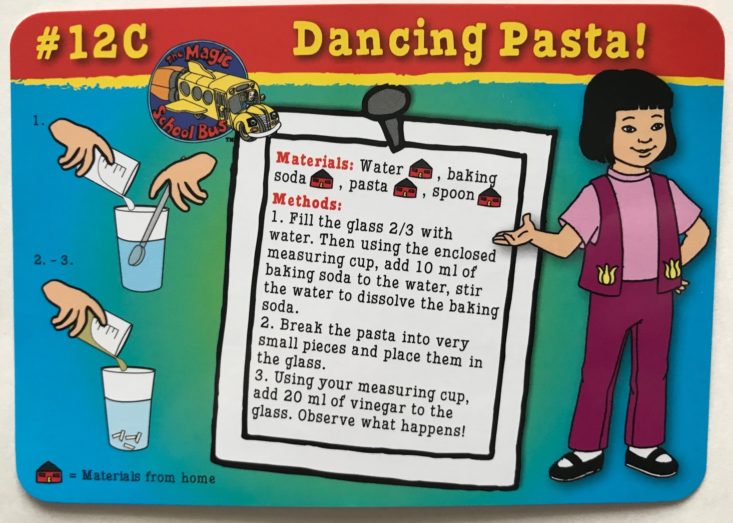
The next part is called Dancing Pasta where you use baking soda and vinegar in water and see if you can get your pasta to dance. They included a tiny measuring cup for this, but everything else you need to provide. This one doesn’t seem to have as much to do with the final problem, but instead just seems like a fun mini activity that we will definitely be trying at some point.

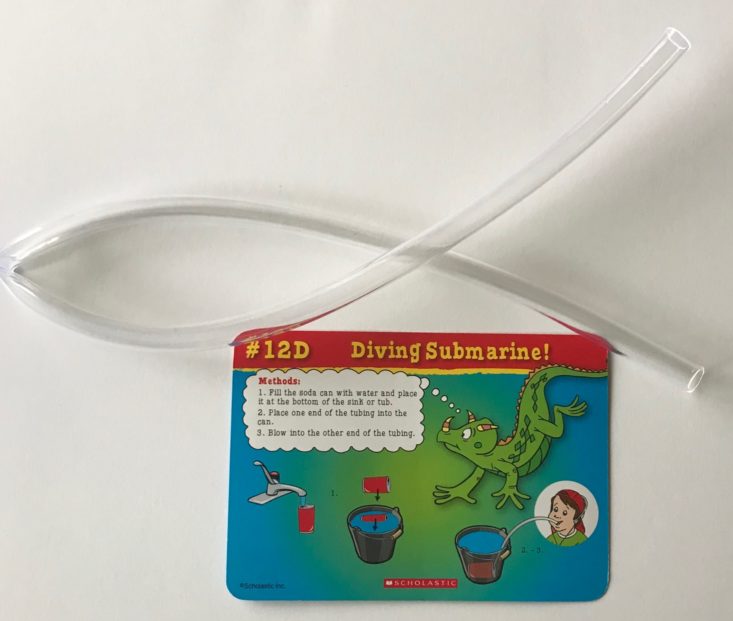
The final part of the problem is to create a diving submarine using a bucket or tub of water, your empty soda can, and the included tubing. You simply put the soda can in the bottom of the water and blow air into it. Very simple, and I’m sure it will be fun for kids to do!
Verdict: Phew, not sure if you are still with me because that was a lot! There was so much included in this little bus and really very little that we had to provide on our own. This was our second experience with Amazon’s STEM Toy Club and again, I was really impressed! I think it was great that they really focused on the Engineering aspect of STEM this month and the bus was full of different projects that will keep kids busy for days! I also really loved that there were explanations for everything and that each problem had multiple parts that built upon one another. This is incredibly educational and will appeal to kids of multiple ages. The toy originally retails for $39.99 (on sale for $29.99), but we only paid $19.99 which I think is a great value, especially considering how many different activities there were for us to do.
To Wrap Up:
Value Breakdown: The cost of the subscription was $19.99 and we received a toy valued at $39.99. That’s a savings of $20 on this toy!
If you like this box, you might also like: Tinker Crate (ages 9+), Groovy Lab in a Box (ages 8+), Bitsbox (ages 6-12)
Check out all of our Amazon STEM Toy Club reviews, more educational and STEM subscriptions for kids, and all Amazon subscription boxes in our subscription box directory!
Keep Track of Your Subscriptions: Add this box to your subscription list or wish list!
What do you think of this month's toy from the Amazon STEM Club Toy subscription box?


Please do not enter your email address in the Name field or in the comment content. Your email address will not be published. Required fields are marked *. Remember to post with kindness and respect. Comments with offensive language, cruelness to others, etc will not be approved. See our full comment policy here.